You can add a custom frame to your design in Canva by adding a new element and selecting the “Frame” option from the drop-down menu.
You can then choose from a variety of frame shapes and colors, or upload your own image to use as a frame.
Once you’ve added a frame to your design, you can adjust its size and position, and add text or images inside the frame.
To add a custom frame to your design:
1. Click the “+” icon in the left sidebar, then select “Frame” from the drop-down menu. Or go to the Elements tab and scroll down and find the “Frames” section. Click ‘see all’ to open the Frames panel.
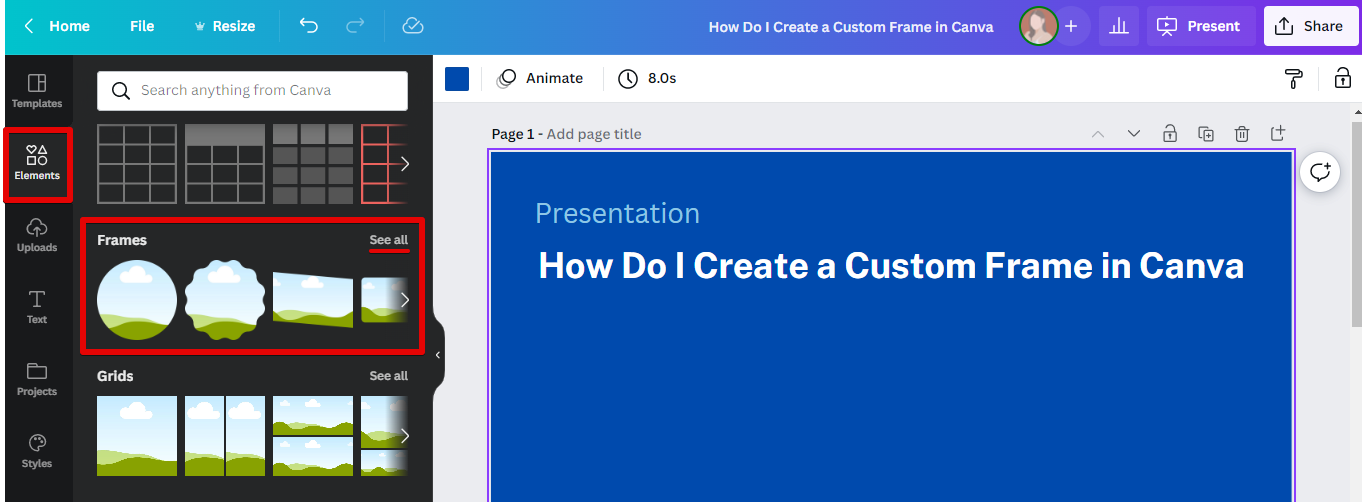
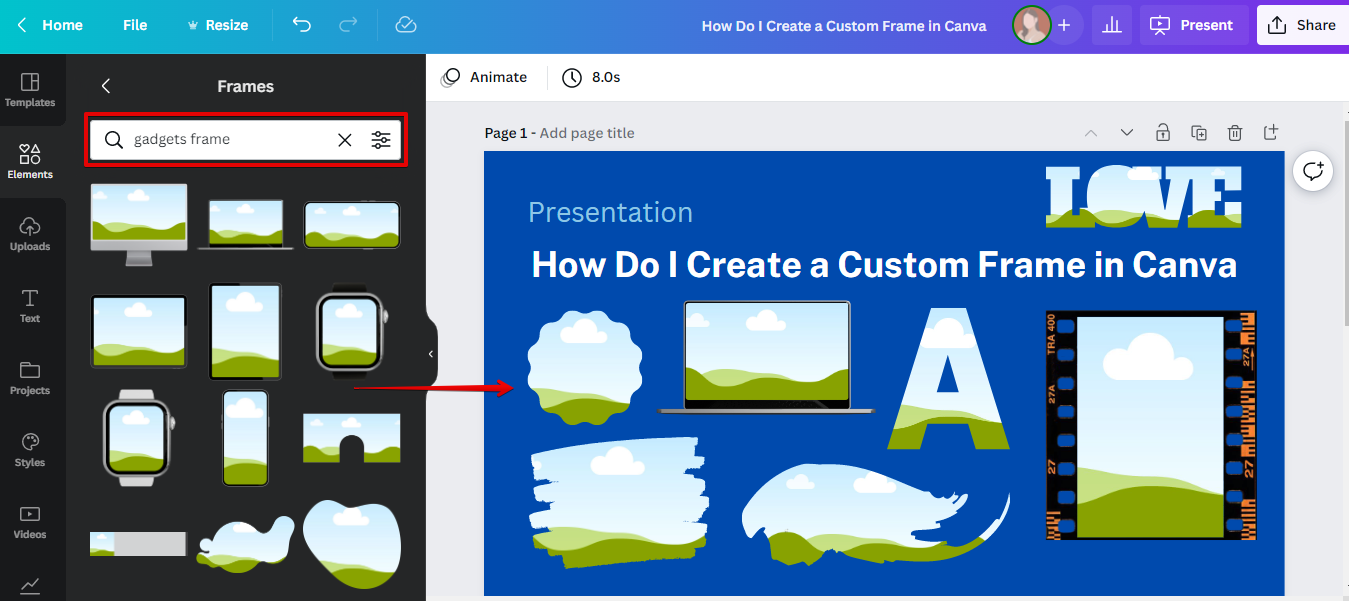
2. Choose from a variety of frame shapes and colors, or upload your own image to use as a frame. Furthermore, in the search bar, you can search for a specific frame in mind. You will be surprised to find Canva’s wide collection of custom frames.
PRO TIP: If you are not familiar with Canva or graphic design, we do not recommend using this tool to create a custom frame.
There is a risk that you may not be able to create a frame that meets your needs, or that the frame you create will not be compatible with Canva’s design tools.
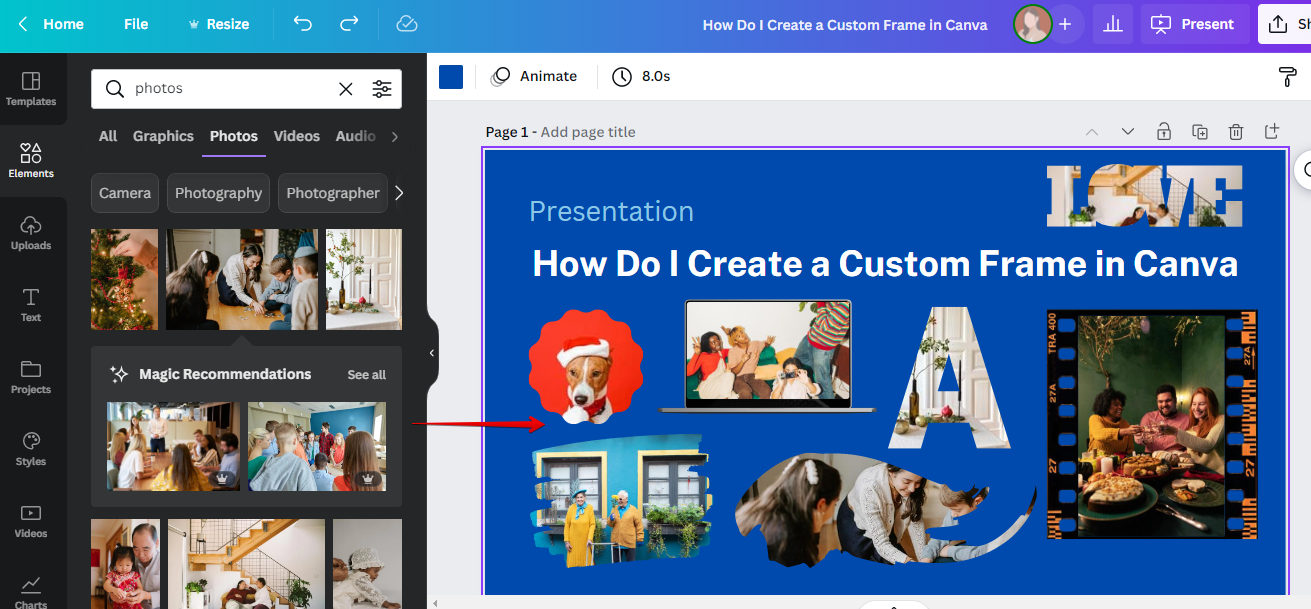
3. Then, simply drag and drop your uploaded photos or chosen stock images from Canva near the vicinity of your frames and it will instantly frame your photos.
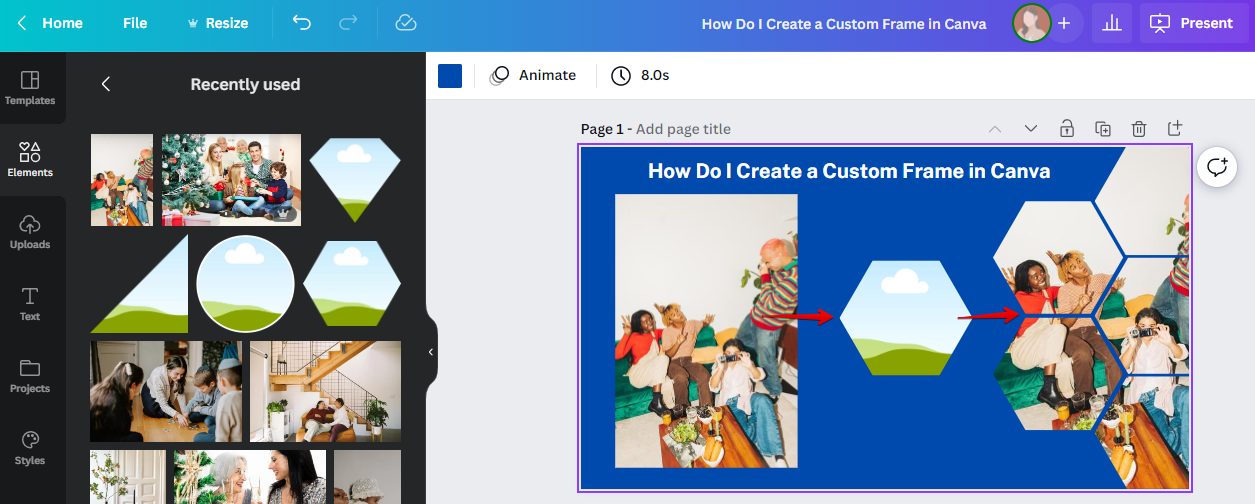
4. Lastly, you can arrange the frames to create more custom frames for your photo.
10 Related Question Answers Found
Creating a custom frame in Canva is easy and can be done in just a few simple steps. First, you’ll need to create a new design. To do this, click the “+” icon in the top left-hand corner of the Canva homepage.
There are a few different ways that you can go about creating a frame in Canva. The first way is to use the built-in frames that are available in the program. To do this, simply click on the “Frames” tab in the left sidebar and then choose the frame that you want to use.
There are a few different ways that you can go about creating a frame in Canva. The first way is to use the Rectangle tool, which can be found in the Tools menu on the left-hand side of the Canva interface. Simply click and drag your mouse to draw a rectangle around the area that you want to frame.
Yes, you can create a frame in Canva. You can use the Frames tool to add a frame to your design. To do this, first select the element you want to add a frame to.
If you’ve ever wanted to add some extra pizazz to your photos, you may have considered using a frame. Frames can help to add visual interest to an image, as well as serving as a way to draw attention to a particular area of the photo. Canva is a free online design platform that makes it easy to add frames to your photos.
There are a few different ways that you can make a frame in Canva. You can use the Frames tool, which is located in the left sidebar. You can also use the Shapes tool to create a frame, or you can even use a photo as a frame.
If you’re looking to add some personalization to your images or design projects, you may be wondering if you can create your own frame in Canva. The short answer is yes! You can create a frame in Canva using their built-in tools and templates.
Making a frame in Canva is easy! With just a few clicks, you can add a frame to any image. To start, open Canva and click on the “Frames” tab.
Yes, you can make custom frames in Canva! With Canva’s easy-to-use design tools, you can create custom frames for any occasion. Whether you’re looking to add a personal touch to your home décor, or want to create a unique gift for a friend, our custom frames are the perfect way to do it.
As anyone who’s ever used Canva knows, it’s an amazing tool for creating beautiful designs. But one of the best things about Canva is that it’s so easy to use, even if you’re not a designer. With just a few clicks, you can create a professional-looking design.