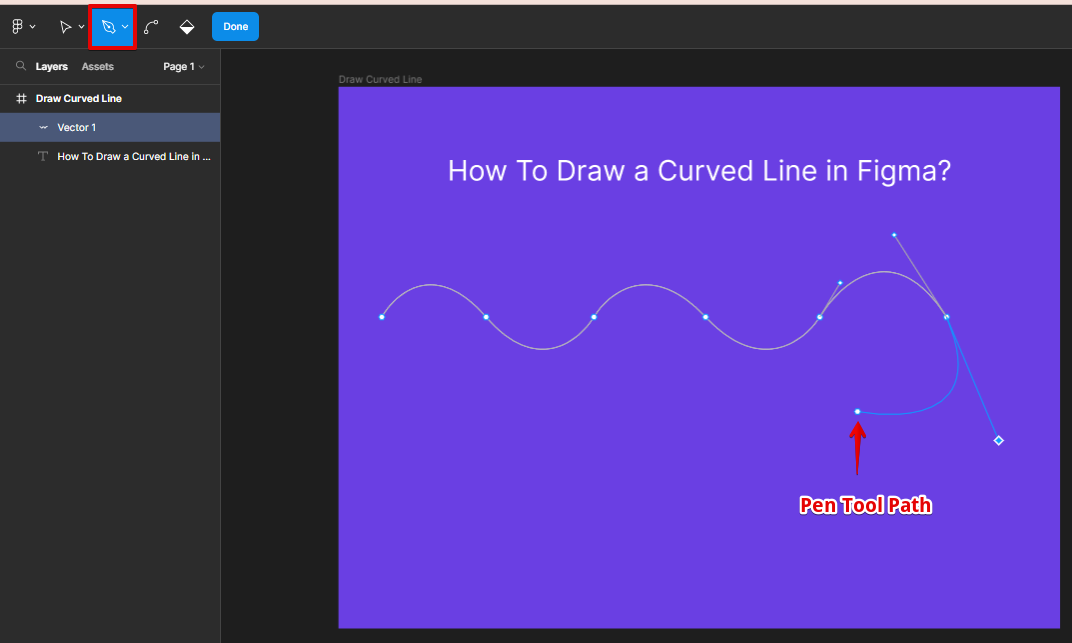
In Figma, several methods exist for drawing a curved line, with one of the primary ways being the use of the pen tool. First, select the pen tool, then click at the point where you want the curve to begin. Next, while holding down the shift key, click at the point where you want the curve to end; this action creates a straight line between these two points.
To transform this line into a curve, simply click and drag one of the handles that emerge on the line. This action allows you to adjust and shape the curve as desired.
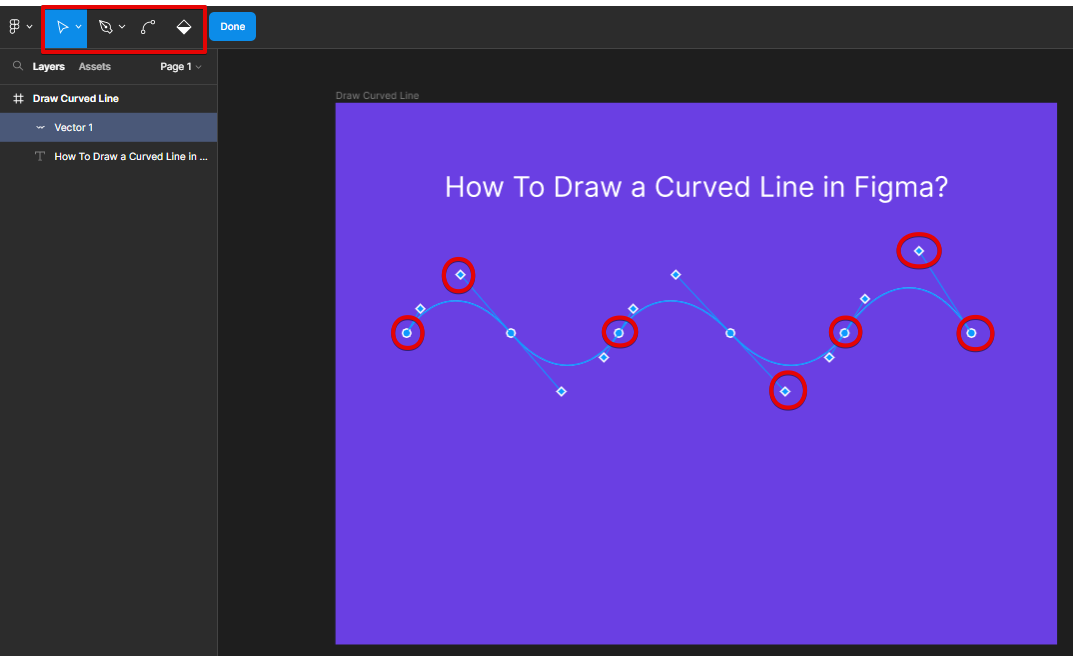
Another way to create a curved line is to use the vector network tool. With this tool selected, click on the canvas where you want the curve to start, then hold down the shift key and click where you want the curve to end. To create a curve, click and drag one of the handles that appear on the line.
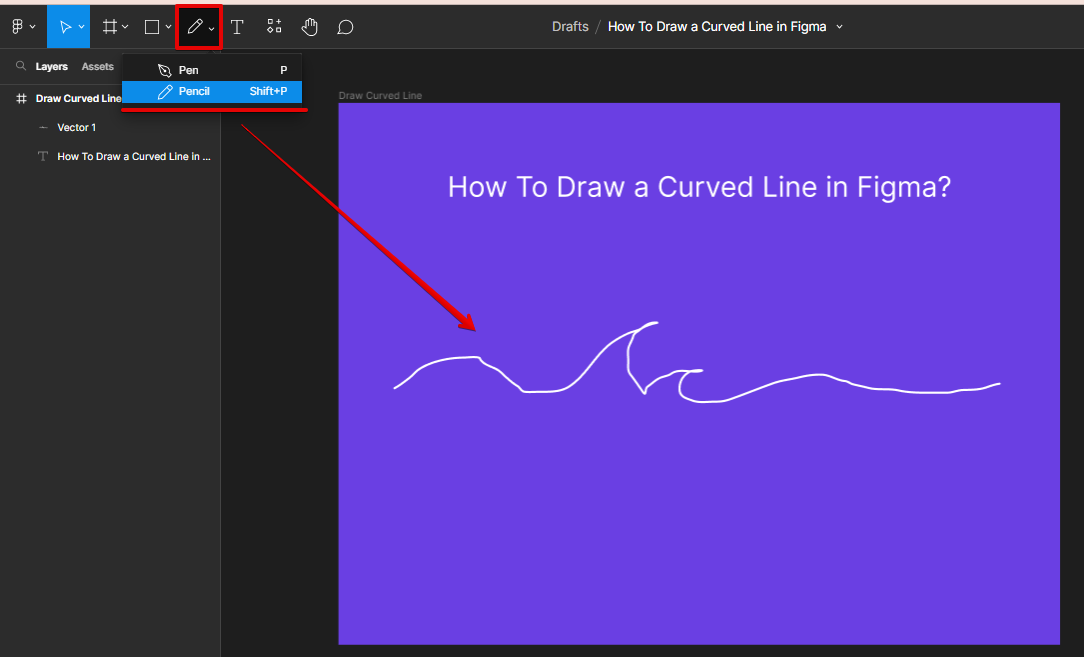
You can also use the pencil tool to create a curved line by clicking on the canvas where you want the curve to start, then holding down the alt/option key and clicking where you want the curve to end. This will create a curved line between the two points.
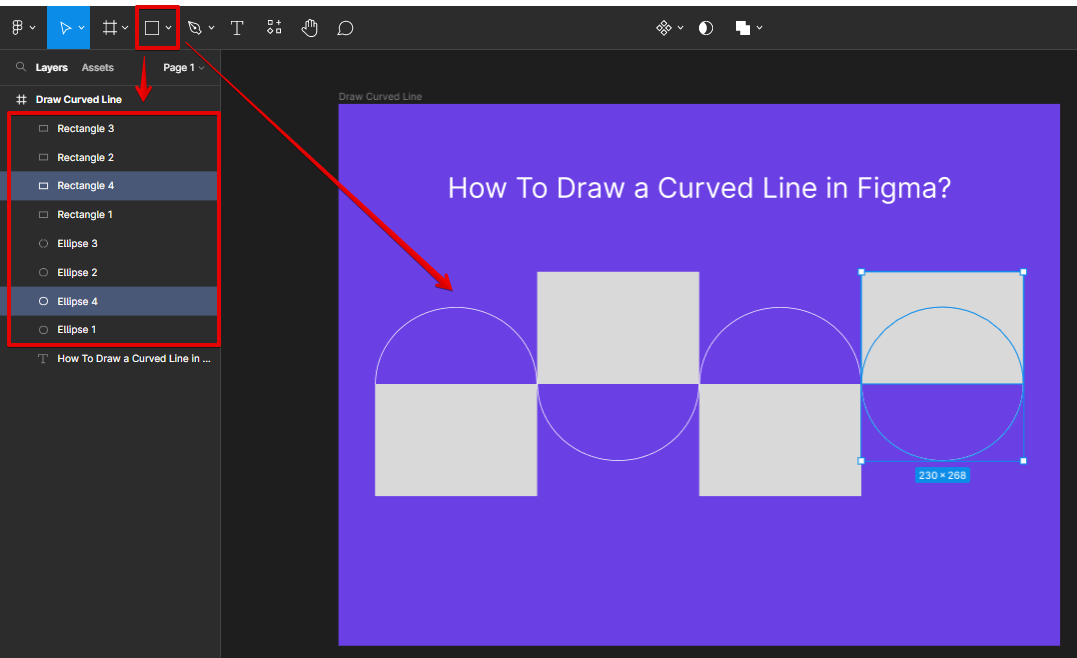
Finally, you can use the shape tool to create a curved line. With the shape tool selected, click on the canvas where you want the curve to start, then hold down the shift key and click where you want the curve to end.
How Do You Draw a Curved Line in Figma?
There are a few different ways that you can draw a curved line in Figma:
- Use the pen tool. With the pen tool selected, click where you want the curve to start, then hold down the shift key and click where you want the curve to end. This will create a straight line between the two points. To create a curve, click and drag one of the handles that appear on the line.
- Use the vector network tool. With this tool selected, click on the canvas where you want the curve to start, then hold down the shift key and click where you want the curve to end. This will create a straight line between
the two points. To create a curve, click and drag one of the handles that appear on the line. - Use the pencil tool to create a curved line by clicking on the canvas where you want the curve to start, then holding down the alt/option key and clicking where you want the curve to end. This will create a curved line between two points.
- Use the shape tool to create a curved line. With the shape tool selected, click on the canvas where you want the curve to start, then hold down the shift key and click where you want the curve to end.