Padding is an important aspect of web design, and it can be used to improve the look and feel of your site. However, adding padding in Figma can be a bit tricky.
There are a few things to keep in mind when adding padding in Figma.
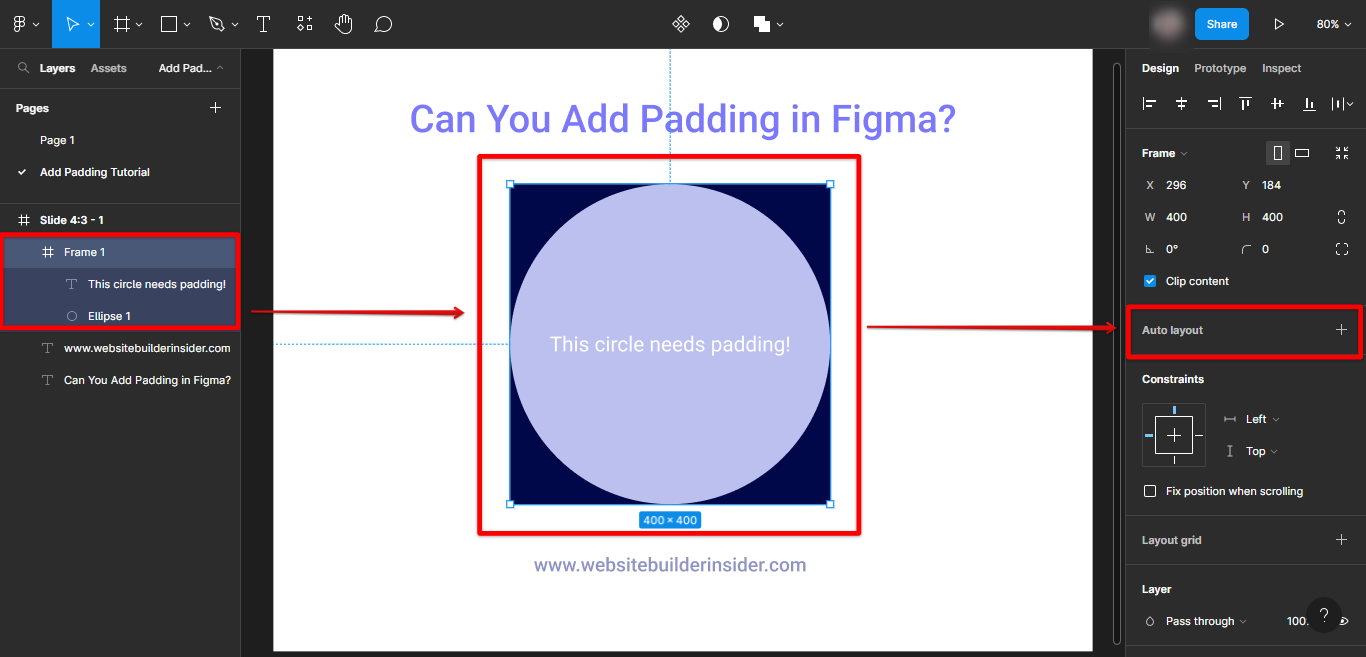
First, you must ensure that the element you’re adding padding to is selected. If you’re not sure how to do this, you can click on the element in the layers panel. Then click the “Auto layout” on the right-side panel.
PRO TIP: Please be aware that adding padding in Figma may result in your design being misaligned or looking off-center. Additionally, if you are using a grid, your padding may throw off the alignment of your elements. Therefore, it is advisable to use caution when adding padding and to check your work afterward to ensure everything is still aligned correctly.
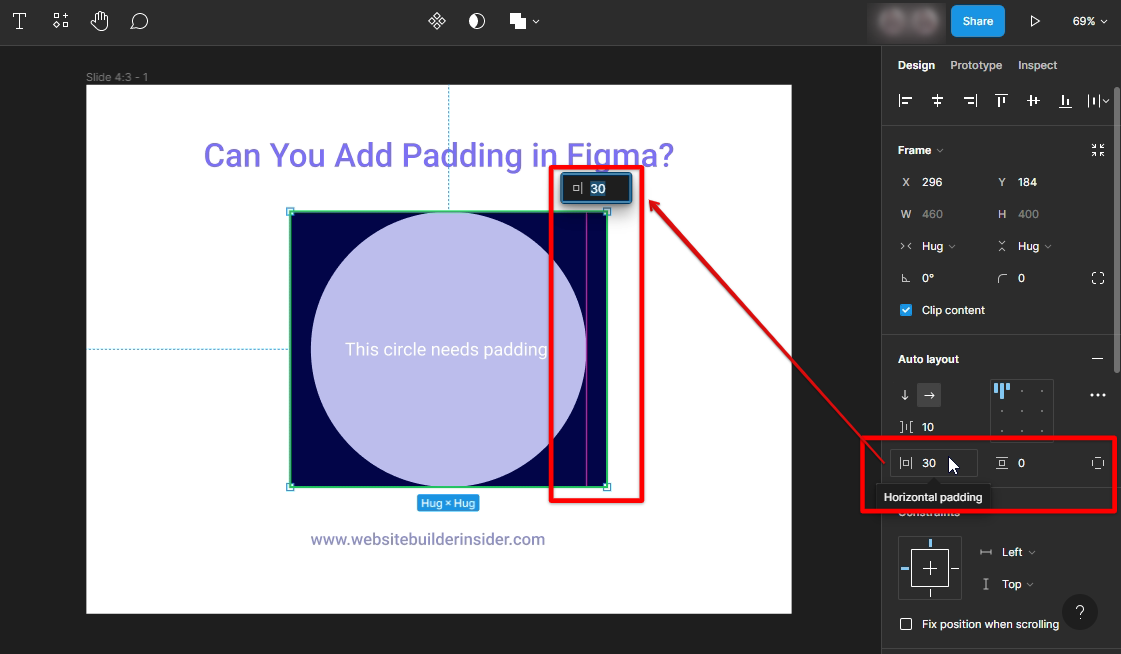
Once you’ve selected the element, you can add padding by clicking on the “Add padding” button in the toolbar. This will open up a dialog box where you can specify the amount of padding you want to add.
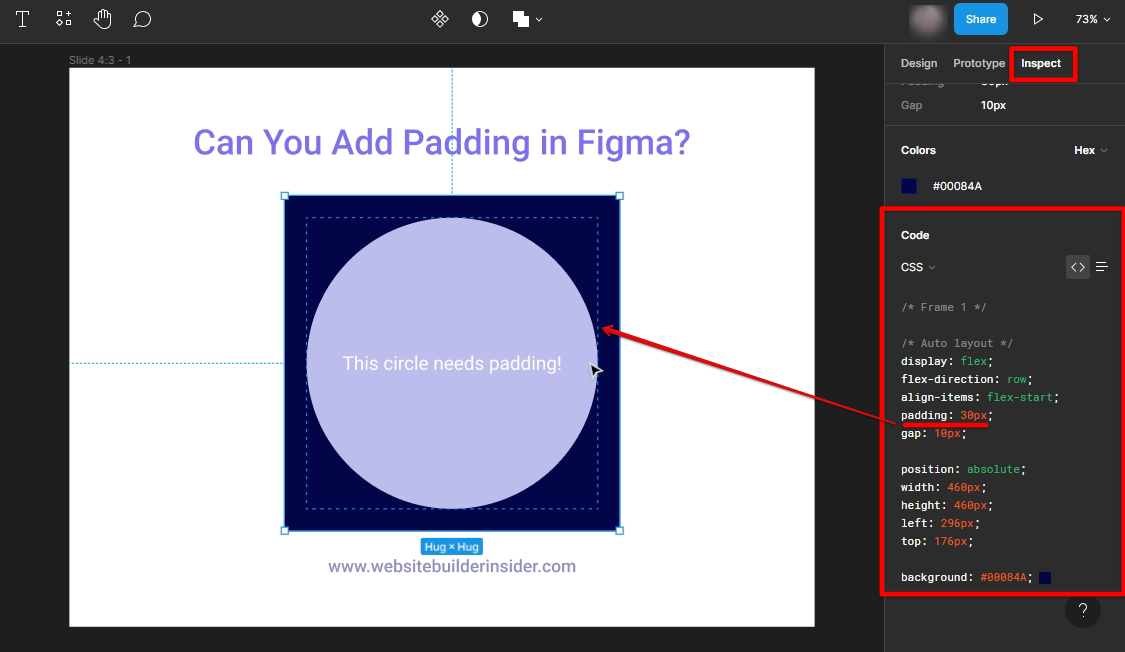
Keep in mind that you can also add padding to elements by using the “Inspect” tool. This tool allows you to see the CSS properties of an element, including its padding.
Adding padding in Figma can be a bit tricky, but it’s definitely possible. Just make sure that you select the element first, and then use either the “Add padding” button or the “Inspect” tool to add padding.
8 Related Question Answers Found
Adding Symbols in Figma
Adding symbols in Figma is a simple process that can be done in a few simple steps.
1. Open the symbol you want to add in Figma and select the “Symbol” tab in the toolbar.
2. In the “Symbol Properties” dialog box, select the “Font” tab and choose the font you would like to use for the symbol.
3.
There are a few different ways to add a vector in Figma. The first way is to click on the “Vectors” button in the left toolbar. This will open up the “Vector Library” where you can browse through a variety of vector illustrations.
Adding a cell in Figma is easy! First, select the layer you want to add the cell to. Then, click the “Add Cell” button in the toolbar.
Figma is a vector-based design tool that is gaining popularity among web and app designers. One of the reasons for this popularity is Figma’s ease of use. For example, adding a chart to your Figma design is a simple process that can be accomplished in just a few steps.
Adding a button in Figma is a simple process that can be accomplished in just a few steps. First, create a frame for the button. Next, add a rectangle to the frame.
There are two ways to add a ruler in Figma. The first is to use the “Ruler” tool, which can be found in the Tools panel. To use this tool, simply click and drag on the canvas to create a horizontal or vertical ruler.
There’s no denying that Figma is a powerful design tool. But one of its most underrated features is its ability to create and style text. With the right tips and tricks, you can easily style text in Figma using the < p >, < b > and < u > tags.
Flow is a powerful tool that allows you to create interactive prototypes in Figma. It’s easy to get started with and you can use it to create all sorts of prototypes, from simple click-through prototypes to more complex, interactive ones. In this article, we’ll show you how to add a flow in Figma.