Adding a link to a Figma image is a simple process that can be accomplished in just a few steps. Here is how to do it:
1. Open your file in Figma and choose which image would you like to have a link added on. Insert a text overlay on top of your image to create a clickable area.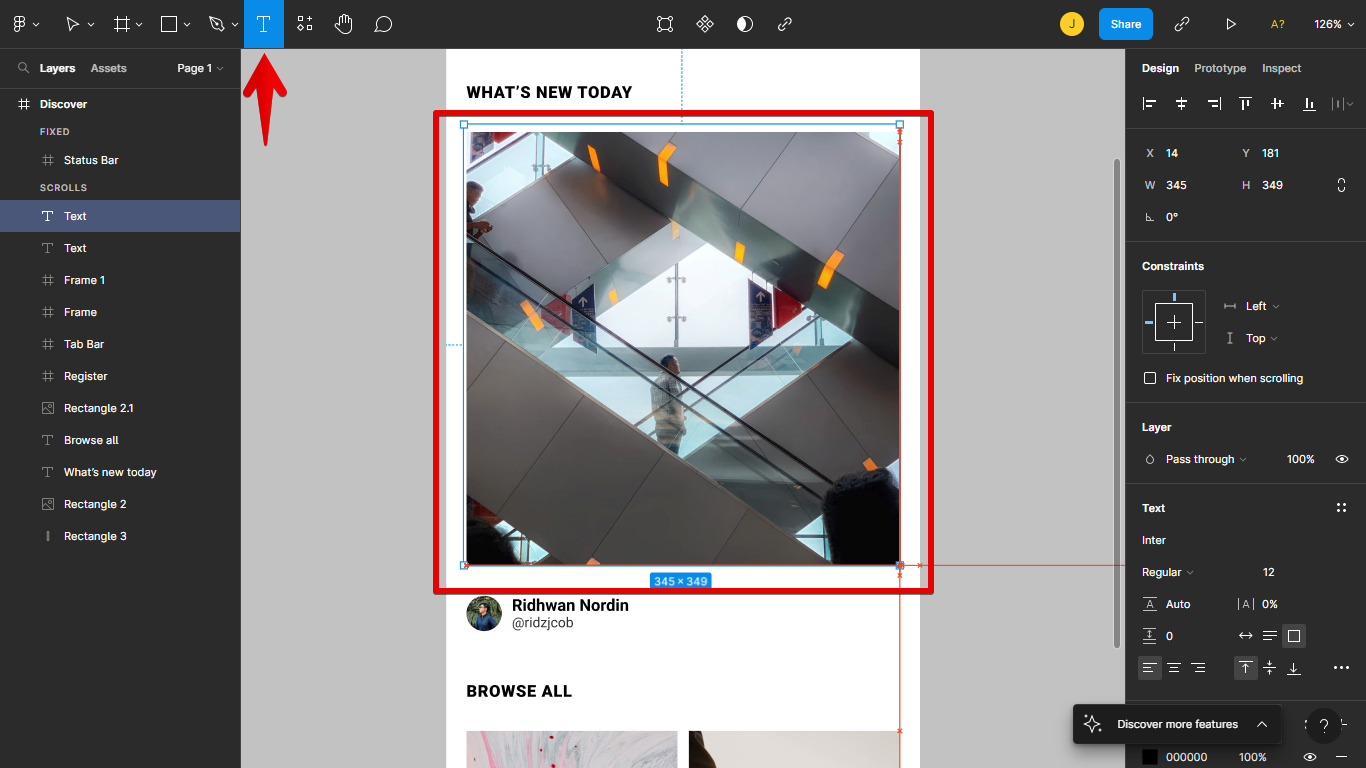 2. Fill the text overlay with blank spaces. You can increase the font size to make the space bigger and create a blank space faster and select all by pressing Ctrl + A.
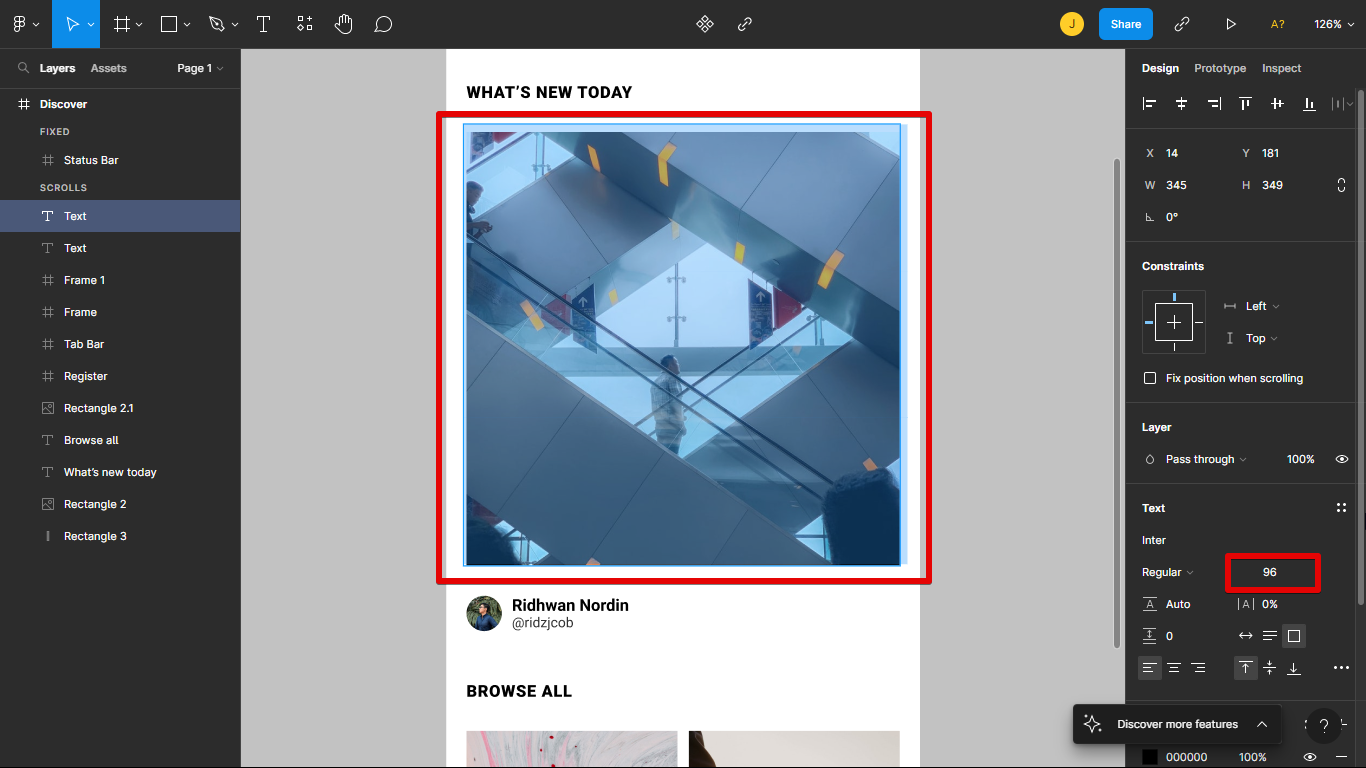 3. Select the “Link” icon (or press Ctrl + K) from the toolbar at the top of the screen. Enter the URL of the page you want to link to and click Enter.
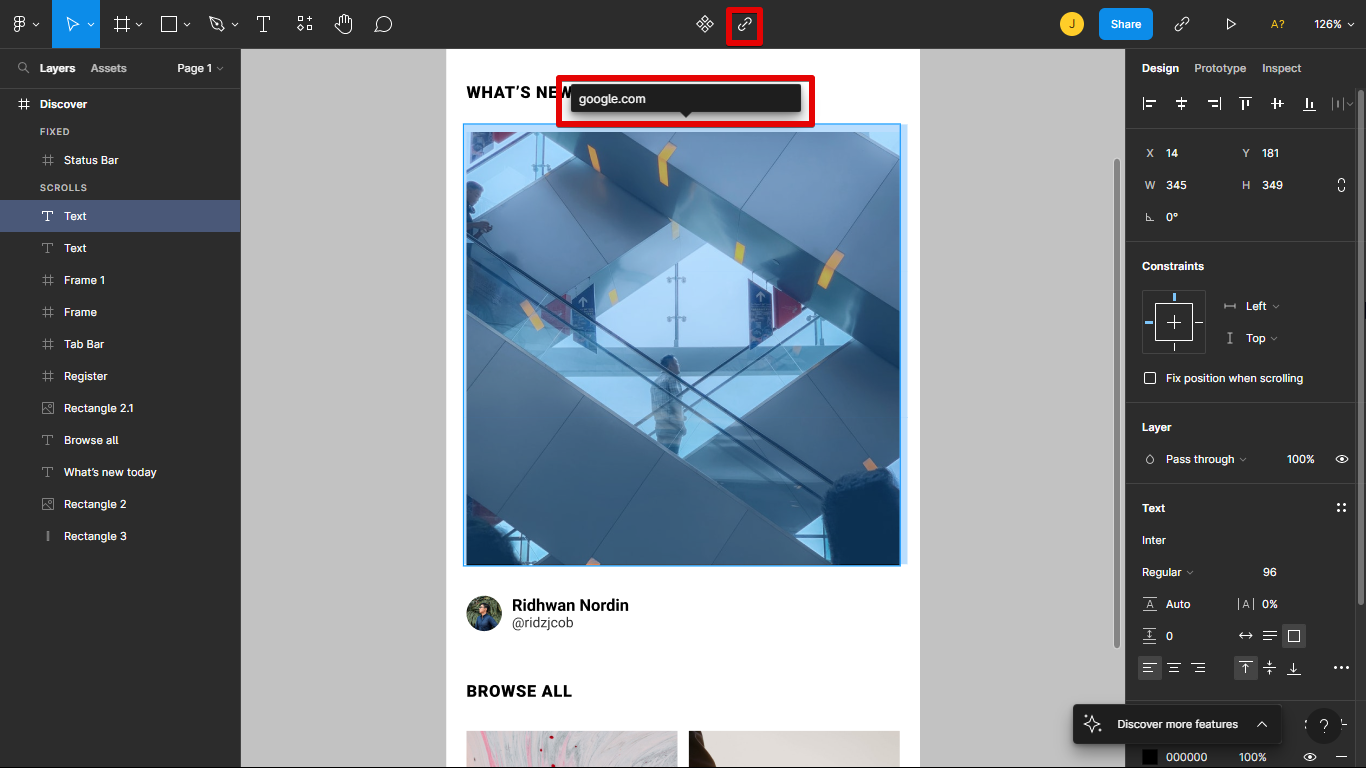 4. After you click Enter. it will have an underline since it is a hyperlink text. You need to remove the underline by clicking the “3 dots” icon at the right side panel and selecting the “None” option in Decoration.
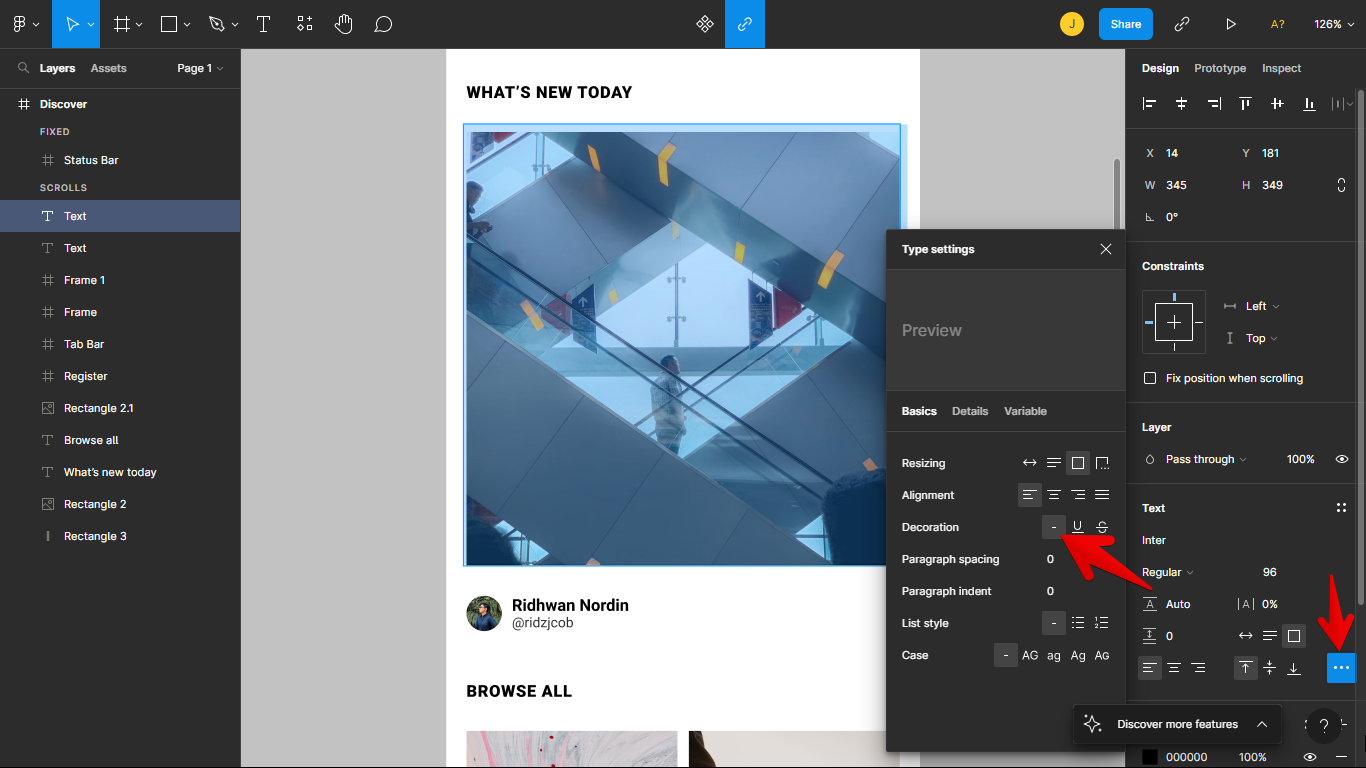 5. Now you can click the image to open a new tab of your inserted link.
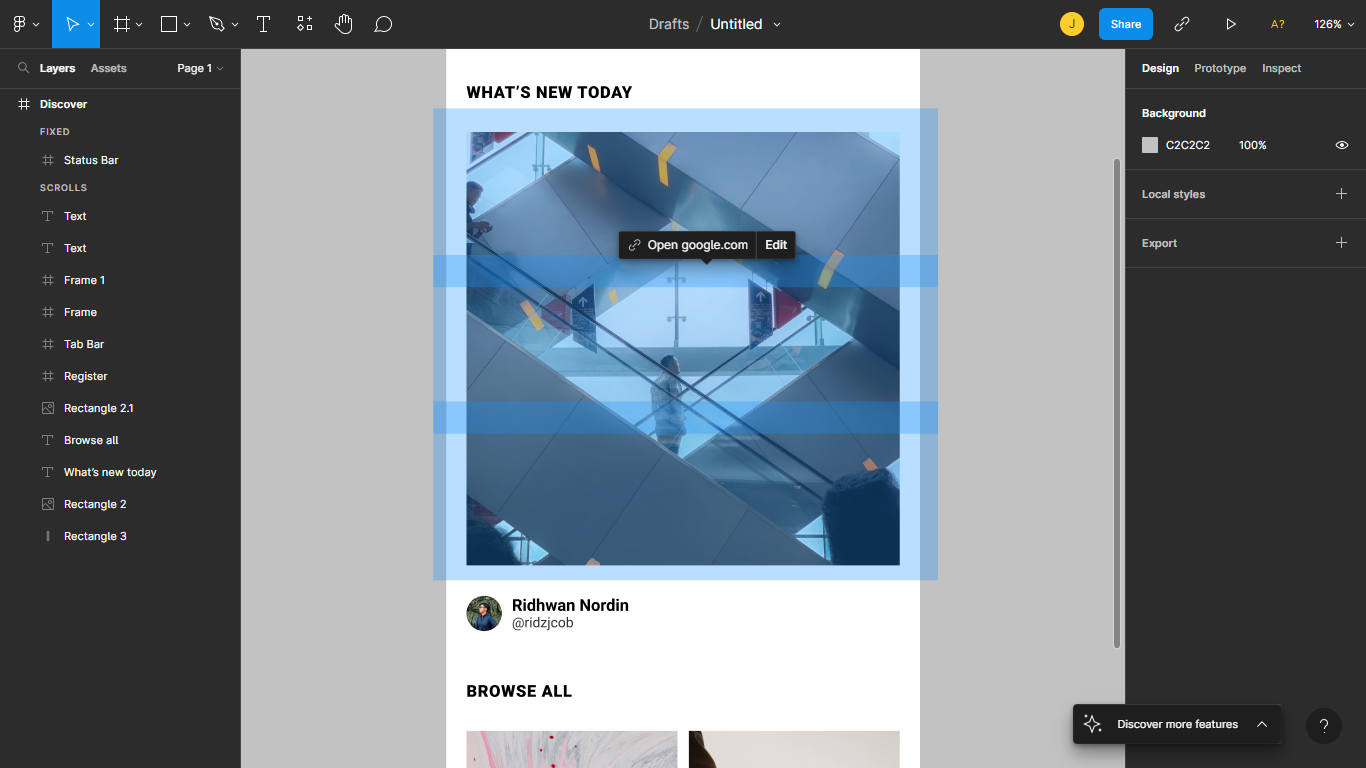 Below is the full process of adding a link to a Figma Image:
That’s all there is to it! Now when someone clicks on your image, they will be taken to the page you specified. This is a great way to add extra information or links to resources that might be helpful to your audience.