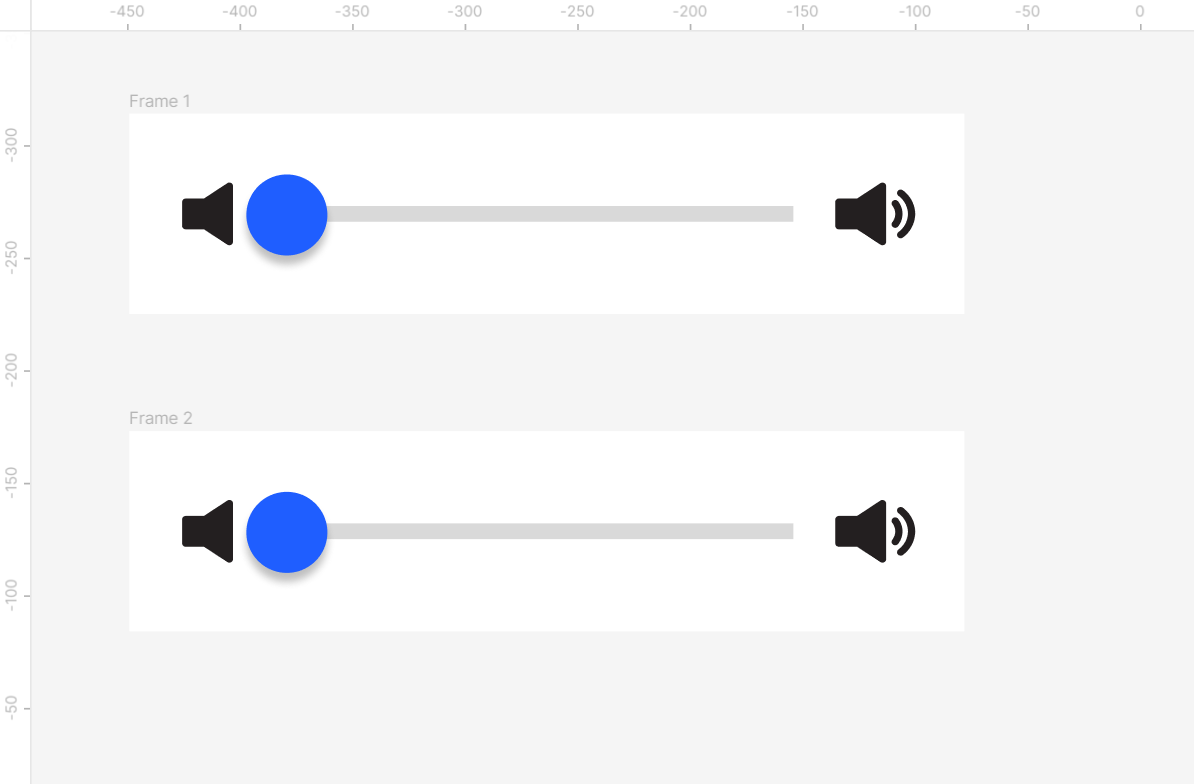
Figma is a great tool for creating designs for websites and apps. One of the best features of Figma is that you can add a slider to your design.
This allows you to create a more interactive and responsive design.
To add a slider in Figma, first, create a rectangle using the “Rectangle shape tool” which will serve as the track of your slider.
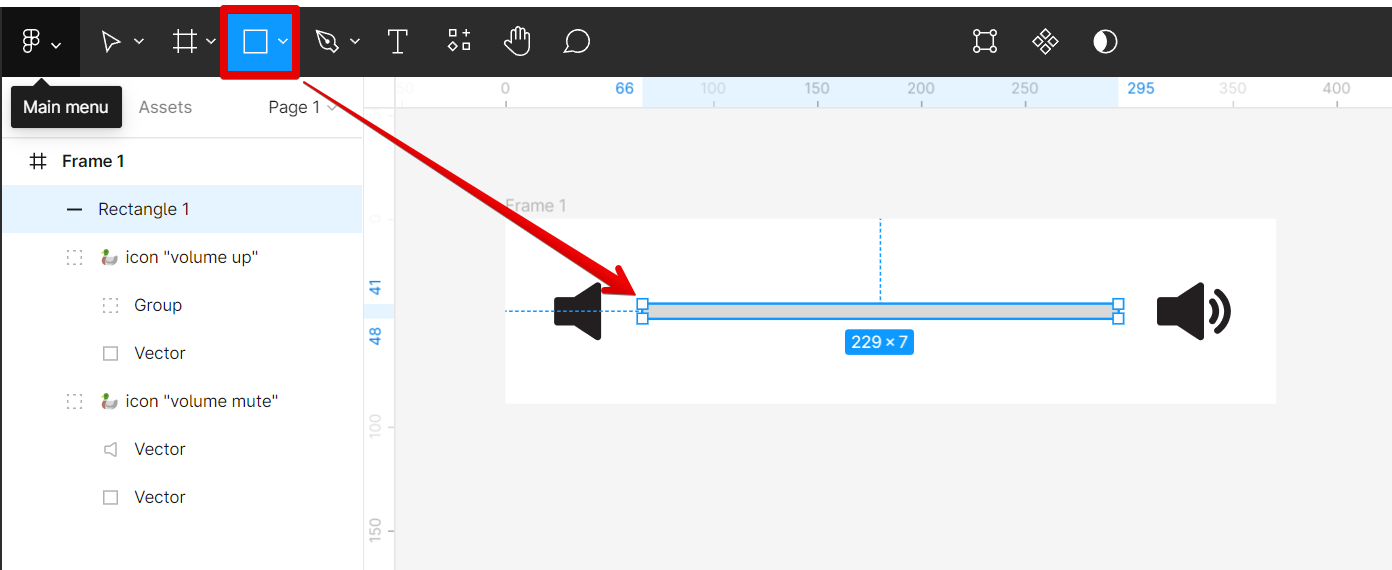
Next is to create another small rectangle track with the same height but with a small width. Also, add color to your small track using the “Fill” section.
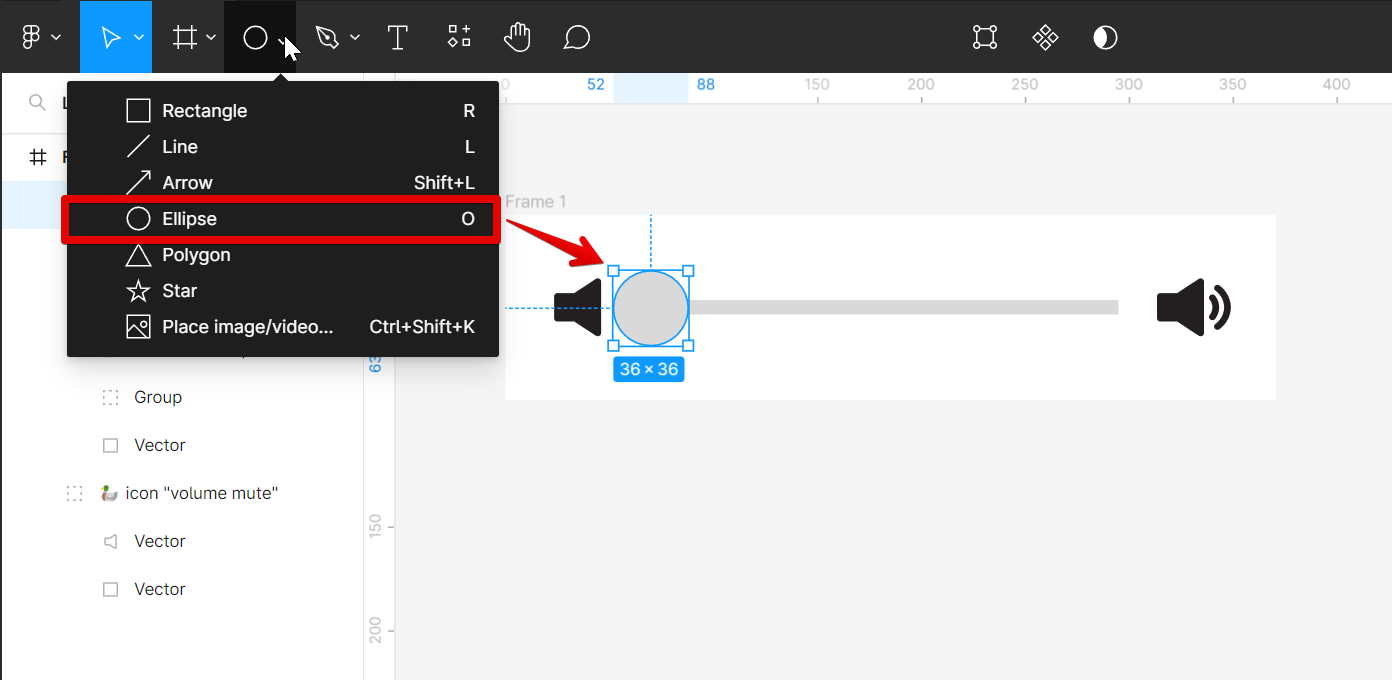
Now, add a circular handle to your slider using the “Ellipse shape tool” in the upper toolbar.
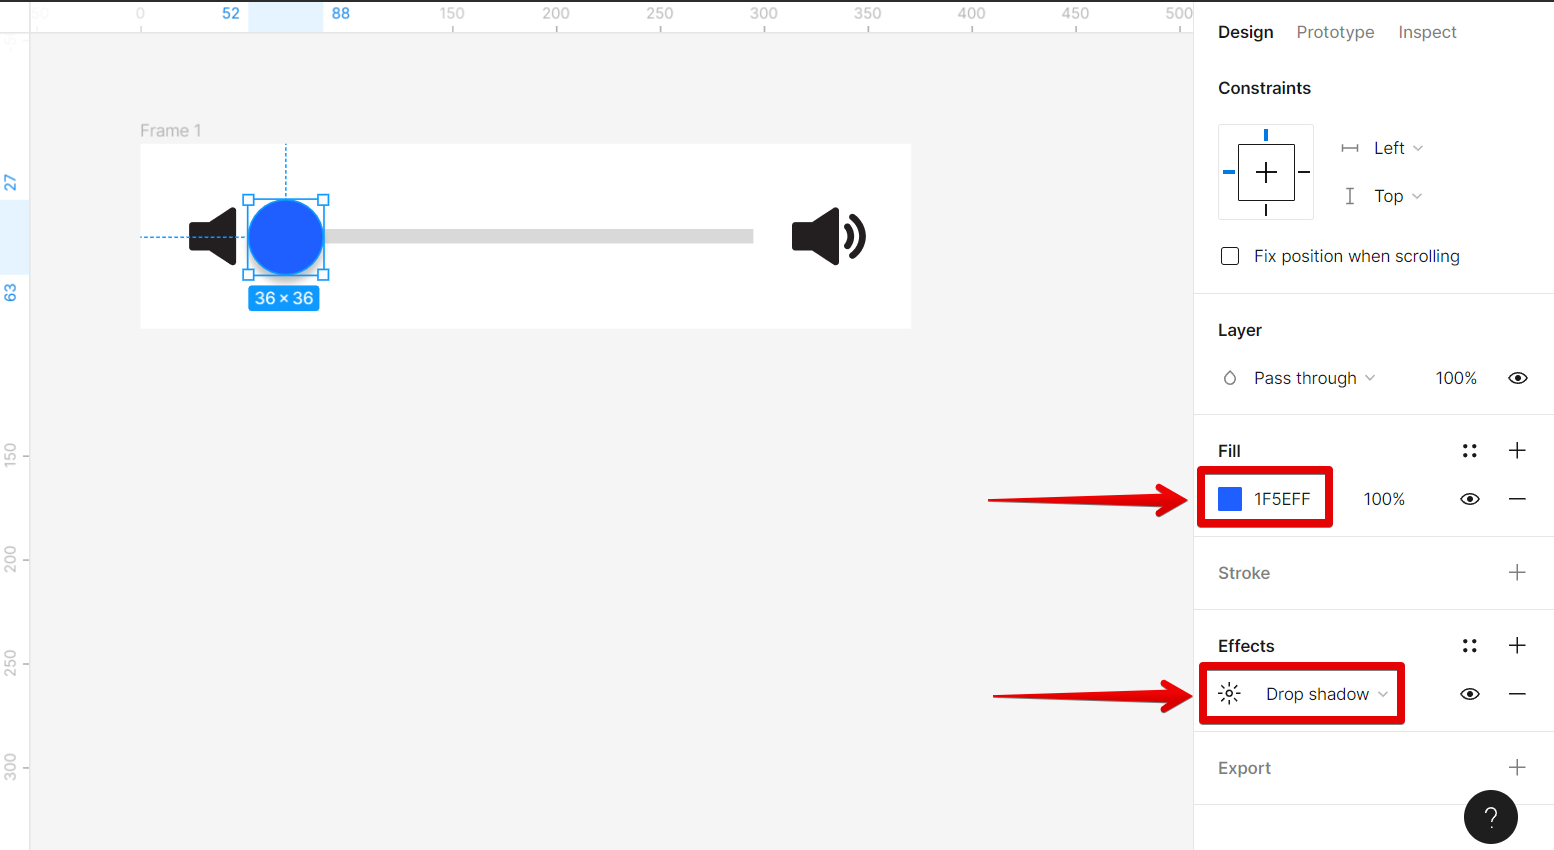
Then, add color to your handle using the “Fill” section and also a drop shadow using the “Effects” panel.
NOTE: This will add a realistic effect to your slider design.
Once done, create a copy of your frame by pressing the keyboard shortcuts “Ctrl+C” to copy and “Ctrl+V” to paste.
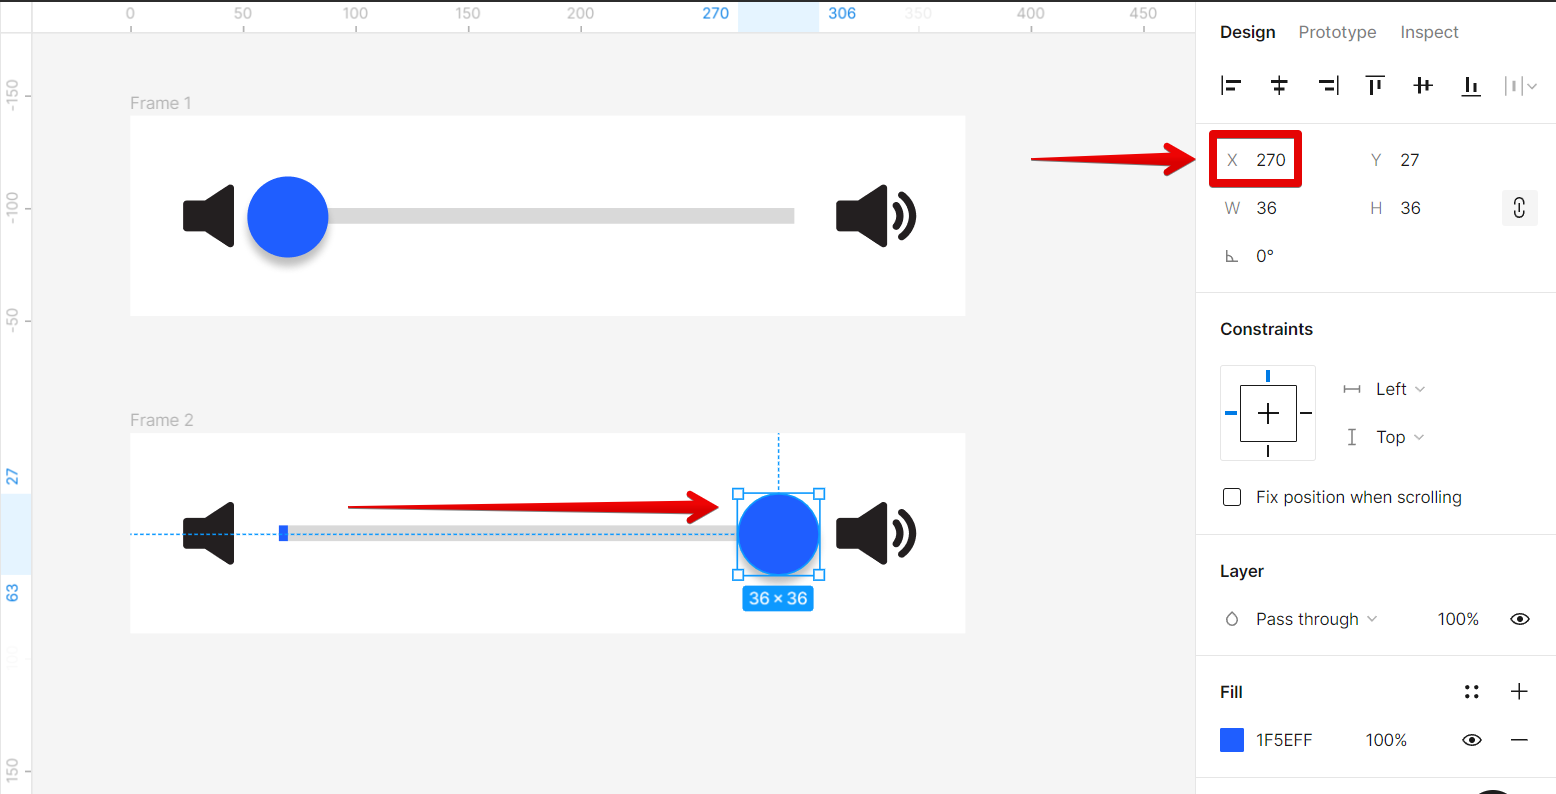
The next step is to set the handle in your Frame 2 slider to its maximum in the track. To do this, just click and drag on the handle until it reaches the end of the track. However, make sure that the handle is still aligned with the original position to create a smooth animated effect.
NOTE: You can also opt to just input the “X-axis” position of where you want the slider to be for better accuracy. You can use the ruler at the top of the page as a guide for this.
PRO TIP: Adding a slider in Figma is a relatively simple process, but there are a few things to keep in mind. First, make sure that the layer you want to use for the slider is selected. Next, create a slider using the shape tools available in the toolbar. You can design your slider to your preference, however, keep in mind to always check if your transitions are properly aligned with the original one to create a smooth animated effect.
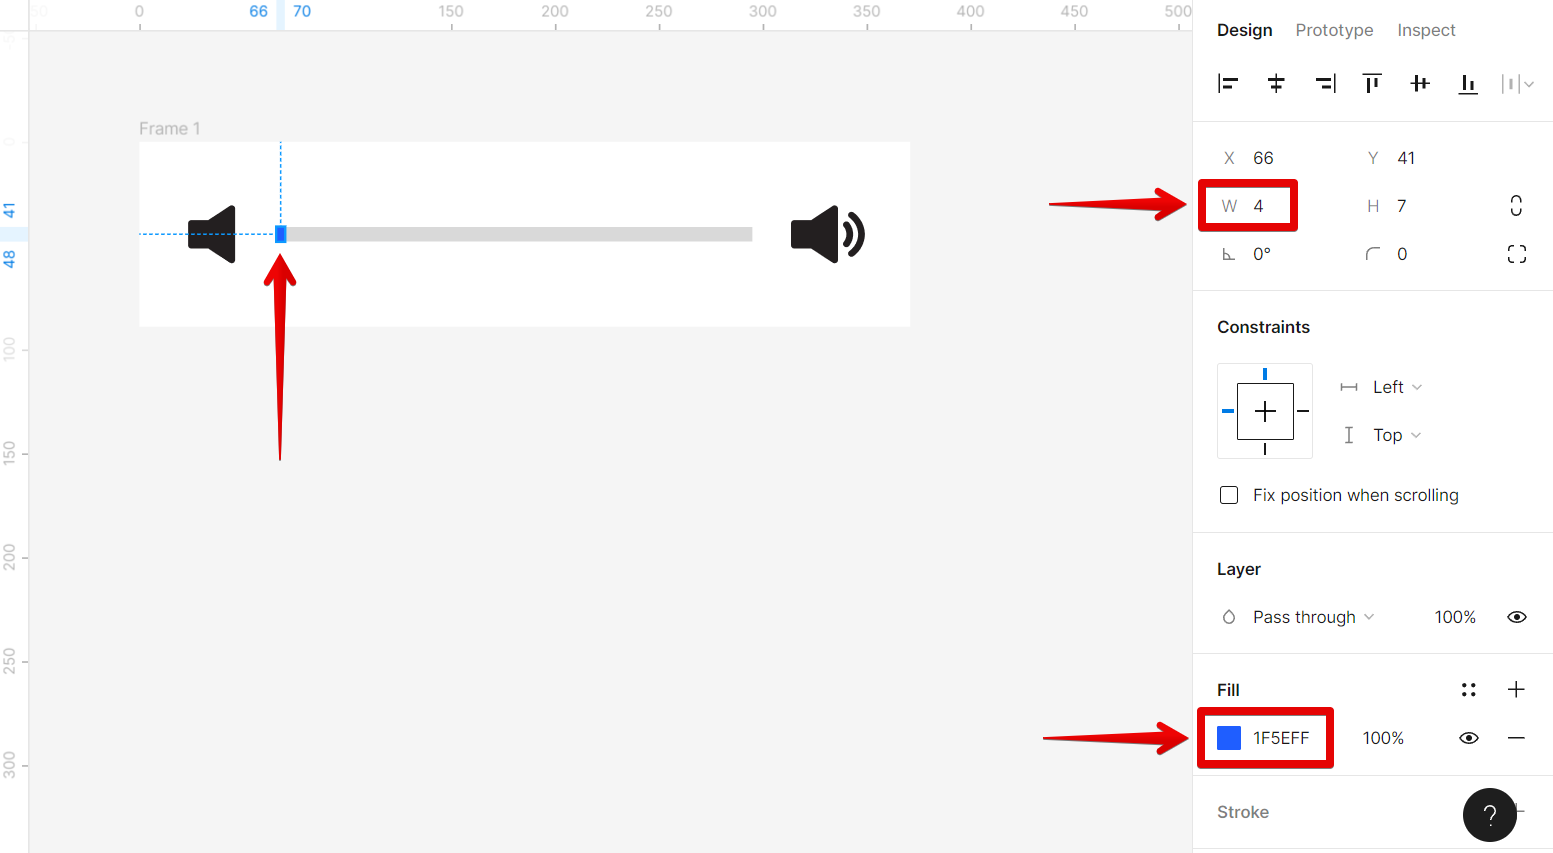
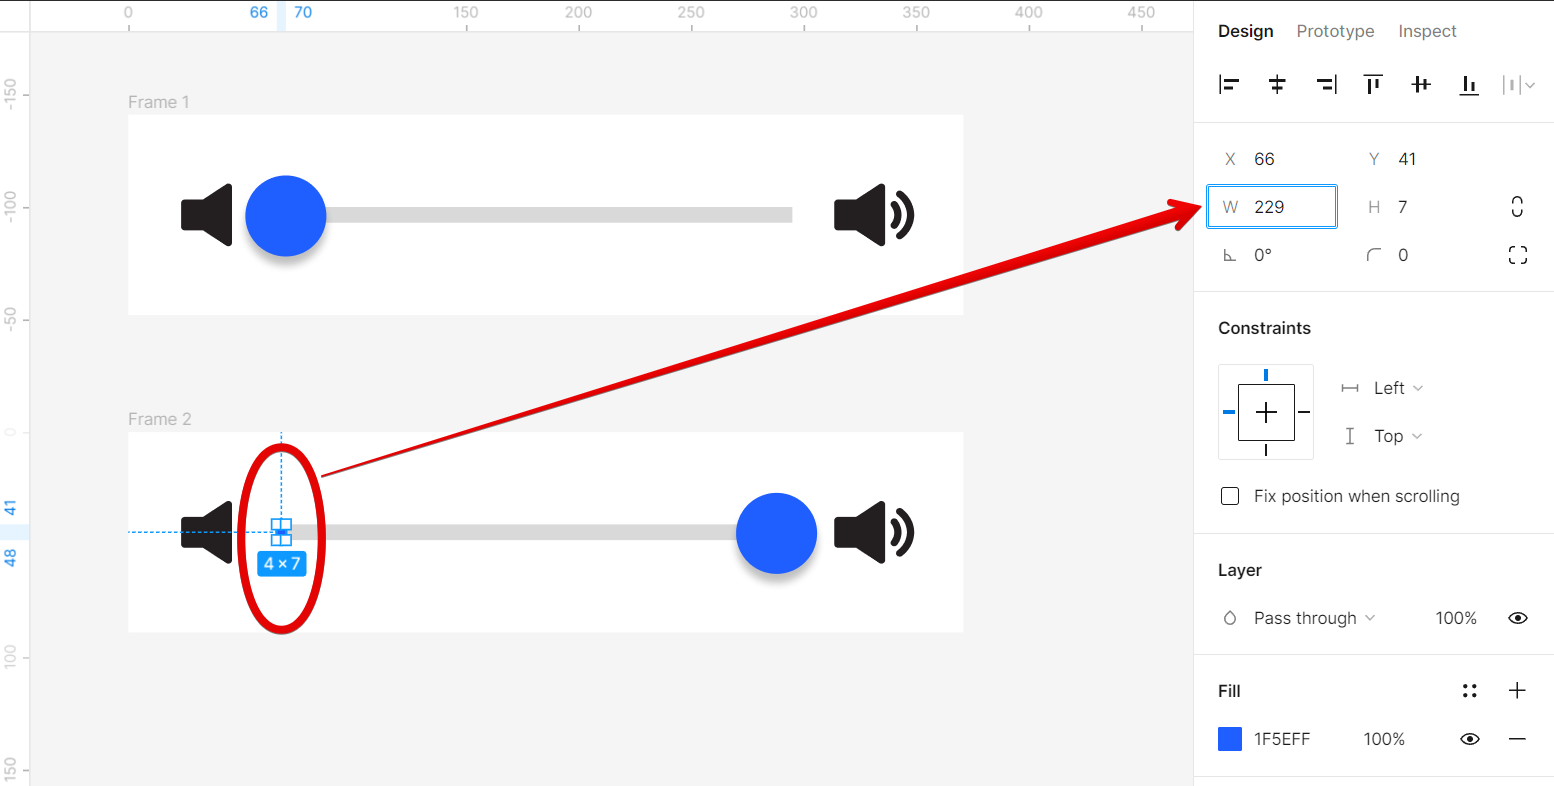
Now, still in Frame 2, adjust the width of the small track that you created earlier and set it to the same width as the long rectangular track. In this case, that would be 229.
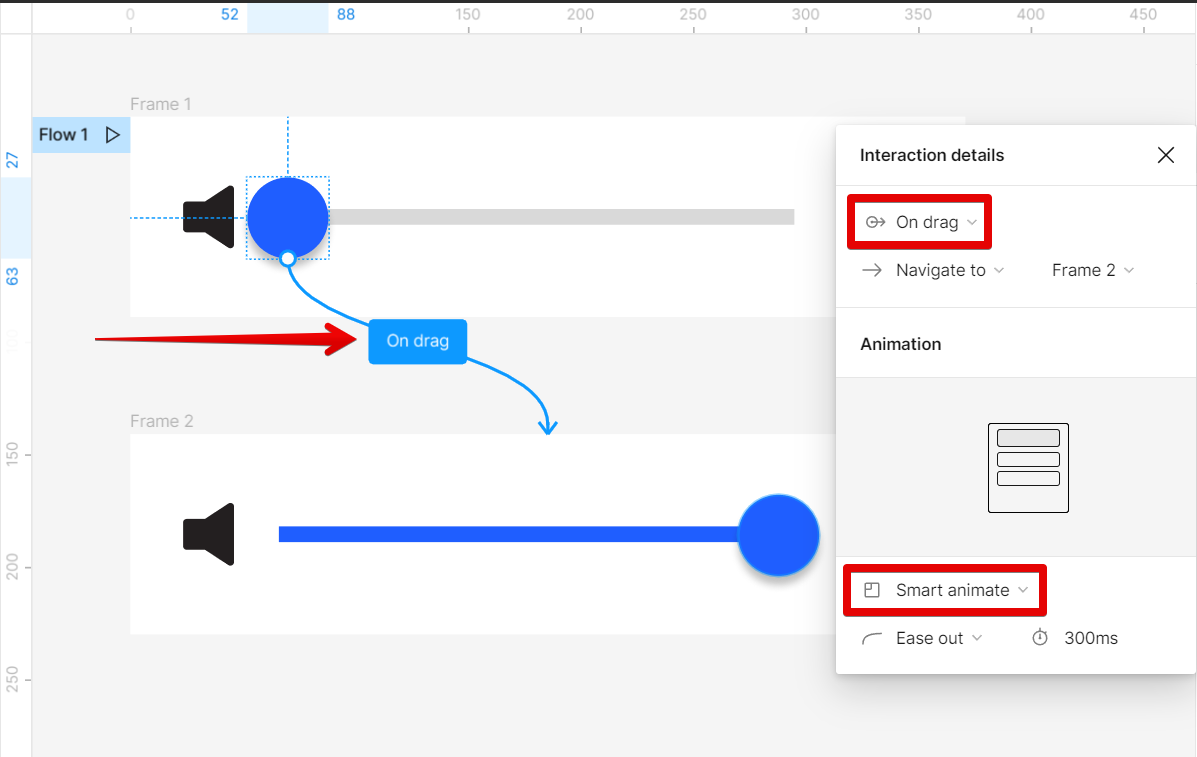
Once done, we can now start creating the animation flow of the slider. To do this, select the “Prototype” tab in the right menu and hover over the handle in Frame 1 until the “+” icon appears.
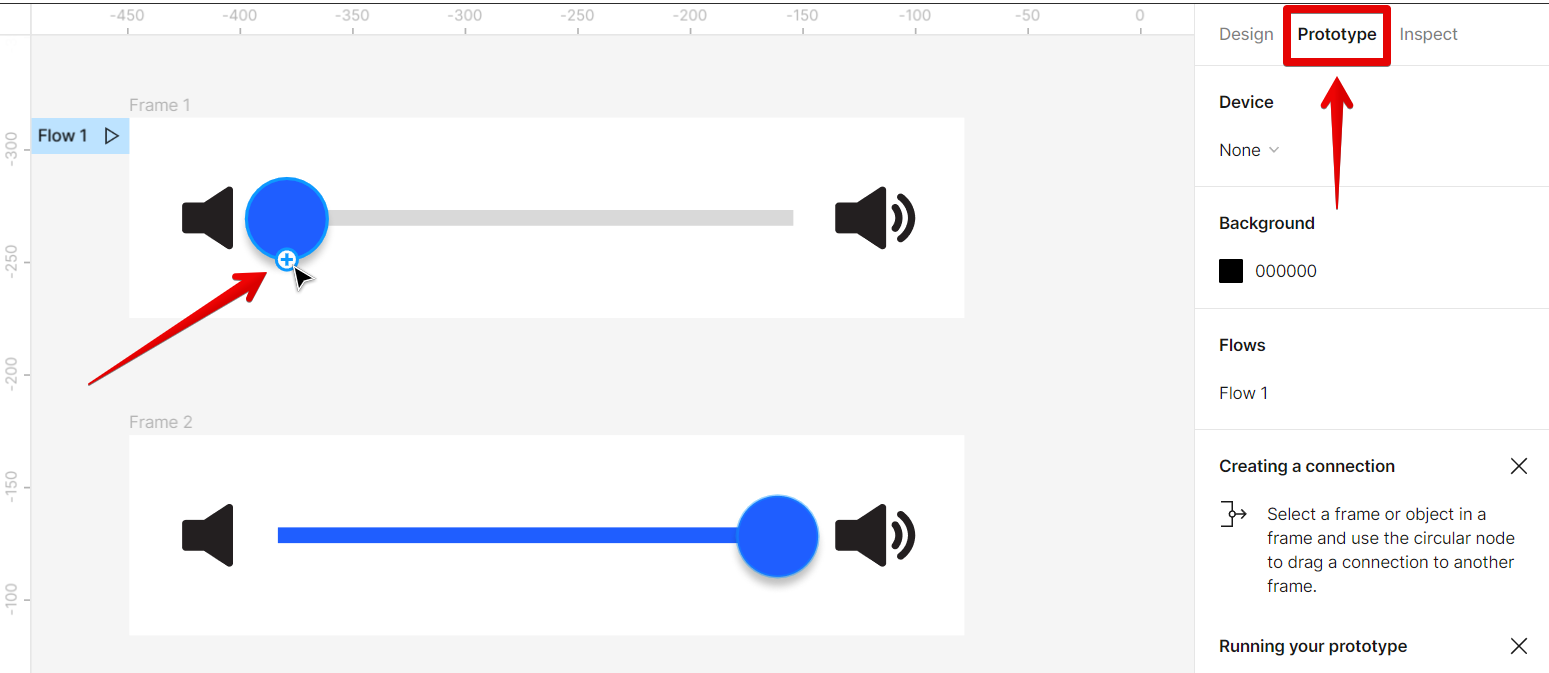
Connect the handle in Frame 1 to Frame 2 to create the first animation where you slide the handle of the slider to the right. In the “Interaction details” window, select the “On drag” and “Smart animate” options.
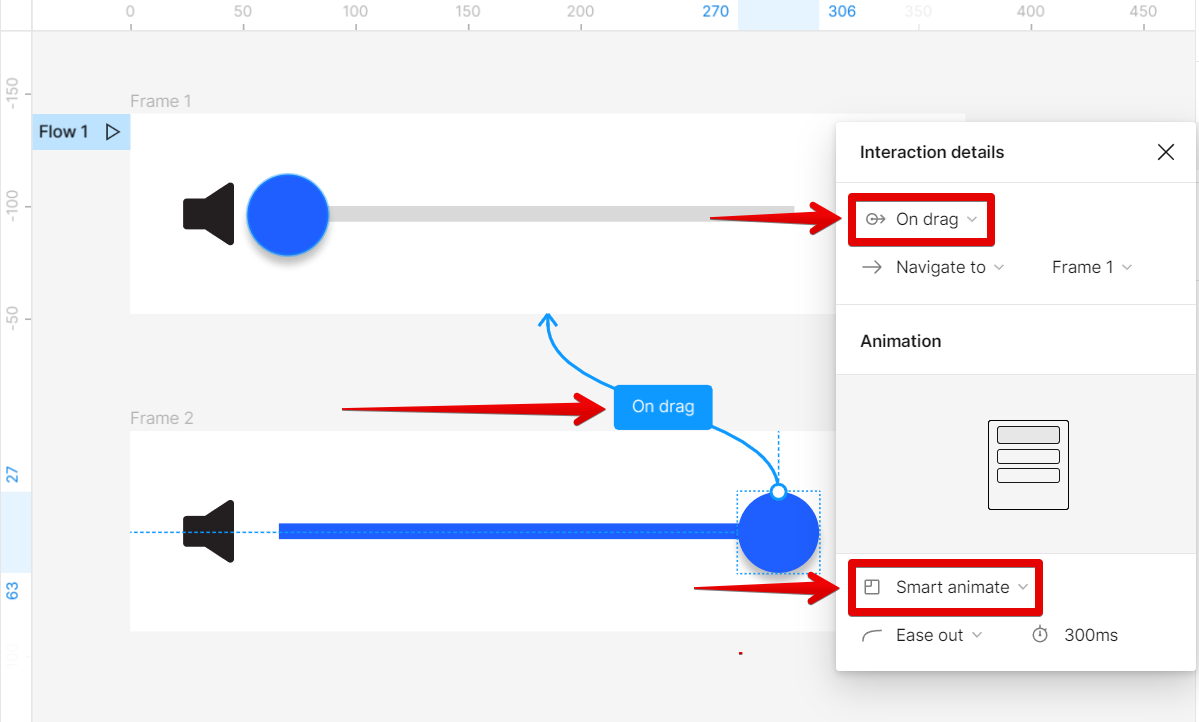
For the next animation, connect the handle in Frame 2 to Frame 1 and select “On drag” and “Smart animate” for the Interaction details. This will let you slide the handle to the left and go back to its original form.
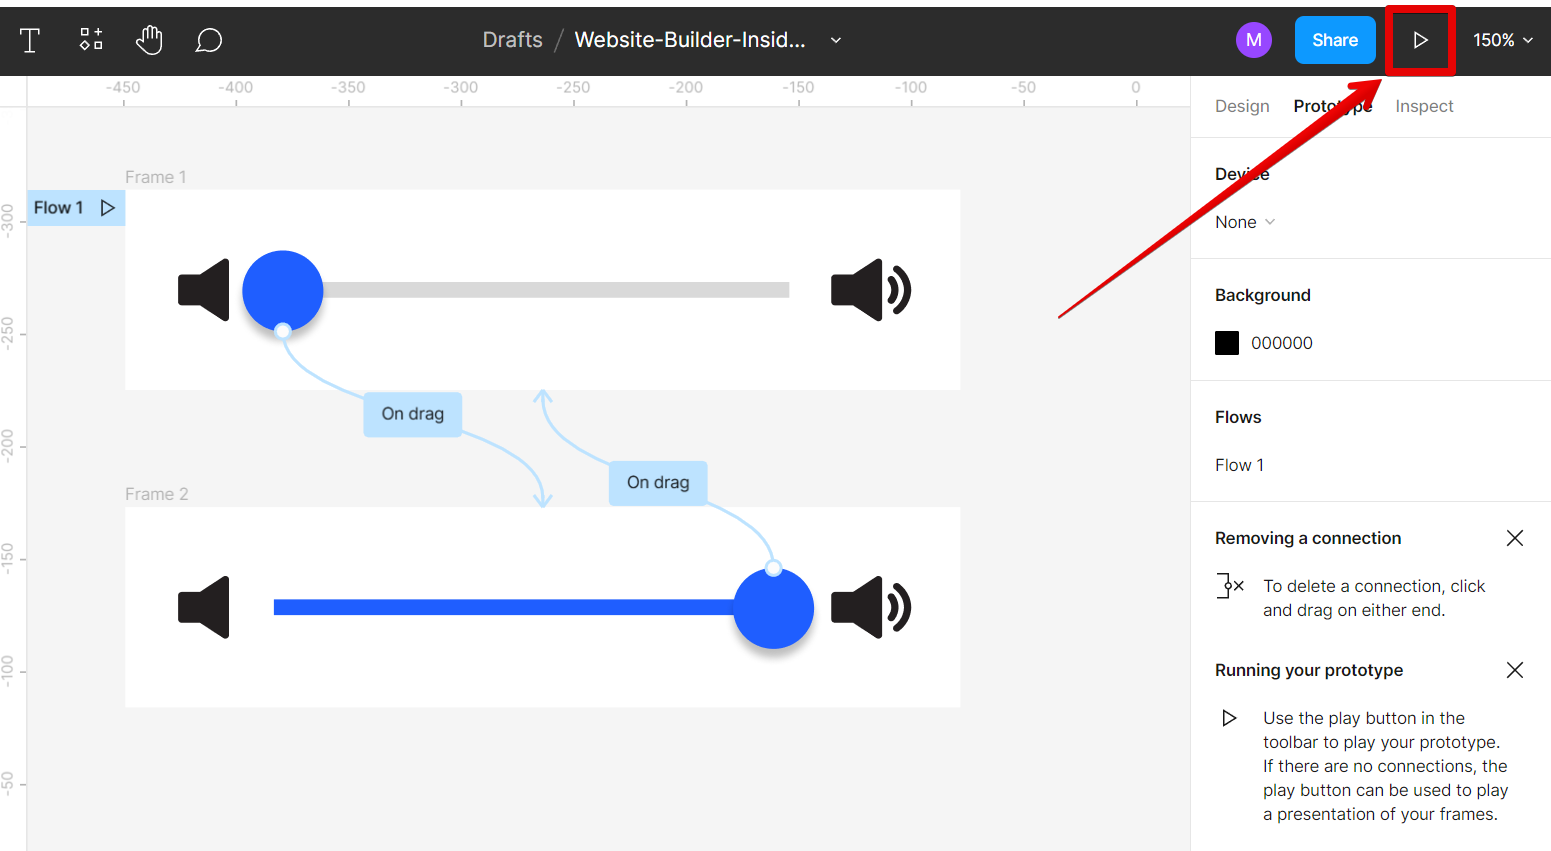
Once you’re finished with the prototype, click on the “Play” icon at the top-right corner of the page.
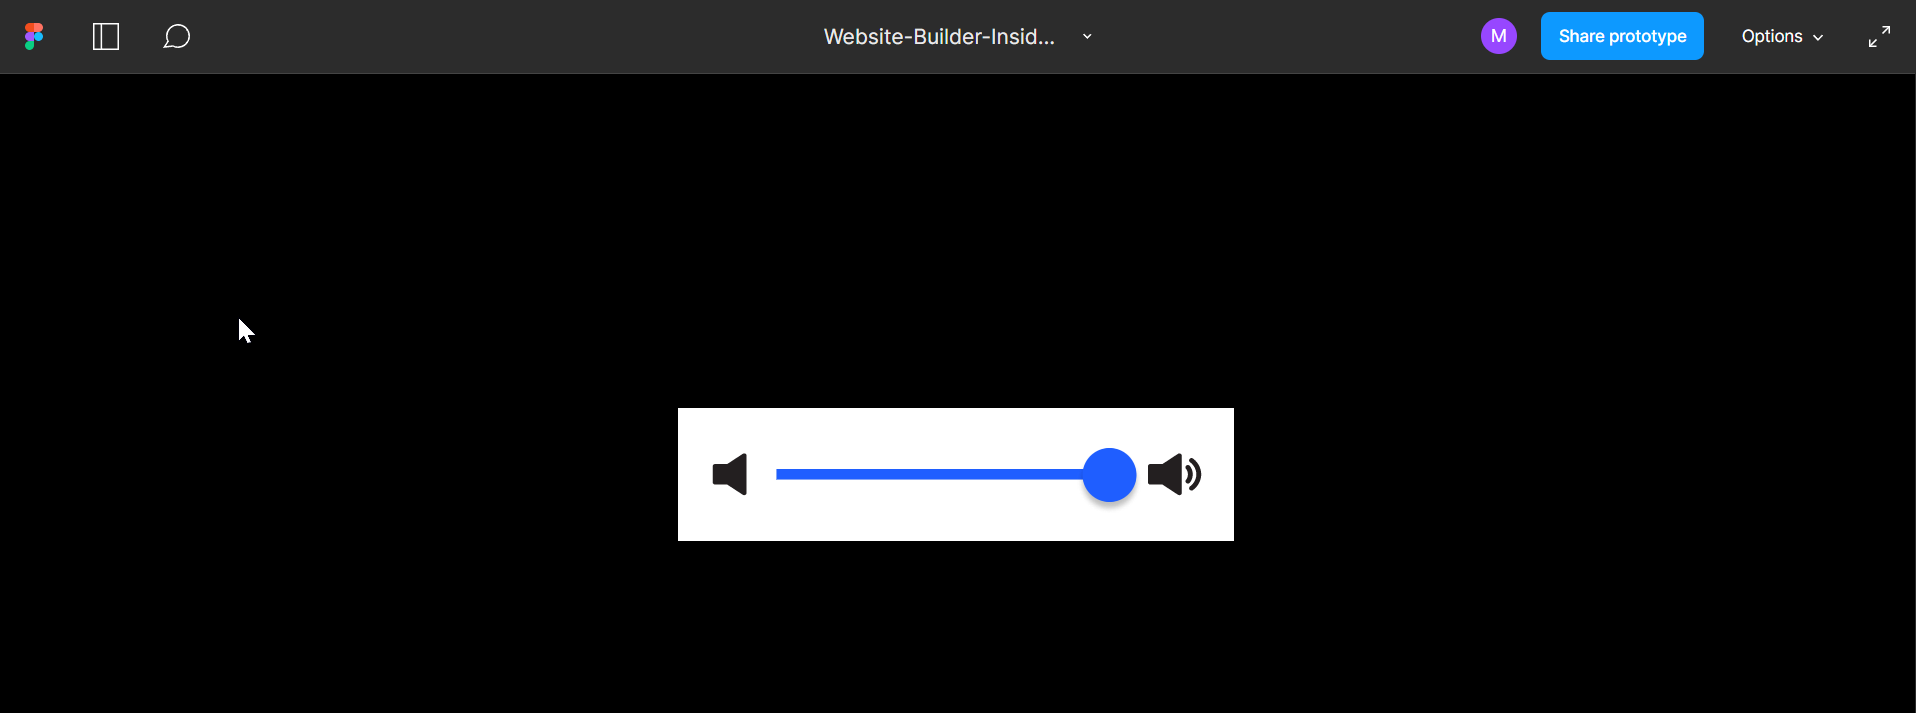
And there you have it! You can now add a slider to your Figma design!
6 Related Question Answers Found
Whether you’re a web developer or graphic designer, at some point you’ll likely need to create a slideshow. Slideshows are a great way to showcase your work, present information to an audience, or tell a story. Figma is a great tool for creating slideshows because it’s easy to use and has a wide range of features.
Slideshows can be a great way to showcase products, services, or just about anything else you can imagine. Figma makes it easy to create and share slideshows. Here’s how:
1.
Figma is a great tool for creating high-quality visuals, but can it also be used to create slides? The answer is yes! Figma provides all the features you need to create beautiful slides, including the ability to add and style text, shapes, and images.
Figma is a powerful tool for creating beautiful, interactive, and responsive websites. It has a wide range of features, including the ability to create slideshows. In this article, we will show you how to create a simple slideshow in Figma.
A carousel slider is a great way to display multiple pieces of content in a single area on your website. Figma makes it easy to create a carousel slider with its ‘Component’ and ‘Interaction details’ features. Here’s how you do it:
1.
In Figma, you can animate individual layers on a frame-by-frame basis. To do this, select the layer that you want to animate in the Layers panel, then click the Animate button in the top toolbar. This will open the Animations panel, where you can add keyframes and adjust properties such as position, opacity, and rotation.