Adding an RSVP to Squarespace is easy.
First, sign in to your account. Then, go to the Main Navigation panel and click on the plus icon to add a new page. In the menu that will appear, select the “Page Layouts” option.
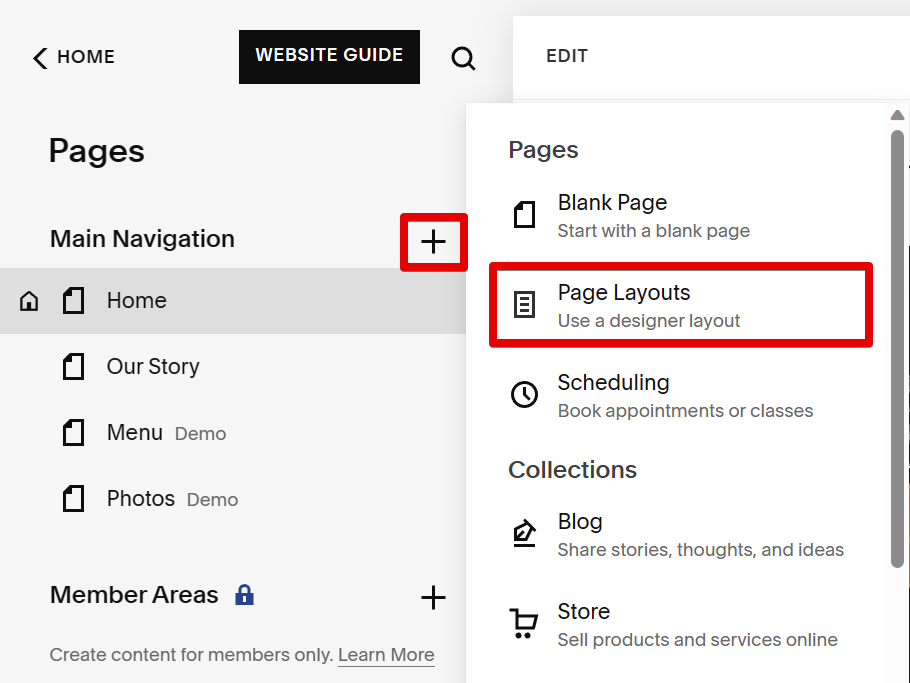
In the “Add a Page” window that will appear, go to the left panel and select the “RSVP” options from there. Various RSVP layout options will then be presented on the right panel. Select one to add it to your website.

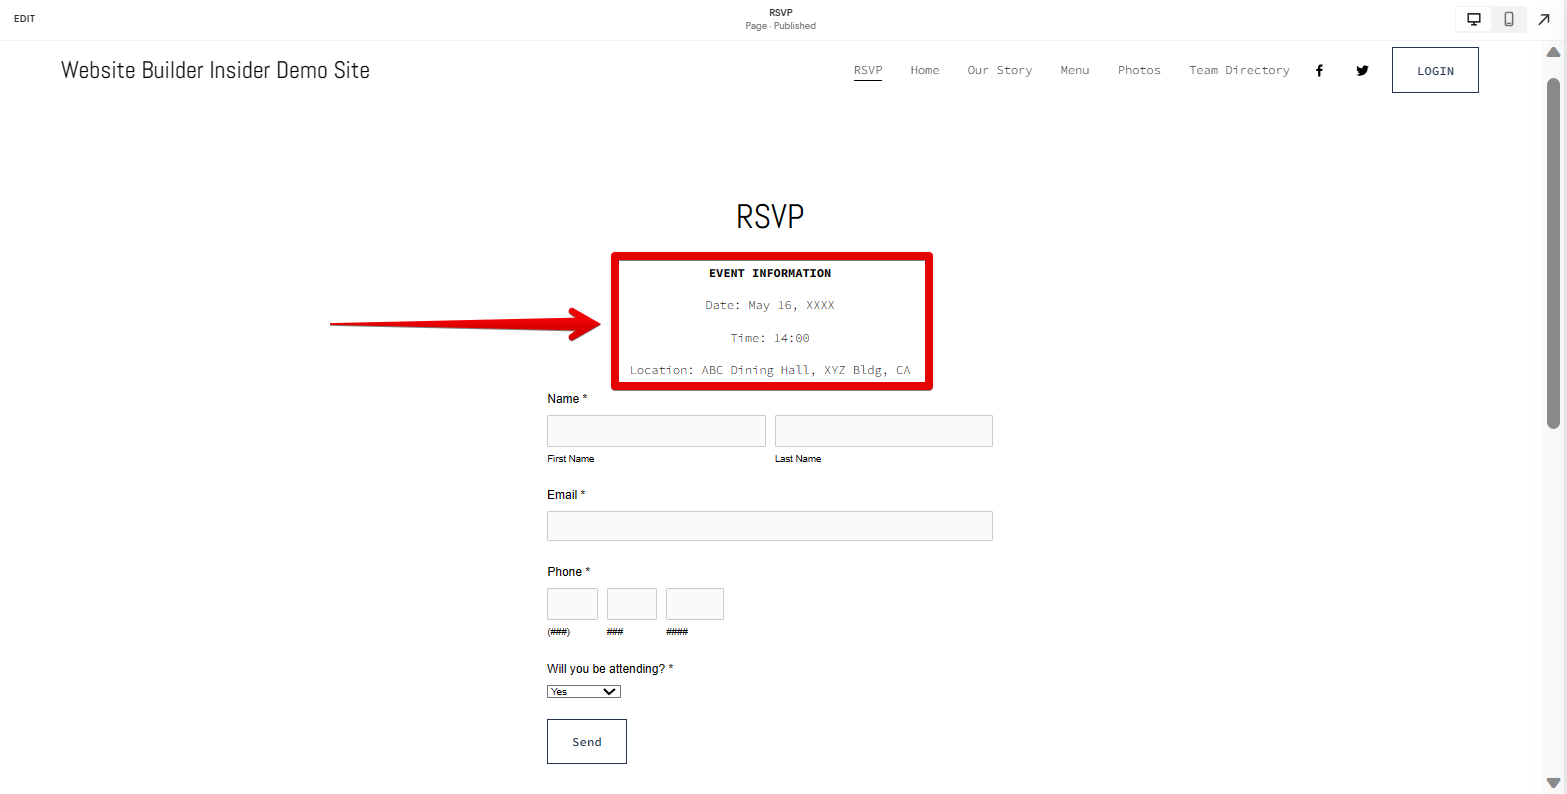
The RSVP page should now be added to your page. Here, in the “Event Information” section, you’ll need to provide the following information:
- Date
- Time
- Location
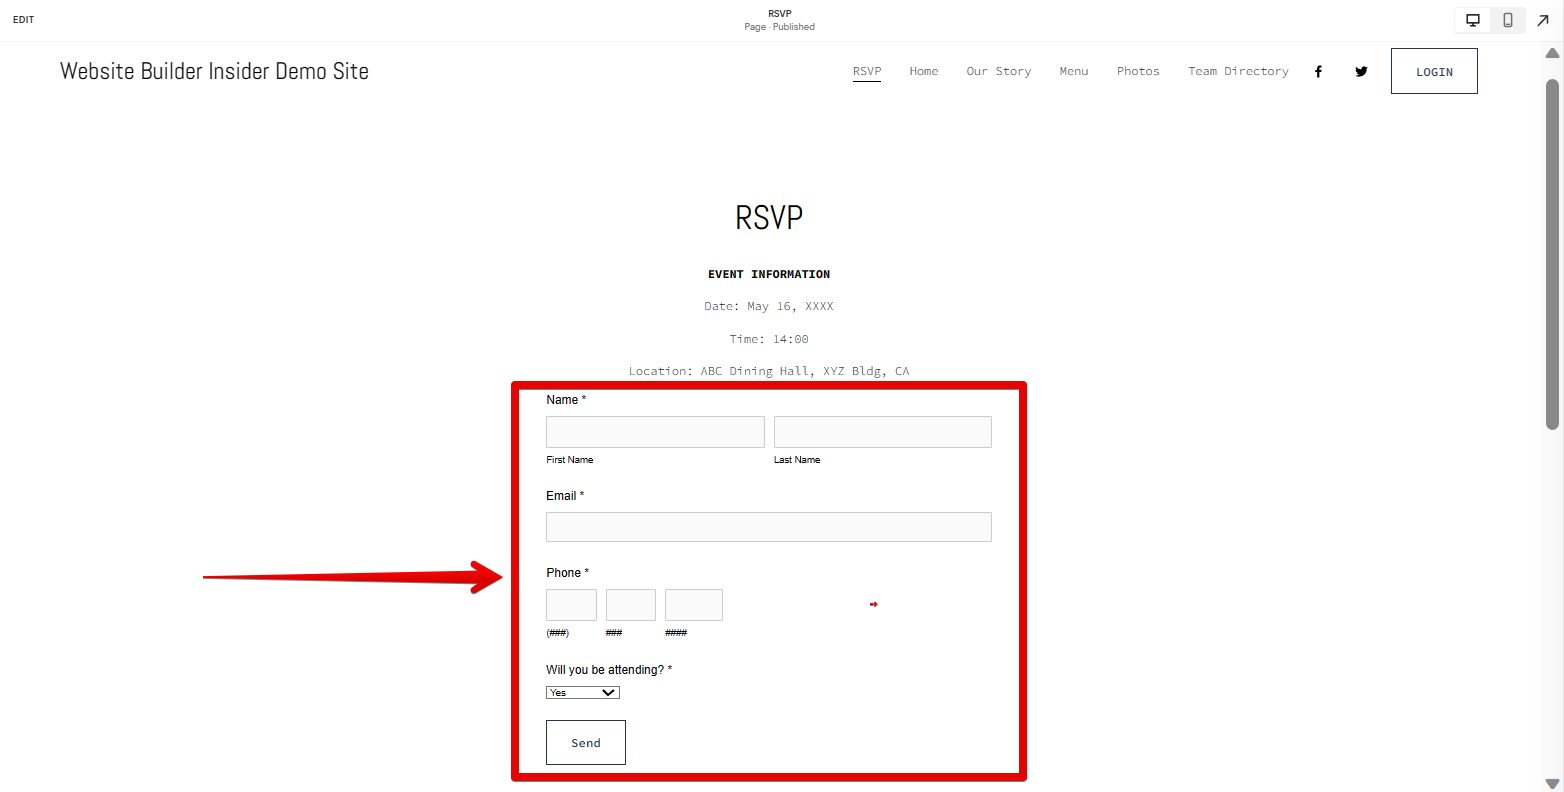
Once you’ve completed these fields, go to the section below it and make sure that the “Attendee Details” fields are complete. Here, you’ll need to provide the following information for each attendee:
- Name
- Email
- Phone Number
- RSVP Status
PRO TIP: If you are not familiar with the Squarespace interface, we do recommend following the steps in this article while trying to add an RSVP to your Squarespace website. Keep in mind that adding an RSVP to your website can be a tricky process and doing so could result in unexpected changes to your website’s design and layout.
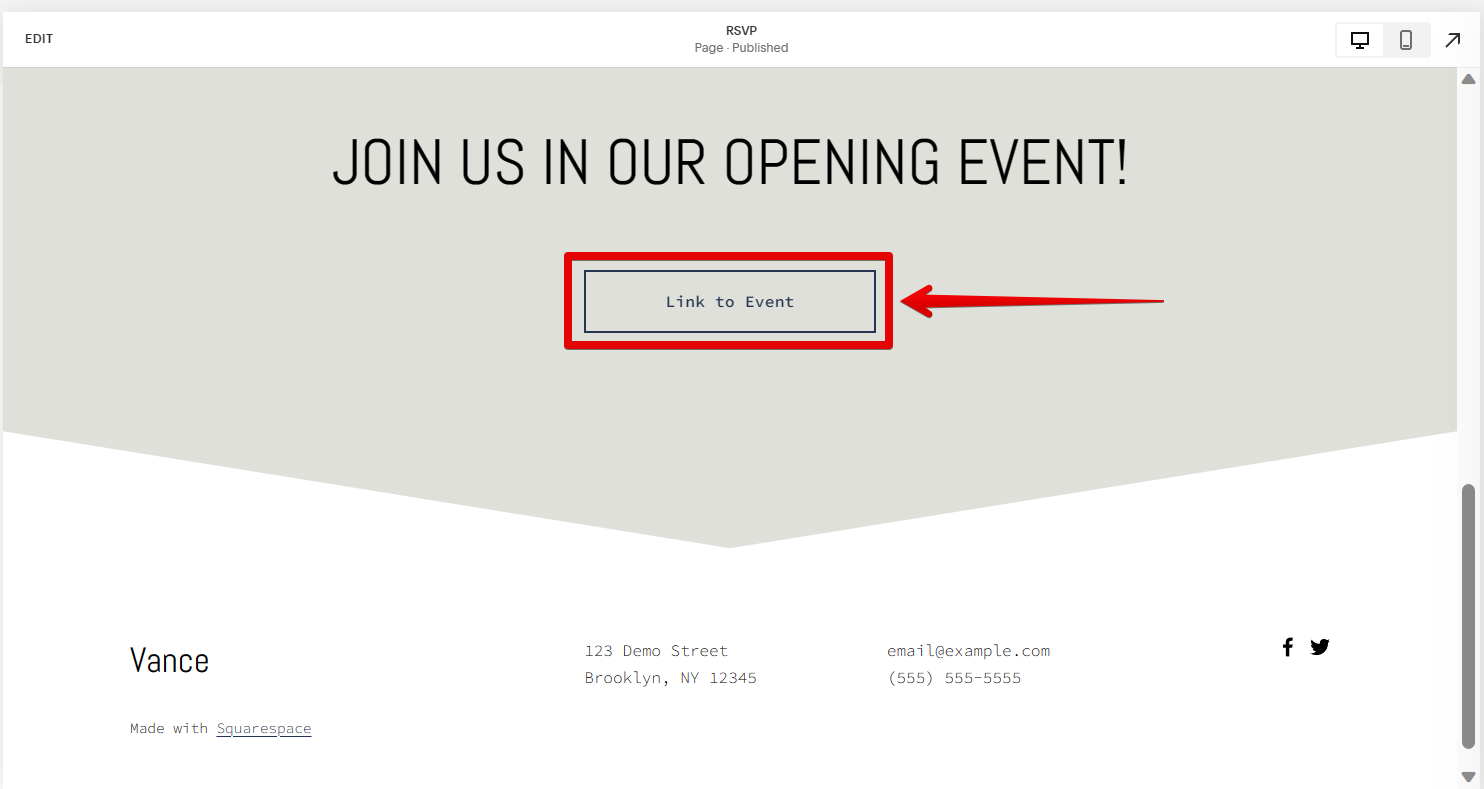
To add more accessibility to your event, you’ll need to copy a link to the event and paste it into a message on Facebook, Google+, or another social media site. You can also post the “Link to Event” on your website. Once you’ve completed these steps, your event is ready to go!
8 Related Question Answers Found
Uploading a File to Squarespace
If you have a file you would like to upload to Squarespace, the process is relatively simple. First, find the file you want to upload. You can do this by locating the file in your computer and then dragging it over to the Squarespace website.
Adding your logo to Squarespace is easy. Log into your account, click on “Your Account” in the top right corner, and then click on “Products” in the left sidebar. On the “Products” page, find “Squarespace” and click on it.
If you want to upload images to Squarespace, you can do so in a few different ways. One way is to use the Upload button on the page where you want to upload your images. Another way is to use the File menu on the Squarespace main page, and then select Upload Images. .
If you are ready to move your website to Squarespace, there are a few things you will need to do before you start. First, you will need to gather all of your website files. This includes your website content, images, and any other files related to your website.
The first step is to create an account on Squarespace.com. Once you have an account, follow these steps to connect your domain to your Squarespace account:
1. Log in to your Squarespace account.
2.
Adding social icons to Squarespace can be a great way to connect with your followers and build your brand. There are a few different ways to do this, and each has its own set of pros and cons. The first option is to use a third-party social media plugin.
Adding social media icons to Squarespace can be a bit tricky. There are a few different ways to go about it. The easiest way is to add the icons from the social media platforms themselves.
Adding a form to your Squarespace site is easy. First, go to the “Design” tab and select ” Forms .
” You’ll see a list of all the forms that are currently installed on your site. Select the form you want to add, and then click on the “Create” button.