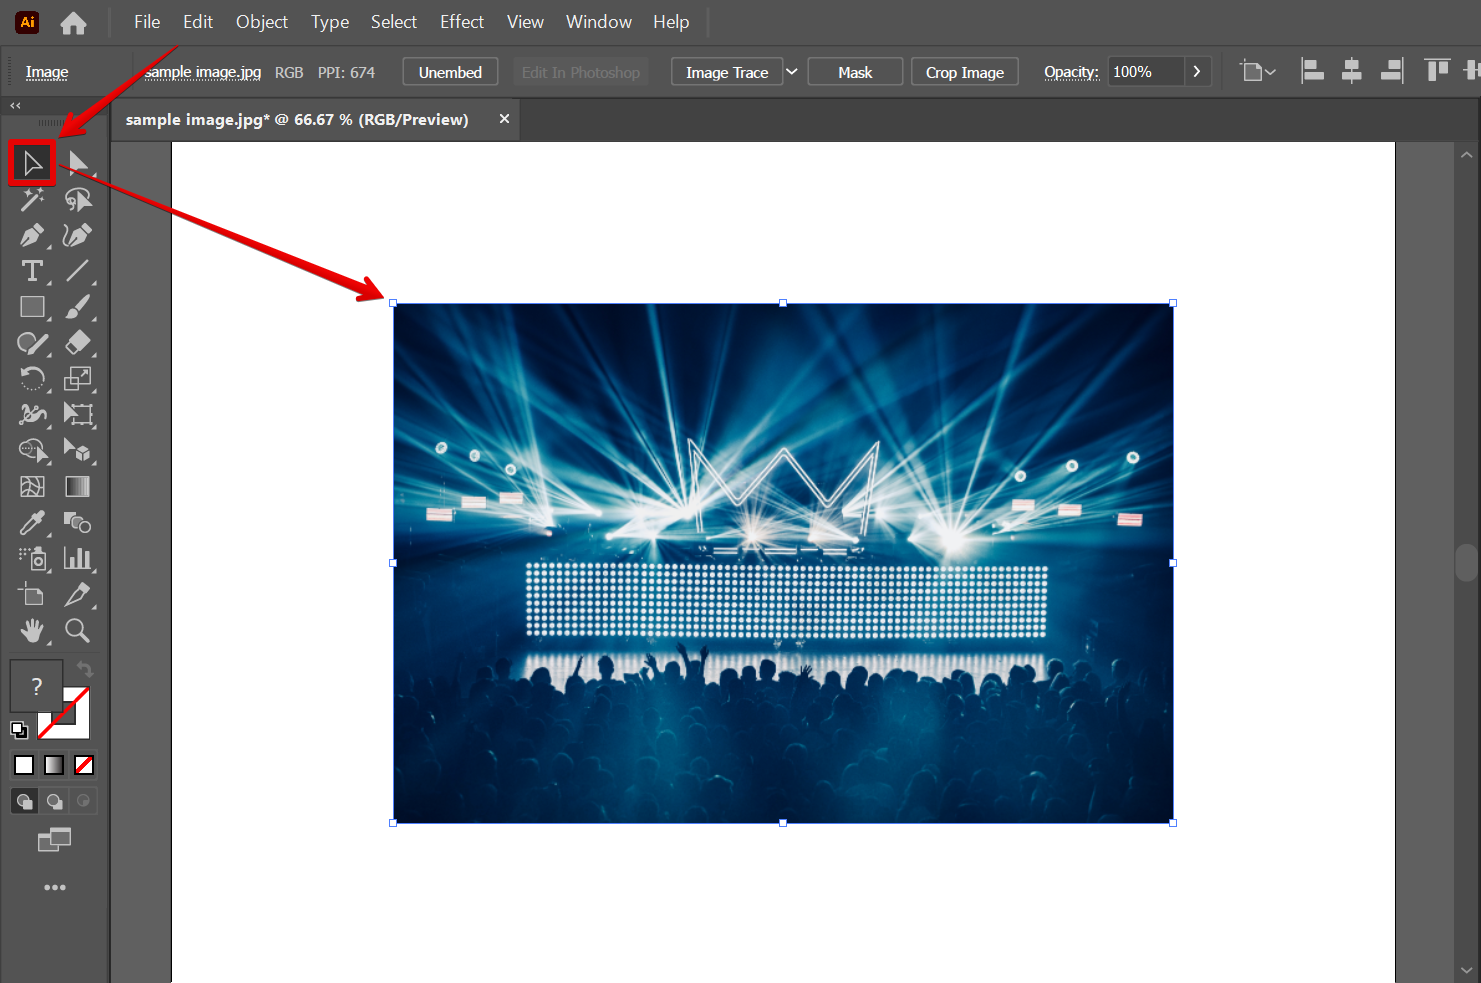
Changing the perspective of an image in Illustrator is a relatively simple process. To begin, open the image you want to transform in Illustrator, then use the Selection Tool to select the image.
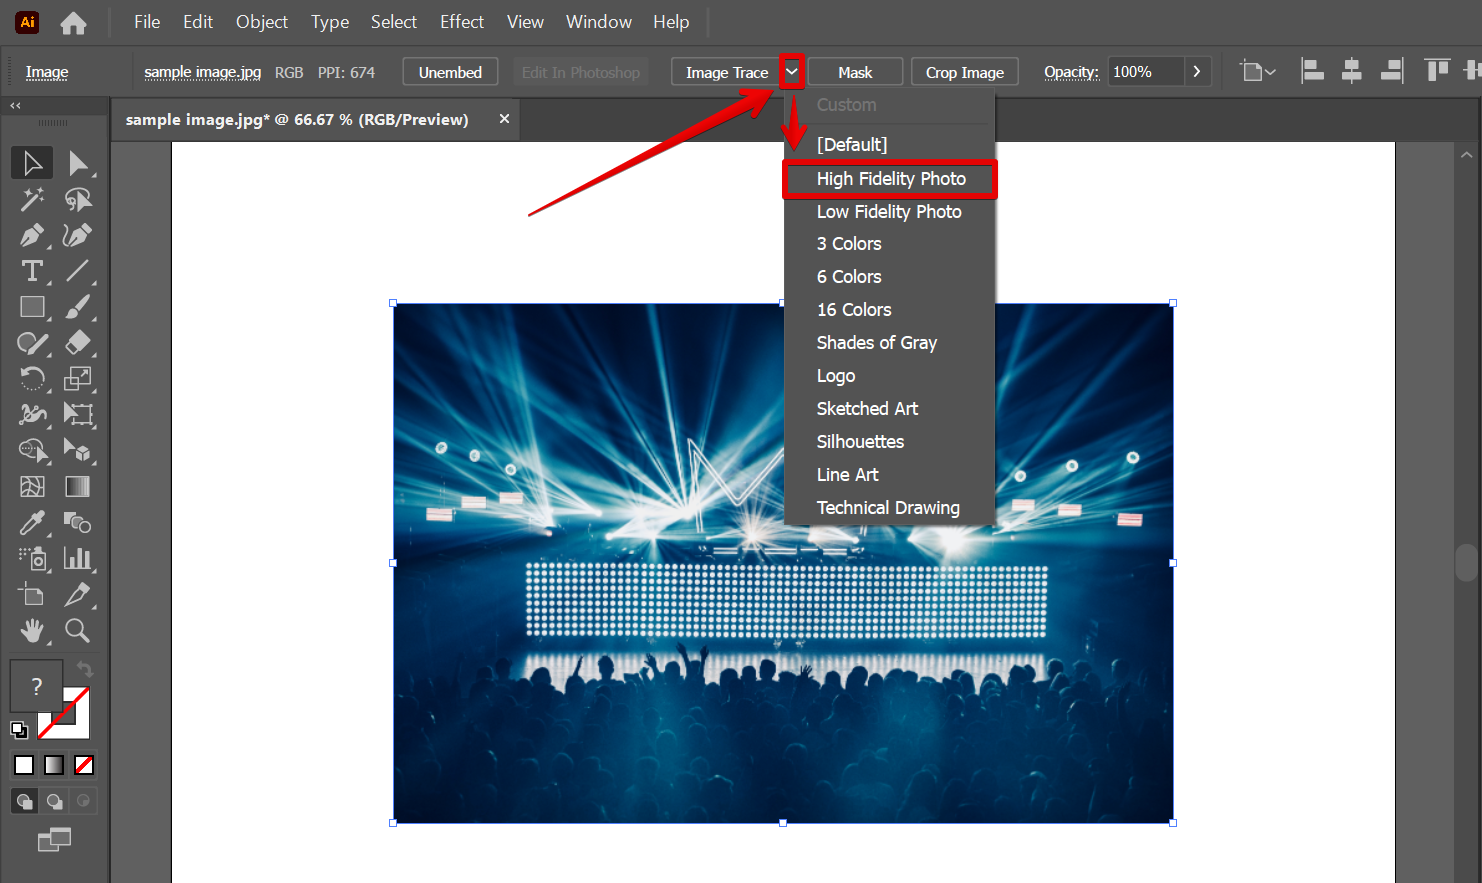
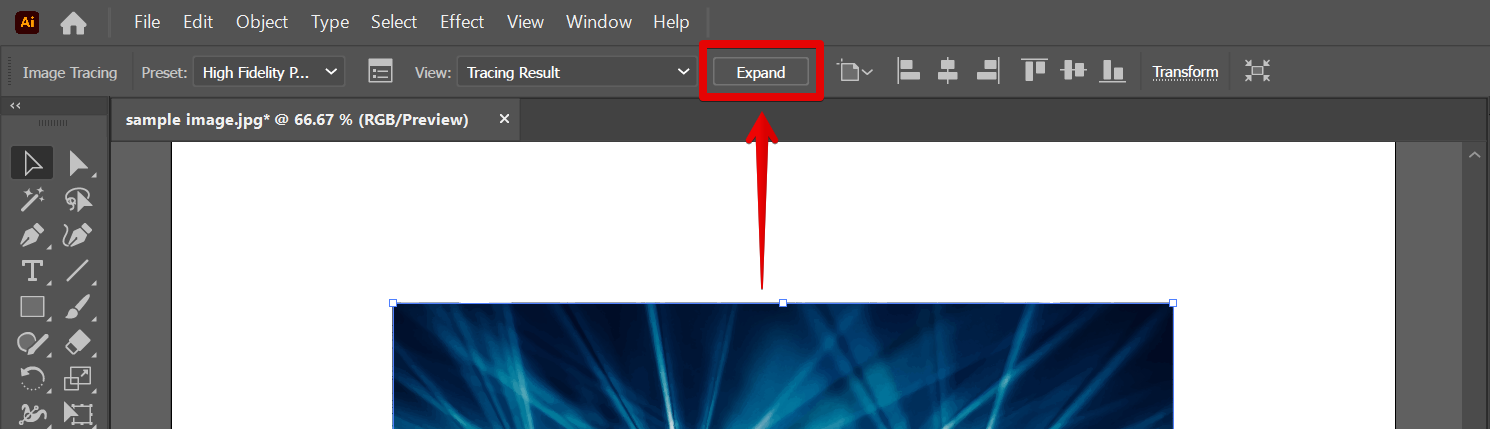
Next, go to the top menu and open the Image Trace options. From there, select the “High Fidelity Photo” option.
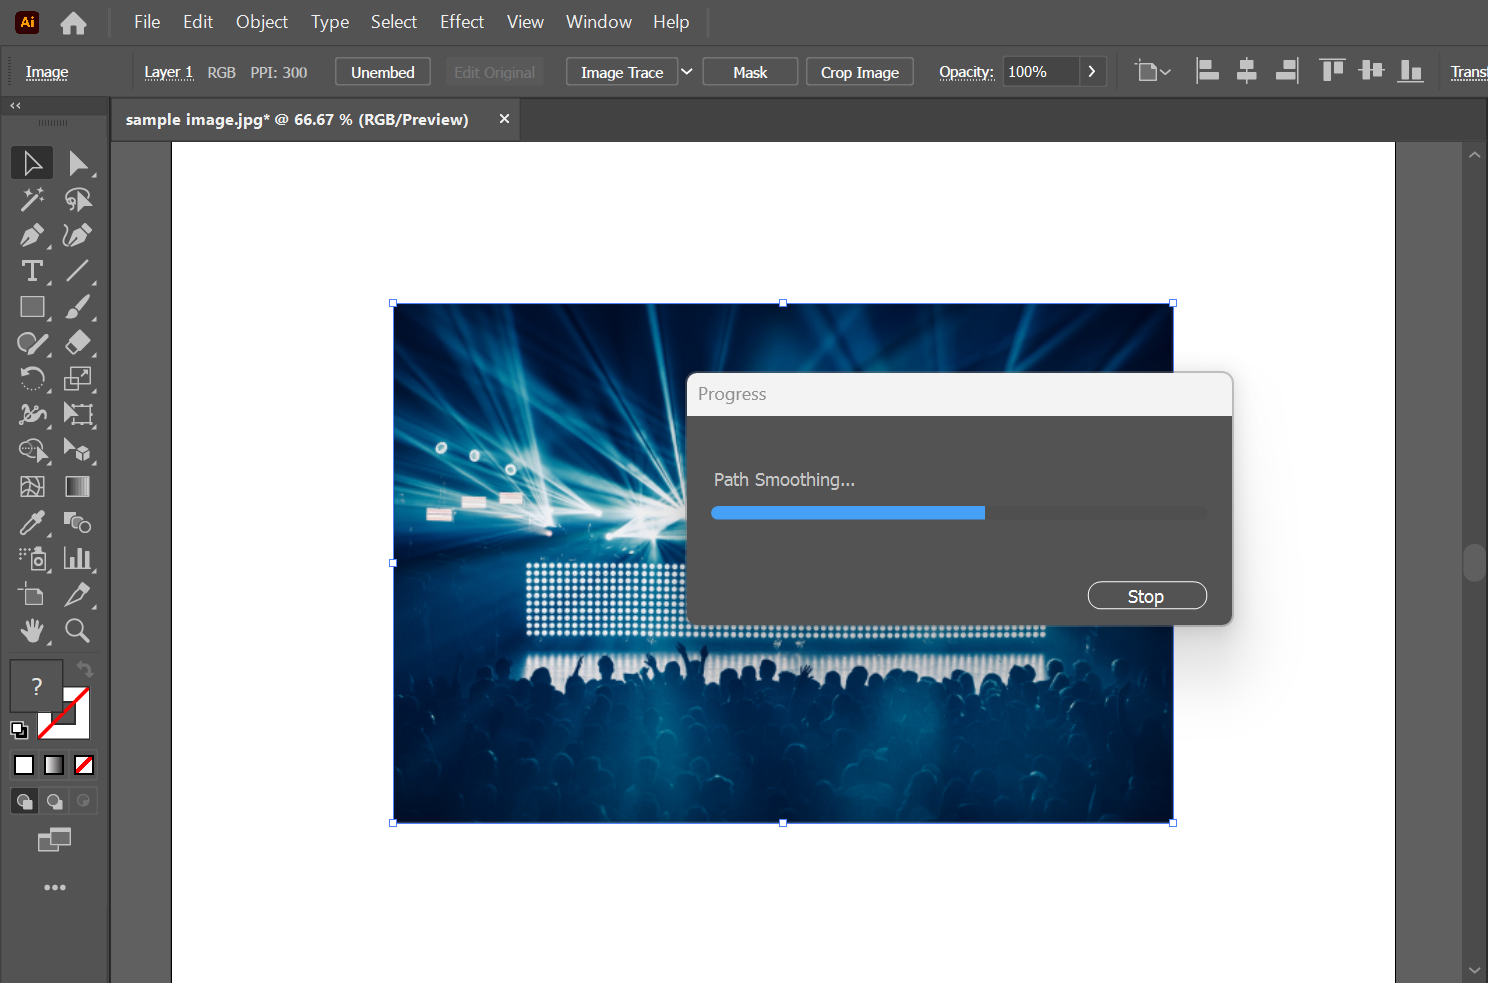
Wait for the process to finish. This may take some time depending on the resolution of your image.
Once done, click on the “Expand” button that will appear on the top menu.
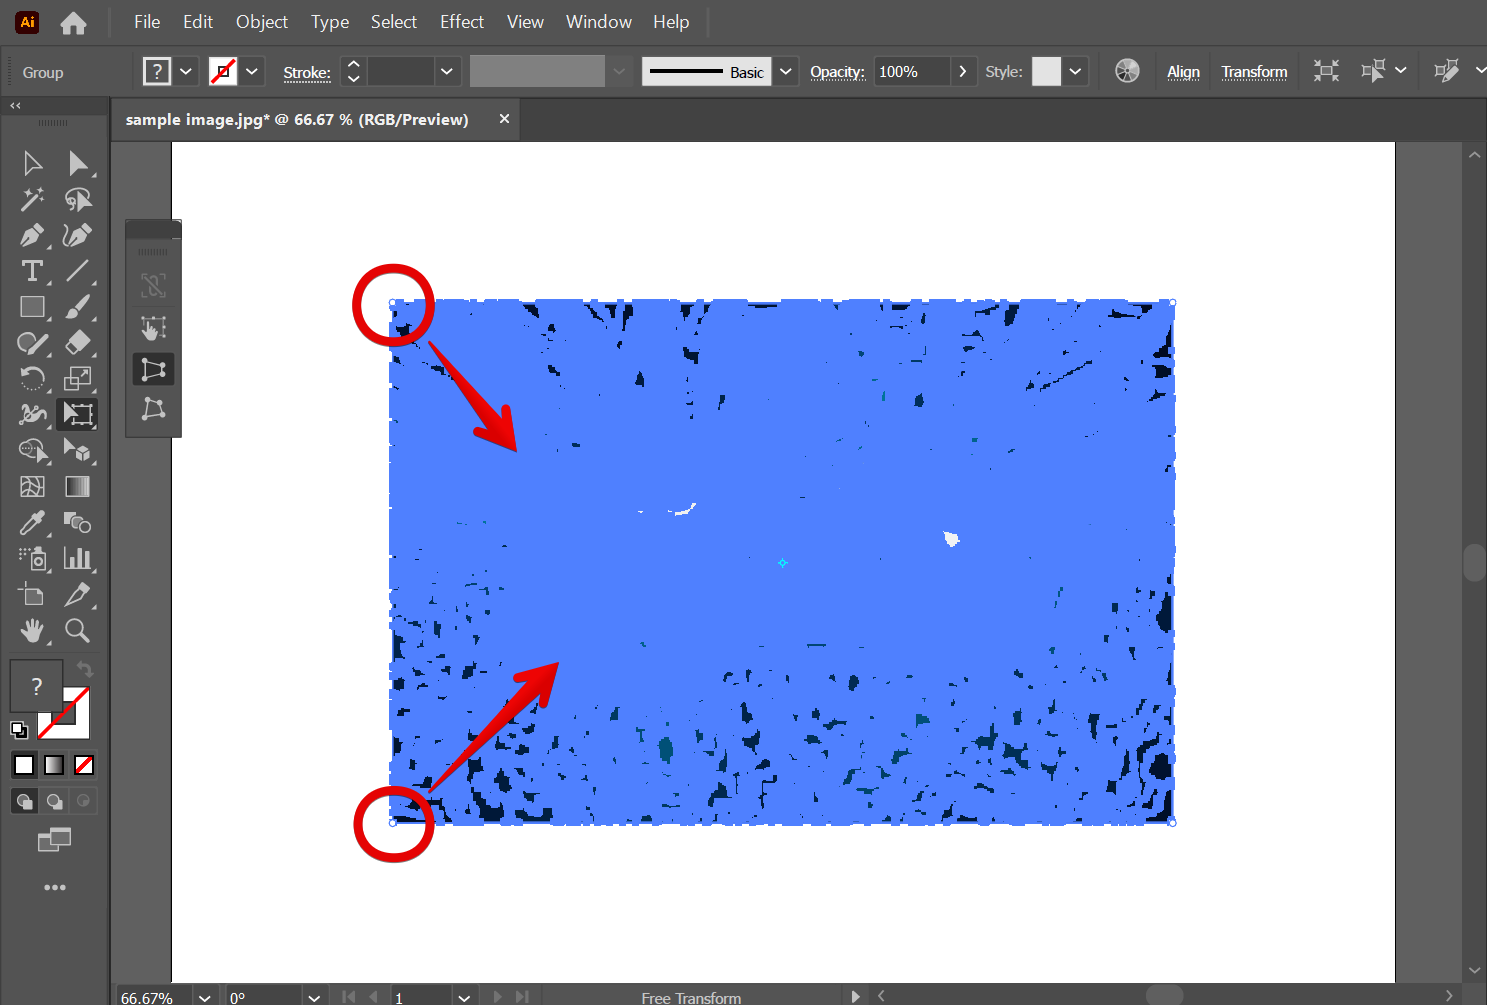
Now go to the left toolbar and select the “Free Transform” tool.
![]()
Four options will then appear on its side. Choose the “Perspective Distort” tool from there.

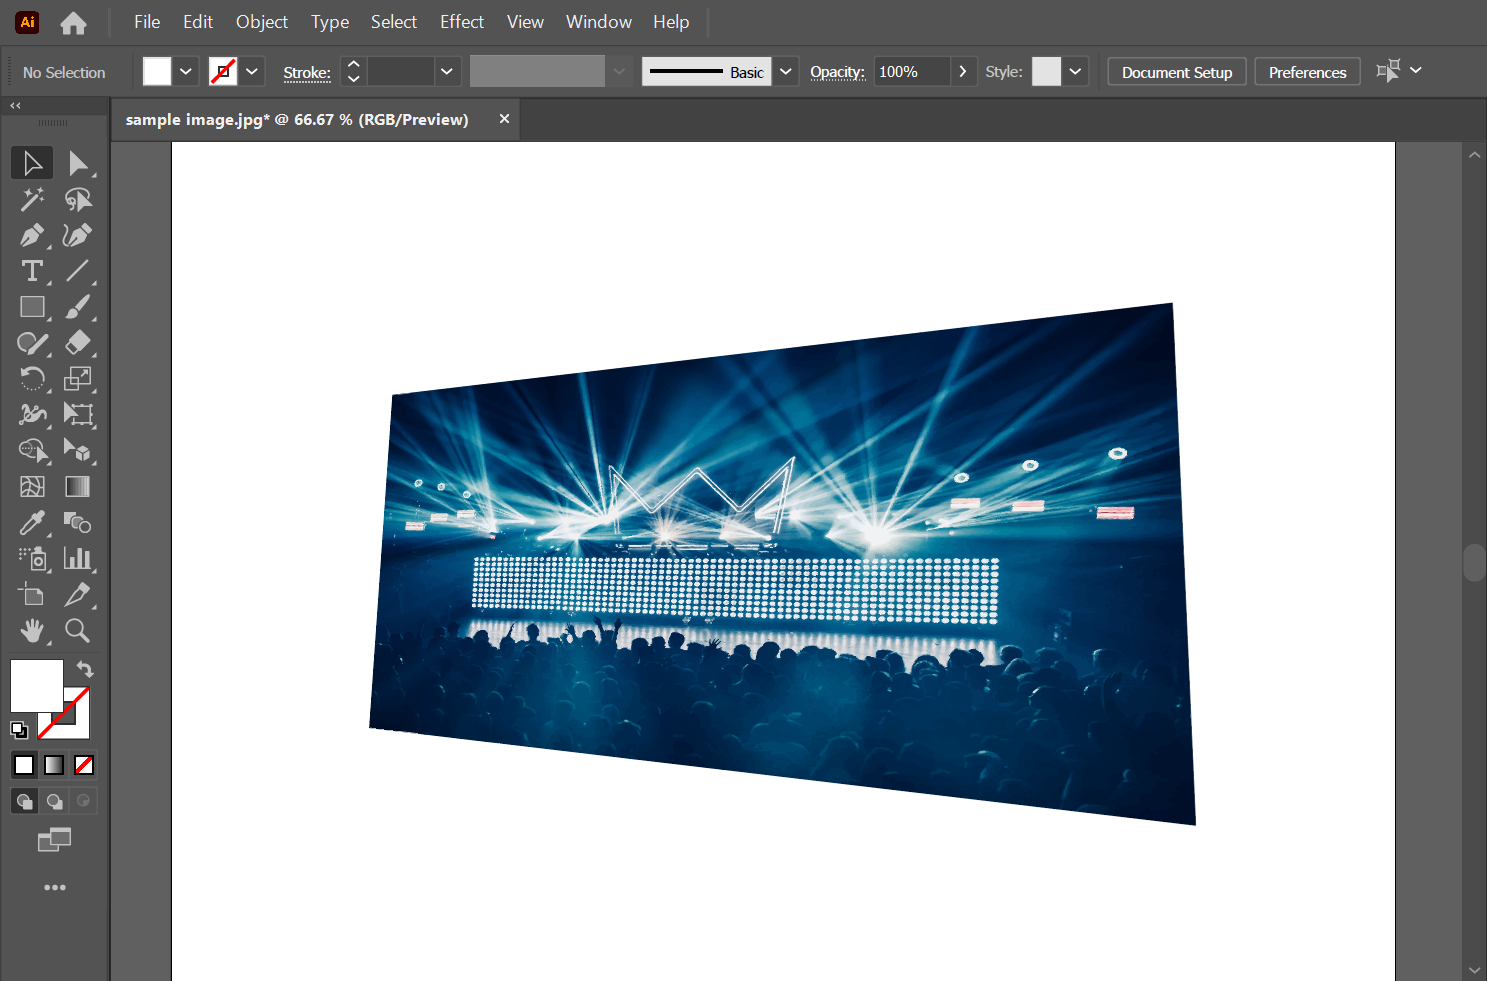
Then, click and drag on the handles of your image to change its perspective.
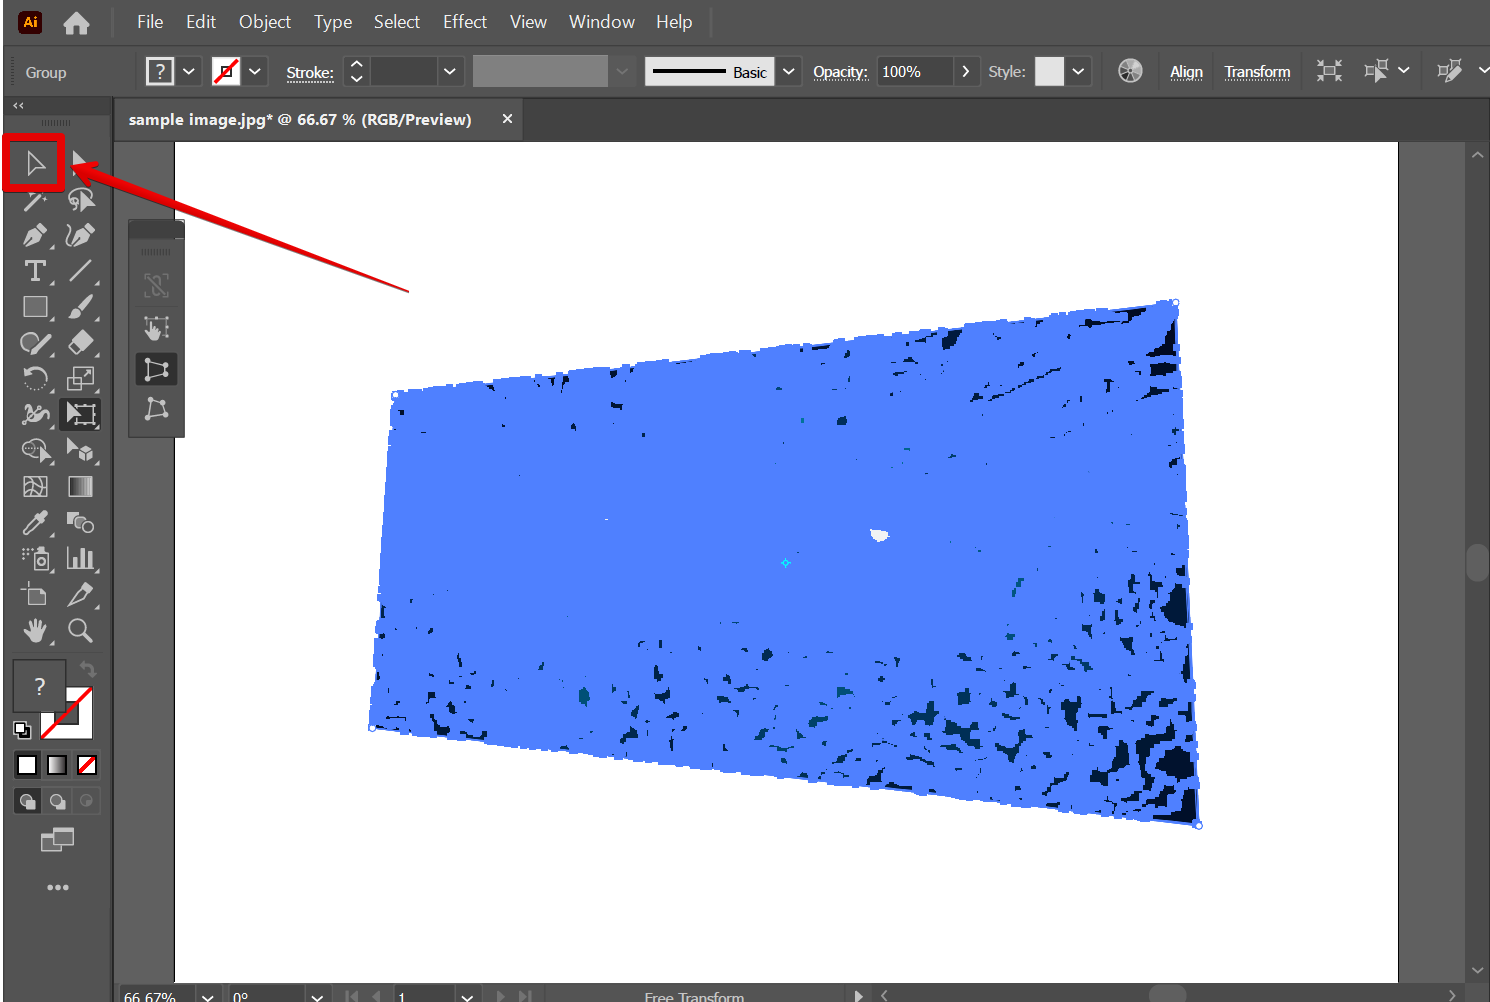
Once done, click on the “Selection Tool” from the left toolbar. This will make the default resize handles appear.
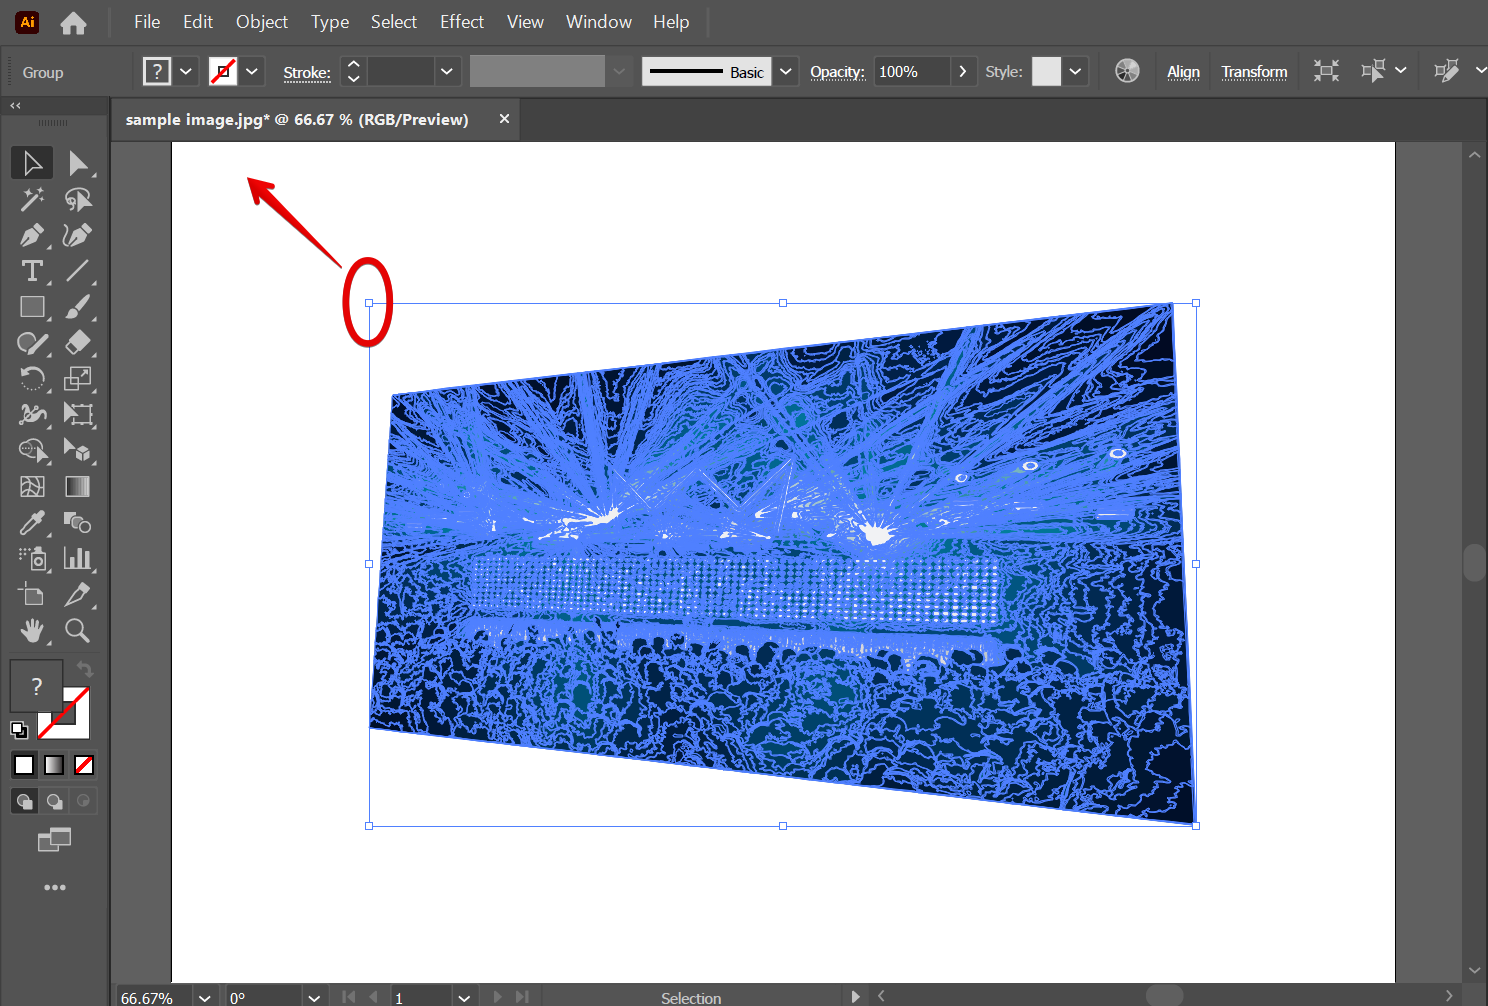
If the image is too large to fit in the window, you can resize it by clicking and dragging the edge of the image. When finished, just click outside of the image to disable the handles.
And there you have it! Now you can change the perspective of your image!