Are you looking to change the sales badge text in WooCommerce? Maybe you want to style the text to make it stand out more? In this article, we’ll show you how to do both.
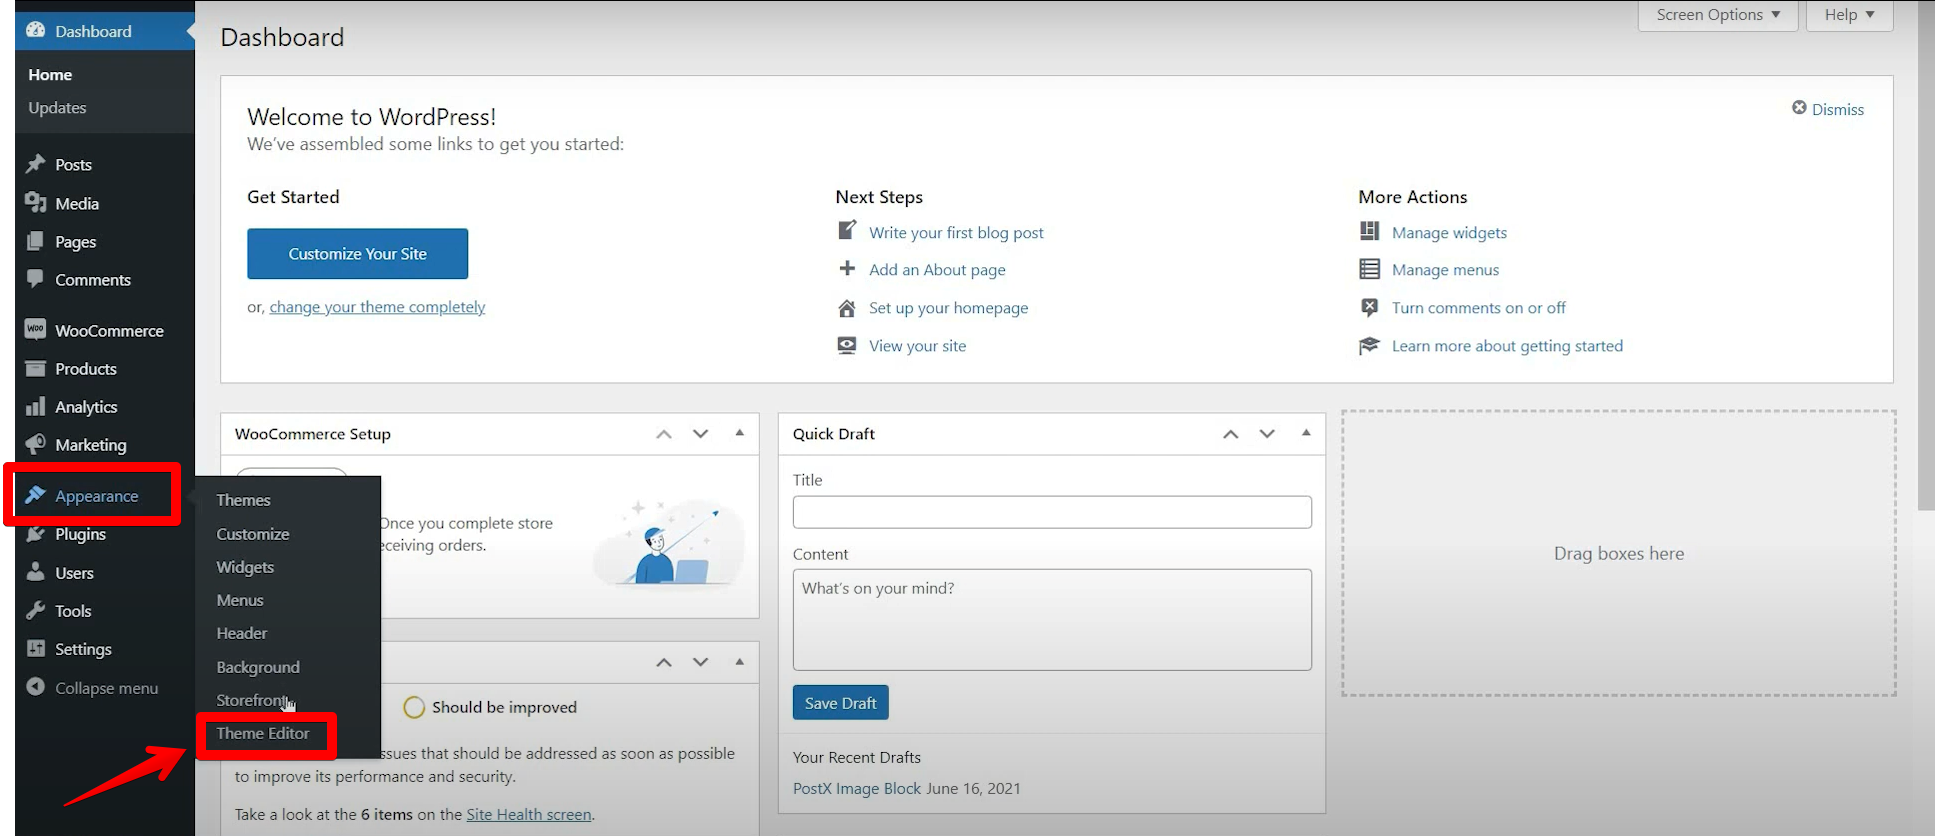
In your WordPress dashboard, go to “Appearance” > “Theme Editor”.
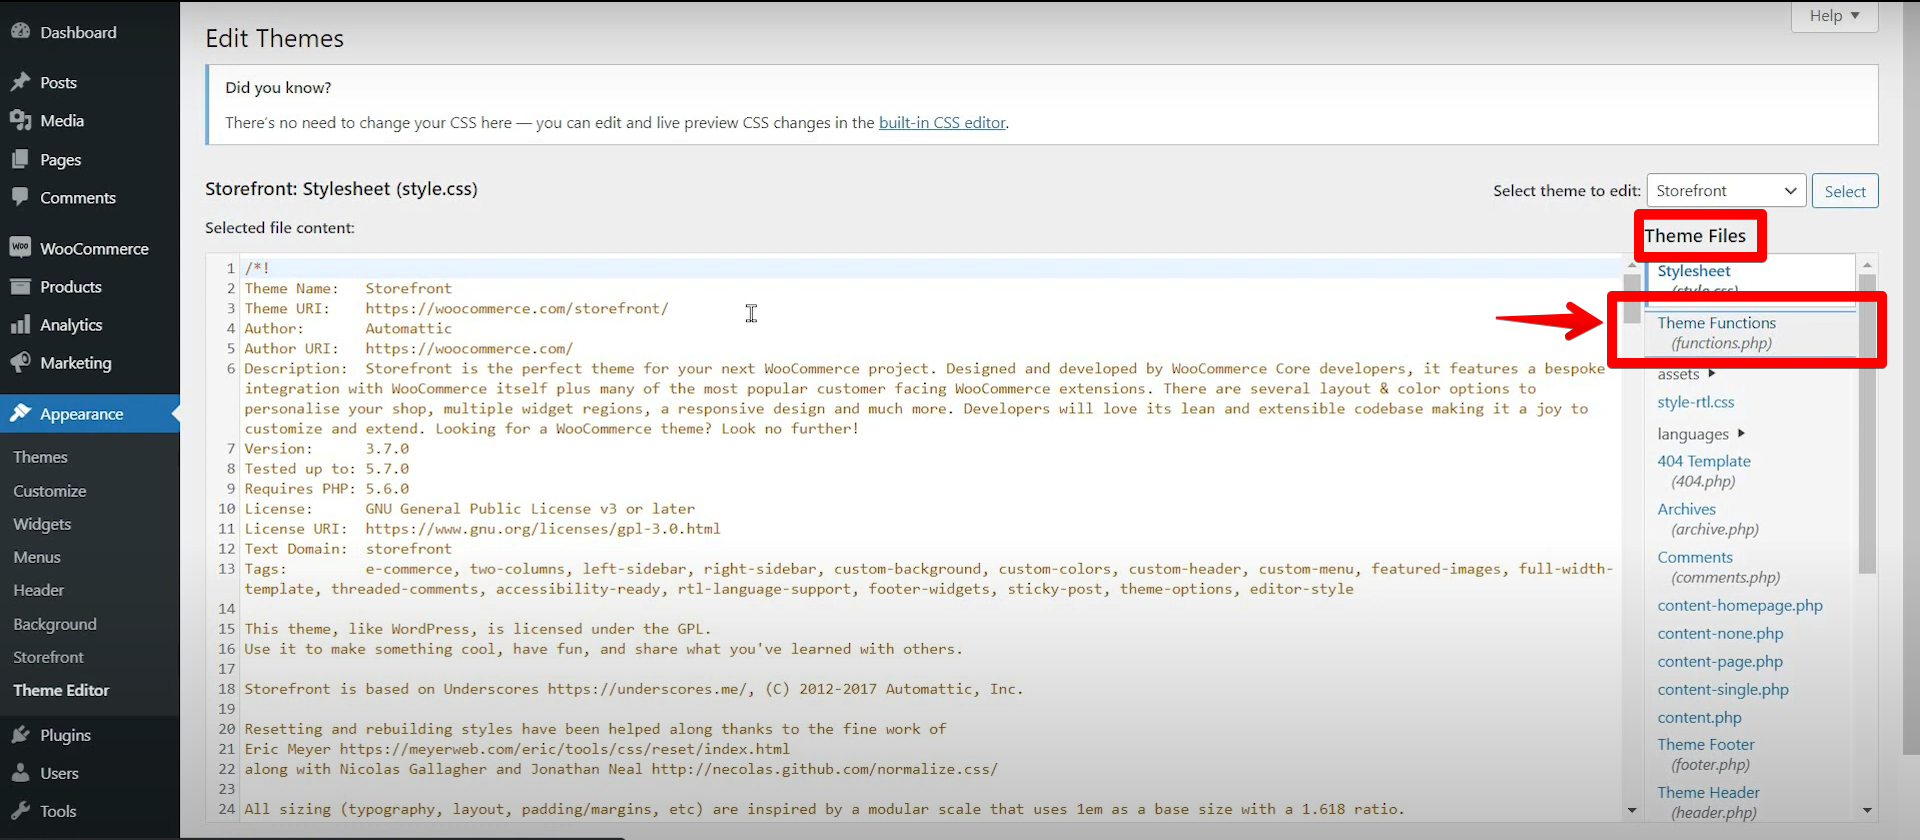
On the right-hand side, you will see “Theme Functions” under “Theme Files”; click on “Theme Functions”.
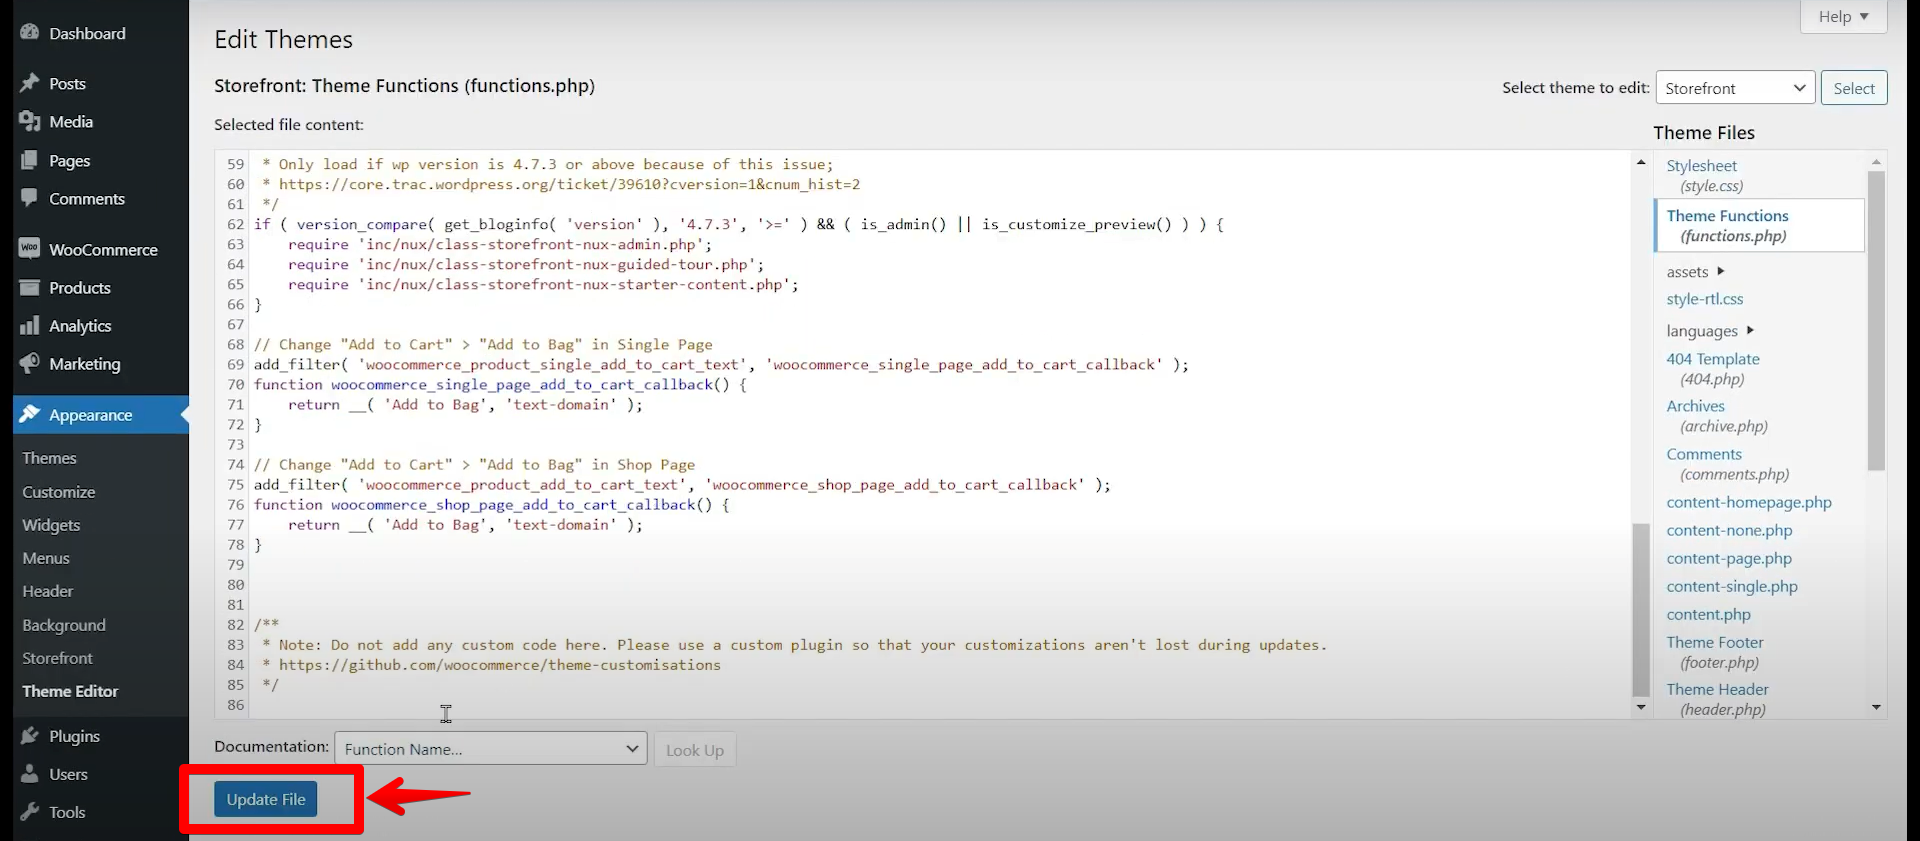
Add the code below to your “functions.php” file.
function ds_change_sale_text() {
	return '<span class="onsale">Limited Time Offer</span>';
}
If you want to style the text, you can do so by using HTML tags. For example, if you want to make the text bold, you would use the tag. If you want to underline the text, you would use the tag.
Here’s an example of how you would style the “On Sale” badge text:
On Sale
And here’s an example of how you would style the “Featured” badge text:
Featured
Once you’ve made your changes, be sure to click the “Update File” button at the bottom of the page.
That’s all there is to it! Now you know how to change the sales badge text in WooCommerce and how to style it using HTML tags.
PRO TIP: If you are not comfortable with code, we recommend that you seek help from a developer before proceeding. Changing the sales badge text in WooCommerce can be done by editing the functions.php file or by using a plugin.
8 Related Question Answers Found
It’s easy to change the color of a sales badge in WooCommerce. Simply go to the WooCommerce > Settings > Badges page and select the color you want from the drop-down menu. You can also use the Custom CSS field to add your own CSS code to change the badge color.
If you’re using WooCommerce to run your online store, you may want to change the sales text that appears on the product page. By default, WooCommerce displays the following text:
Sale! This text is hard-coded into the WooCommerce plugin and cannot be changed from the WordPress admin area.
WooCommerce is a powerful eCommerce platform that helps you sell online. One of the great things about WooCommerce is that it’s flexible and customizable. You can change the text that appears on your billing and shipping pages to match your brand or store personality.
If you’re running a WooCommerce store, it’s important to keep your sales tags up to date. Otherwise, you might miss out on important sales or discounts. Fortunately, changing a sales tag in WooCommerce is easy to do.
If you’re running a WooCommerce store, there are times when you might need to change the sales text that appears on your products. For example, you might want to change the “Sale!” text to “Discount!” or something else. Luckily, changing this text is relatively easy to do.
There are a few different ways that you can change the product page template in WooCommerce. One way is to simply edit the template file within the WooCommerce plugin folder. Another way is to create a child theme and then override the WooCommerce template files.
If you are using WooCommerce to sell products on your WordPress website, then you may need to change the product description from time to time. For example, if you have a sale or if you need to update the information about a product. In this article, we will show you how to easily change a product description in WooCommerce.
You can change the shop page code in WooCommerce by accessing the WooCommerce settings page and selecting the “Shop” tab. From here, you can select the “Page” drop-down menu and choose the page you want to use for your shop. You can also change the shop page code by editing the “shop.php” template file.