To make a diagonal guide in Photoshop, first, open your image. Then, go to the “View” menu and select “New Guide.” A dialogue box will appear.
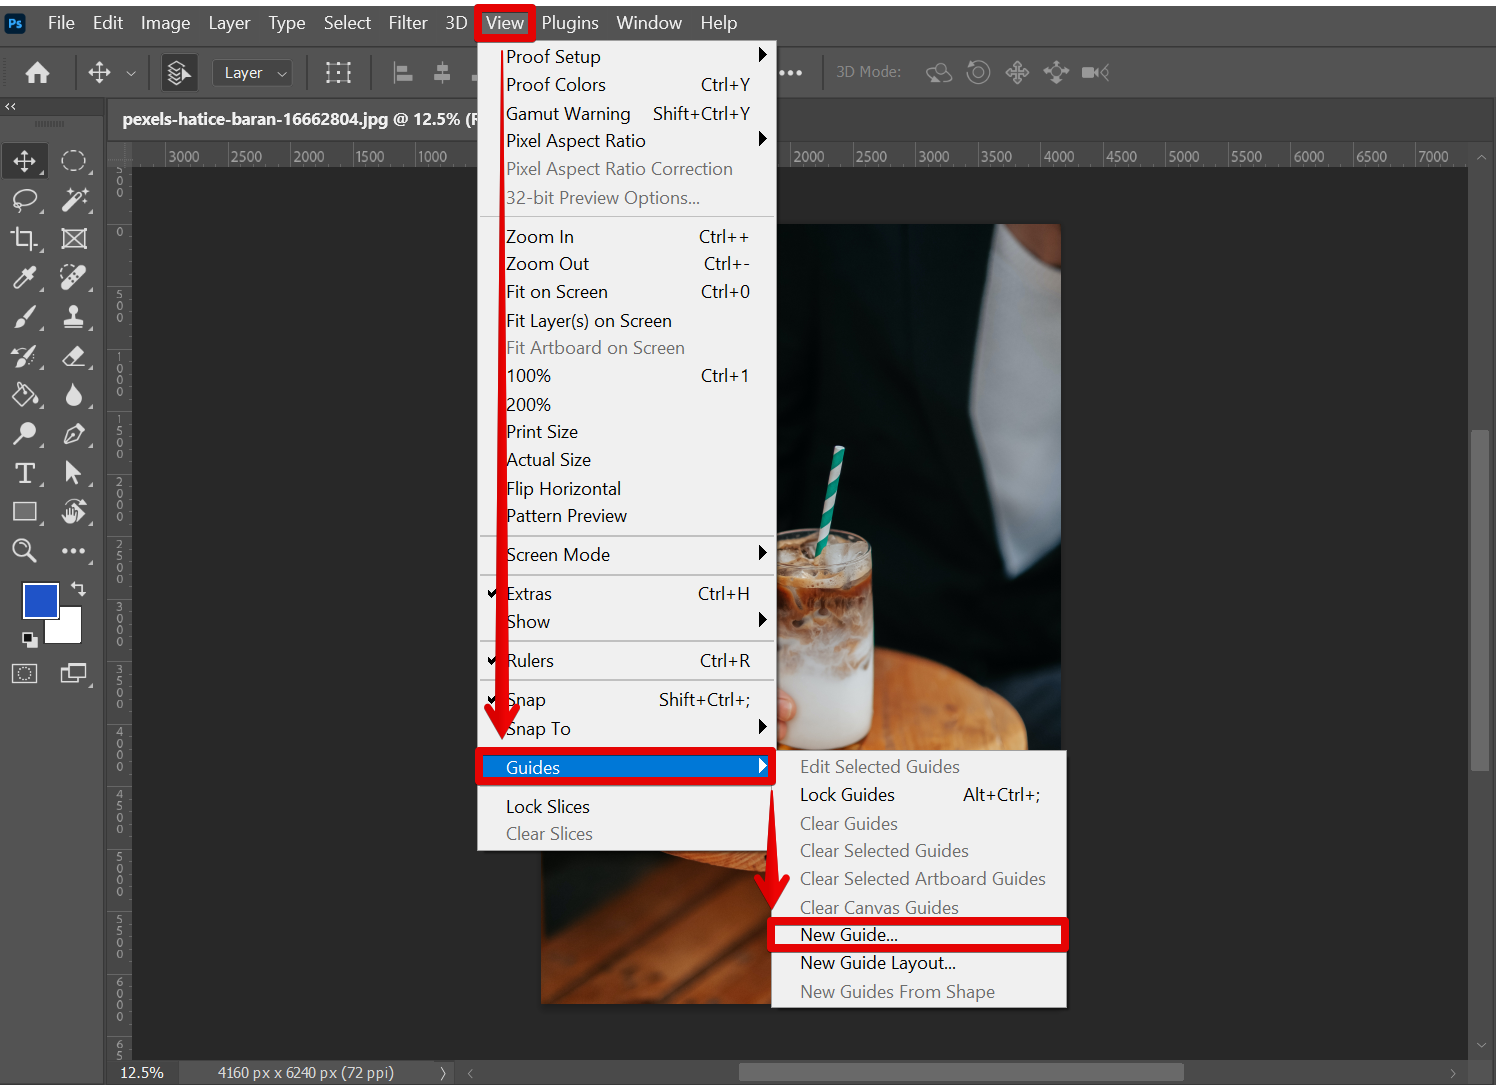
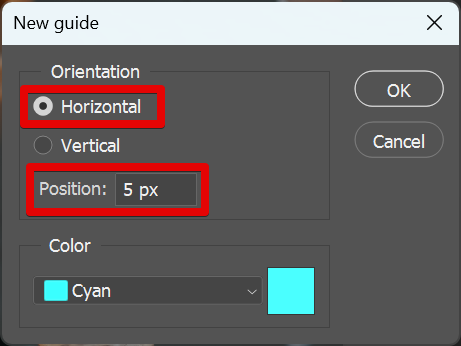
In the “Orientation” menu, select either the “Horizontal” or the “Vertical” option. Next, enter the number of pixels you want the guide to be from the top or bottom edge of the image in the “Position” field. Finally, click “OK.”
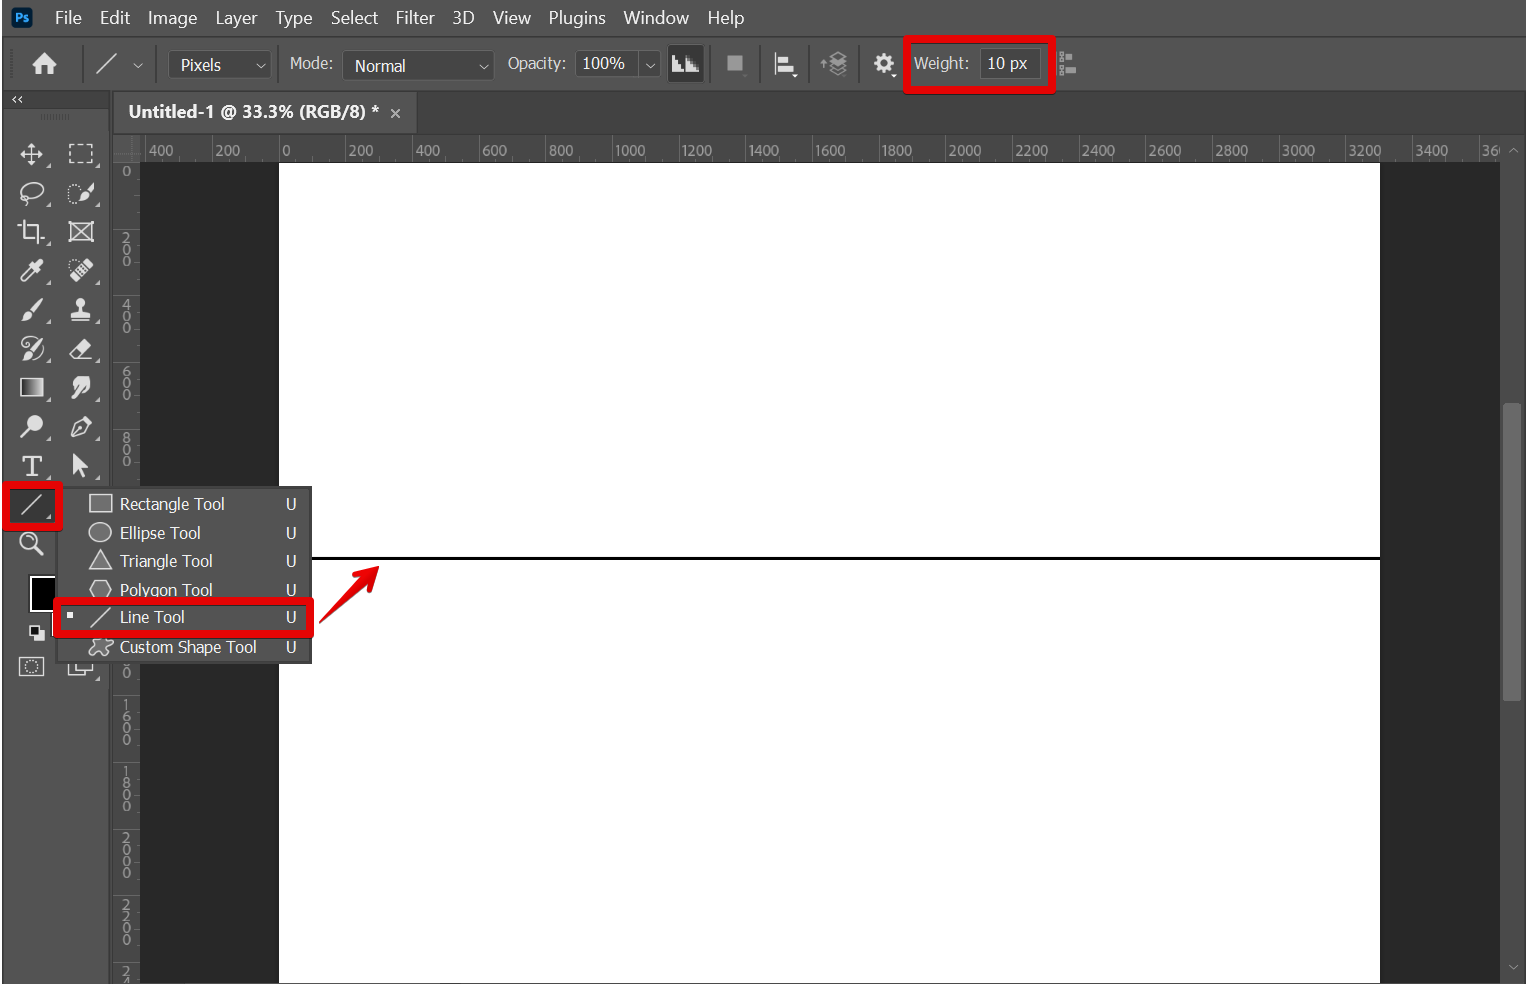
Now that you know how to add the basic type of guides in place, it’s time to add the diagonal guide. One way to make a diagonal guide is to use the Line Tool and Polygon Tool. First, we will be using the Line Tool by selecting it from the left toolbar. With the Line tool selected, click and drag to draw a horizontal line at the center.
Then, select the Polygon Tool and go to the top menu to adjust some settings.

Set the Tool Mode to “Pixels” and the Number of Sides/Points to “100“.
![]()
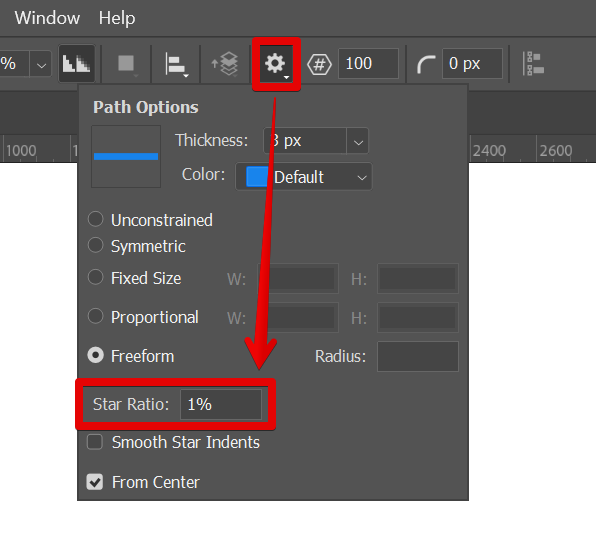
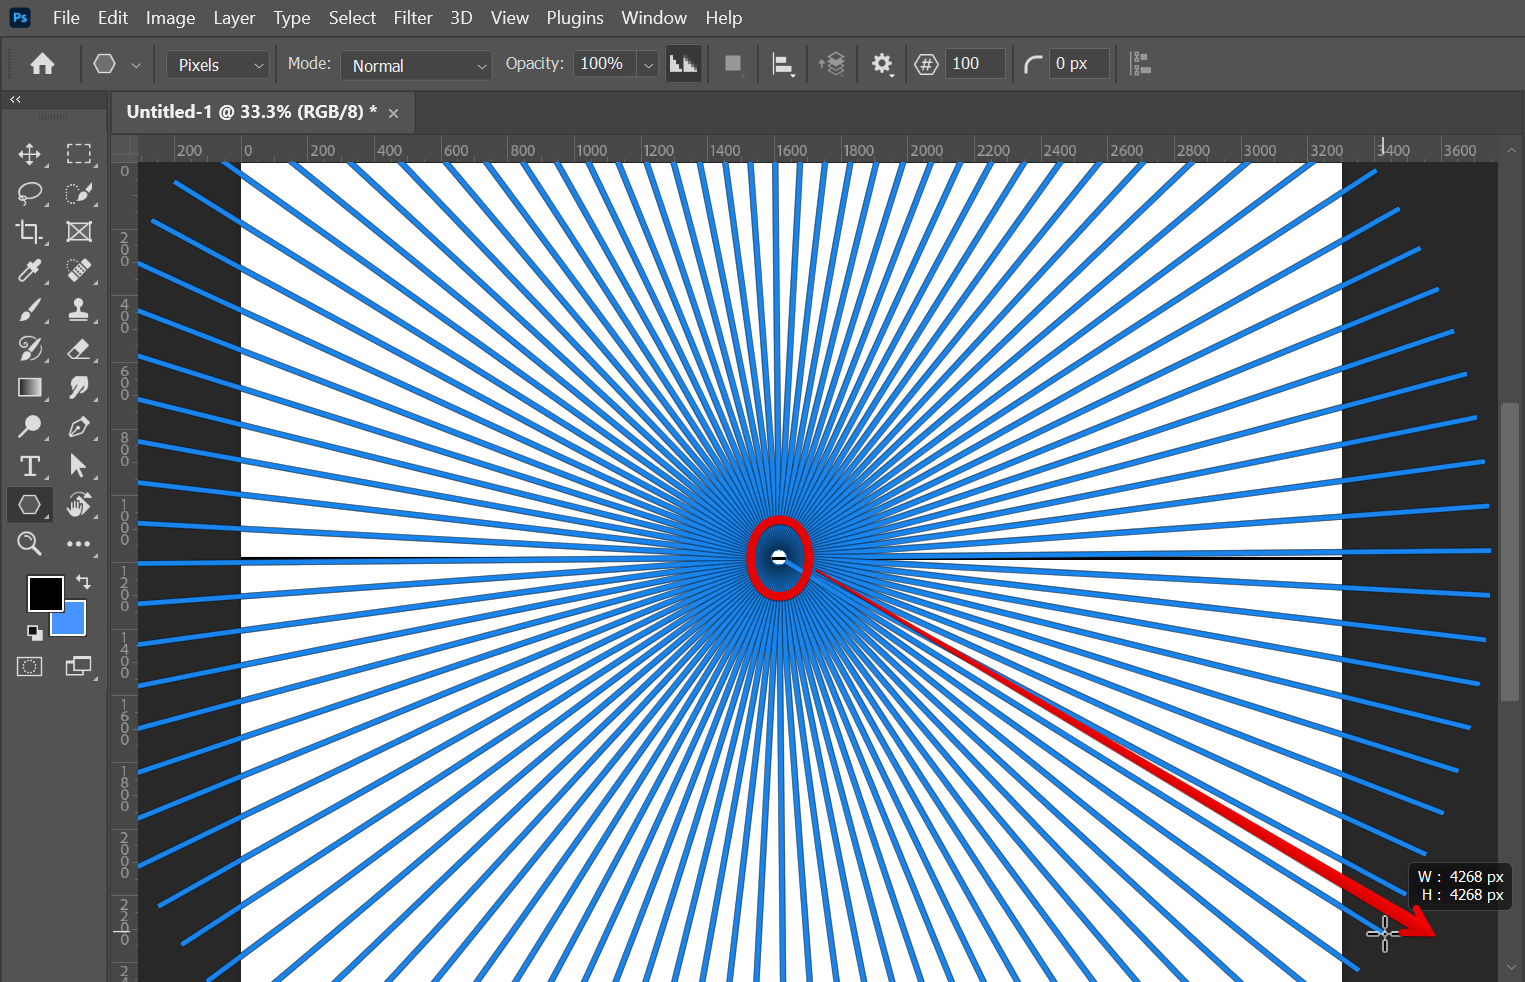
Then, click on the gear icon and set the Star Ratio to “1%“.
You can now start creating the diagonal guidelines. To do this, click at the center of the line created earlier then drag up to the edge of the canvas. Once the diagonal lines are already covering the whole canvas, release your mouse.
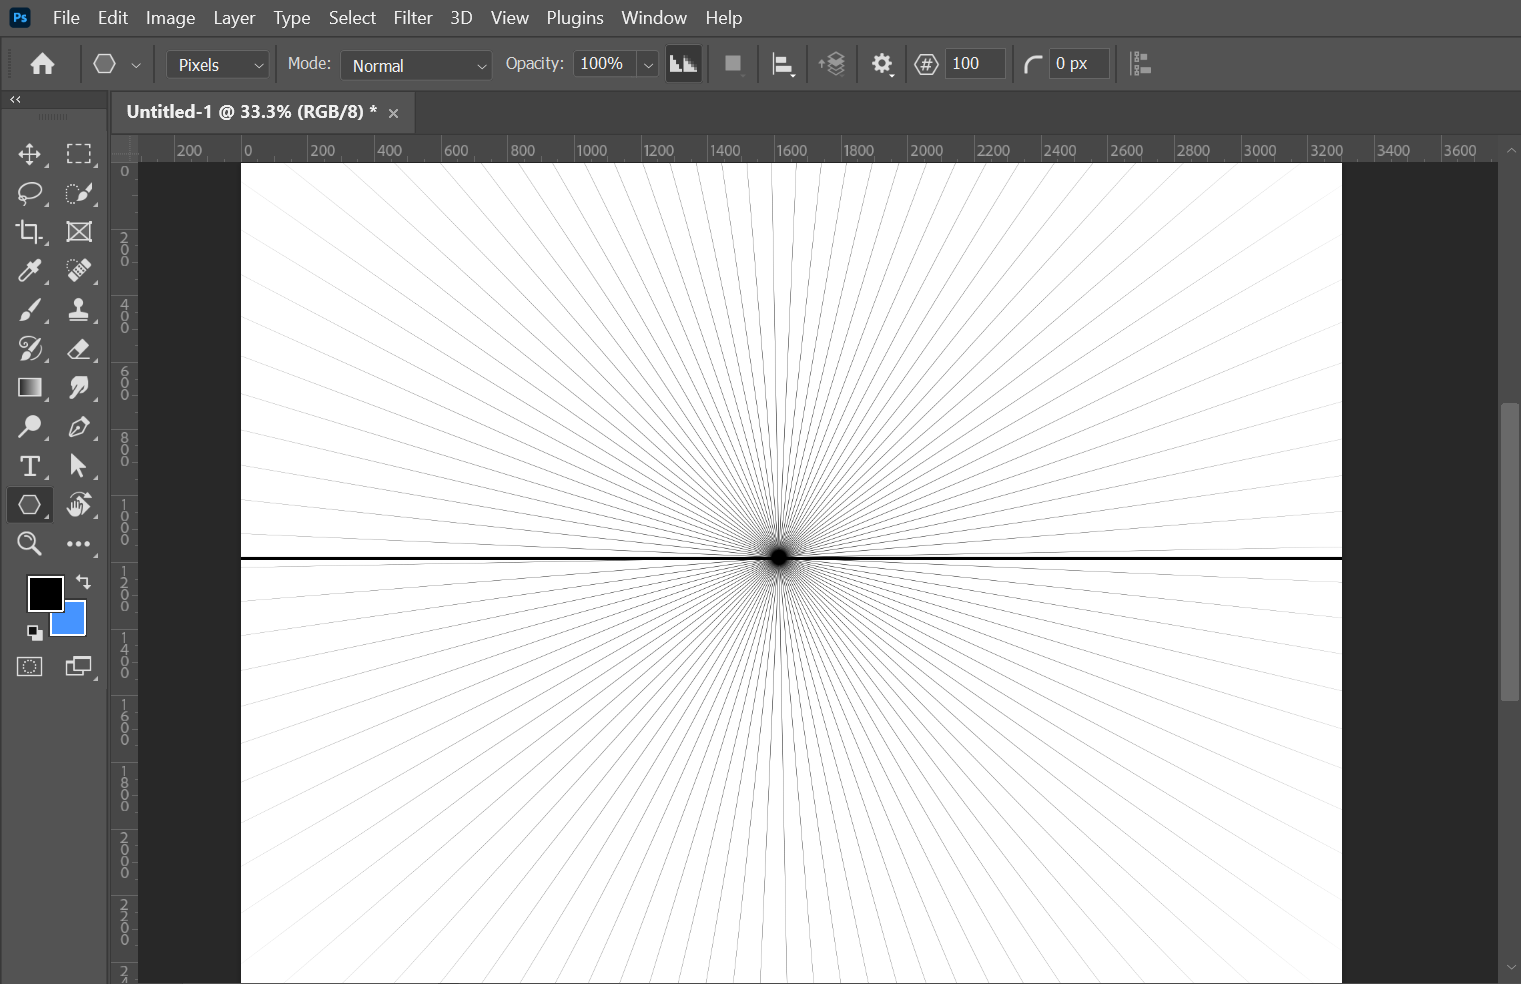
This will create a grid of lines that can be used as a guide for aligning elements in your design.
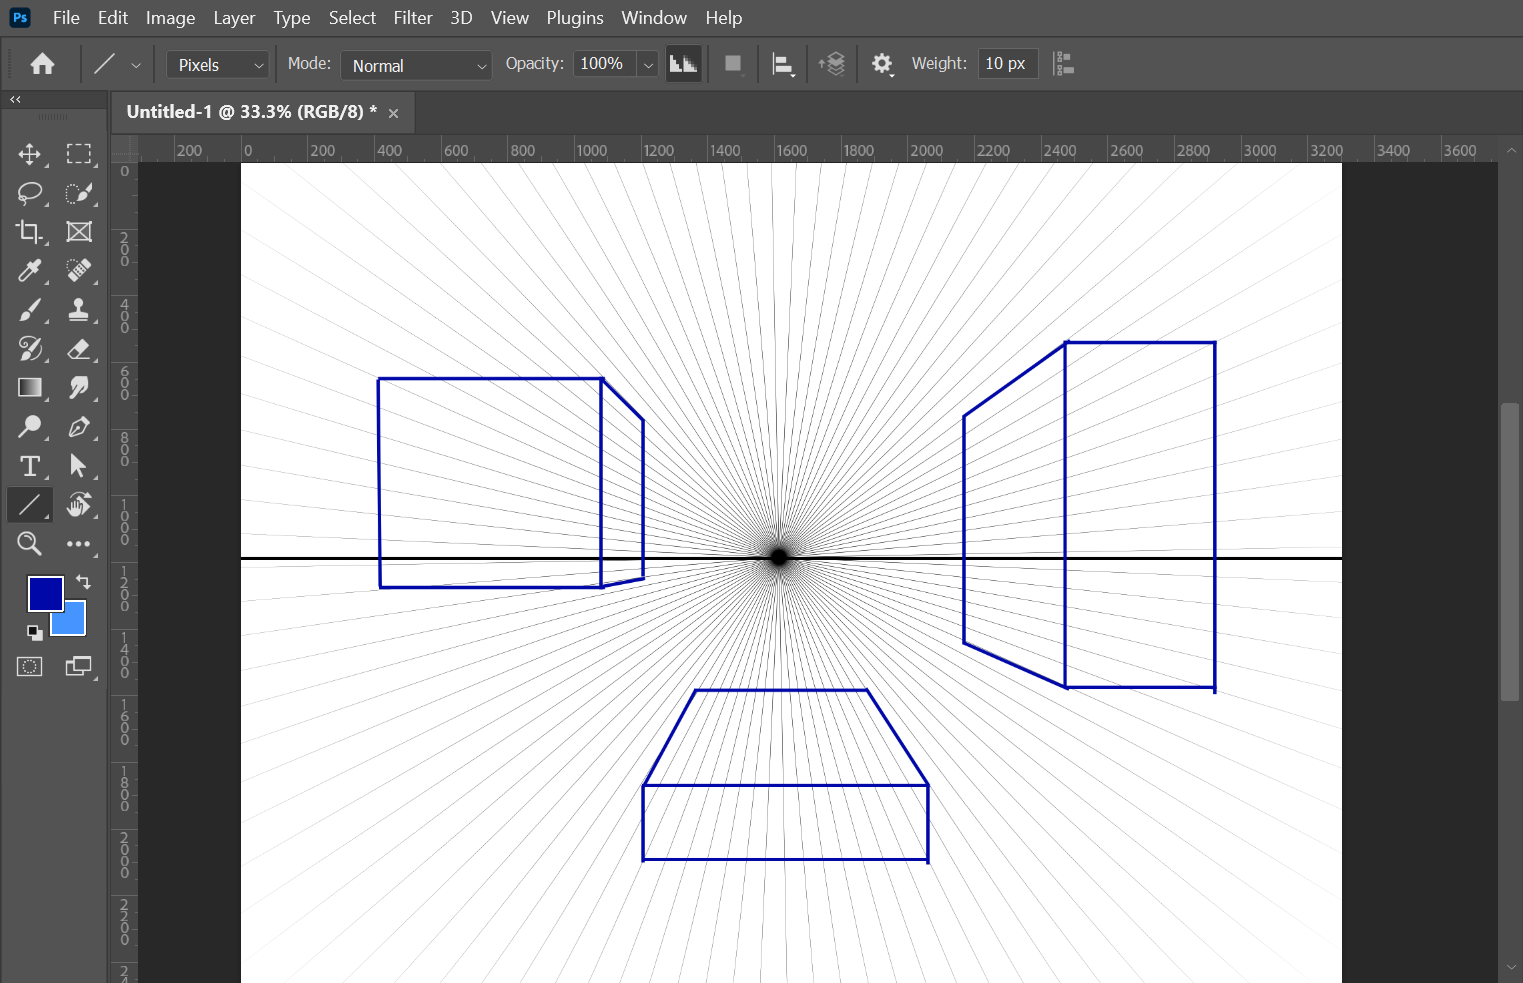
Once you have created your diagonal guidelines, you can begin aligning elements in your design. To do this, simply select an element and position it so that it lines up with one of the lines in the grid.
When you are finished aligning elements in your design, you can delete the diagonal lines by selecting them and pressing Delete/Backspace. Alternatively, you can leave the diagonal lines in place and use them as a background layer for your design.
And that’s it! Your diagonal guide is now in place!
So there you have it – everything you need to know about making diagonal guides in Photoshop. With these skills at your disposal, you’ll be able to create beautiful and professional-looking images and web pages in no time!