Figma is a vector-based design tool that is gaining popularity among designers. One of the reasons for its popularity is its ability to easily change measurements. In this article, we will show you how to change measurements in Figma.
There are two ways to change measurements in Figma. The first way is to use the “Resize” option in the top menu. The second way is to use the “Edit” option in the top menu.
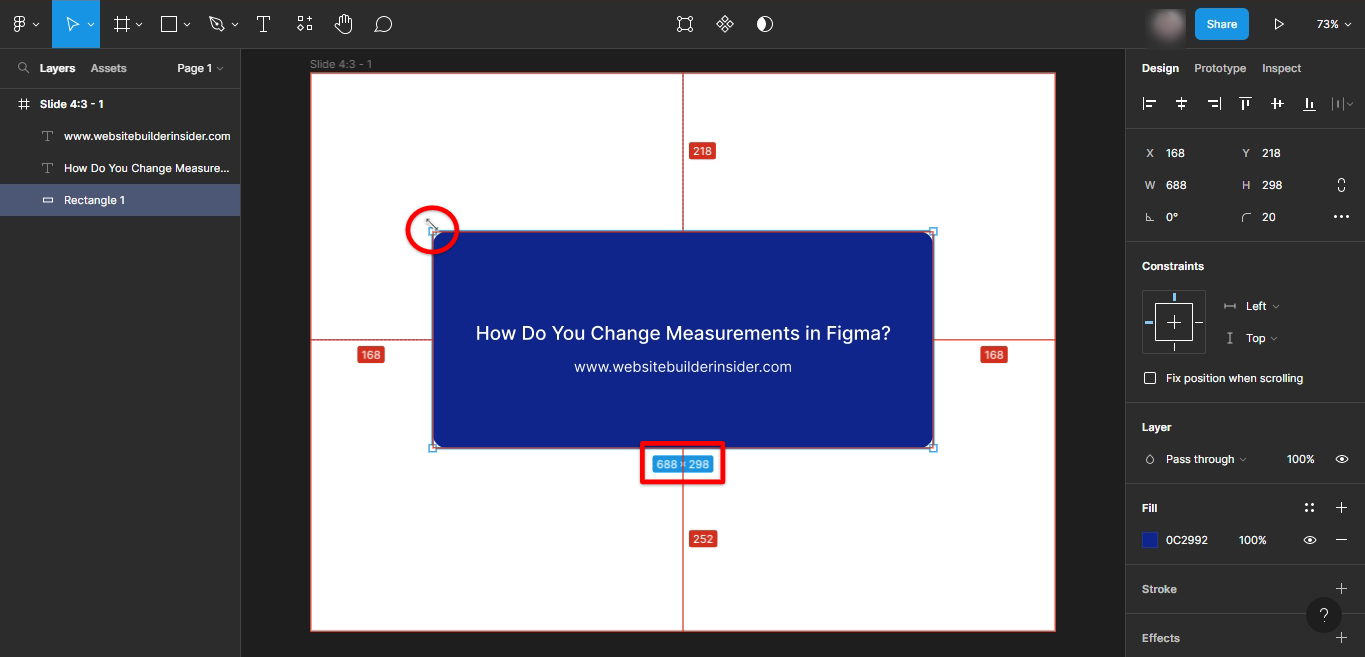
PRO TIP: If you are working on a design in Figma and need to change the measurements, be sure to first select the unit of measurement you want to use. To do this, go to the Units dropdown menu in the top toolbar and select the unit you want to use. Once you have selected the unit, you can change the measurement by selecting the object you want to resize and entering the new measurement in the top toolbar.
If you want to change the measurement of an entire object, select the object and then click “Resize” in the top menu. A window will appear that allows you to enter new values for width and height. You can also enter values for x and y offset, which will move the object’s position.
If you want to change the measurement of a specific point on an object, select the object and then click “Edit” in the top menu. A window will appear that allows you to select a point on the object and enter new values for x and y coordinates.

Both of these methods are quick and easy ways to change measurements in Figma. Try them out next time you’re working on a design project!
8 Related Question Answers Found
There are many ways to change properties in Figma. The most common way is to use the Properties panel on the right-hand side of the screen. To do this, first select the object you want to change.
If you want to change the shape of an object in Figma, there are a few different ways to do it. You can use the control points to move the edges of the shape, or use the transform controls to scale, rotate, or skew the object. To change the shape of an object using the control points:
1.
Figma is a user interface design tool that helps users create and manage user interfaces. It is a popular choice for software design and development projects. In order to change a component in Figma, users must first identify the component they wish to change.
There are a few different ways that you can change the shape of an object in Figma. The first way is to use the direct selection tool to select the points on the object that you want to move. You can also use the pen tool to draw new shapes.
There are a few different ways that you can split a shape in Figma. One way is to use the Rectangle tool to draw a rectangle over the area that you want to split. Then, use the Split Now command from the right-click menu to split the shape.
Figma is a vector-based design tool that is gaining popularity in the design community. One of its key features is the ability to change colors easily. This article will show you how to change colors in Figma.
If you’re anything like me, then you’re probably always looking for new ways to improve your design process. Whether that means trying out new software or learning new techniques, there’s always room for improvement. One area that I’ve been wanting to improve lately is my perspective in Figma.
When it comes to Figma, there are a few ways that you can change variants. The first way is to use the Selection tool, which is the black arrow in the toolbar. With this tool, you can select any object on the canvas and then click on the drop-down menu in the top-right corner of the interface.