There is one simple way that you can make a semi-circle in Figma. That is to use the “Intersect selection” tool, which you can find in the toolbar on top of the Figma interface.
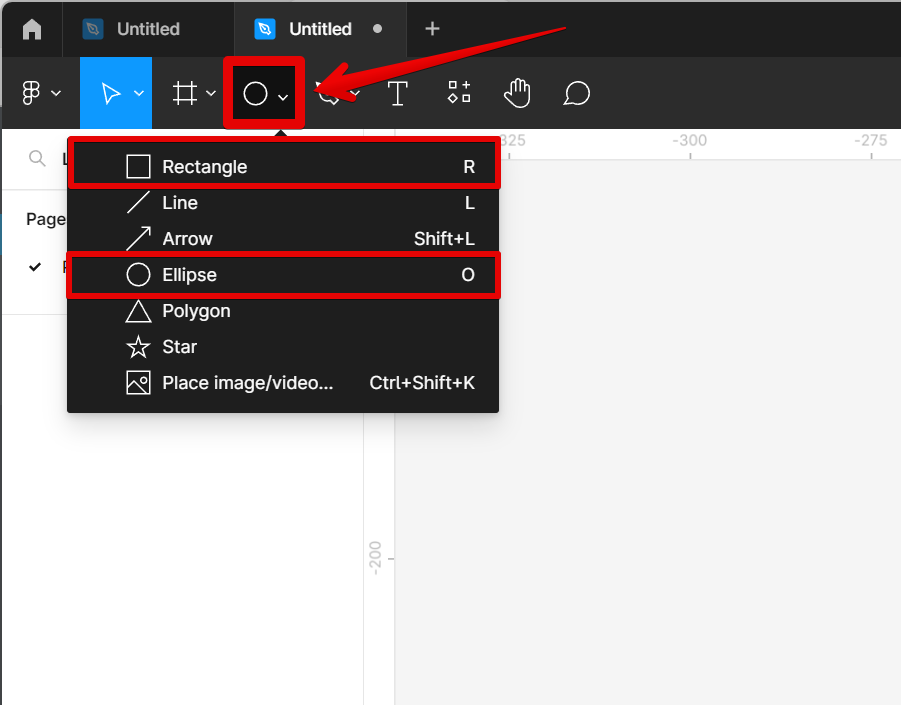
To create a semi-circle, first, you have to create a rectangle and a circle. To do this, go to the “Shape tools” at the top-left corner of the toolbar, then select Rectangle. Select Ellipse afterwards.
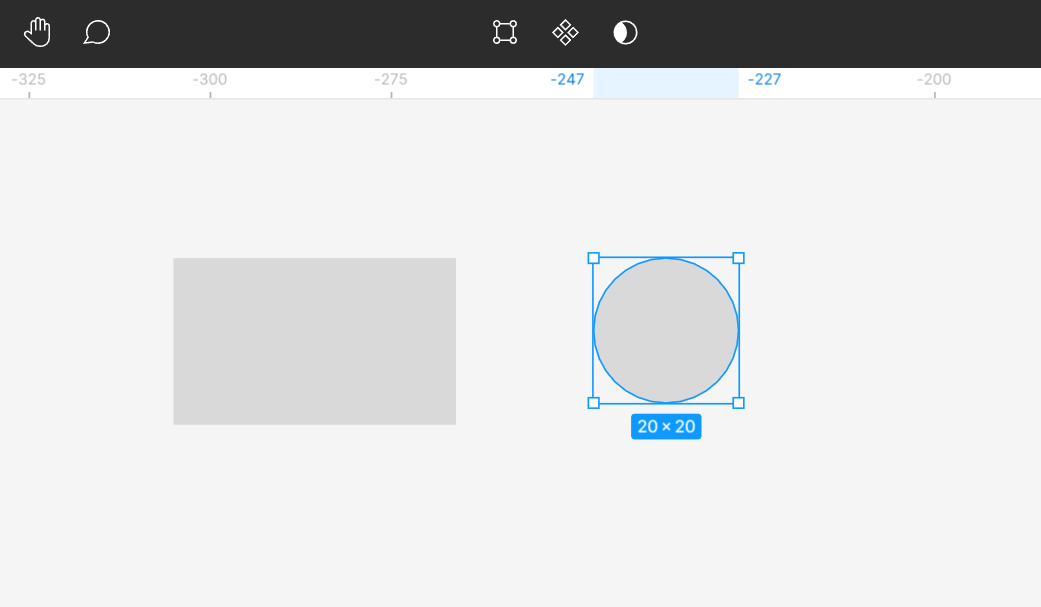
With this tool selected, just click and drag on the canvas to create the shapes into your desired size.
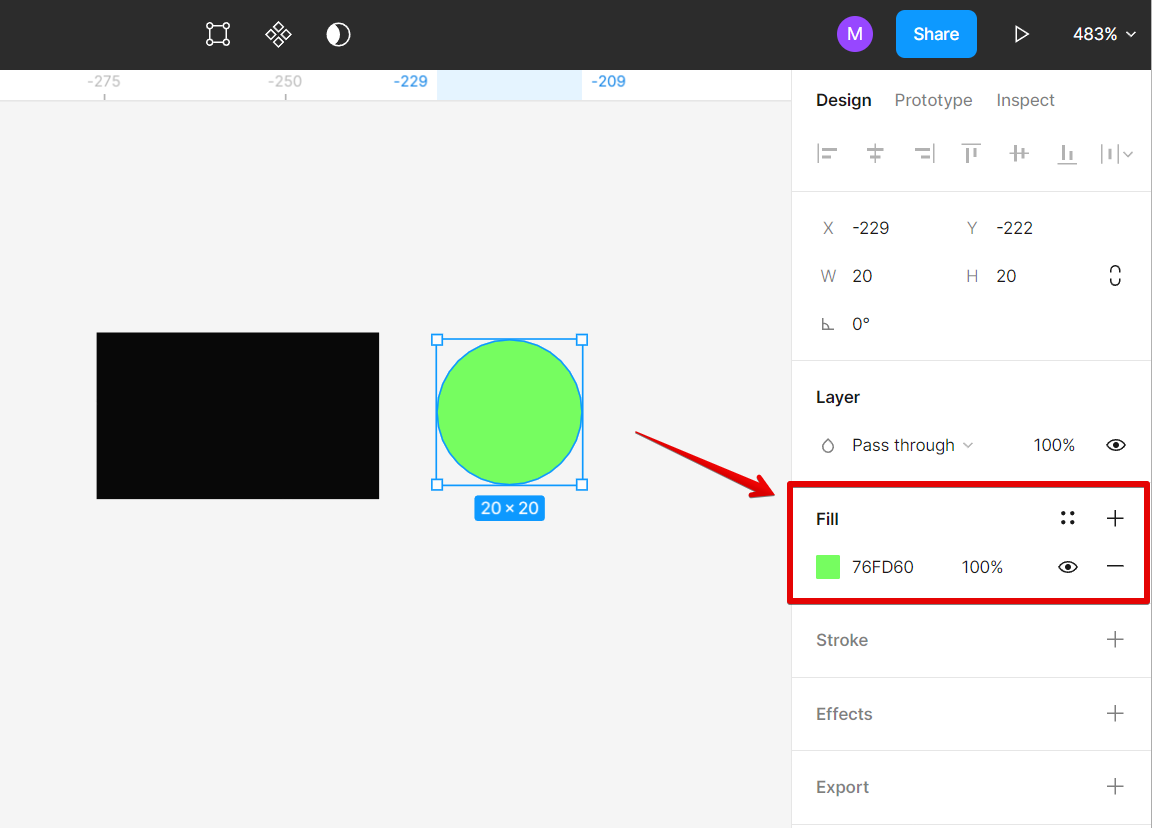
Next, fill the shapes with color to easily identify them. You can do this by selecting the “Fill” option on the right menu.
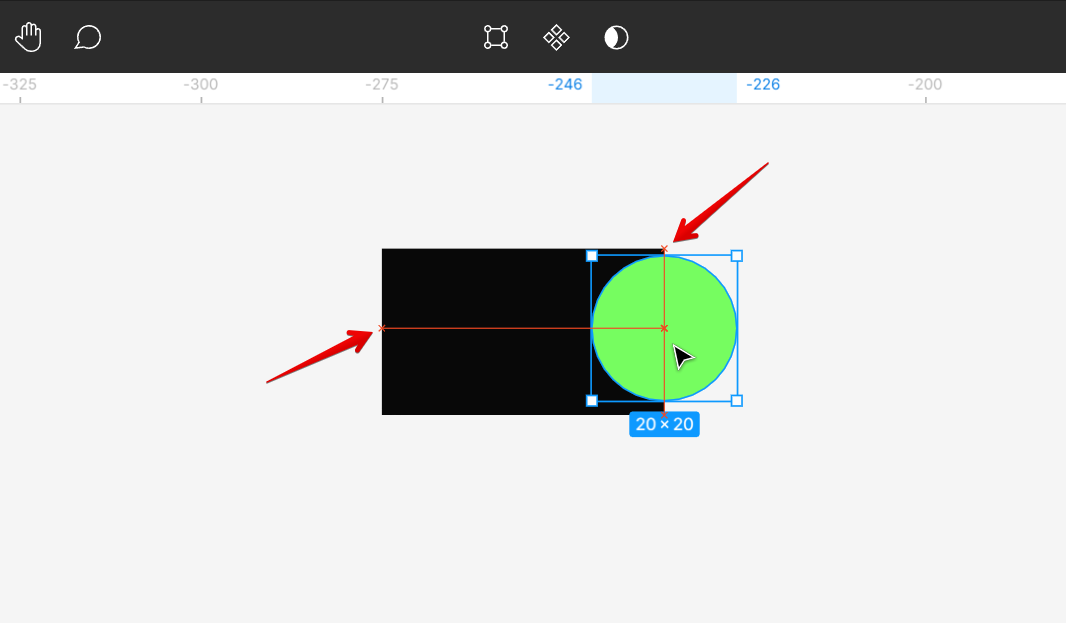
Put the two shapes together in such a way that one overlaps the other until the red perpendicular line appears indicating that the edge of the rectangle is exactly at the middle of the circle.
NOTE: The arrangement of layers does not matter in this case. You can choose whichever is at the top.
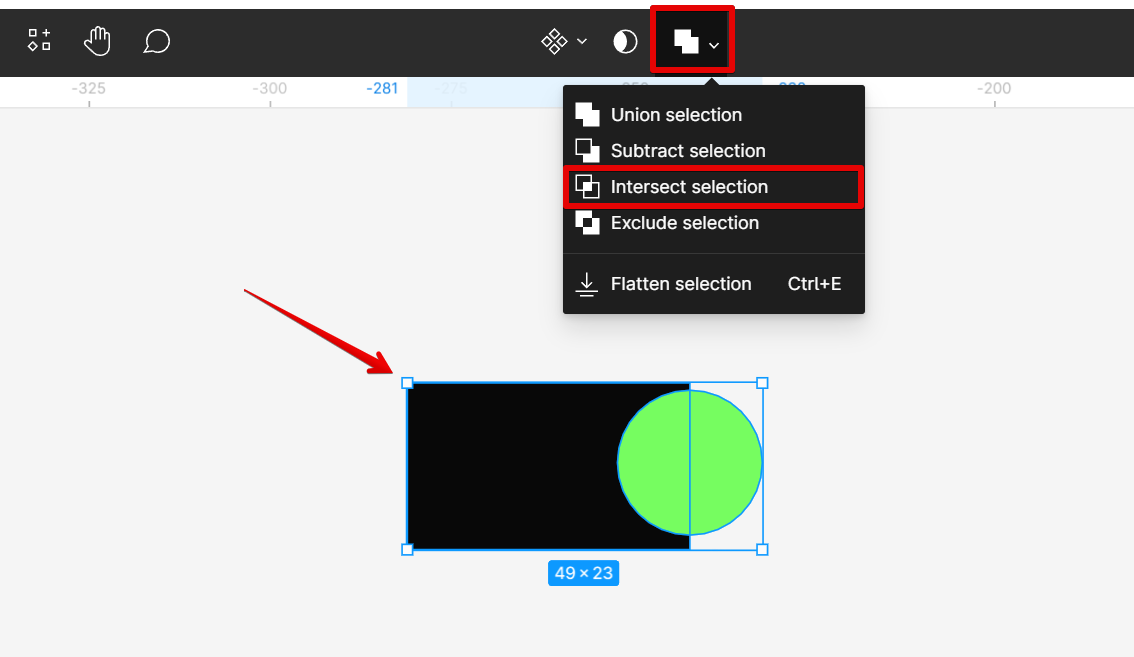
To turn this into a semi circle, simply select the two overlapping shapes, then click on the “boolean groups” tool found at the top-middle part of the page. From there, select the “Intersect selection” option.
NOTE: The “Intersect selection” tool is used on combined elements which results in such a way that only the overlapping area remains.
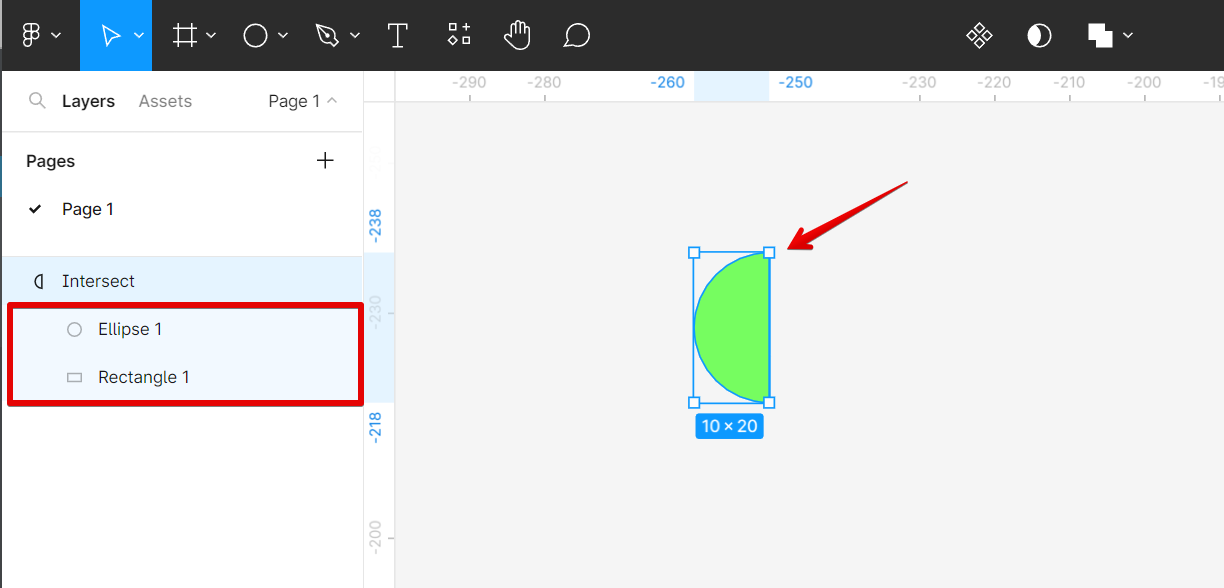
Now you can see that we already have a semi-circle. However, this effect is still incomplete because two layers still exist.
To have this effect permanent, select the semi-circle and click on the “boolean groups” tool at the top menu, then select the “Flatten selection” option.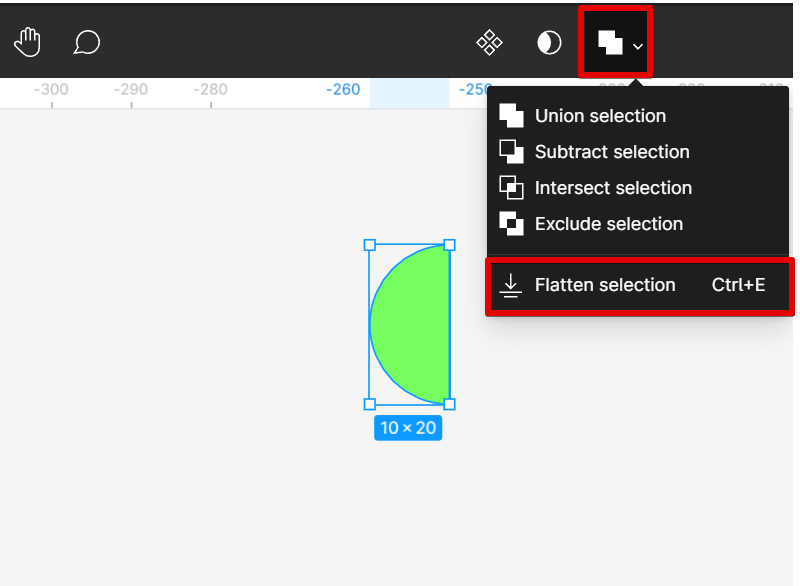
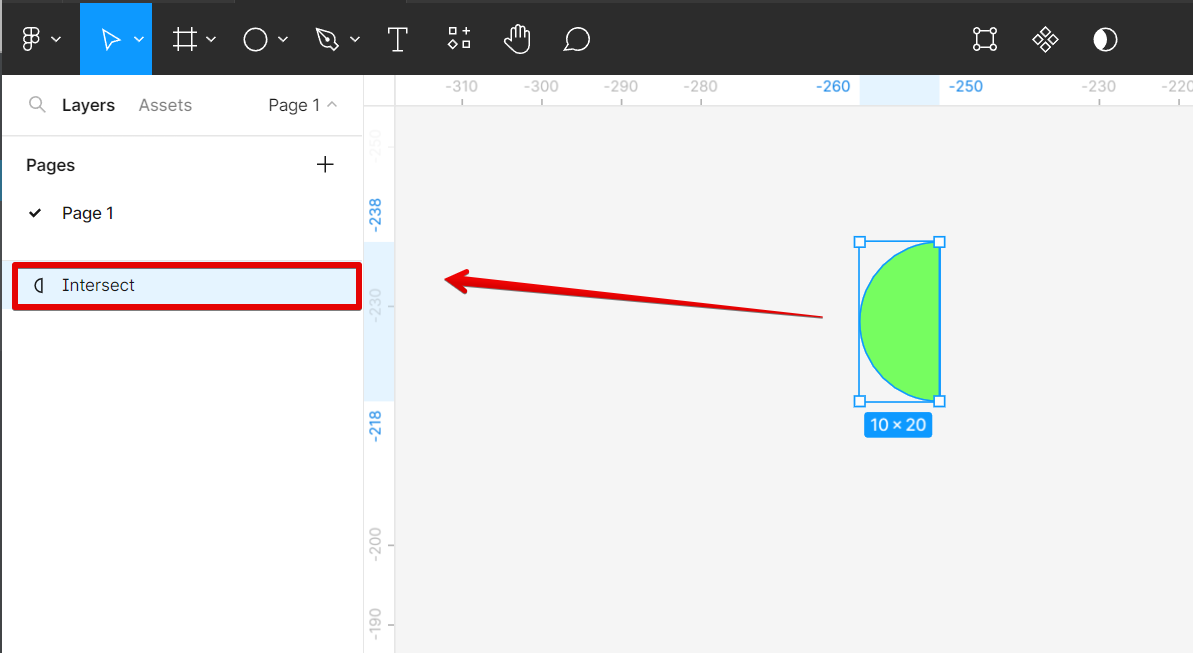
Now you have a one-layer semi-circle!
PRO TIP: If you are not familiar with Figma, please be aware that creating a semi-circle can be tricky. We recommend that you ask for help from a friend or colleague who is more experienced with the program.
6 Related Question Answers Found
In Figma, you can use the Ellipse Tool to create circles. To create a perfect circle, hold down the Shift key while you drag. You can also use the Rectangle Tool to create circles by holding down the Alt (Option on Mac) key while you drag.
Inner shadows are a type of shadows that are cast inside an element, on its inner side. They are commonly used to give depth to buttons, cards, and other UI elements. In Figma, you can create an inner shadow by selecting the element you want to add the shadow to, and then going to the “Shadows” section of the “Properties” panel.
There are a few different ways that you can subtract a shape in Figma. The first way is to use the Subtract From Shape mode. This mode can be found in the top toolbar, under the Edit menu.
When you want to add a curve to your design in Figma, there are a few different ways to do it. The first way is to use the pen tool. With the pen tool selected, click on the anchor point that you want to start your curve at.
There are a few different ways that you can make shadows in Figma. One way is to use the built-in Drop Shadow tool. To use this tool, select the object that you want to add a shadow to and then click on the “Drop Shadow” icon in the toolbar.
If you’re new to Figma, you may be wondering how to subtract shapes from one another. The process is actually quite simple and can be done with just a few clicks of the mouse. Here’s a step-by-step guide on how to subtract Figma shapes:
1.