There are a few ways to make rounded corners in Canva. The first way is to use built-in shapes.
To do this, go to the shapes menu and select the shape you want to use. You can access it through the “Elements” tab.
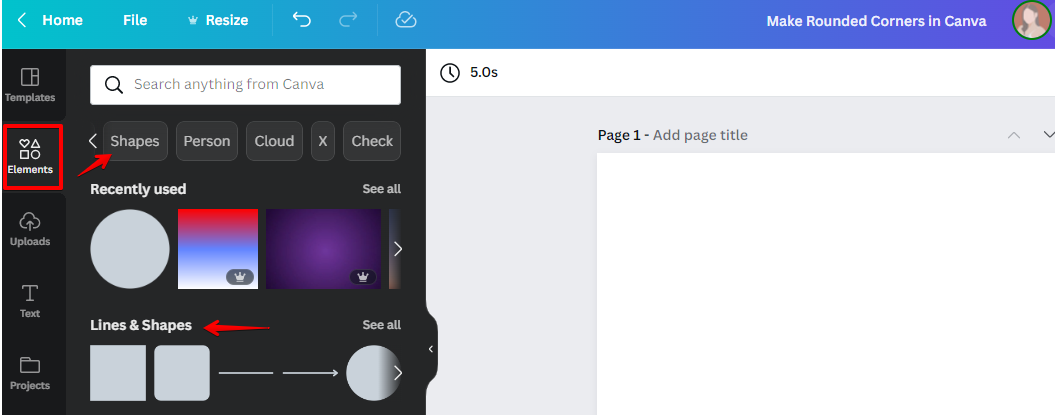
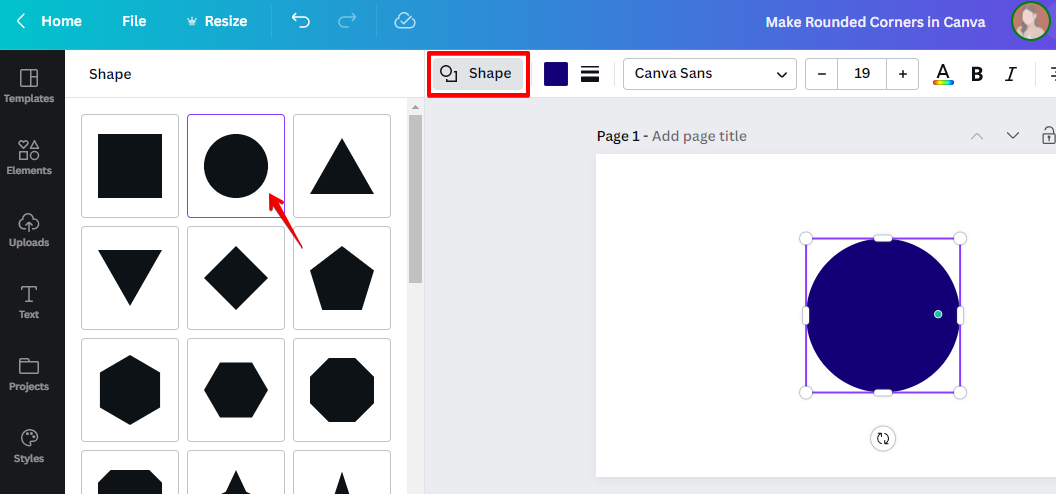
Then, click on the “Edit” button and choose the “Round Corners” option.
You can also use the “Images” button to upload your image and then select the “Round Corners” option. Or access Canva’s millions of free stock photos and preset round frames to instantly add round corners to your photos. Here’s how you do it:
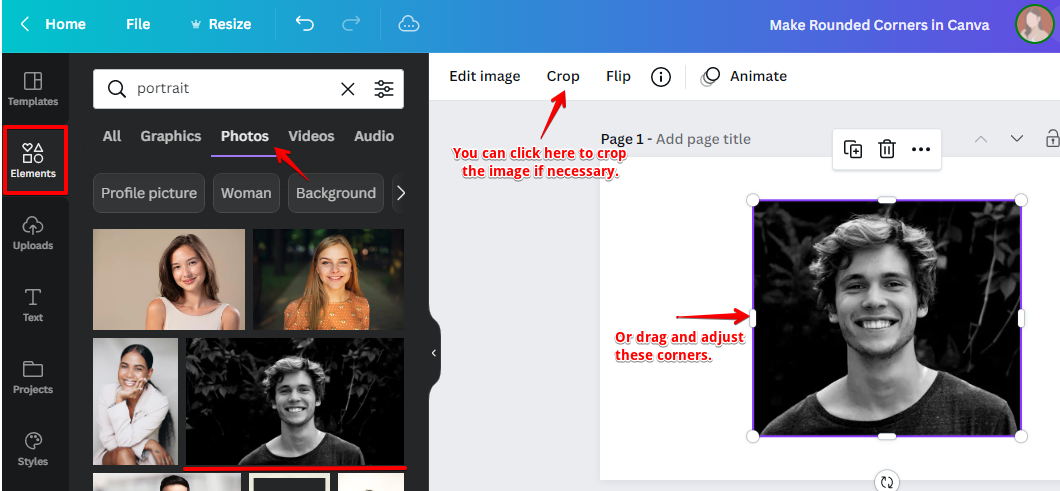
First, go to the “Elements” tab and click “Photos” or use the search engine to specify what image you’re looking for. Next, take your pick and drop it into your canvas. You can click on the “Crop” option to cut some size in your selected photo or simply drag and adjust the rectangular rounded corners conveniently.
Next, search for “Frames” and select the one with “Rounded Corners”. Drag and drop it into your canvas.
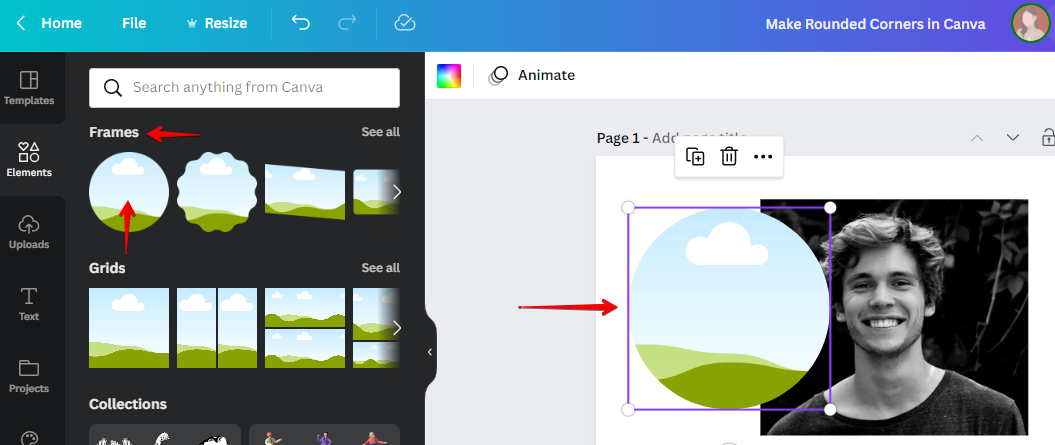
Select your image and place it on top of the round frame. The round frame act as a mask so anything beyond the shape will be cropped. Adjust your image to fit on the rounded frame accordingly.
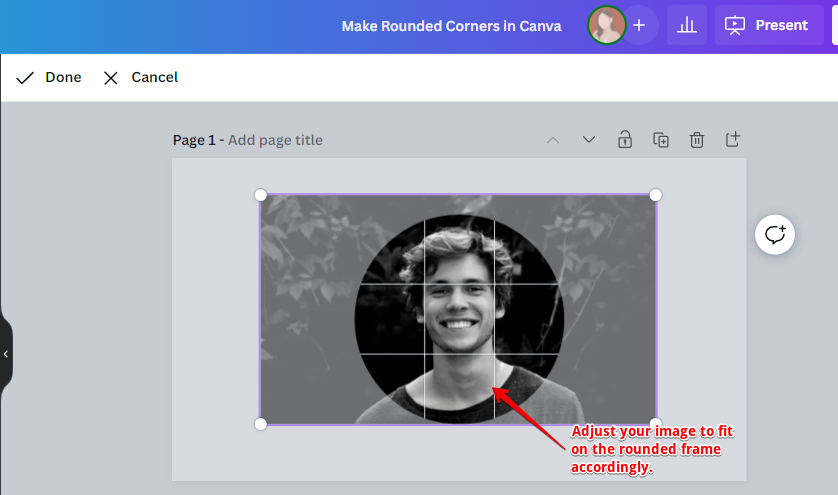
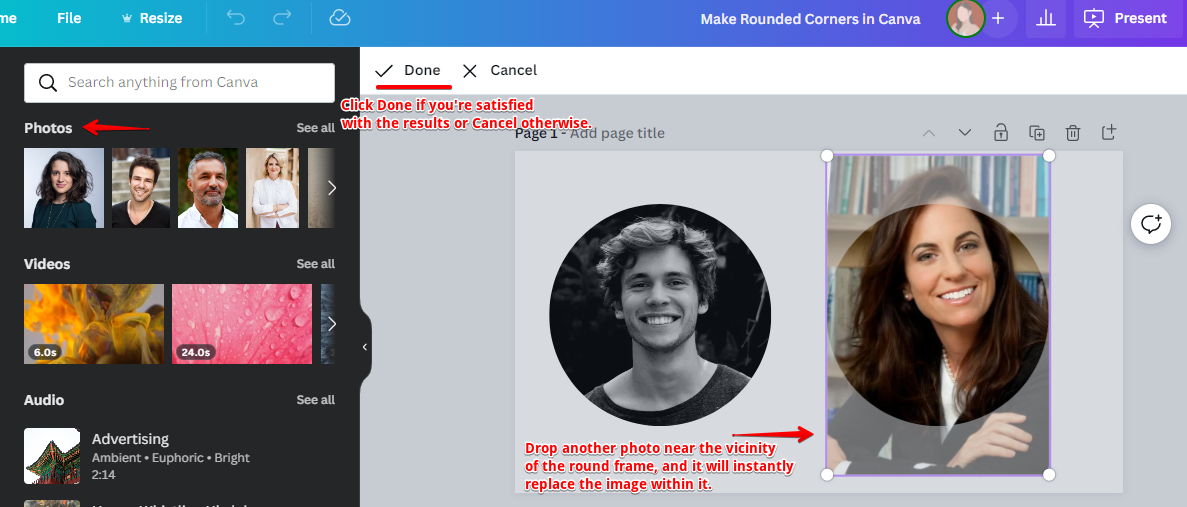
To create multiple rounded images, copy the previous one and drop another photo near the vicinity of the round frame, and it will instantly replace the image within it. Click “Done” if you’re satisfied with the results or “Cancel” otherwise.
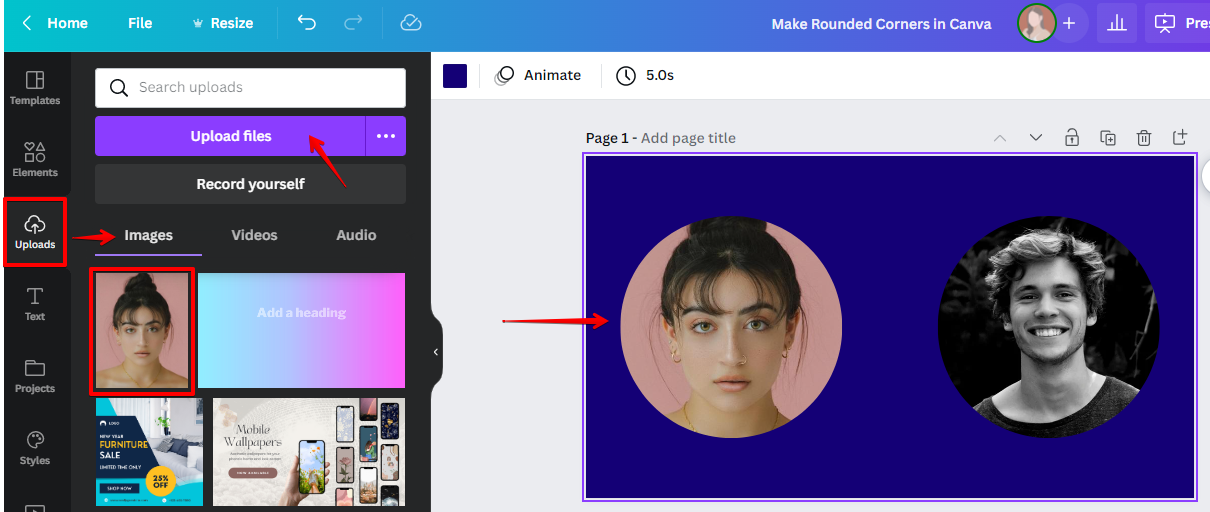
Now, if you want to use your image, you can do so by proceeding to the “Uploads” tab and clicking the “Upload files” button. You can find your uploaded image in the “Images” tab. Finally, drag and drop it into the round frame and you should now have a photo with “Rounded Corners”.
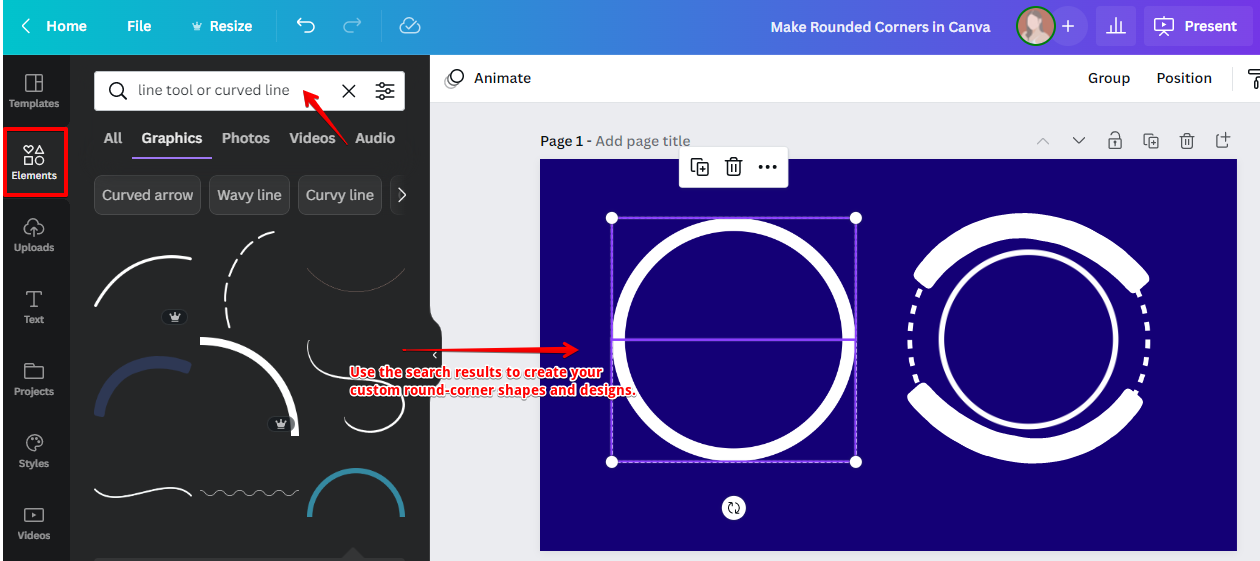
The second way to make rounded corners in Canva is to use the “Line” tool. To do this, go to the lines menu and select the “Line” tool or go to the “Elements” tab and search for “Line tool or Curved Line”. Use the search results to create your custom round-corner shapes and designs.
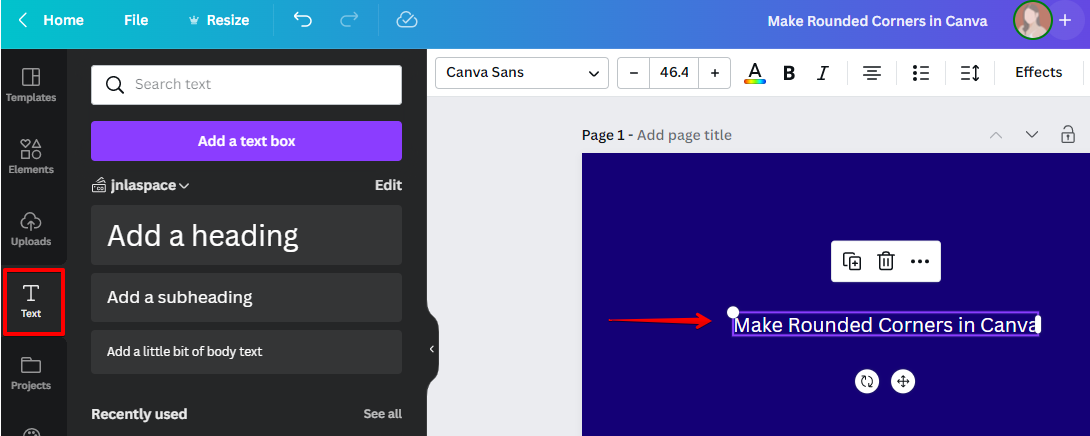
The third way to make rounded corners in Canva is to use the “Text” tool. To do this, go to the text menu and select the “Text” tool. You can click “Add a text box” for a start.
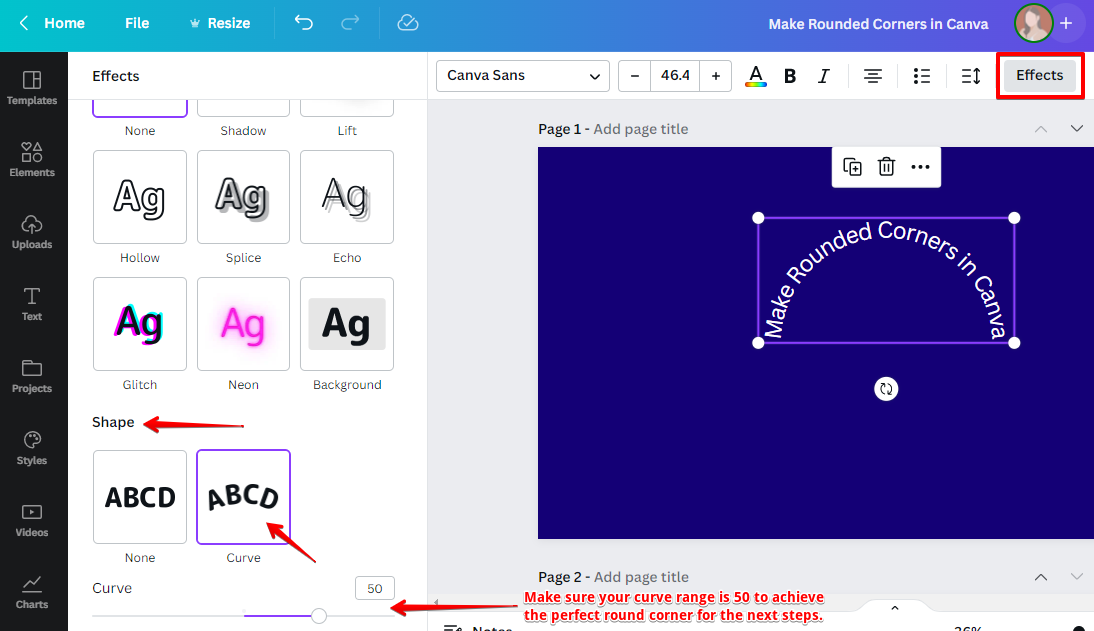
Next, click the “Effects” button and search for the “Shape” label. Under it, click the “Curve” style and make sure your curve range is 50 to achieve the perfect “Round Corners” for the next steps.
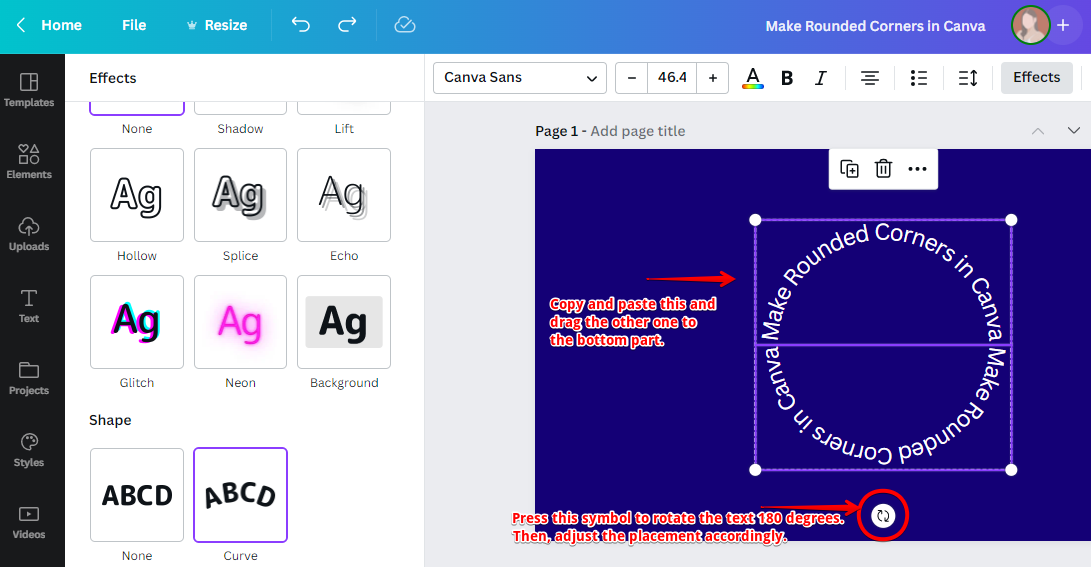
Finally, copy and paste the curved “Text” and drag the other one to the bottom part. Press the rotating symbol to rotate the text at 180 degrees. Then, adjust the placement accordingly. Now you have “Text” with rounded corners.
All of these methods will allow you to create rounded corners in Canva. Experiment with each one to see which one works best for you and your project.