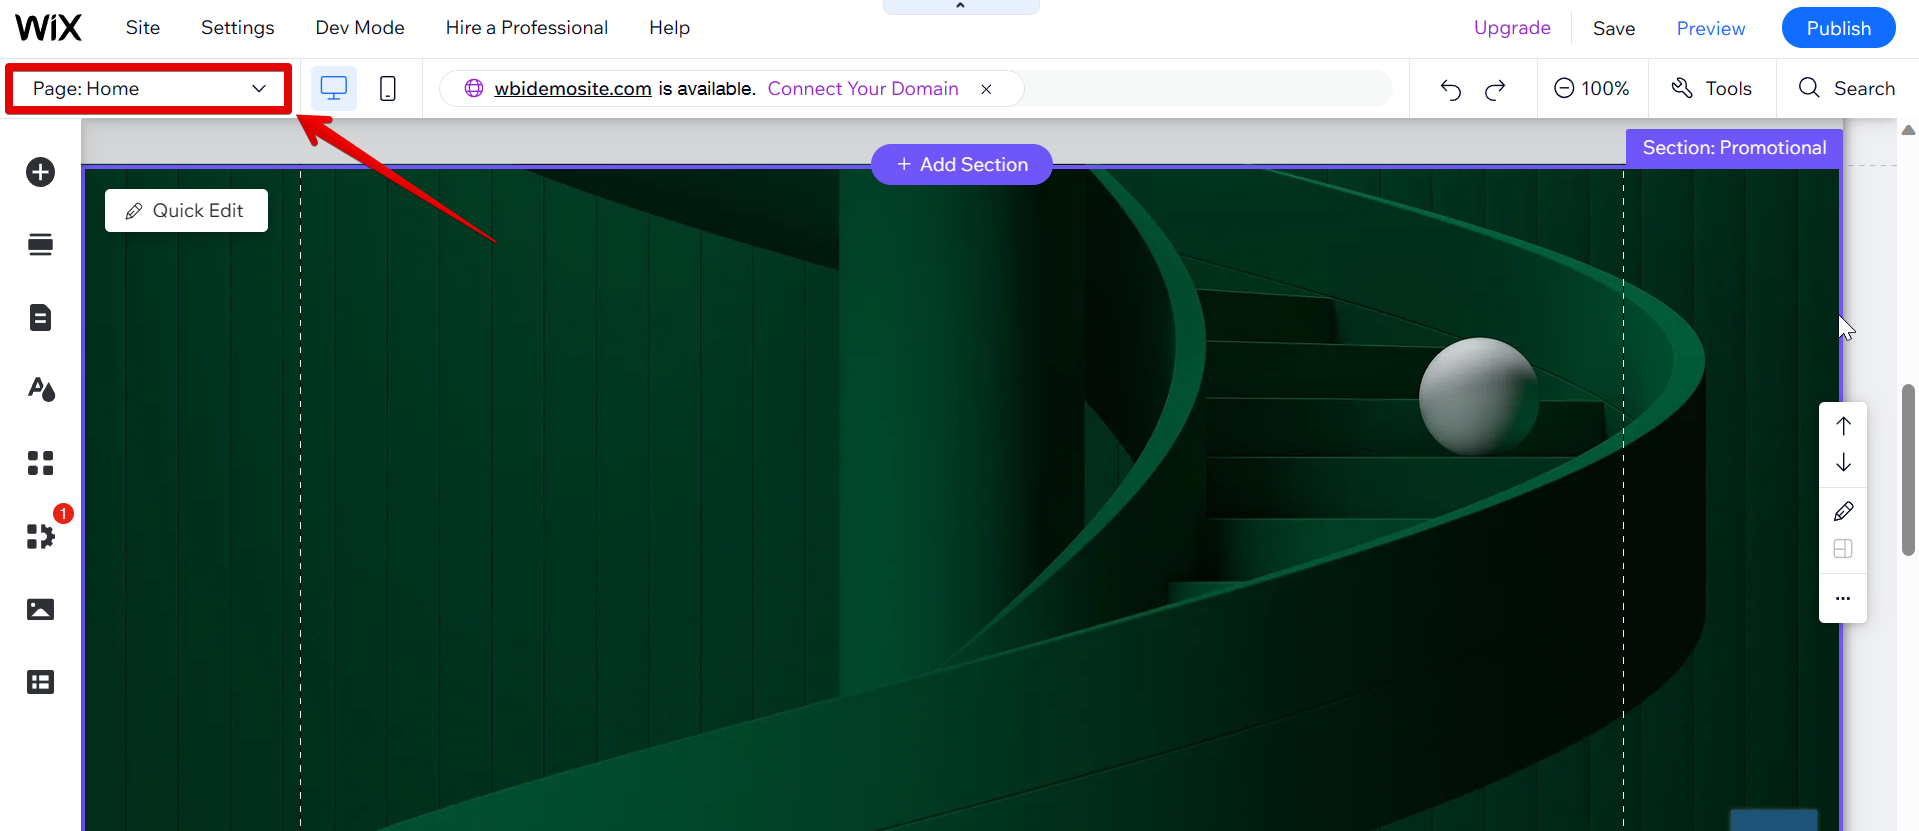
Adding hover text, also known as “alt text” is a great way to give your website visitors more information about an image. The hover text appears when the mouse cursor is over the image. To add hover text in Wix, first, open your Wix website editor and open the page and section where you want to add a hover text.
Exciting update! We've collaborated with Wix to offer WBI users with a free plan for all website creation needs - Explore the details here.
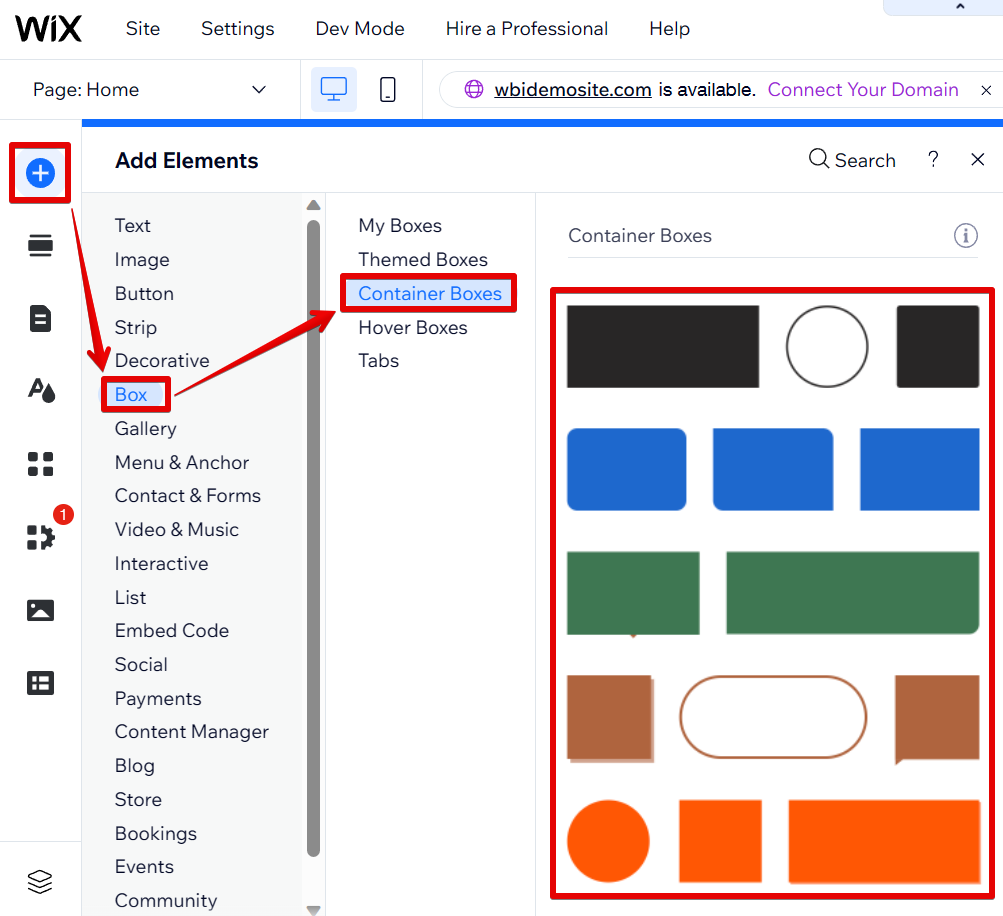
From there, click on the Add Elements (+) button on the left panel and open the “Box” menu, then select “Container Boxes” from the list. This will open a window with a variety of container box options. Select one from the menu.
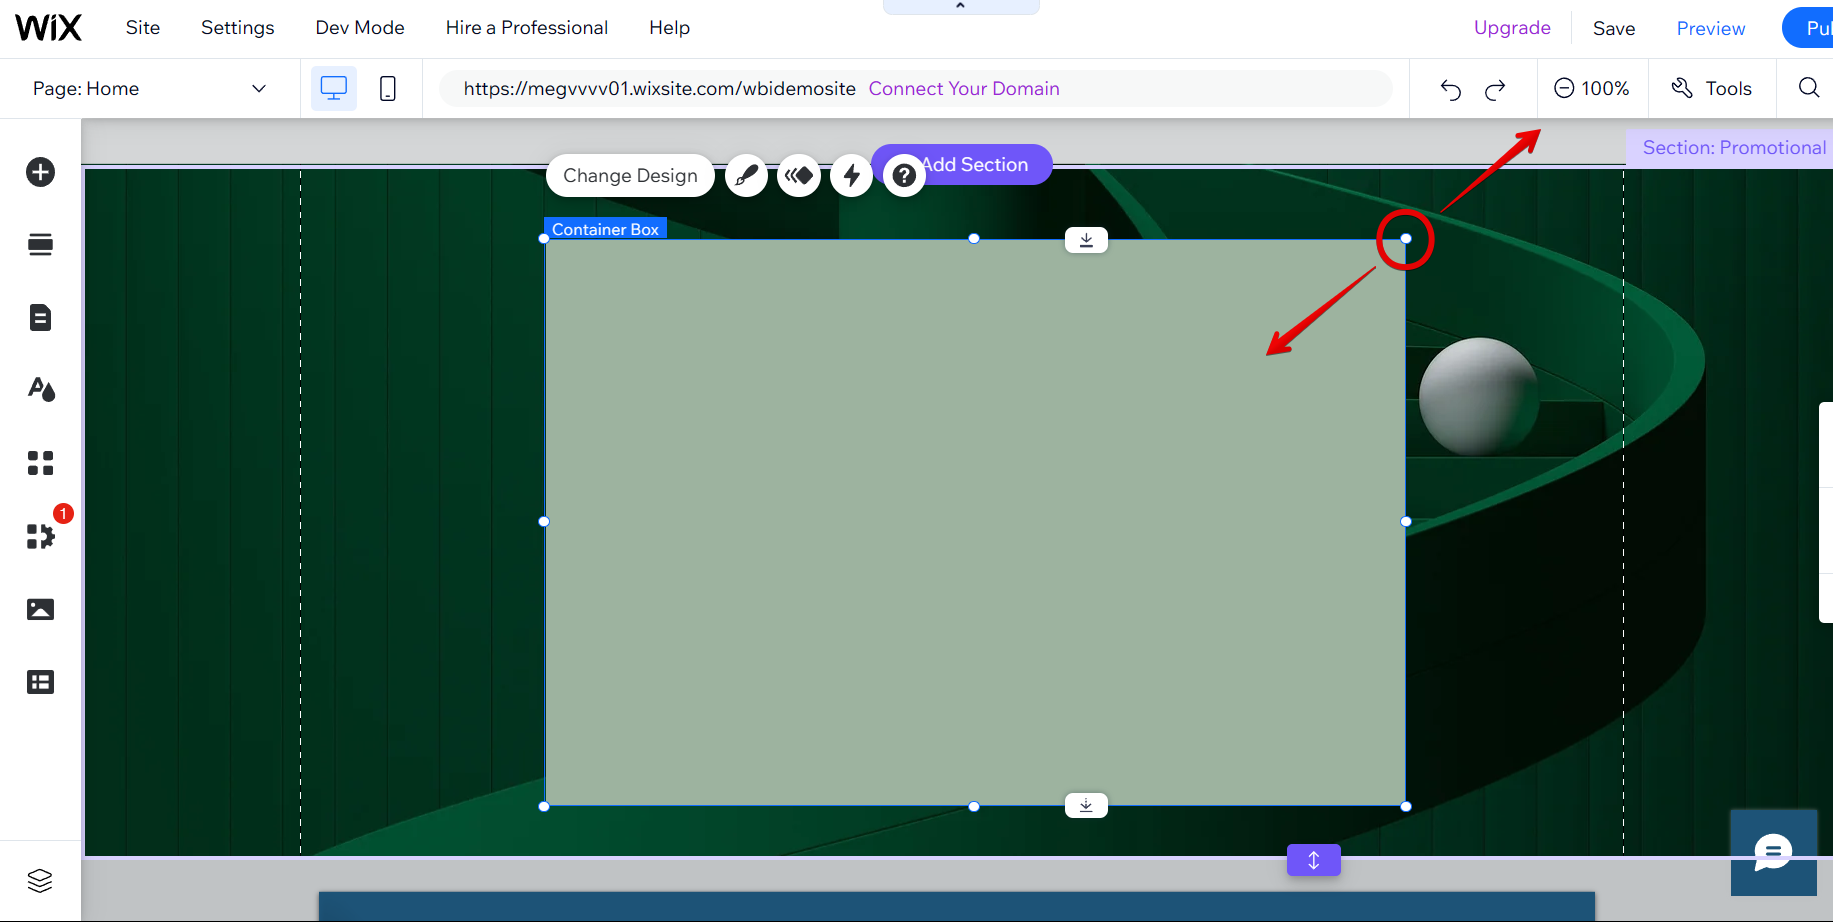
Once the container box is added to your section, you can resize it by clicking and dragging on the pill handles around it.
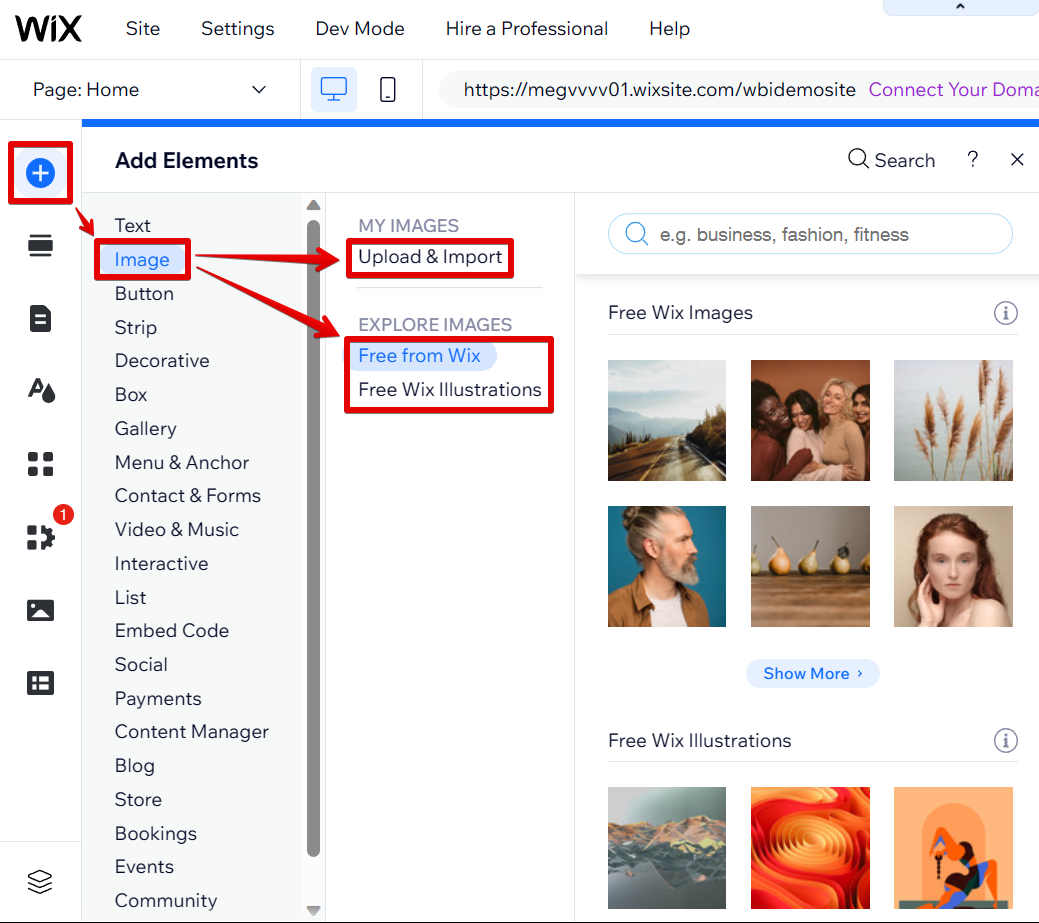
Next is to add an image element to your container box. To do this, click again on the Add Elements (+) button and select “Image” from the options. From there, you can choose to either upload your own images or simply select one from the stock images available in Wix. Select one and add it to your section.
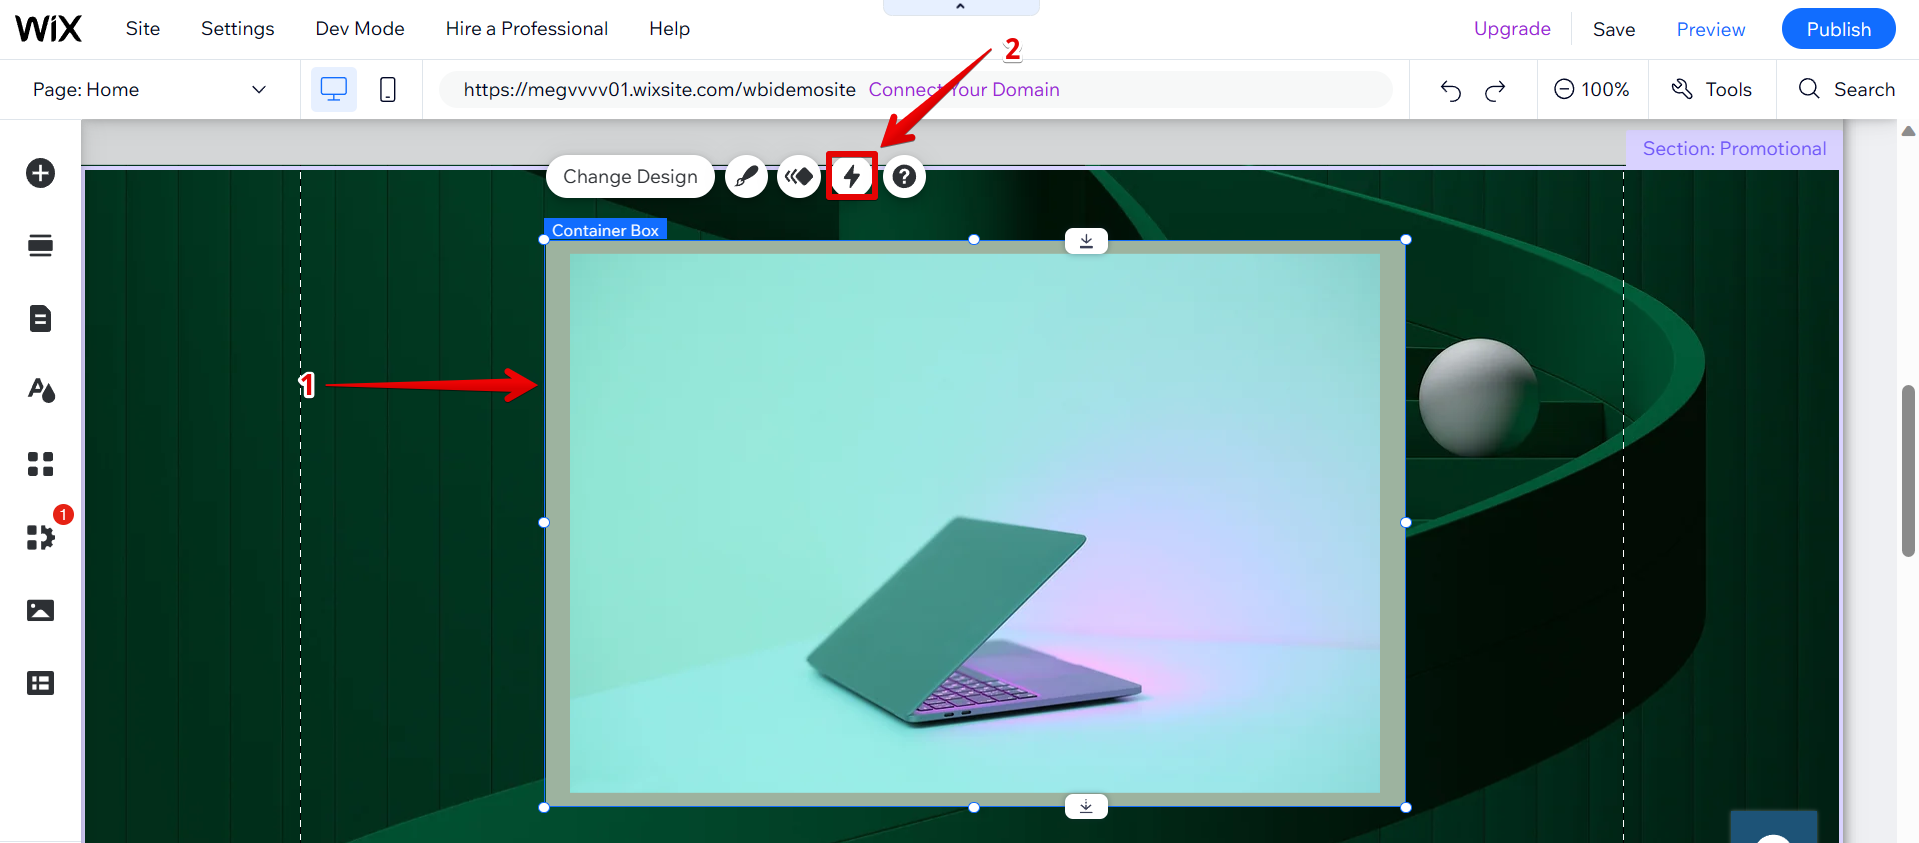
Place the image right above the container box element. Once done, you can now add the hover text. To do this, we need to enter the Hover Mode. Since we are currently in Regular Mode, first, click on the container box element, then select the thunder icon just above the box. This will open the Hover Interactions window and also put us in Hover Mode.
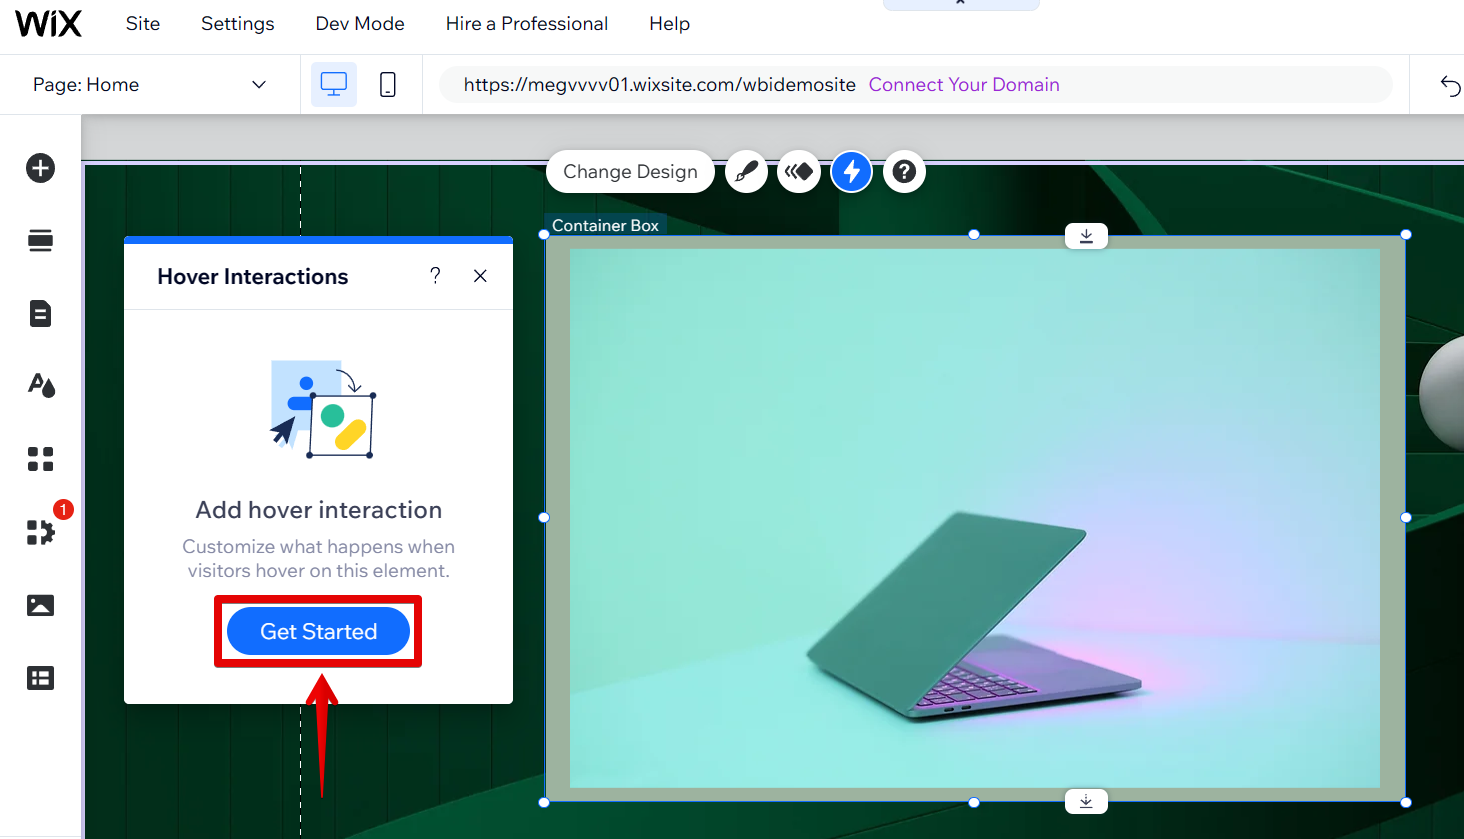
From there, click on the “Get Started” button.
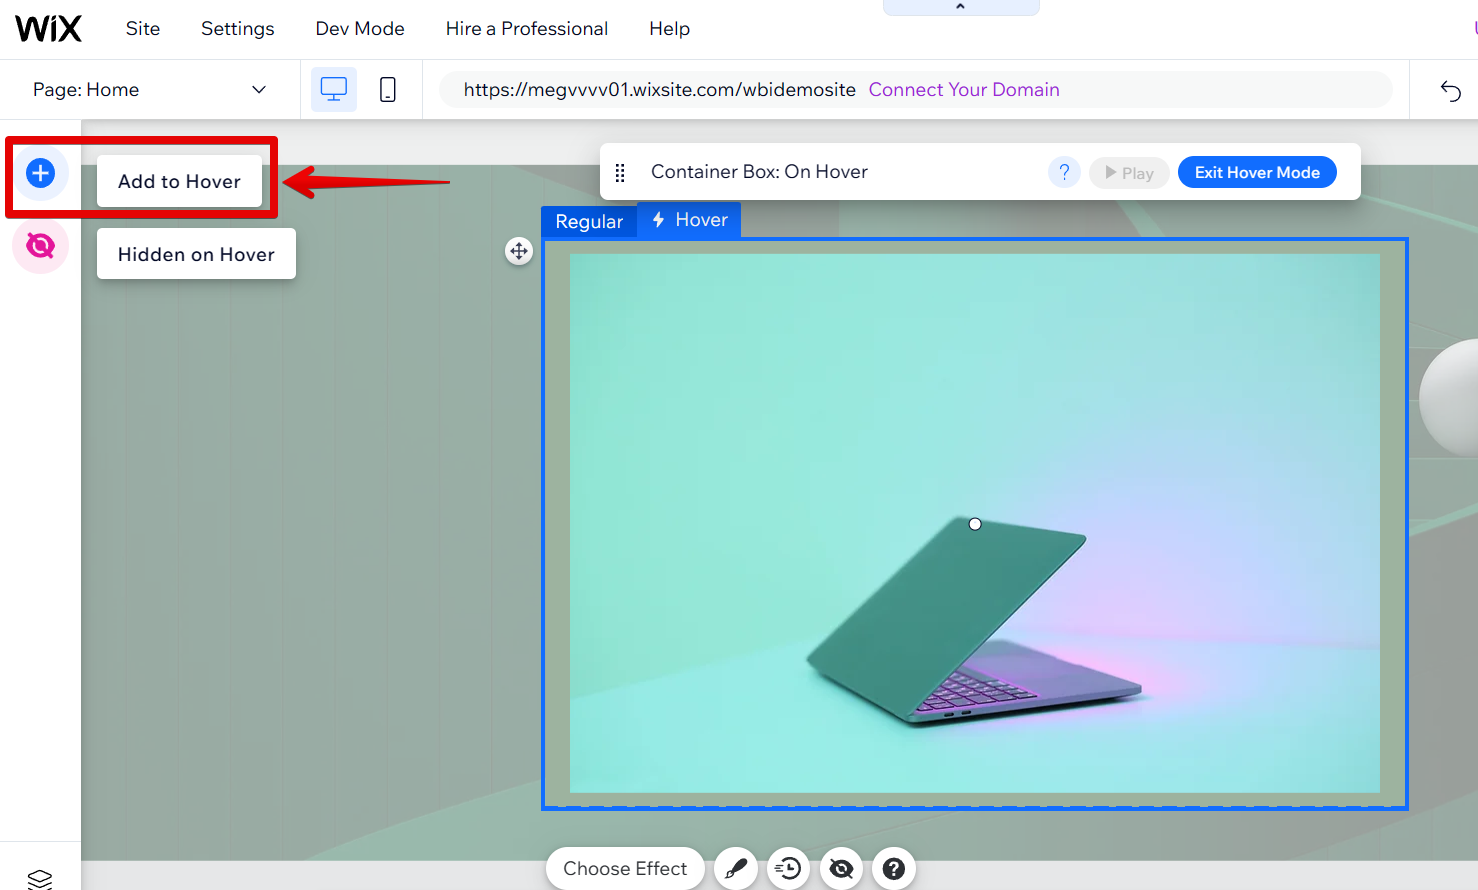
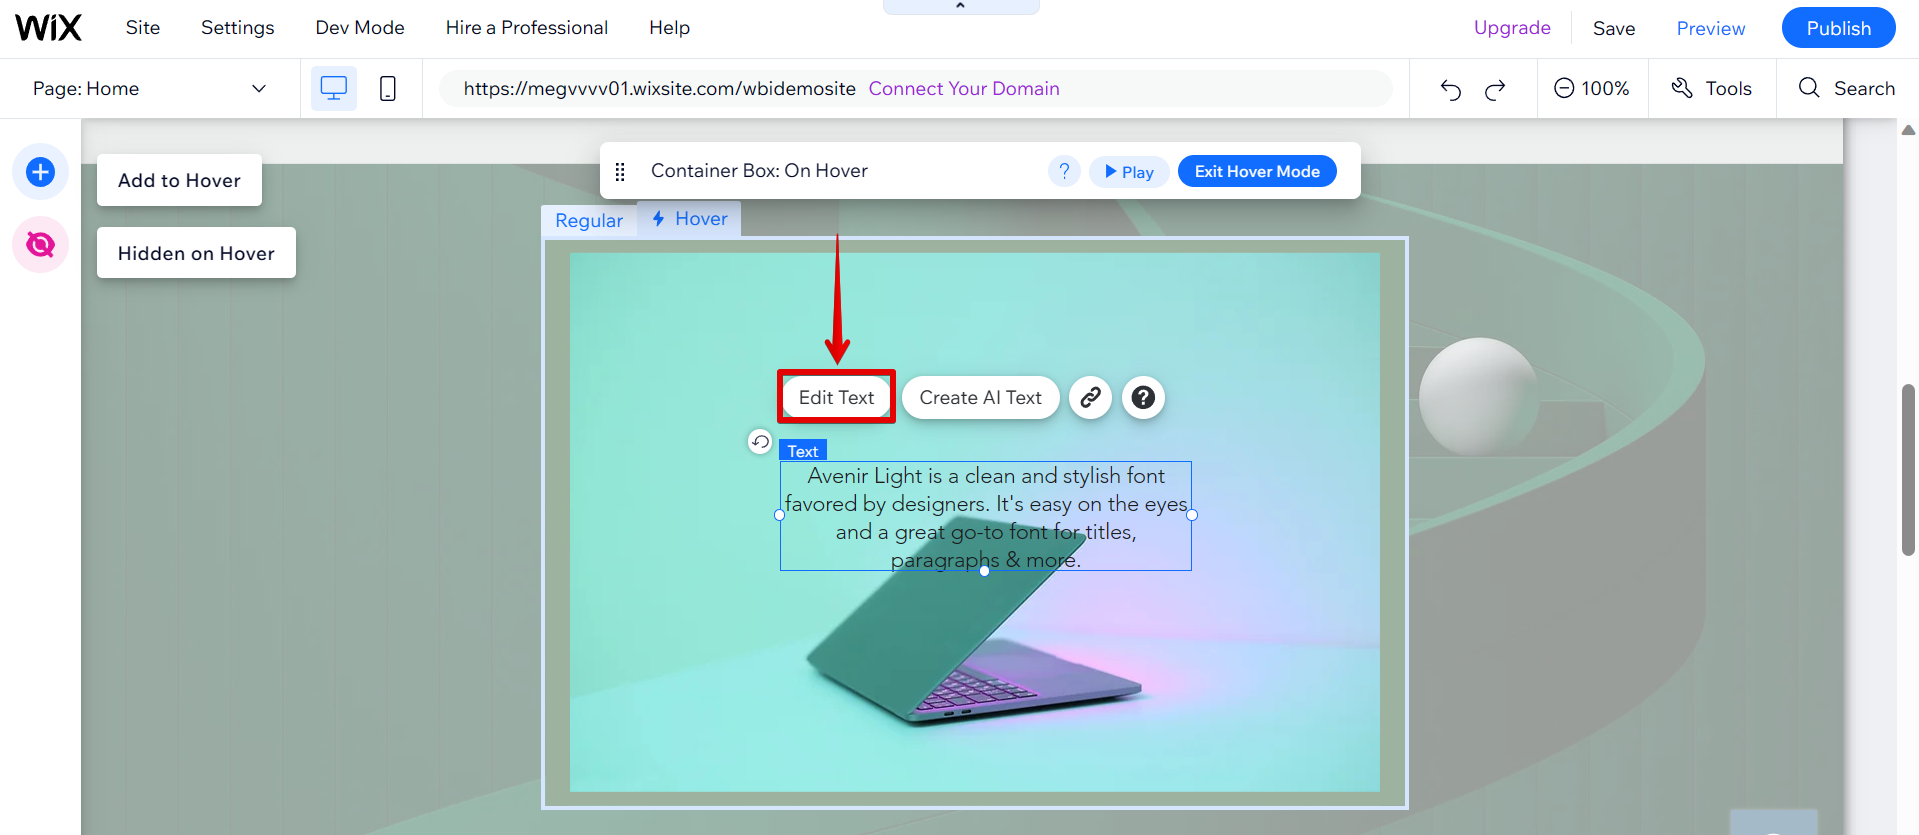
Once you’re in Hover Mode, the next step is to add your text element. To do this, go to the left menu and click on the Add to Hover (+) button.
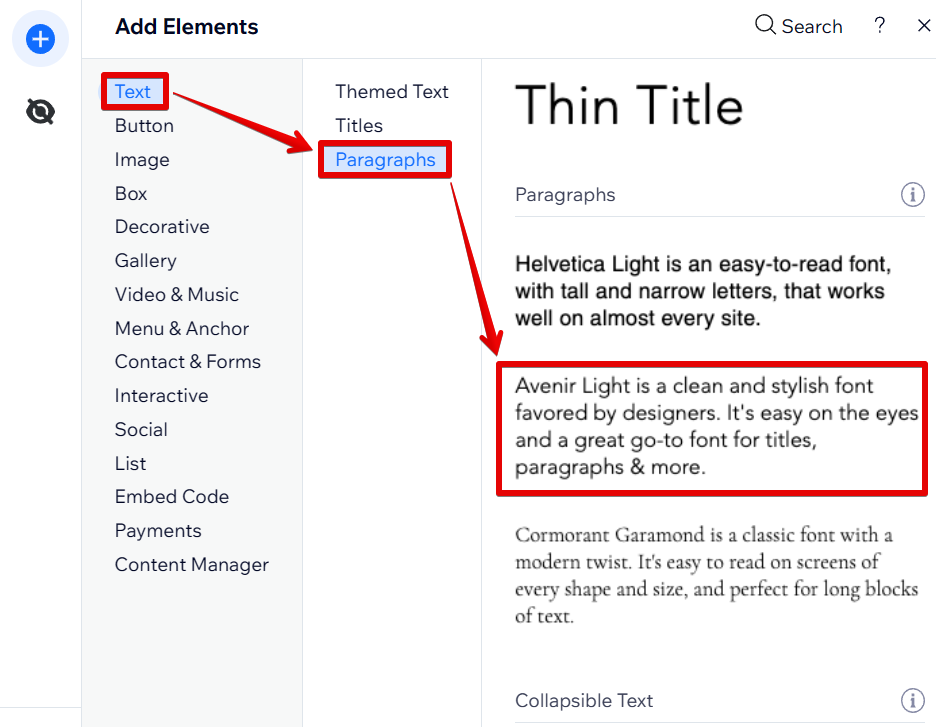
From there, select the “Text” option, then choose your preferred text format from the menu. This will automatically add your text element above the image.
From there, you can add style to your hover text by clicking on the “Edit text” button.
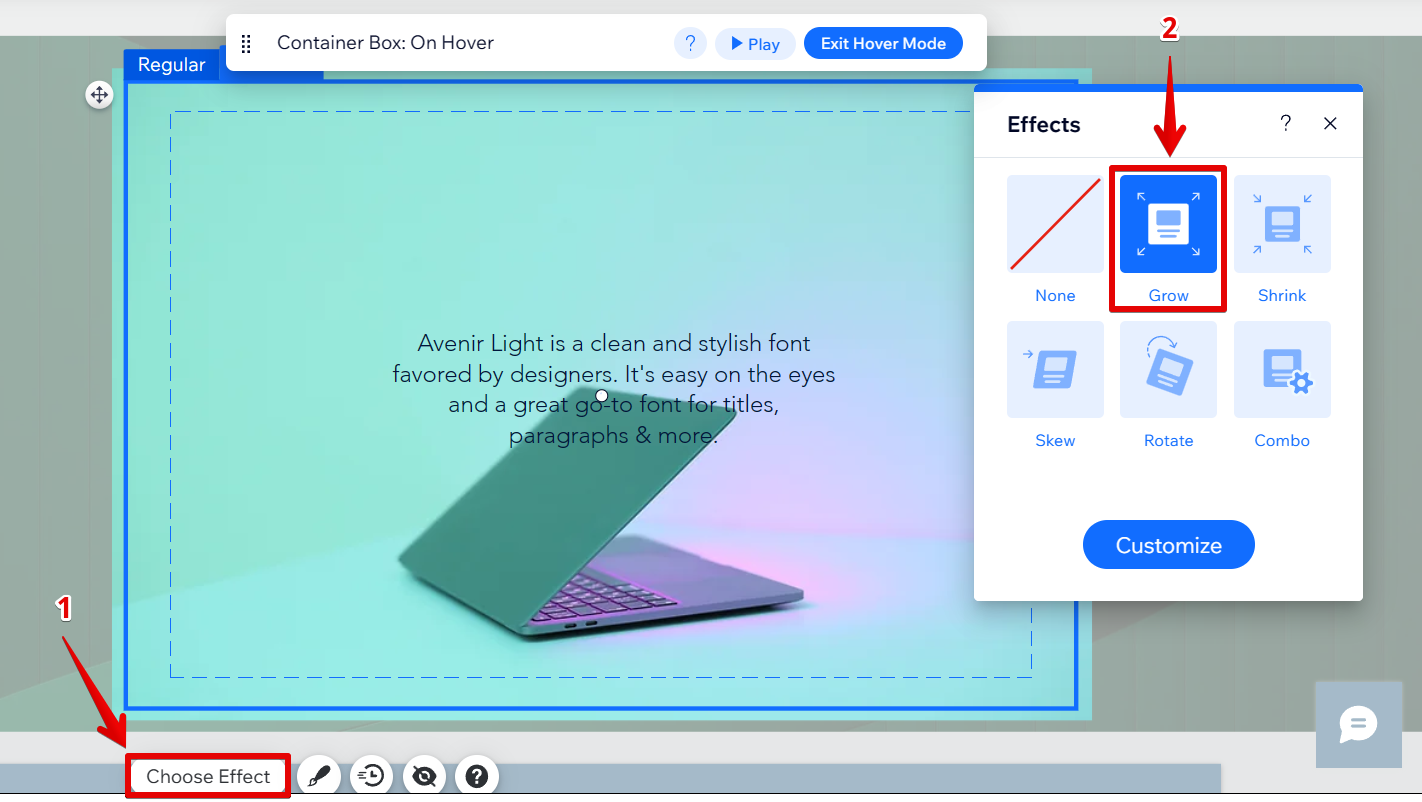
You can also choose an effect for your hover text. Just click on the “Choose Effect” button then choose one from the options in the Effects window.
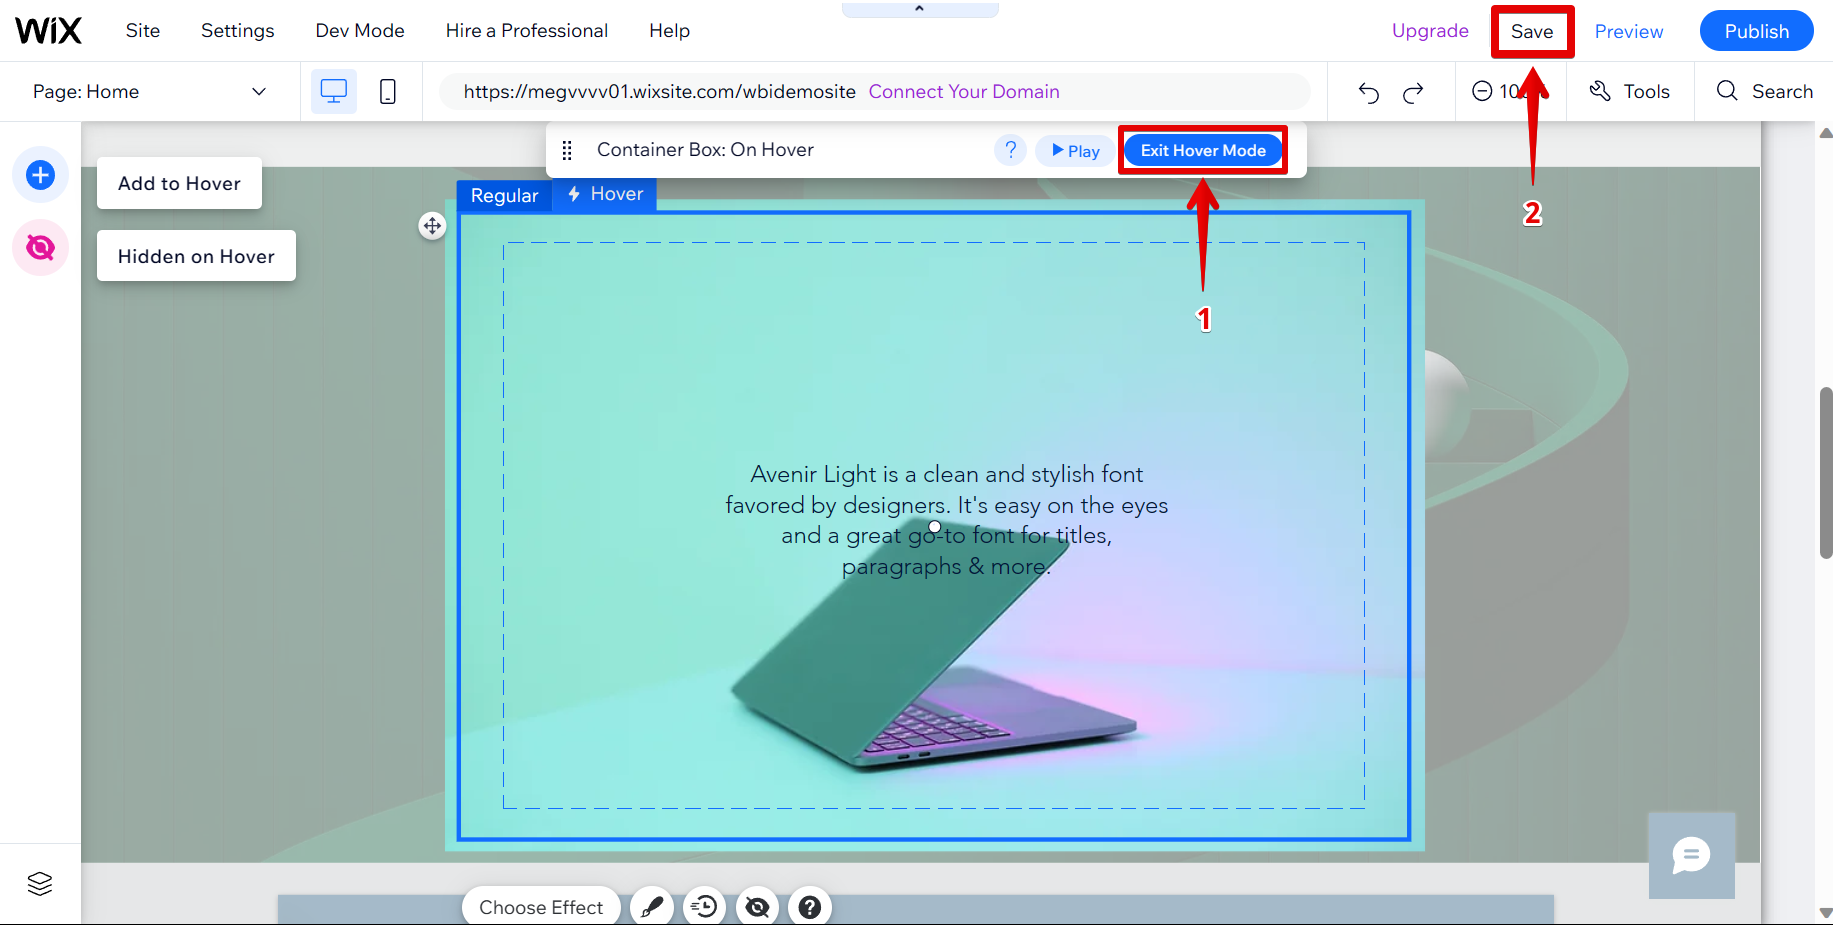
Once you’re happy with your hover text, simply click “Exit Hover Mode” and then “Save” to save your changes.
That’s all there is to it! Adding hover text is a great way to make your website more informative and user-friendly. This allows you to create a consistent and cohesive design across your web pages while also adding interactive elements that engage your visitors!