Want to make a big impression with your Canva designs? If so, put your skills as a graphic designer to the test by trying your hand at photo blending.
Blending photographs, technically speaking, is the same as making the foreground merge or fade into the backdrop. If you want to learn how to combine images in Canva, continue reading this guide.
How to blend photos is Canva
The vast majority of us undoubtedly believe that combining photographs in Canva is a skill that can only be mastered by the most accomplished designers. However, if you are an expert at using even Canva’s most fundamental capabilities, you won’t need our help at all.
Therefore, this is what you need to do in order to get that blended look in Canva:
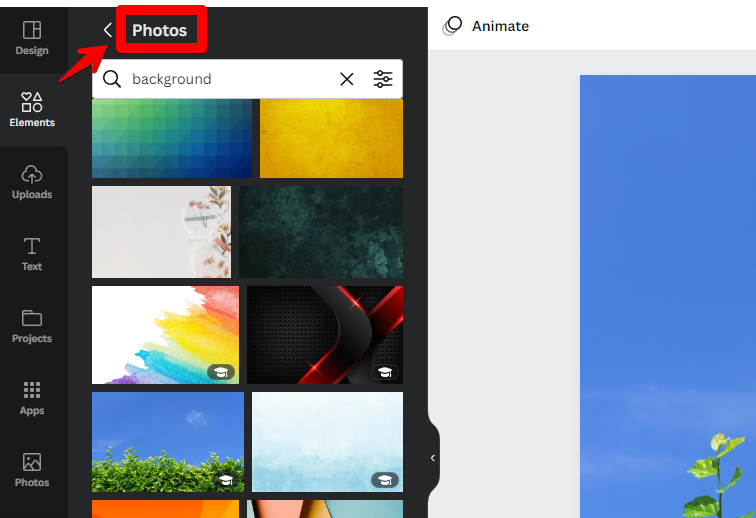
Step 1: Once you are on the editing page, navigate to the panel menu on the left side of the page, and select the photographs you want to utilize as the foreground of your design. You have the option of importing photographs from your own device or selecting from the stock photos that are already available in the Photos tab.
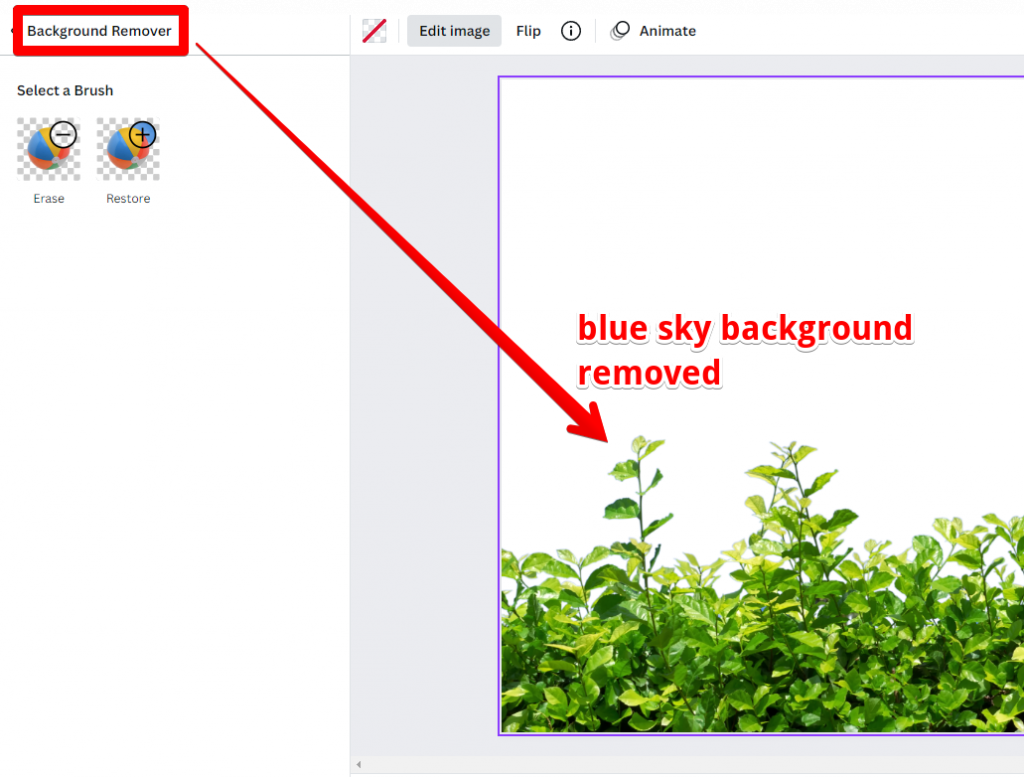
Step 2: Once you’ve selected the photographs you want to use, it’s time to get rid of the backgrounds they came with (assuming they didn’t come with a transparent one already). To accomplish this, click on the picture you want to use. The next step is to select the Edit Image button that is located on the editor toolbar.
After that, you will be presented with a selection of photo effects from which to choose. Tap the Backdrop Remover tool, since our objective here is to eliminate the background from the image that you have picked. After that, you will need to wait for Canva to complete the processing of the image. This phase takes a few seconds to complete most of the time.
It is important to keep in mind, however, that the Background Remover tool is a feature that is only available to Canva Pro customers. If you are currently use Canva Free, you will notice that this tool is disabled and grayed out. Repeat the previous procedures for each of the photographs that you intend to eventually use to create the blended effect.
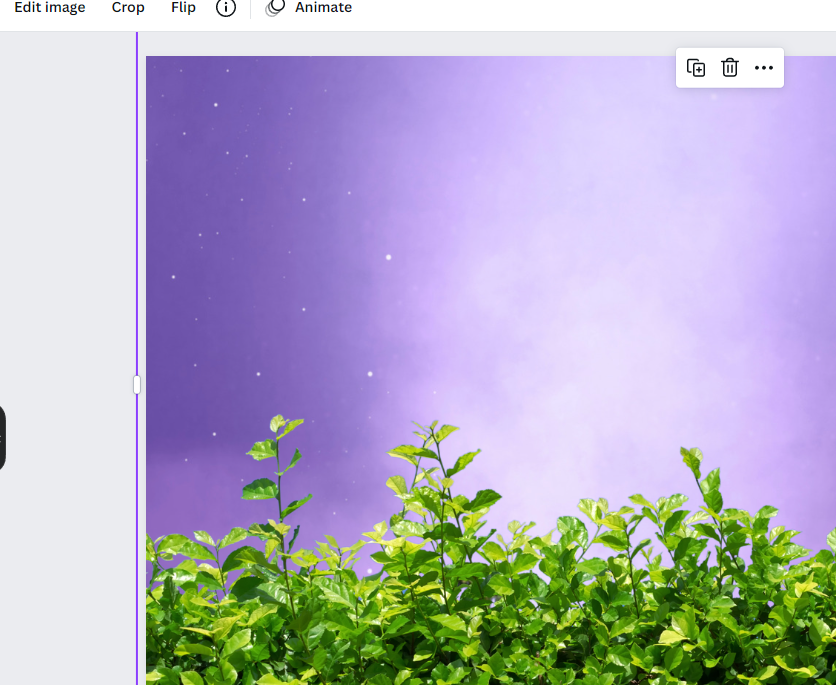
Step 3: When you have finished removing the backgrounds of those photographs, it is time to select a photo to use as another object for your collage. Similar to the step before, you can either discover one from the Photos menu or upload one from your device to use instead.
On the other hand, you can select the Backgrounds option instead if you want to use textured backgrounds in your designs. Right-clicking the photo that you have selected after you have clicked and dragged on it is the final step. Choose the option that allows you to use an image as the background from the dropdown menu that displays.
Step 4: Arrange the first group of photographs that you chose previously over the canvas in the manner that you choose. You have the option to rotate them, resize them, and even mirror them if you want to. Even better, you can put some of the layers together to make the layout process much simpler.

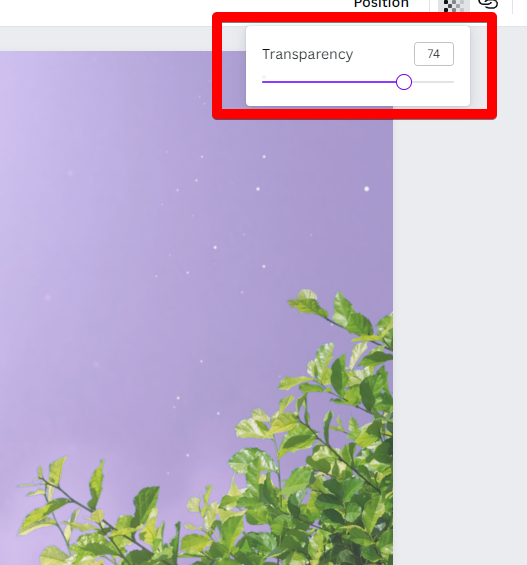
Step 5: Once you are satisfied with the arrangement of your foreground photographs, select one by tapping on it. After you have selected the photo, you can proceed to the icon labeled “Transparency” located in the editor’s toolbar. This tool, which has the appearance of a fading checkered tool, may be found in between the Copy Style button and the icon for the hyperlink.
After clicking on the Transparency button, a slider will appear before your eyes. Move the slider to the left until the photo appears to “merge” with the background gradually. You also have the option of encoding the transparency % into the box if you are aware of the degree to which you would like the image to be translucent.
It is necessary to repeat this process for each of the photos that will be blended into the background.
Step 6: If you want to give the photo edges a more polished look and merge them more seamlessly with the background, you can choose to apply Gradient components.
Be aware, though, that this step works much better with a background that is a solid color. To complete this step, select the Elements tab, then type “gradients” into the search bar located to the right of the Elements tab. From there, choose the sort of gradient you want to use, and then make any necessary adjustments to the colors so that it matches the background.
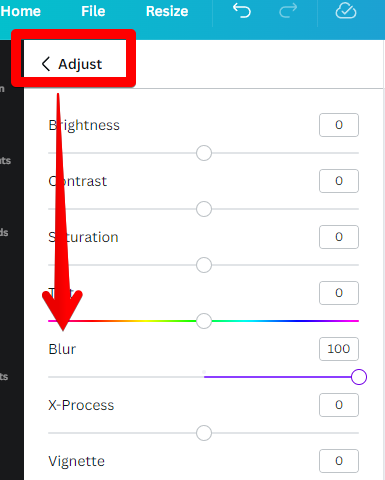
Step 7: Select the gradient element you just inserted, then use the blur slider to adjust its intensity. After that, click the Edit Image button, and then within the Adjust category, select the See all option from the drop-down menu.
Keep scrolling down until you find the slider for the blur effect. Move the slider to the left or right to adjust the degree to which the image has been blurred. When you are finished, you may simply save the modifications by tapping anywhere on the canvas.
Step 8: If you do not want to include a gradient element in your design, you can conceal the boundaries of the blended photo by including graphic components in your layout.
Simply navigate to the Elements tab located on the menu’s left-hand side, and then click and drag the graphic element that you would want to add.
Step 9: You have the option of including text boxes in your design if the design you’re working on requires some text. You may either add a text box to the canvas by pressing the T key on your keyboard or by tapping the Text button located on the menu on the left side of the screen.

There are many other ways to blend photos in Canva, but these are some of the most common. Experiment with different techniques and see what works best for you.
Conclusion
The process of combining two photographs and making them look like one is relatively straightforward and may be completed in a matter of minutes. This is due to the fact that Canva is a platform that allows inexperienced designers to create great graphics with very little prior training.
Use this newfound skill now and enjoy editing in Canva!