There is one simple way to change line spacing in Photoshop. That is to use the “Leading” option in the Character panel.
To access the Character panel, go to Window > Character. This will open up the Character window.
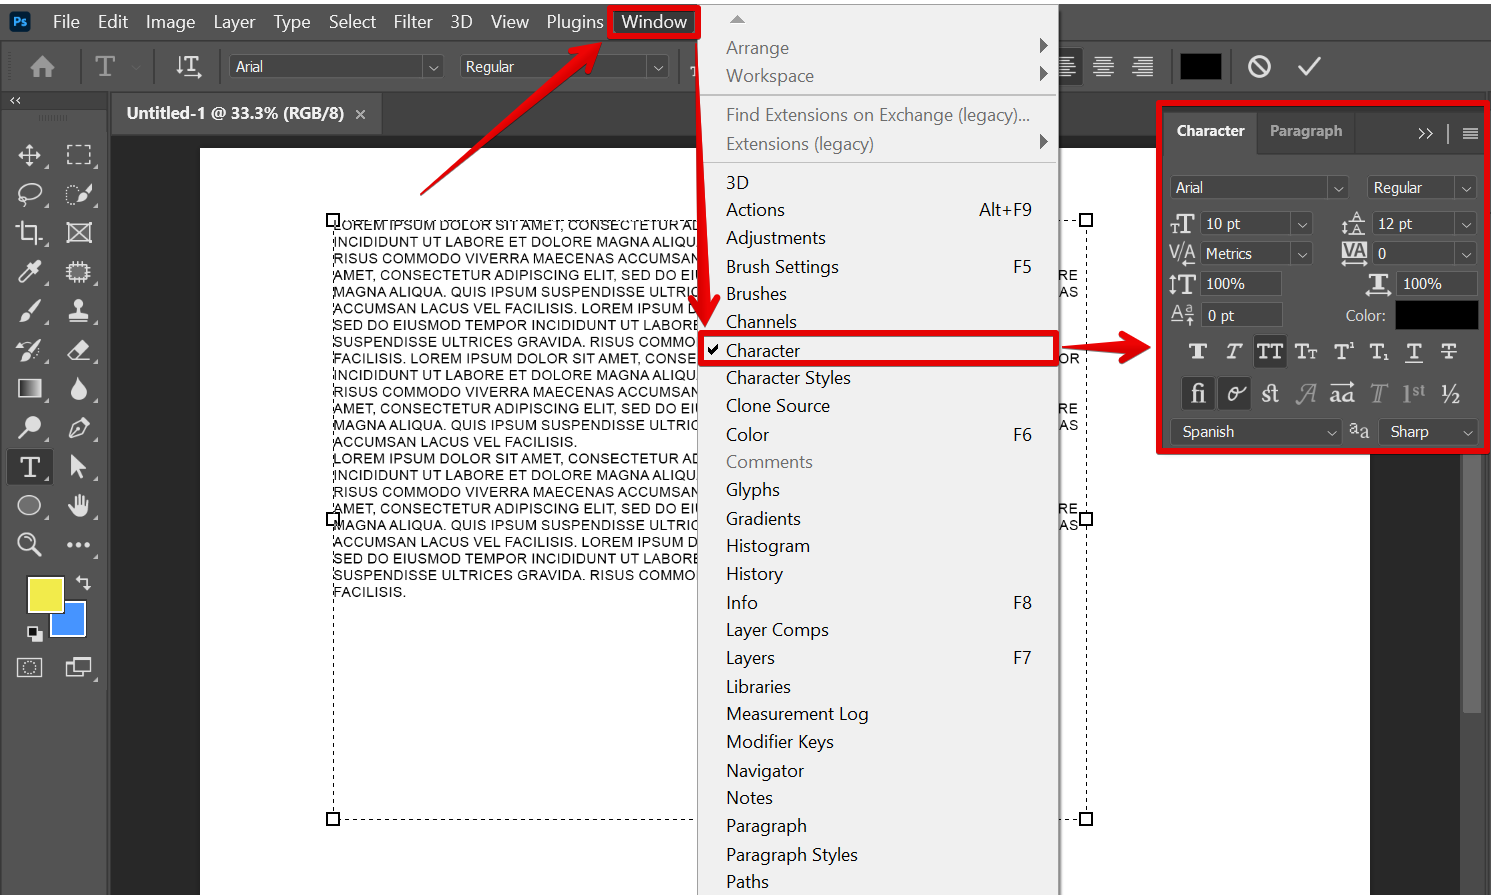
Then, in the Character panel, open the drop-down menu for the “Leading” option and enter the desired amount of space between the lines.
NOTE: Make sure that your text is highlighted before doing this step.
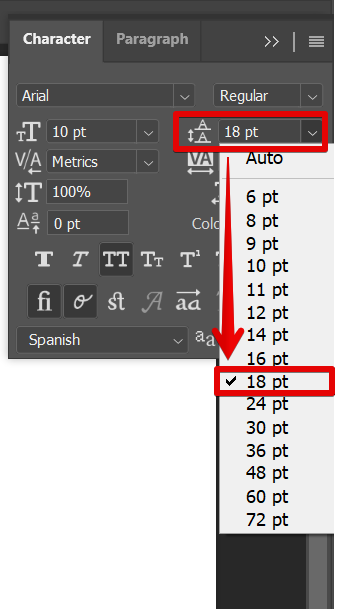
And that’s it! The line spacing will then be automatically applied to your text.

PRO TIP: When adjusting the spacing between lines of text in Photoshop, be sure to select the correct layer in the Layers panel. Otherwise, you may inadvertently change the spacing for all text layers.
Conclusion:
Changing the spacing between the lines in Photoshop is quick and easy. To change the spacing between lines of text in Photoshop, use the “Leading” option in the Character panel and this will automatically be applied to your highlighted text.
5 Related Question Answers Found
There are two types of line spacing in Photoshop: leading and paragraph spacing. Leading is the space between the lines of your text, while paragraph spacing is the space between paragraphs. You can adjust both types of line spacing using the Character panel or the Paragraph panel.
There are a few ways to slant text in Photoshop, and the best method depends on the effect you’re going for. If you want to create simple, understated text, the best approach is to use the Horizontal Type tool and then click and drag to create a slanted baseline. For more dramatic text, try using the Warp Text tool.
There are many ways to style text on a web page, but the most common method is to use HTML tags. The three most common tags are the < p > tag for paragraphs, the < b > tag for bold text, and the < u > tag for underlined text. To skew text in Photoshop, first select the text layer in the Layers panel.
Photoshop is a widely used photo-editing software that offers a number of features and options for users. One of the things that you can do in Photoshop is change the text direction. This can be useful if you want to create a mirror image effect or create text that runs vertically instead of horizontally.
Photoshop is a widely used program for crafting layouts, graphics, logos, and photos. Many people don’t realize that Photoshop can also be used for web design. You can use Photoshop to create website layouts, design website buttons, and even style text.