Creating a checkbox in Figma is a simple process that can be completed in just a few steps. To get started, create a new frame or open an existing one.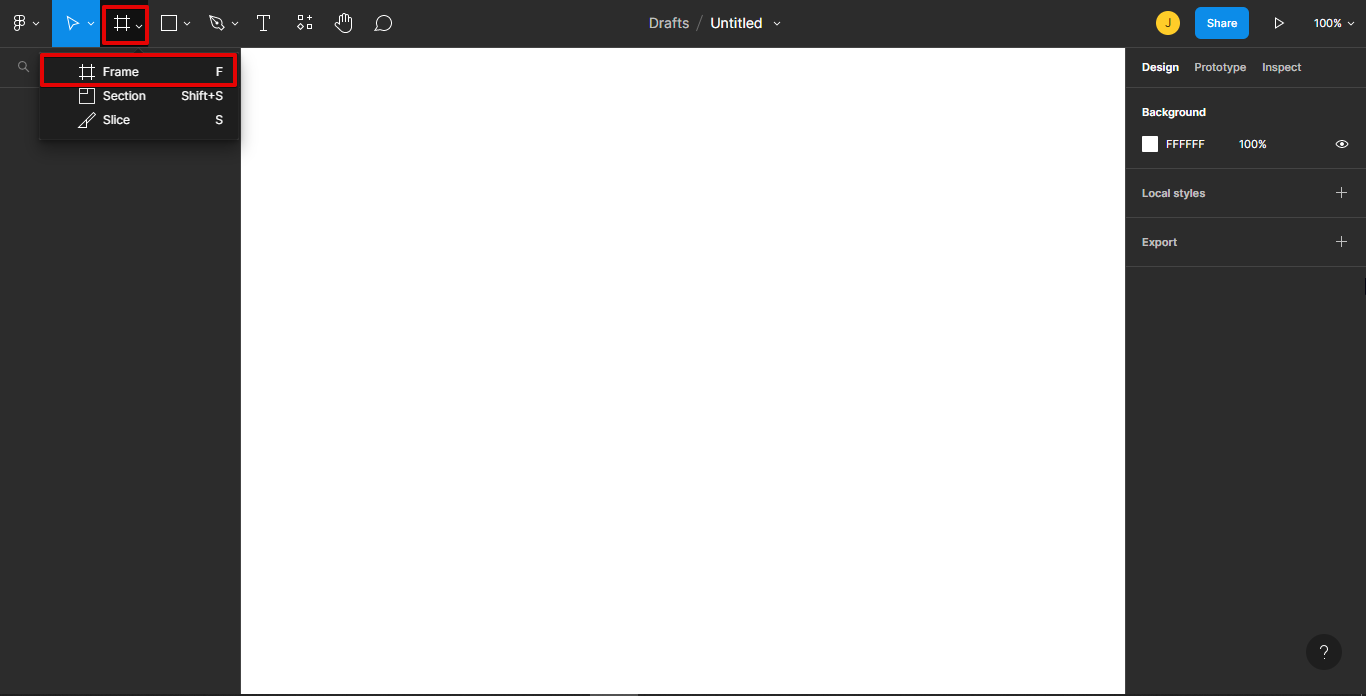 Then, select the Rectangle tool from the toolbar and draw a small square on the frame.
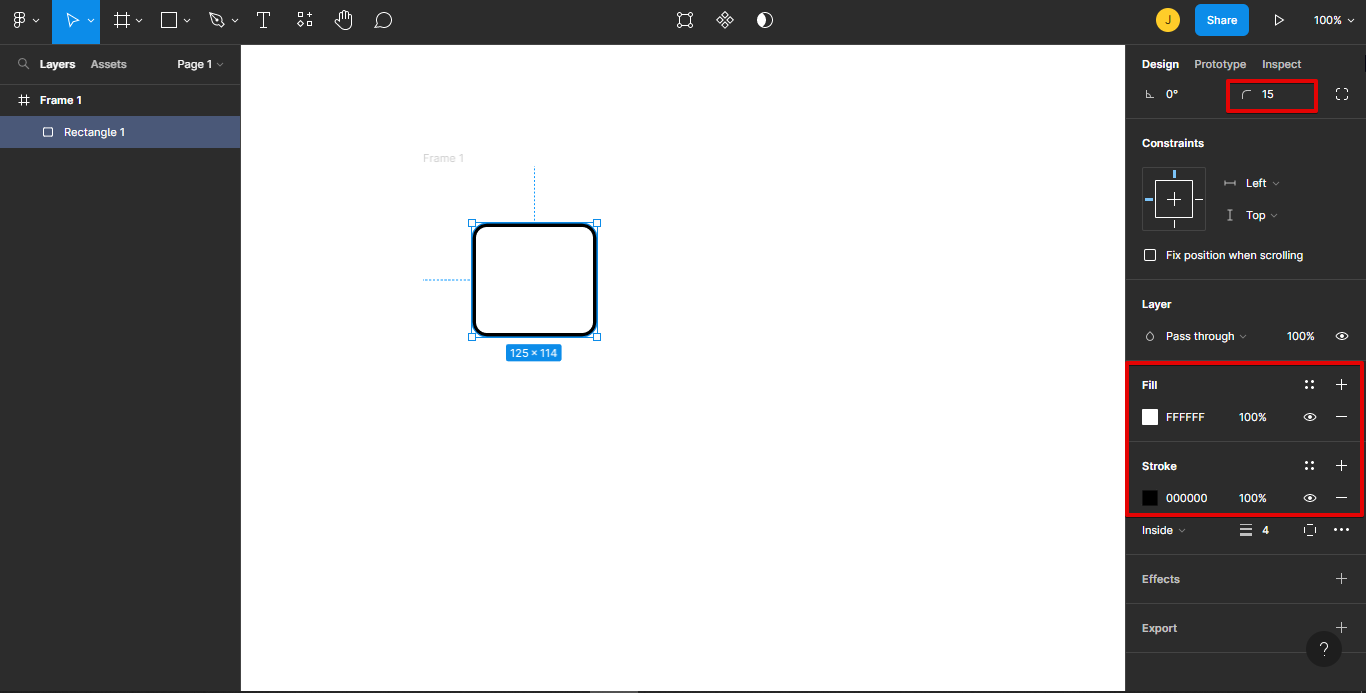
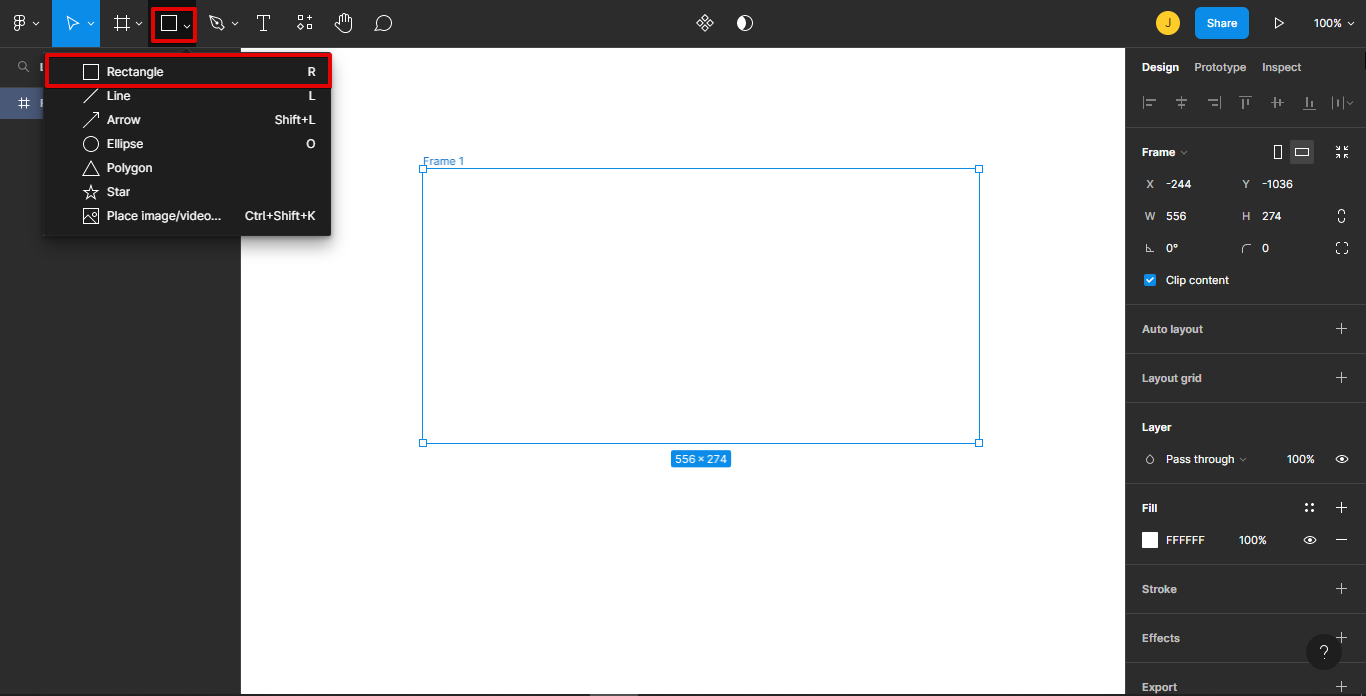 Make adjustments to the square to make it look like a checkbox.
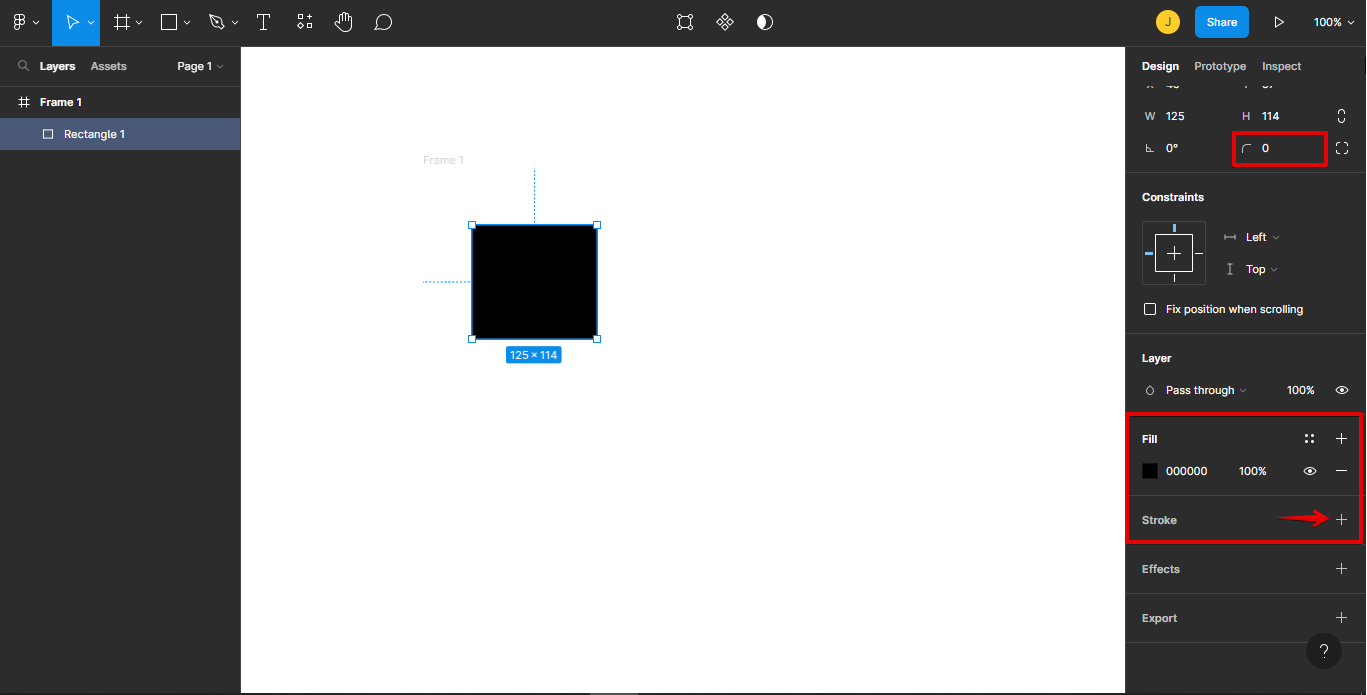
 Next, select the resources icon from the toolbar and click plugins. Type “Iconify” in the search bar to find some check icons.
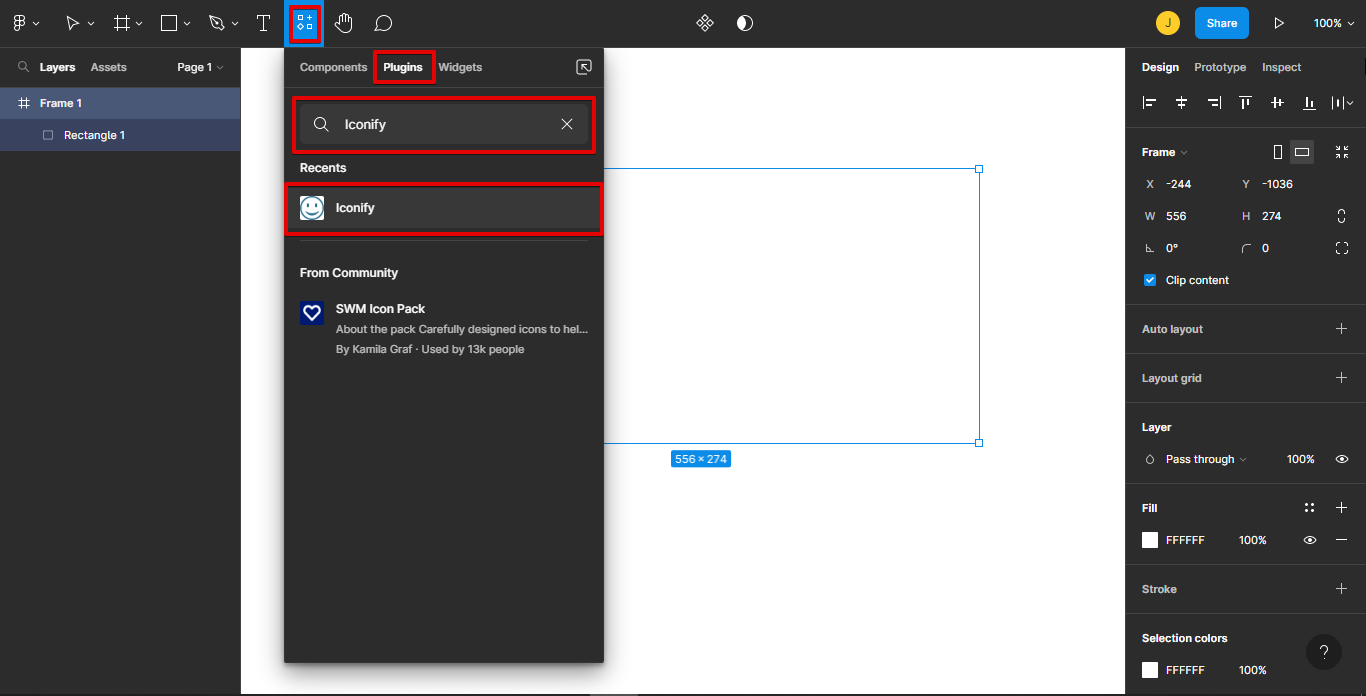 Run the plugin.
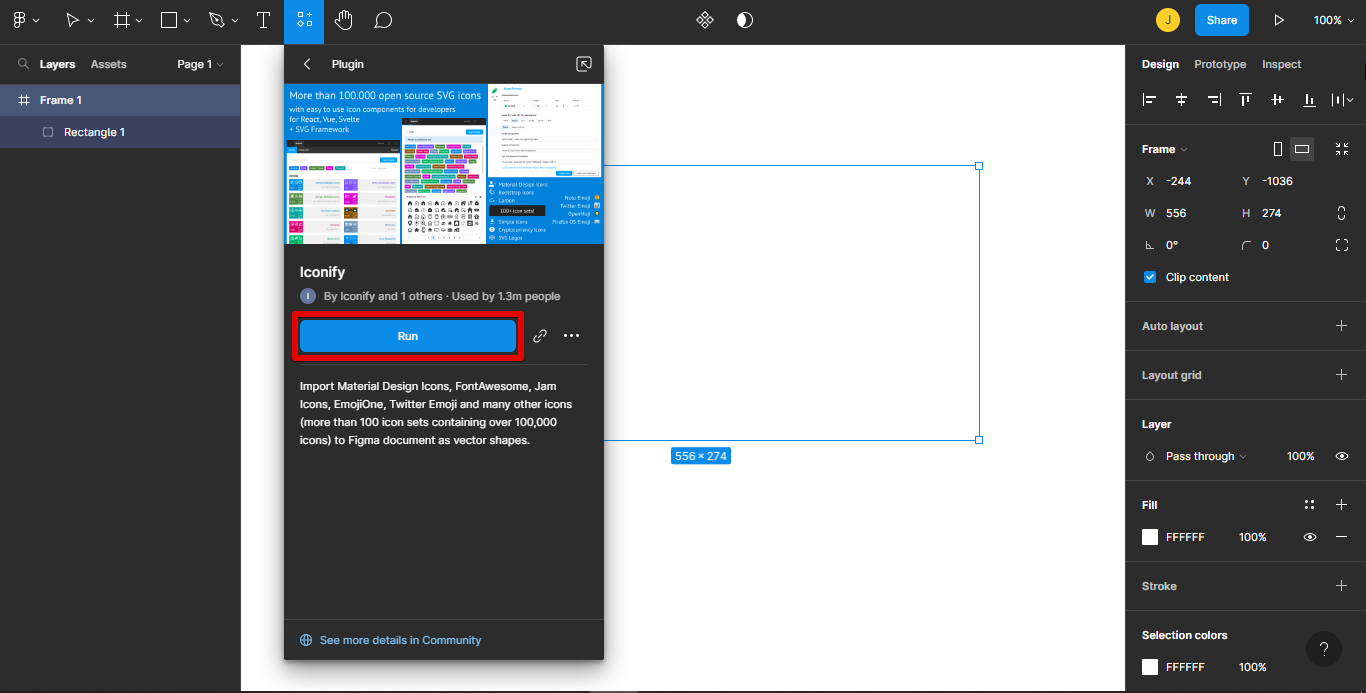 Use the search bar to search for “check” icons and select one of the icons that you want.
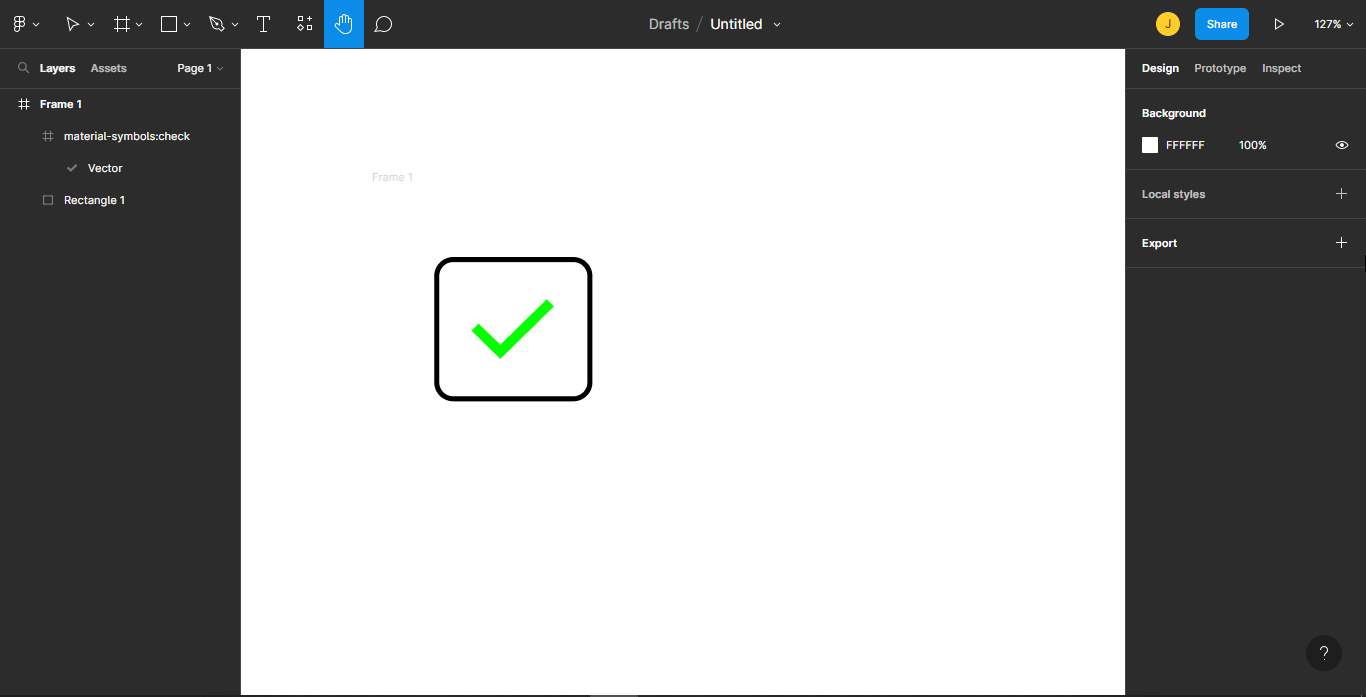
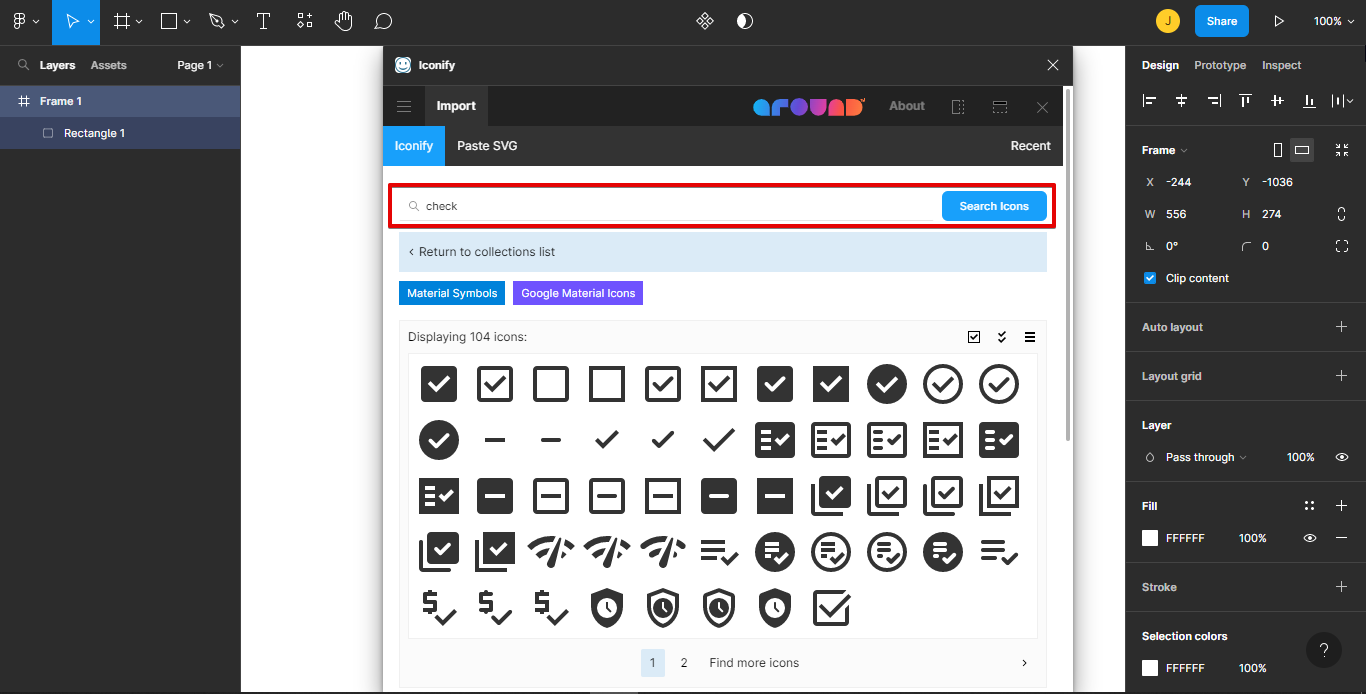 Click “Import Icon”, the icon will be in your Figma file immediately. Close the plugin to check the icon you imported.
 Make adjustments to your check icon using the design tab in the right side panel and then put it inside of the box you created.
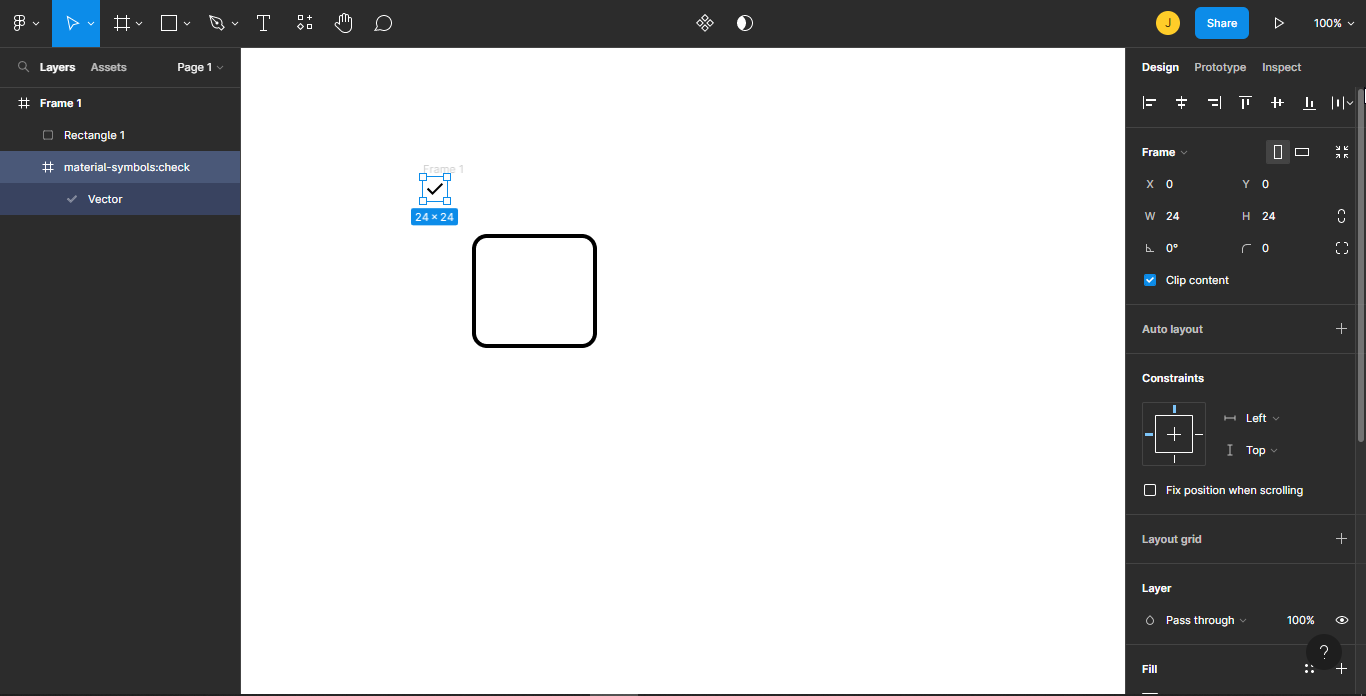
PRO TIP: If you are not familiar with Figma, we recommend that you do not attempt to create a checkbox. This could result in unwanted changes to your design.
Now that you have your checkbox created, you can add some text to it by selecting the Text tool from the toolbar and clicking inside the square. 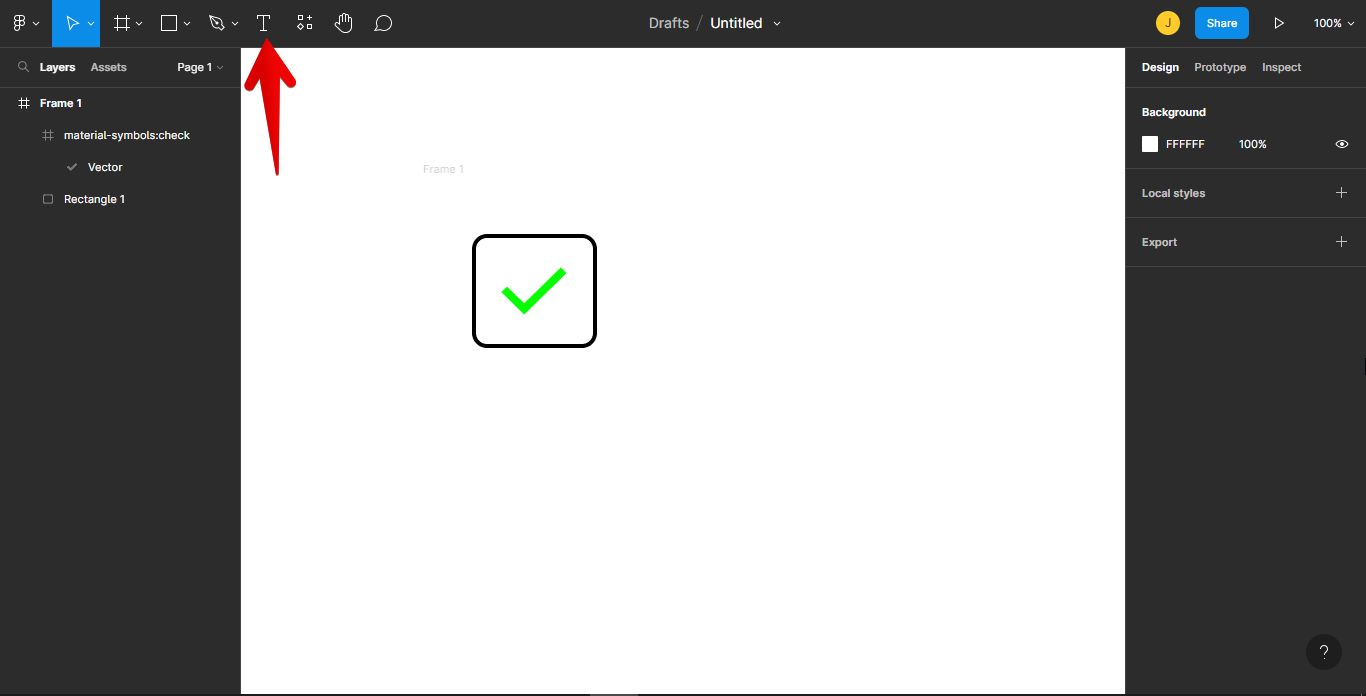 Type out whatever text you want and then hit the Enter key to confirm.
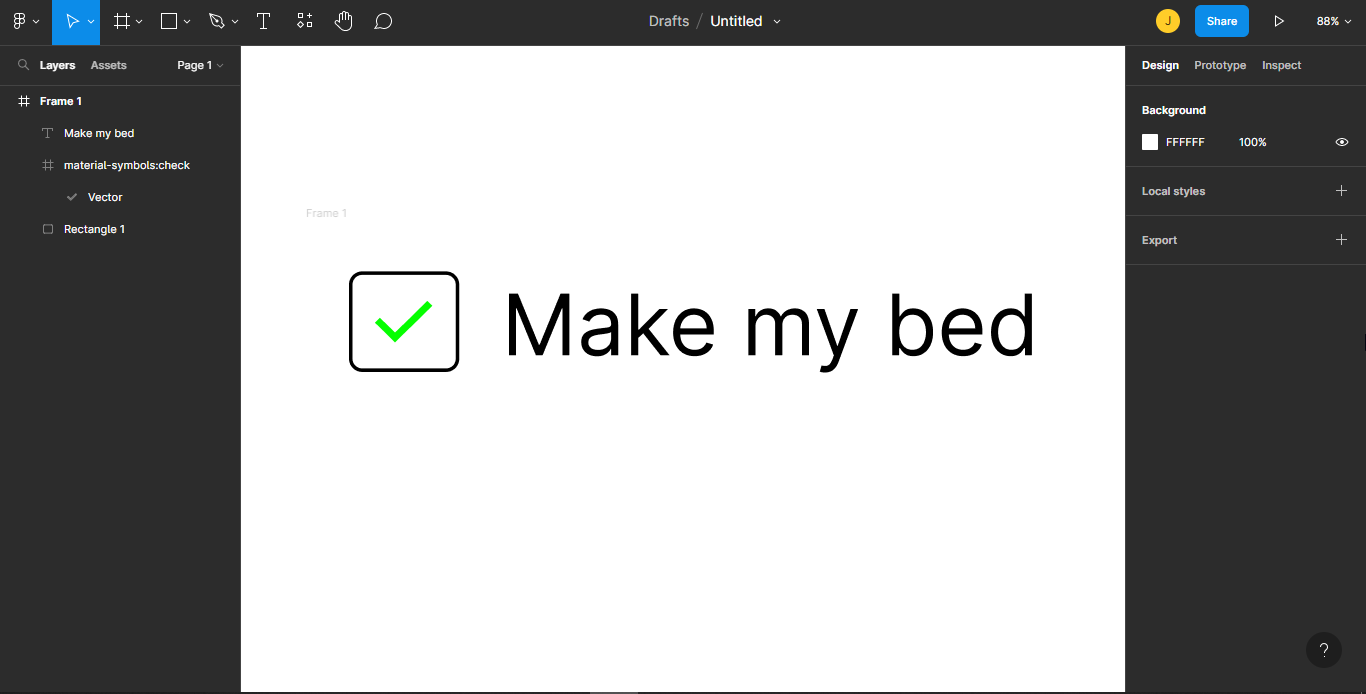 Congratulations! You’ve now successfully created a checkbox in Figma.
10 Related Question Answers Found
There are two types of checkboxes in Figma: the Boolean checkbox and the Radio button. The Boolean checkbox is used for on/off states, while the Radio button is used for mutually exclusive options. To make a Boolean checkbox:
1.
When it comes to design, there are few tools as versatile as Figma. You can use it for everything from wireframing to creating high-fidelity prototypes. And one of the things that makes Figma so versatile is the ability to create custom plugins.
There are two ways to create a text box in Figma. The first is to use the Text tool, which can be found in the toolbar on the left-hand side of the screen. To use the Text tool, simply click and drag to create a text box of any size.
Creating wireframes is a critical part of the web design process. They help you map out the structure of your website and determine which content goes where. But how do you create wireframes?
There are a few ways to create a wireframe in Figma:
1. Click on the “New” button in the toolbar and select “Wireframe”. A new wireframe document will be created.
2.
There are many ways to make a flow diagram in Figma. You can use the built-in shapes library, or you can create your own shapes. You can also use the pen tool to draw your own shapes.
Figma is a vector graphics editor and prototyping tool – the first interface design tool with real-time collaboration. Figma is used by designers at top companies like Google, Facebook, Netflix, Uber, and more. Creating a spreadsheet in Figma is easy!
There are a few things you need to know before you start making a mobile app on Figma. The first is that Figma is a vector drawing and animation software that enables designers to create vector graphics and animations for websites, apps, and games. Second, it’s important to understand the difference between raster and vector graphics before you start using Figma.
Wireframing is the process of creating blueprints for websites or applications. It is a crucial step in the design process, as it allows designers to map out the structure and layout of a project before diving into the visual elements. There are many different ways to create wireframes, but one of the most popular methods is using a digital tool like Figma.
When it comes to design systems, there are a lot of different options and ways to set one up. However, Figma is quickly becoming one of the most popular design tools out there, so it’s important to know how to set up a design system in Figma. Here’s a step-by-step guide:
1.