A hatch pattern is a common technique used by graphic designers to fill in areas with a consistent texture or color. There are many ways to create hatch patterns, but Photoshop offers a simple and easy-to-use method that can be used to create a variety of different hatch patterns.
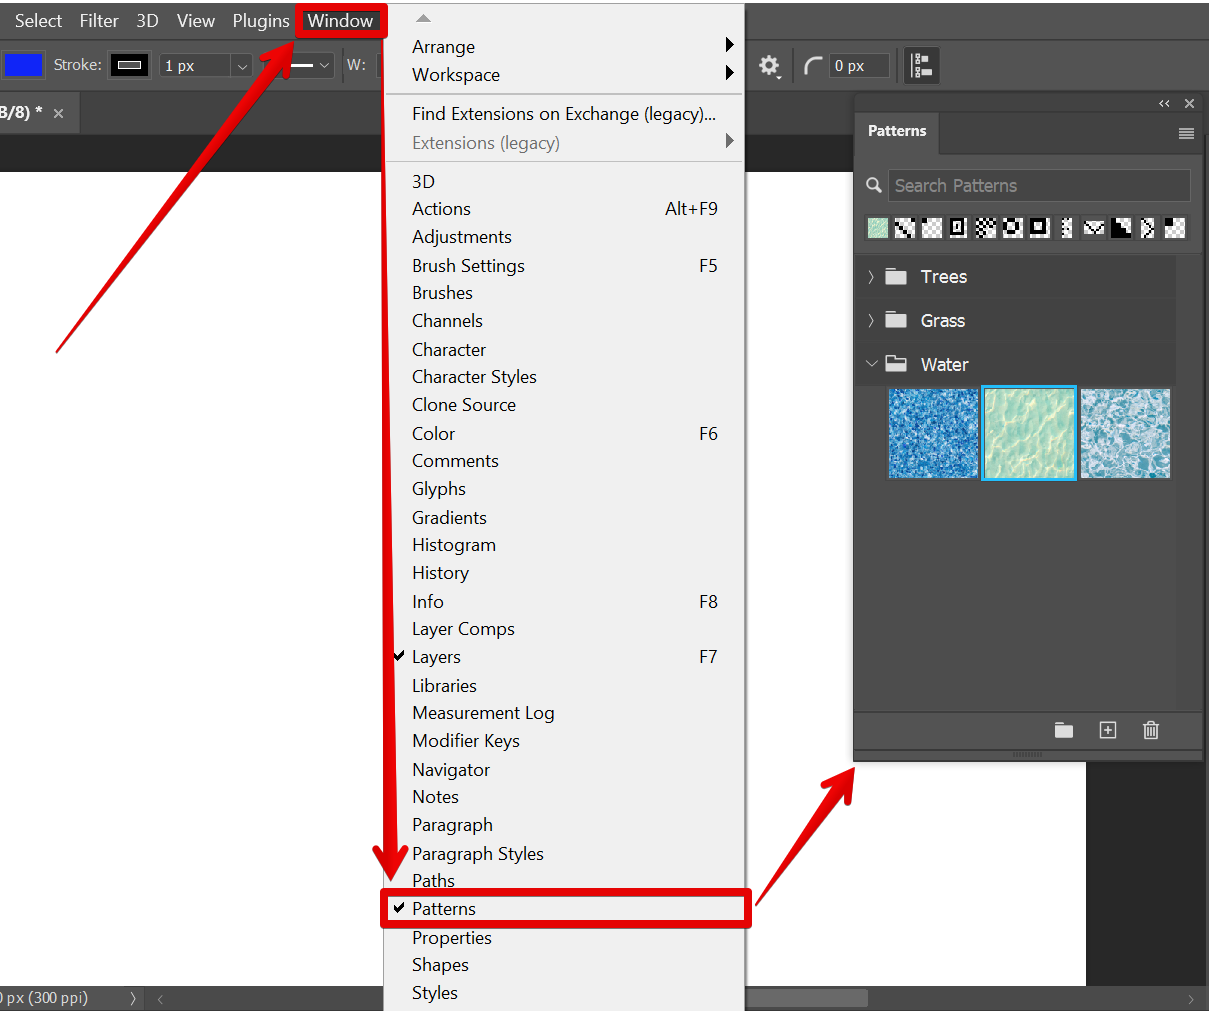
To create a hatch pattern in Photoshop, first, open the “Patterns” menu by going to Window > Patterns.
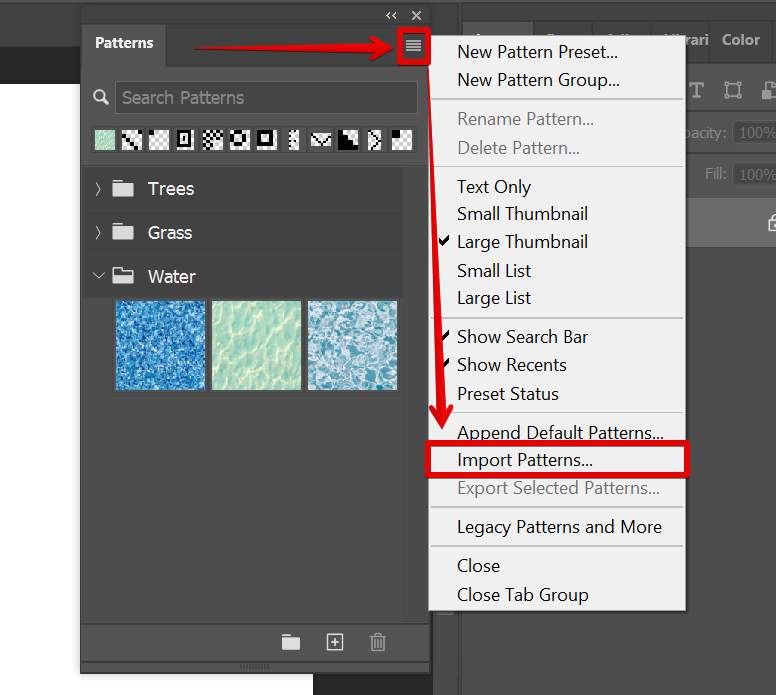
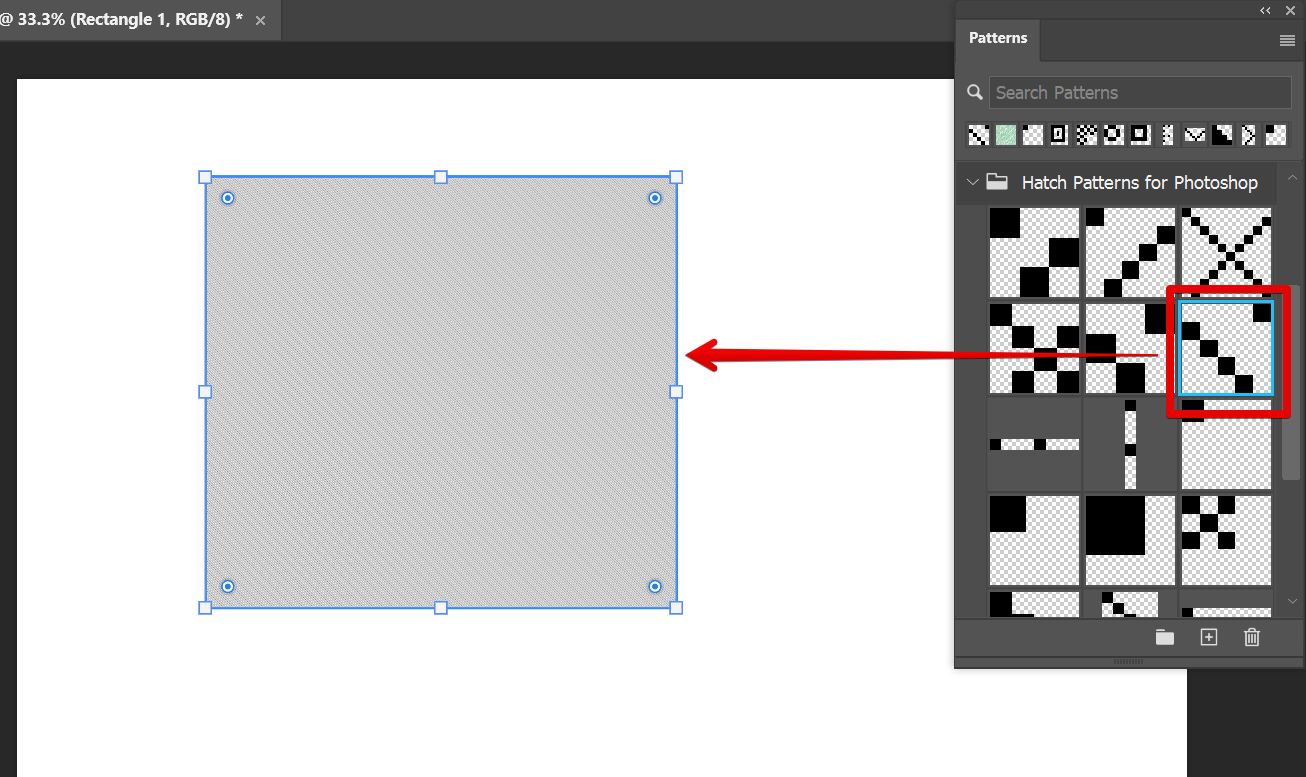
In the upper-right corner of the Patterns menu, click on the dashes icon then select “Import Patterns” from the options.
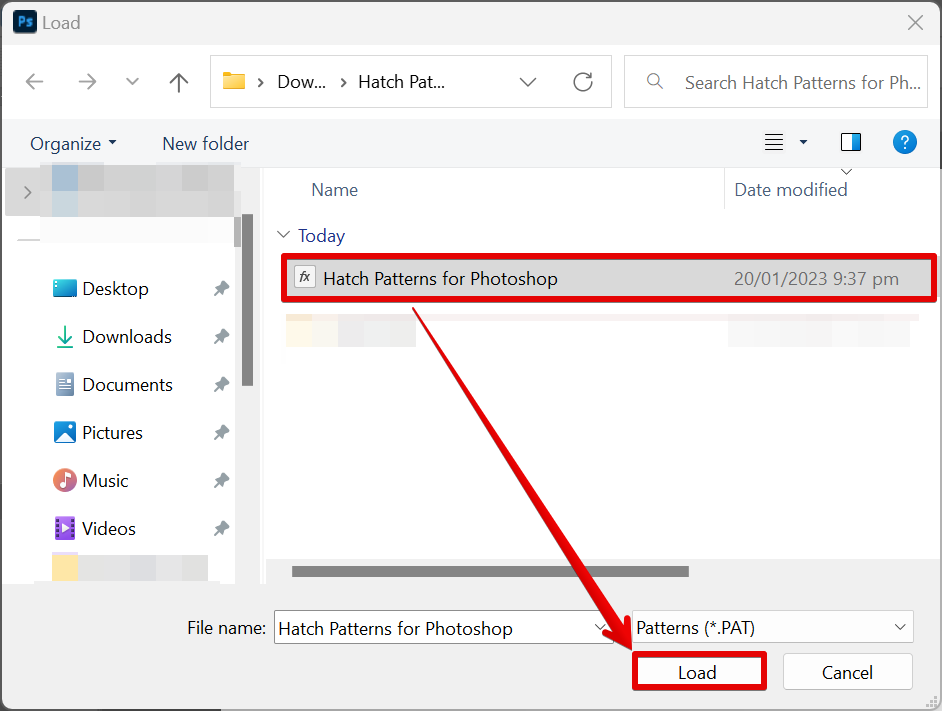
In the Load window that will appear, select the file of the patterns and load it into Photoshop.
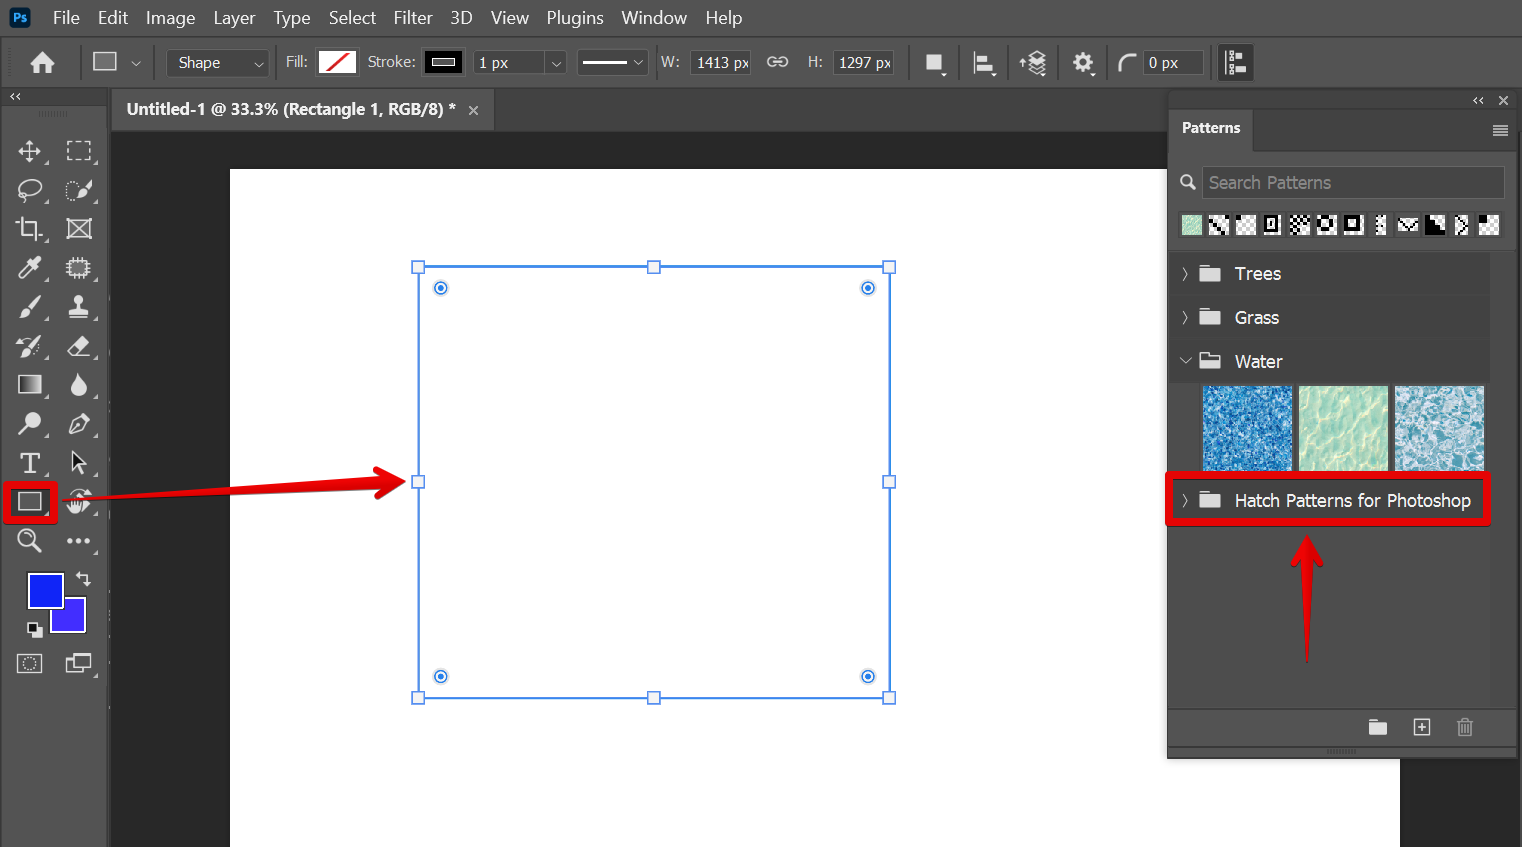
Once loaded, select the “Rectangle Tool” from the toolbar and create a rectangle on your canvas.
Lastly, select the area that you want to fill and click on the pattern that you want to use. Your new hatch pattern will now be applied!
PRO TIP: This tutorial is for creating a hatch pattern in Photoshop, not for using hatch patterns. If you use the instructions in this tutorial to create a hatch pattern and then use that hatch pattern in your design, your design will be full of holes.
Creating hatch patterns in Photoshop is a quick and easy way to add consistent textures or colors to your designs. By using the Patterns menu and the Rectangle tool, you can easily apply your own hatch patterns that can be used in a variety of different projects.
10 Related Question Answers Found
There is one straightforward way that you can turn a path into a shape in Photoshop. That is to create a New Fill Layer. To do this, simply go to the Layers window and create a new fill layer by selecting the icon at the bottom of the window.
There are a few different ways that you can add a flag to your face in Photoshop. One way is to use the Clone Stamp tool. With the Clone Stamp tool selected, hover your mouse over the area of the image that you want to use as the source for the clone.
There are a few different ways that you can make a banner shape in Photoshop. One way is to use the shape tool. With the shape tool, you can make a rectangle, ellipse, or any other shape that you want.
A letter board, or letterpress, is a printing press that uses movable type. Letter boards were the standard method of printing for books and newspapers from the 15th century until the late 19th century. To make a letter board in Photoshop, first select the type tool from the toolbar.
There are many ways to add shapes to Photoshop. One way is to use the shape tools. The shape tools are located in the toolbar on the left side of the screen.
Making a button pin in Photoshop is a fun and easy way to show your style. You can use Photoshop to create a button pin that is truly unique, and that represents your personality perfectly. Here’s how to make a button pin in Photoshop:
1.
To make a starburst shape in Photoshop, first create a new layer. Then use the polygonal lasso tool to draw a starburst shape. To do this, click on the “Polygonal Lasso Tool” icon in the toolbar, and then click on the points where you want the vertices of the starburst to be.
If you have a selection in your image that you want to turn into a shape, there are a few different ways to do it in Photoshop. One way is to use the “Quick Selection” tool to paint over the area you want to select, then click the “Refine Edge” button in the options bar. This will bring up the “Refine Edge” dialog box, where you can choose from a variety of settings to get a perfect selection.
There are many ways to make a food logo in Photoshop. One way is to use the pen tool to create a simple sketch of the food item. Another way is to use the shape tools to create a more complex logo.
Creating a button template in Photoshop is a very simple process. First, create a new file in Photoshop and name it “button.psd”. Next, open the file in Photoshop and create a simple, rectangular object on the Canvas.