When it comes to printing multiple images on one page in Photoshop, there are two main ways that you can go about it. You can either use the built-in Contact Sheet II feature, or you can create your own custom layout. Let’s take a look at both methods so that you can decide which one is right for you.
Method 1: Using the Built-In Contact Sheet II Feature
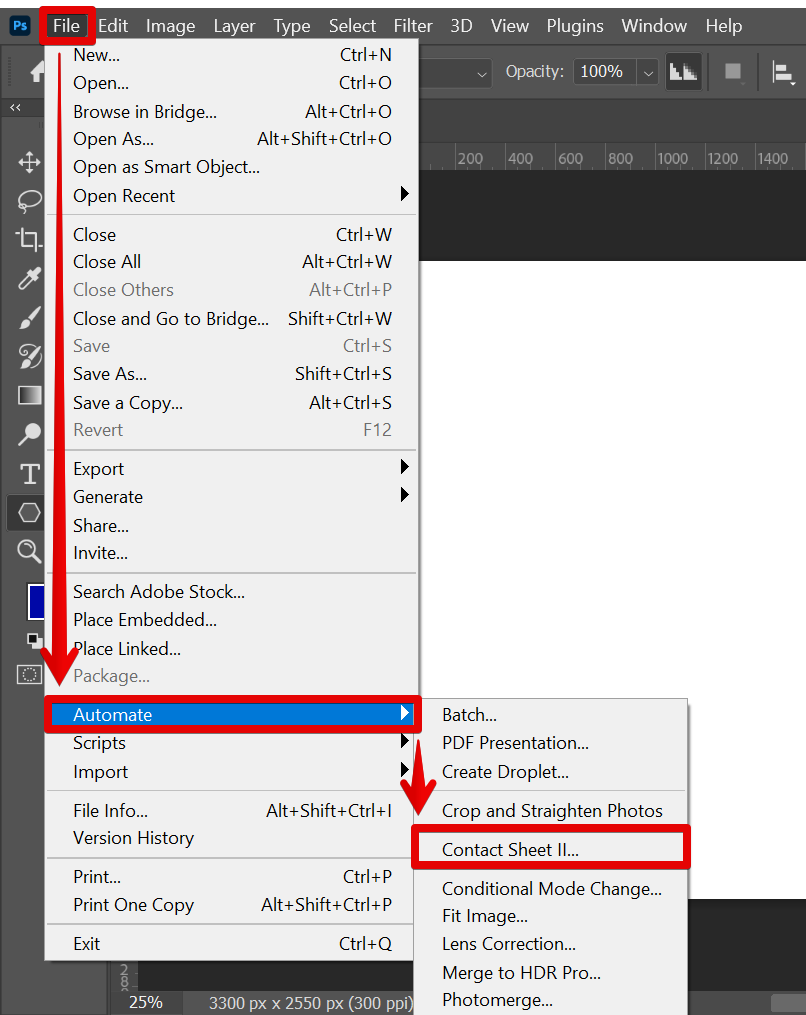
The first method is to use the built-in Contact Sheet II feature. This method is quick and easy, and it produces good results. To use this method, simply open the images that you want to print in Photoshop. Then, go to File > Automate > Contact Sheet II.
A dialog box will appear. In this dialog box, you will need to select the Source Images Folder, which is where your images are located. You can also adjust other settings such as Document, Thumbnails, and Filename settings to create a more personalized feel for your design.
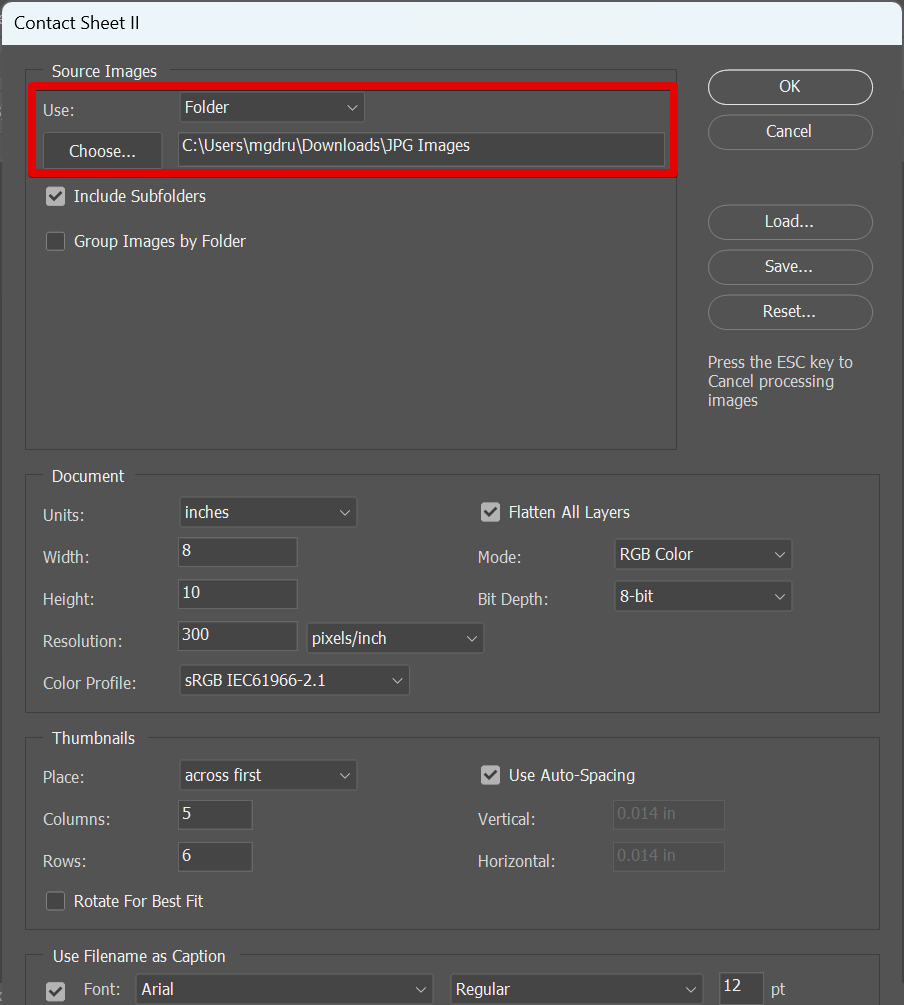
Once you have all of these options set, click OK and Photoshop will do the rest. It will automatically create a contact sheet with your images printed on one page.

Method 2: Creating a Custom Layout
The second method for printing multiple images on one page in Photoshop is to create your own custom layout. This method gives you more control over the final results, but it is also more time-consuming.
To create a custom layout, open the images that you want to print in Photoshop. Then, go to File > New and create a new document. The size of this document will depend on how many images you want to print and the size of those images.

Once you have created a new document, add your images to this document. You can do this by dragging and dropping them from the Source Images Folder into the new document.
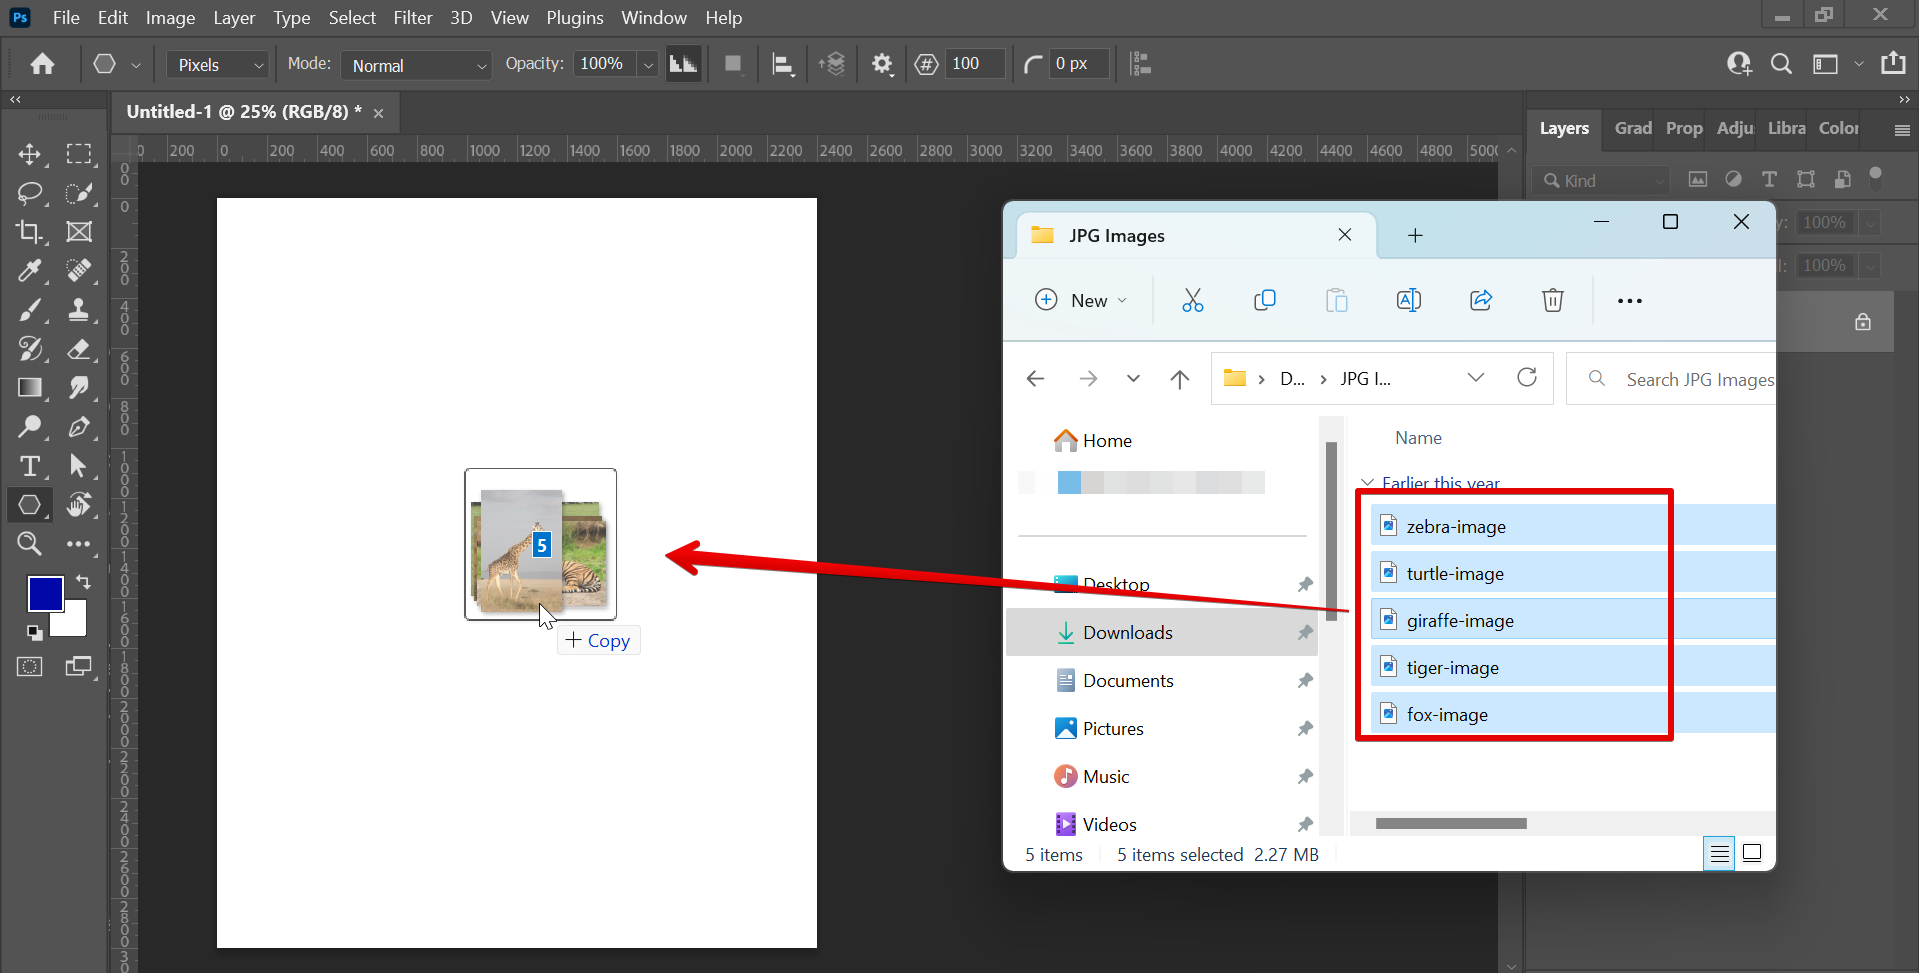
Once they are added, you can arrange them however you like.
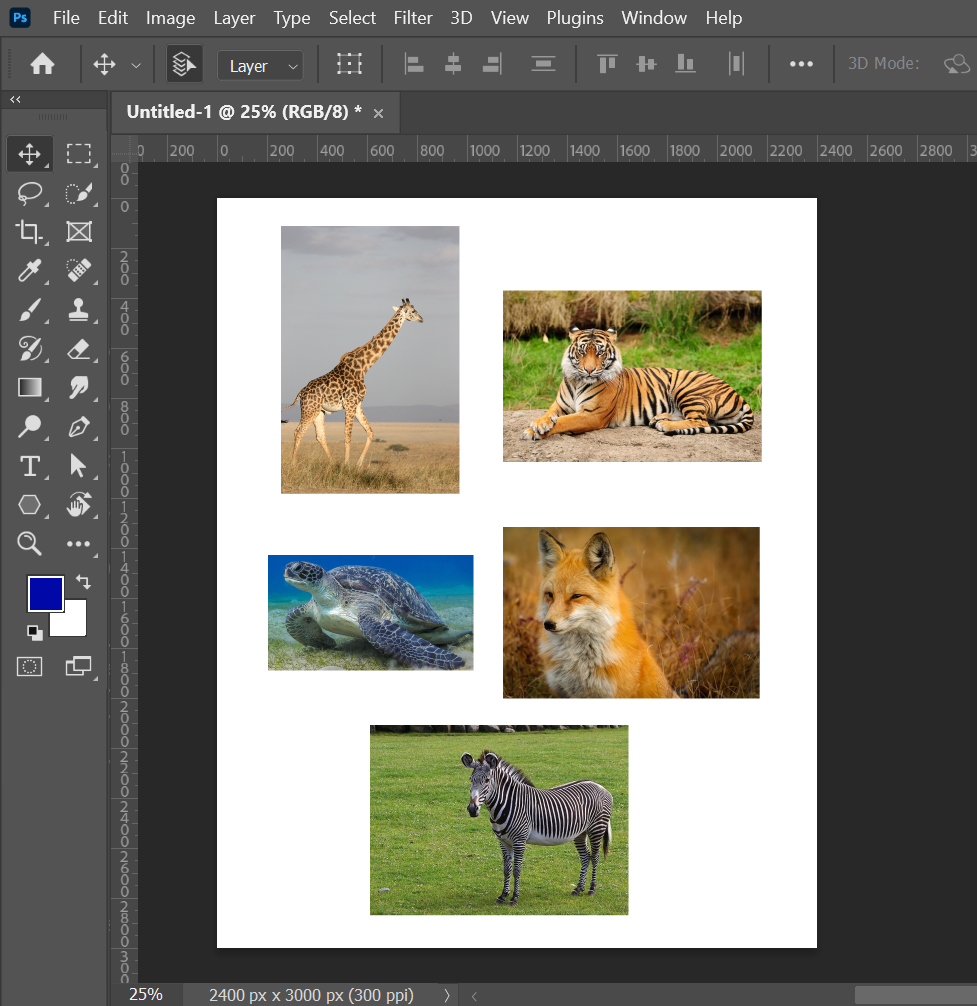
When you are happy with the layout, go to File > Print and select the printer that you want to use.
In the Print Settings dialog box, make sure to choose your preferred Printer Setup and Color Management settings. Then, click Print and Photoshop will print your images onto one page.

Conclusion
So there you have it! Two methods for printing multiple images on one page in Photoshop.
Which method you use will depend on your needs and preferences. If you want something quick and easy, then use the built-in Contact Sheet II feature. If you want more control over the final results, then create your own custom layout.