If you’re new to Illustrator, or if you’re looking to improve your skills, you might be wondering how to emboss text or shapes. In this article, we’ll show you how to emboss text and shapes in Illustrator, step-by-step.
Before we get started, it is important to know a few things about Illustrator’s embossing features.
First, embossing is a type of texturing that creates a raised effect on the surface of an object. It’s used to add a bit of texture and dimension to a design and can be used to create titles, headings, and other text-based elements.
Second, the type of embossing you use will affect the appearance of the text or shape. You can emboss with a flat, or raised, effect, and you can use either the Normal or the Embossing options in the Text or Shape options bar.
Now, let’s get started.
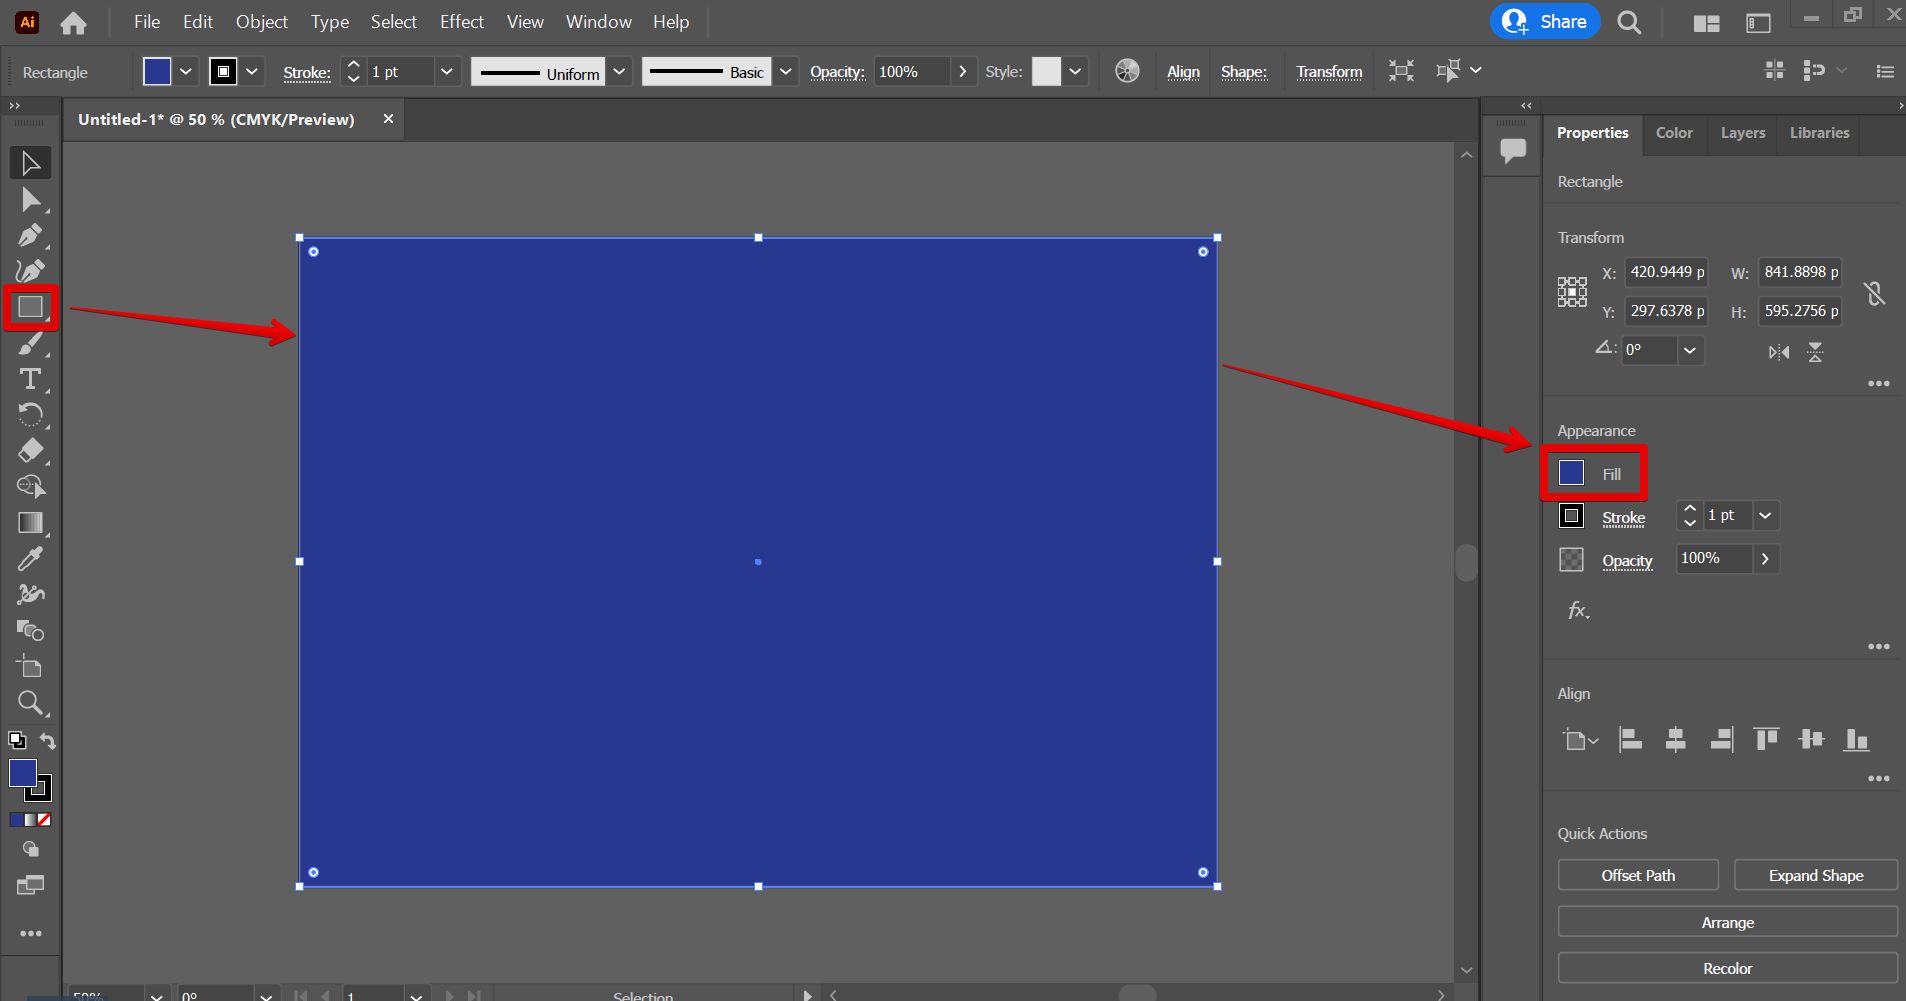
1. Put a Background Color
To emboss text, you’ll first need to create a canvas in Illustrator. Then, put a background color on the canvas using the “Rectangle tool” and the “Fill” option in the “Appearance” window.
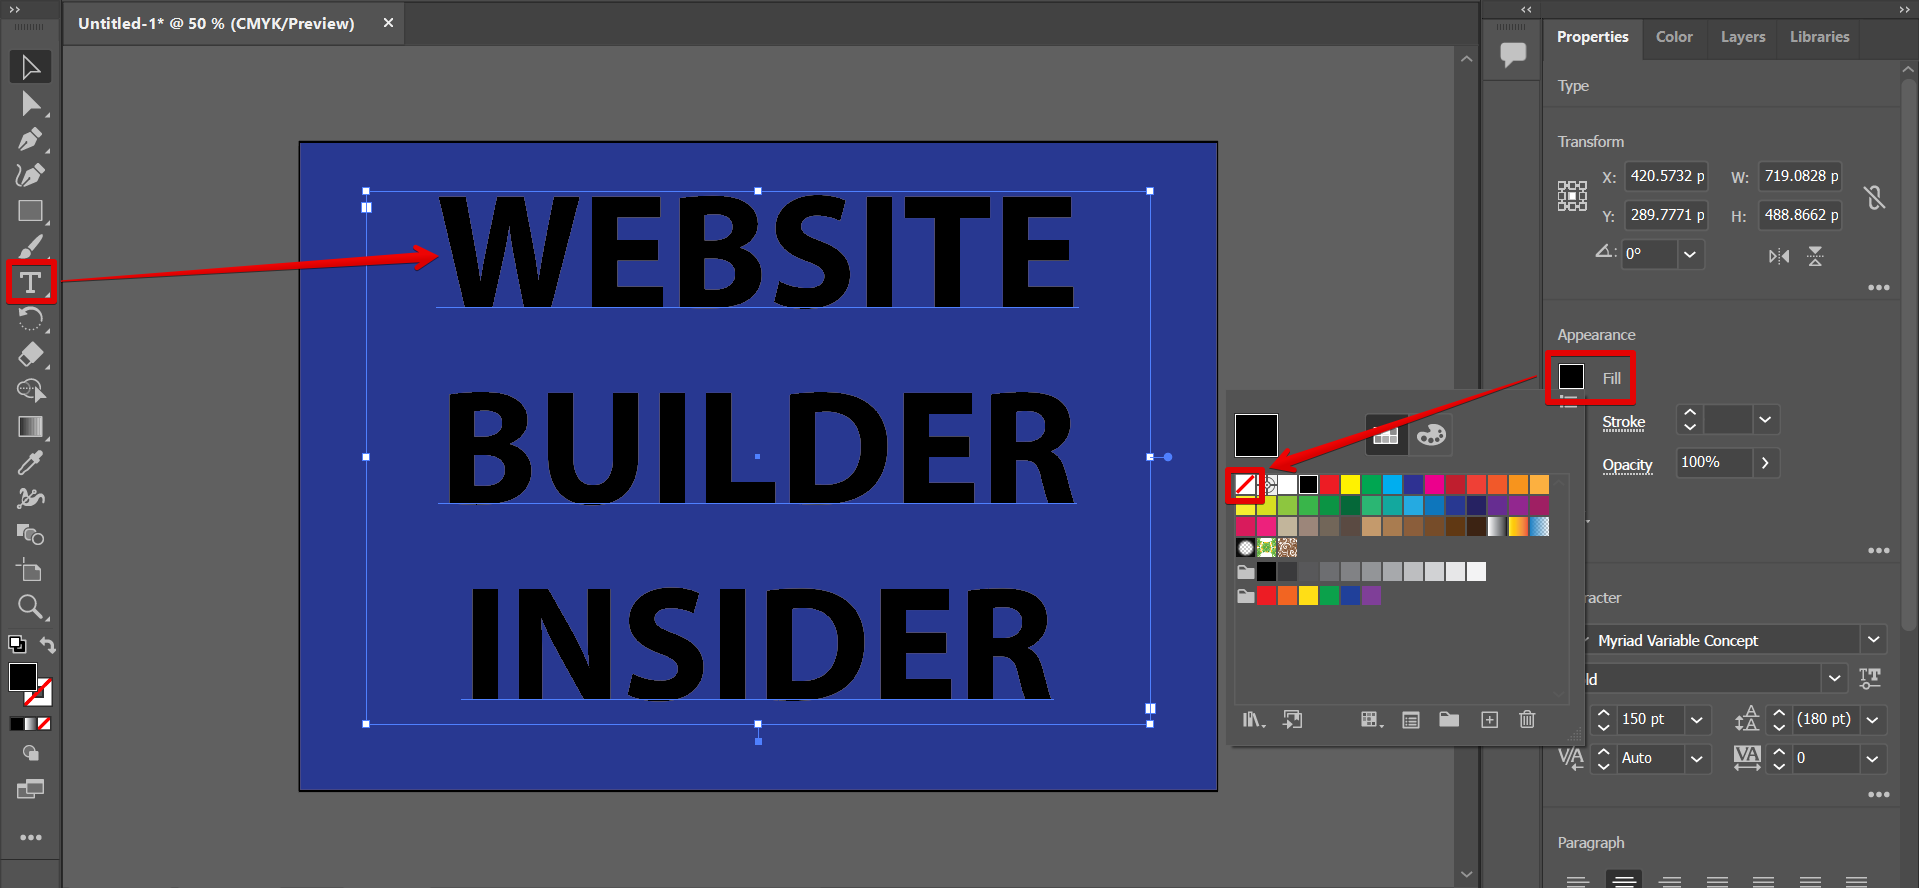
2. Input Text and Disable its Fill Layer
Now, input your text using the “Type tool.” Then, disable the current fill of your text.
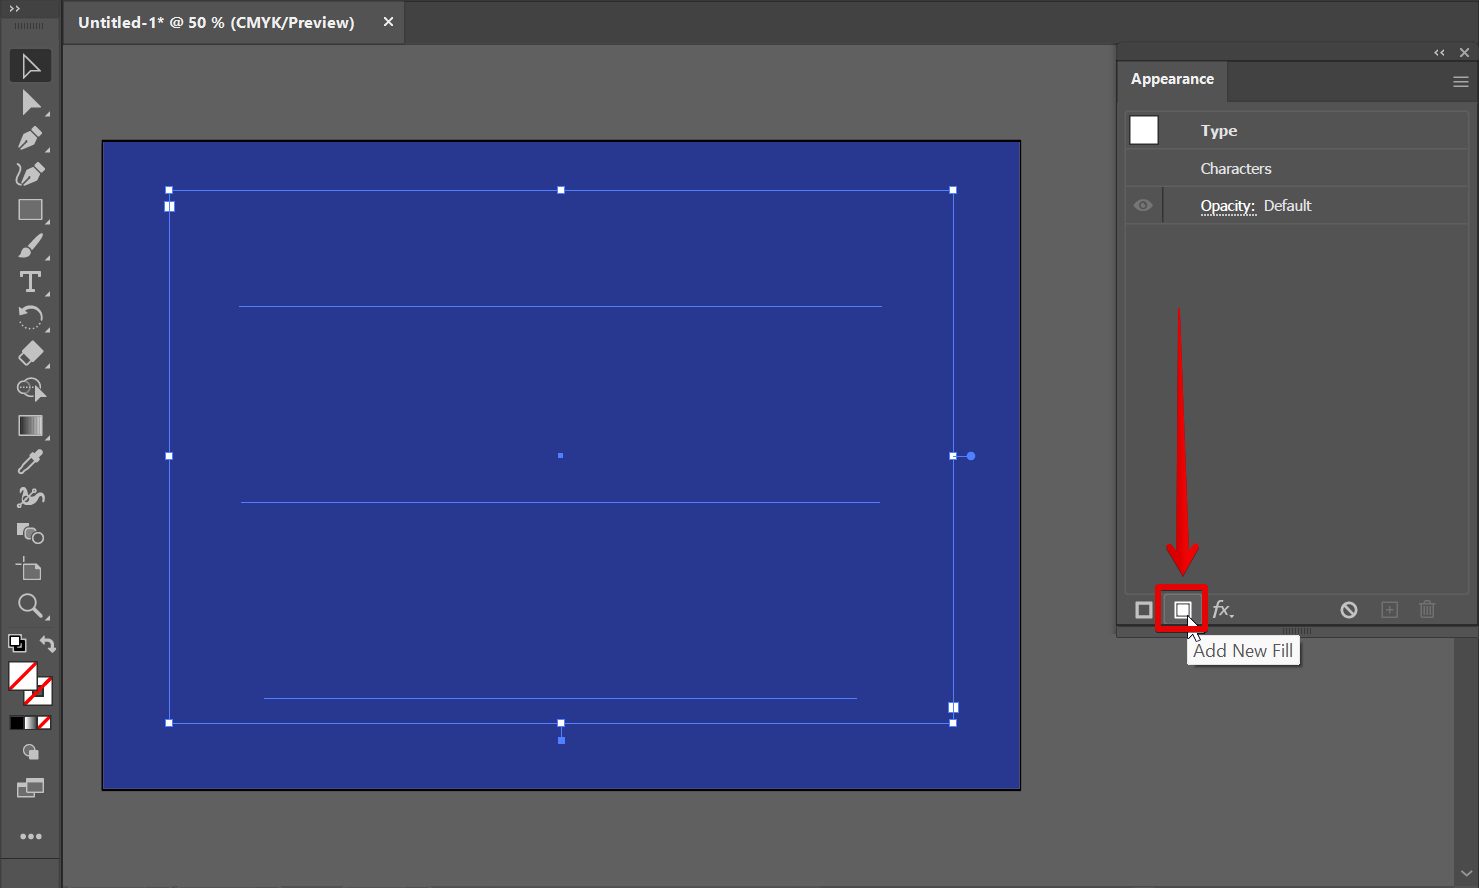
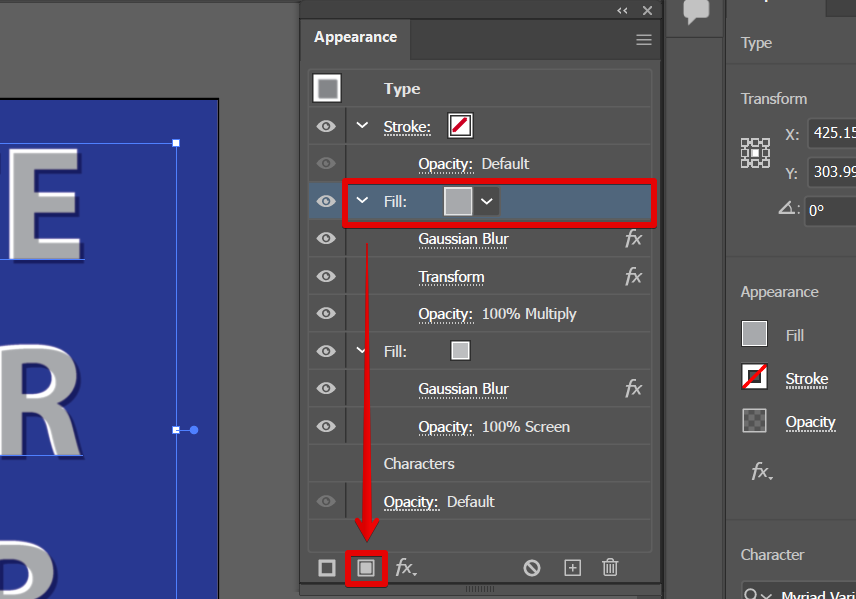
3. Create a New Fill Layer (Top Layer) for the Text
The next step is to create a new fill of your text in the “Appearance” window. This is where we will start adjusting the settings of the text to be embossed.
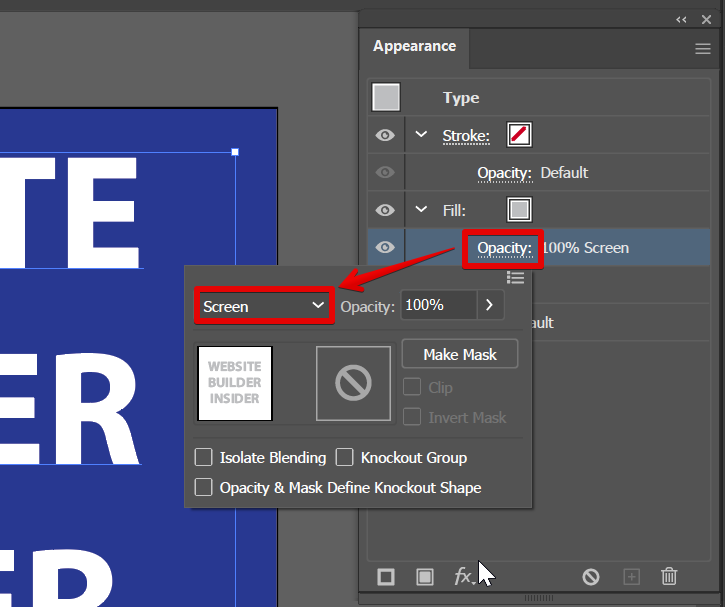
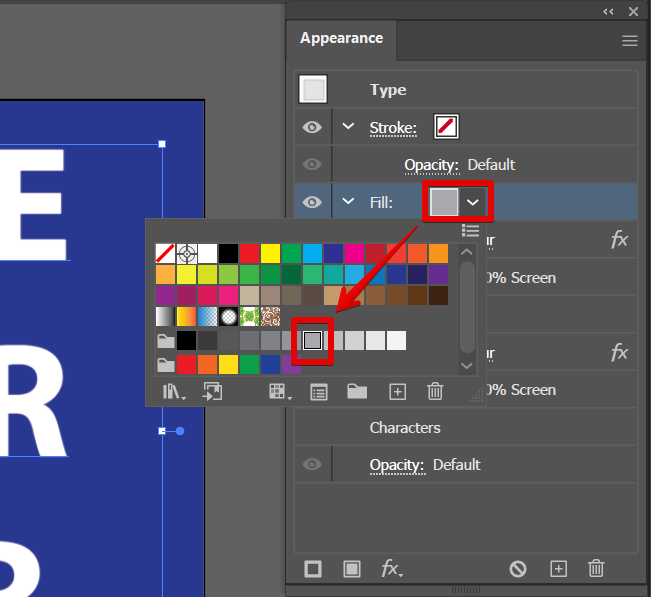
Now, select the light gray color for this new fill.

Click on “Opacity” and change the blending mode settings to “Screen.”
For the next steps to take effect with the top fill layer, make sure that it is selected before proceeding. Now go to Effect > Blur > Gaussian Blur.
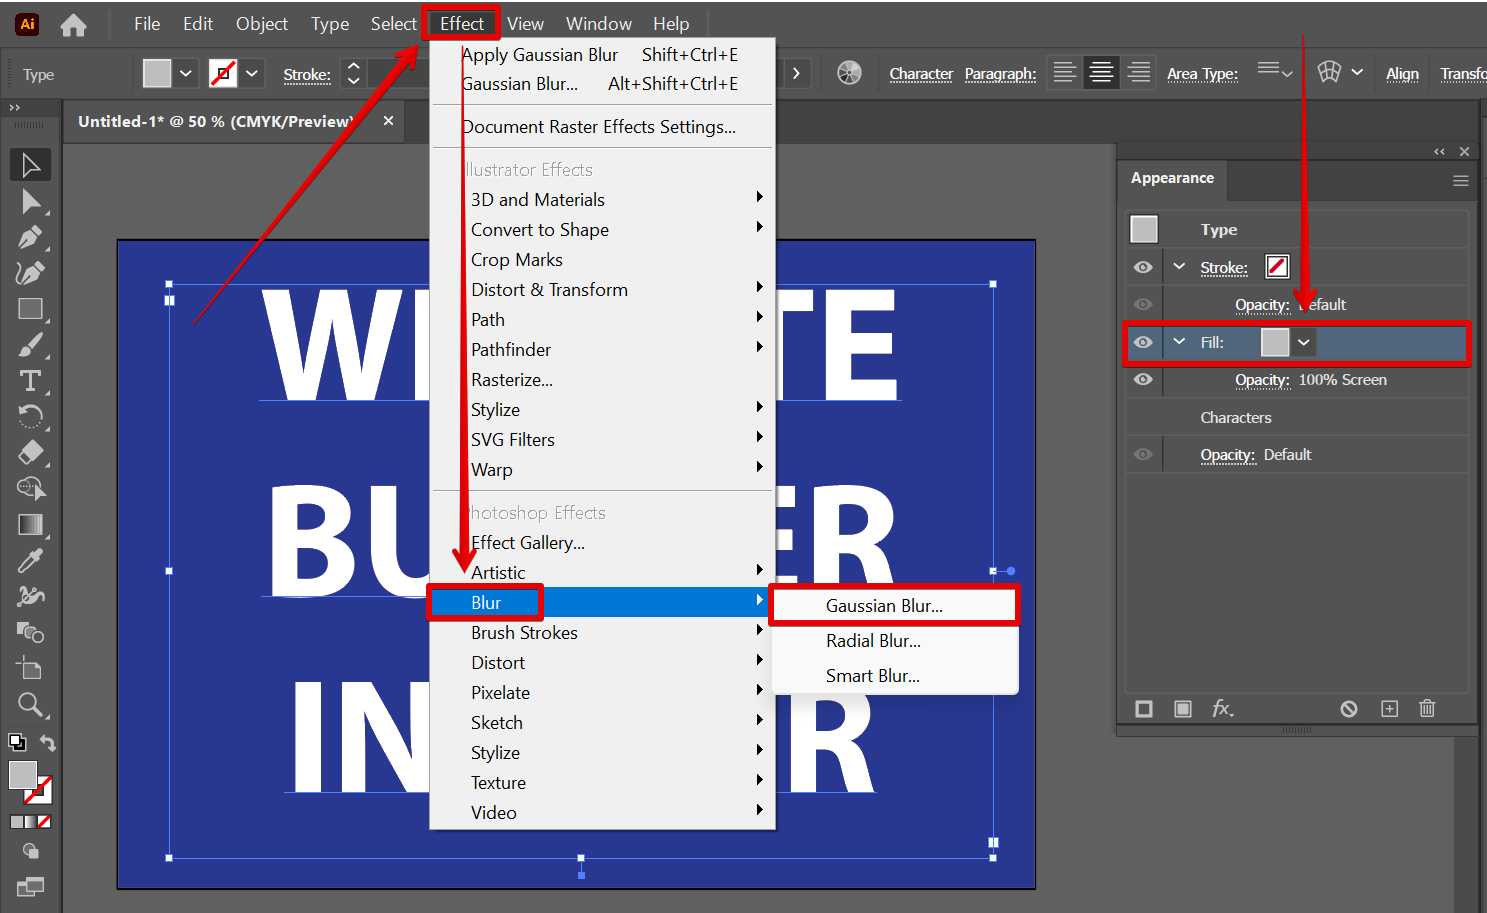
In the window that will appear, change the radius to 2 pixels then click “Ok.”
![]()
4. Duplicate the Top Fill Layer
To create shadows, we need to duplicate the settings of the layer that we did to continuously change the settings of the top layer. You can duplicate the layer by dragging it to the second icon of the bottom-right portion of the “Appearance” window.
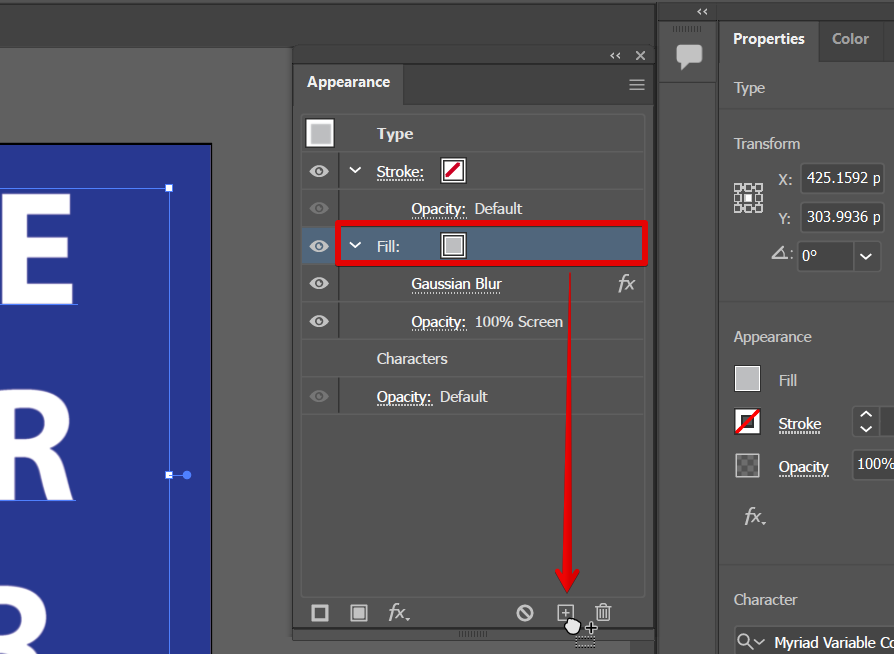
5. Adjust the Settings of the Top Fill Layer
Once done with the duplication, we need to adjust the top fill layer’s settings again. With the top fill layer still selected, change the fill color to a darker shade of gray.
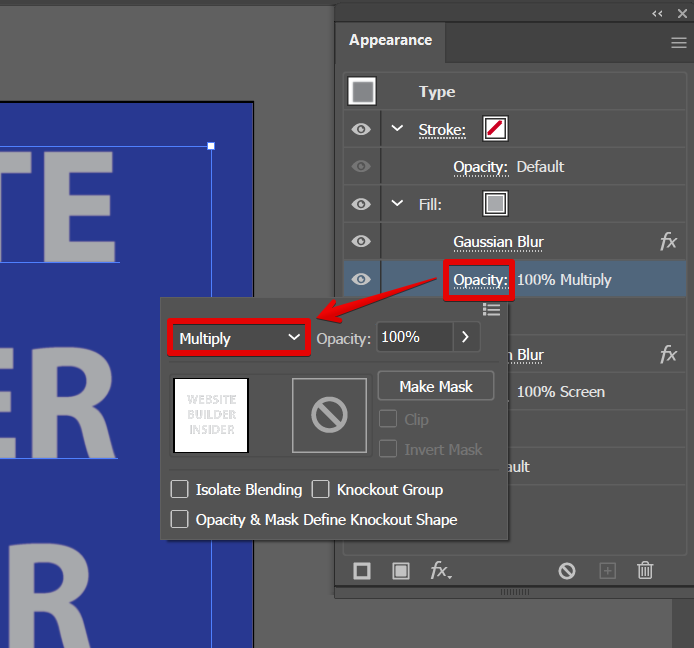
Then, click on “Opacity” and change the blending mode to “Multiply.”
For the next step, make sure that the top fill layer is still selected. Now, go to Effect > Distort and Transform > Transform.
![]()
In the “Transform” window, check the preview box, then set the “Move” values for both horizontal and vertical to 4.
![]()
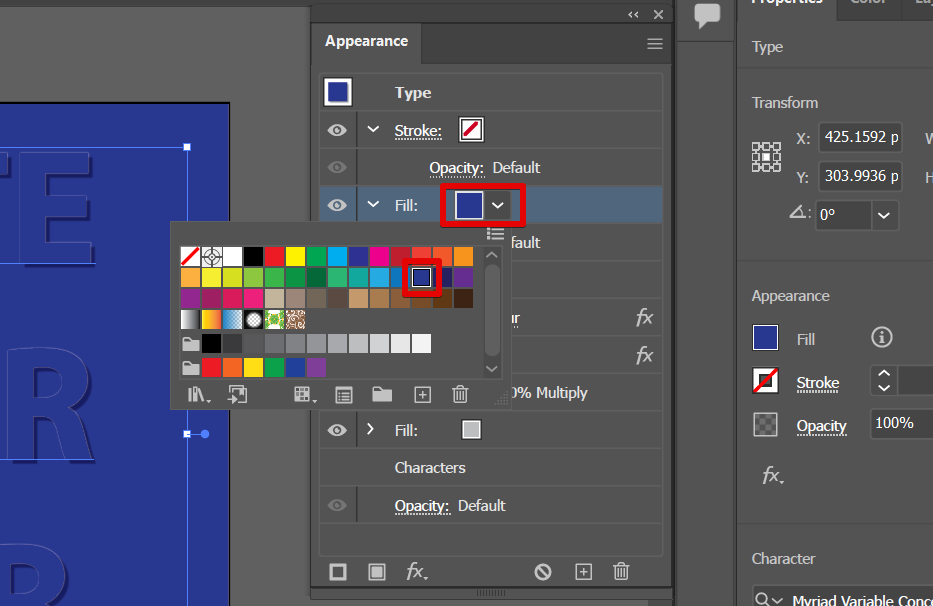
6. Create a New Fill Layer above the Top Layer with the Same Color as the Background
Next is to click on the top fill layer again and add a new fill layer.
Change the new fill layer’s color to the same color as the background.
7. Change the Settings of the Last Fill Layer
For the next step, select the last fill layer (with the light gray color), then go to Effect > Distort and Transform > Transform.
![]()
Lastly, in the “Transform” window, change the move values to -2.
![]()
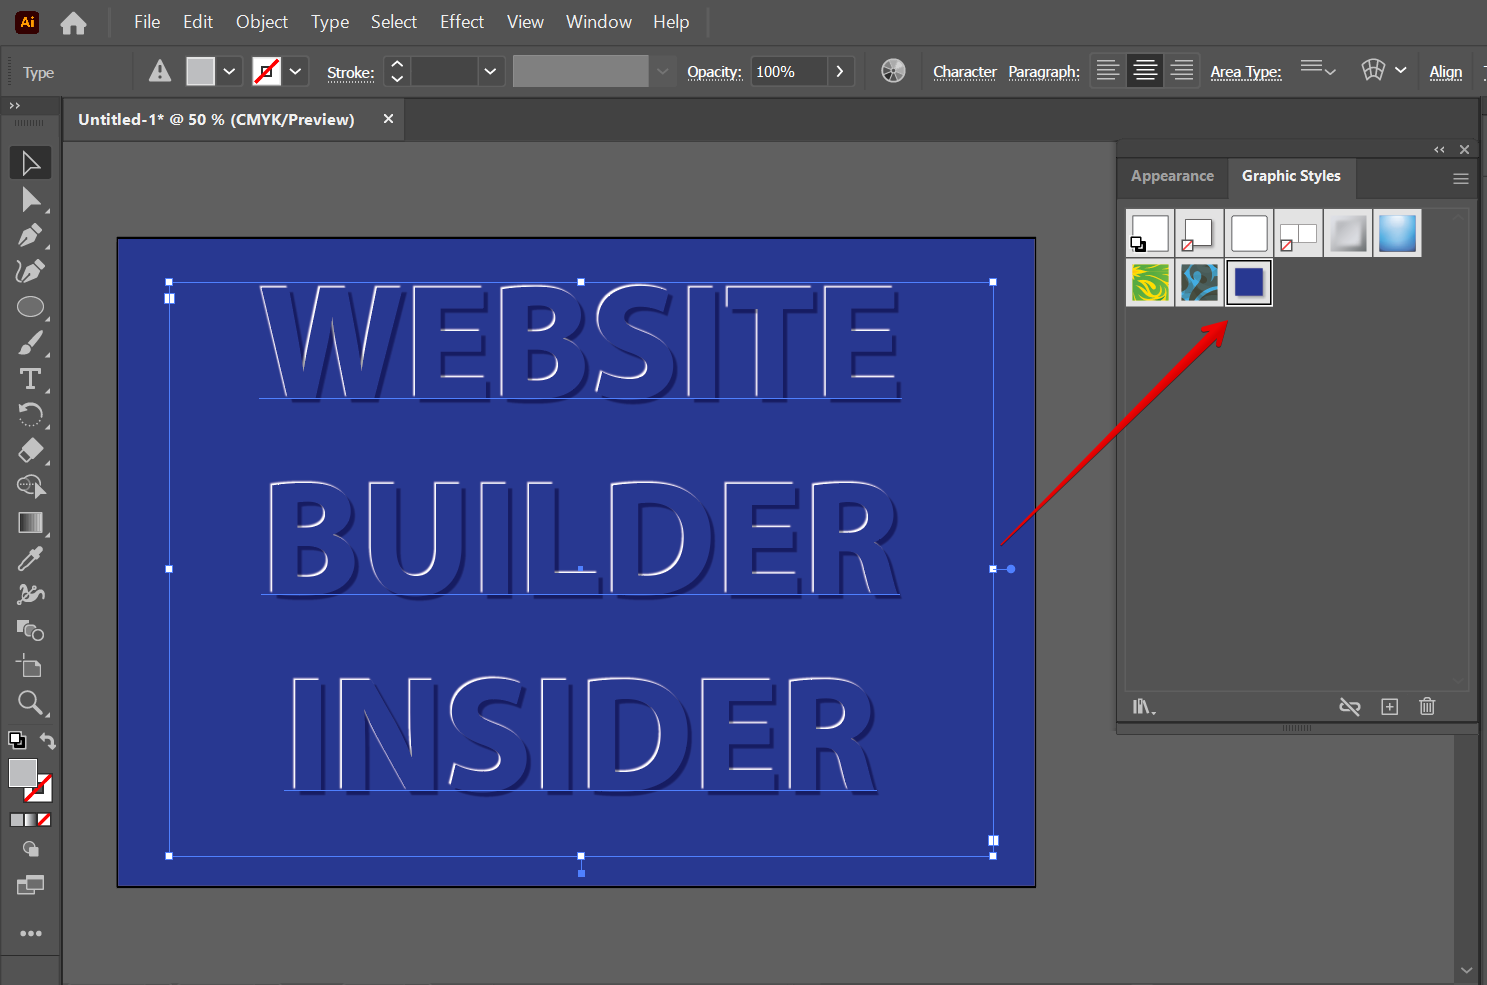
Congratulations! You’ve now embossed your text in Illustrator.

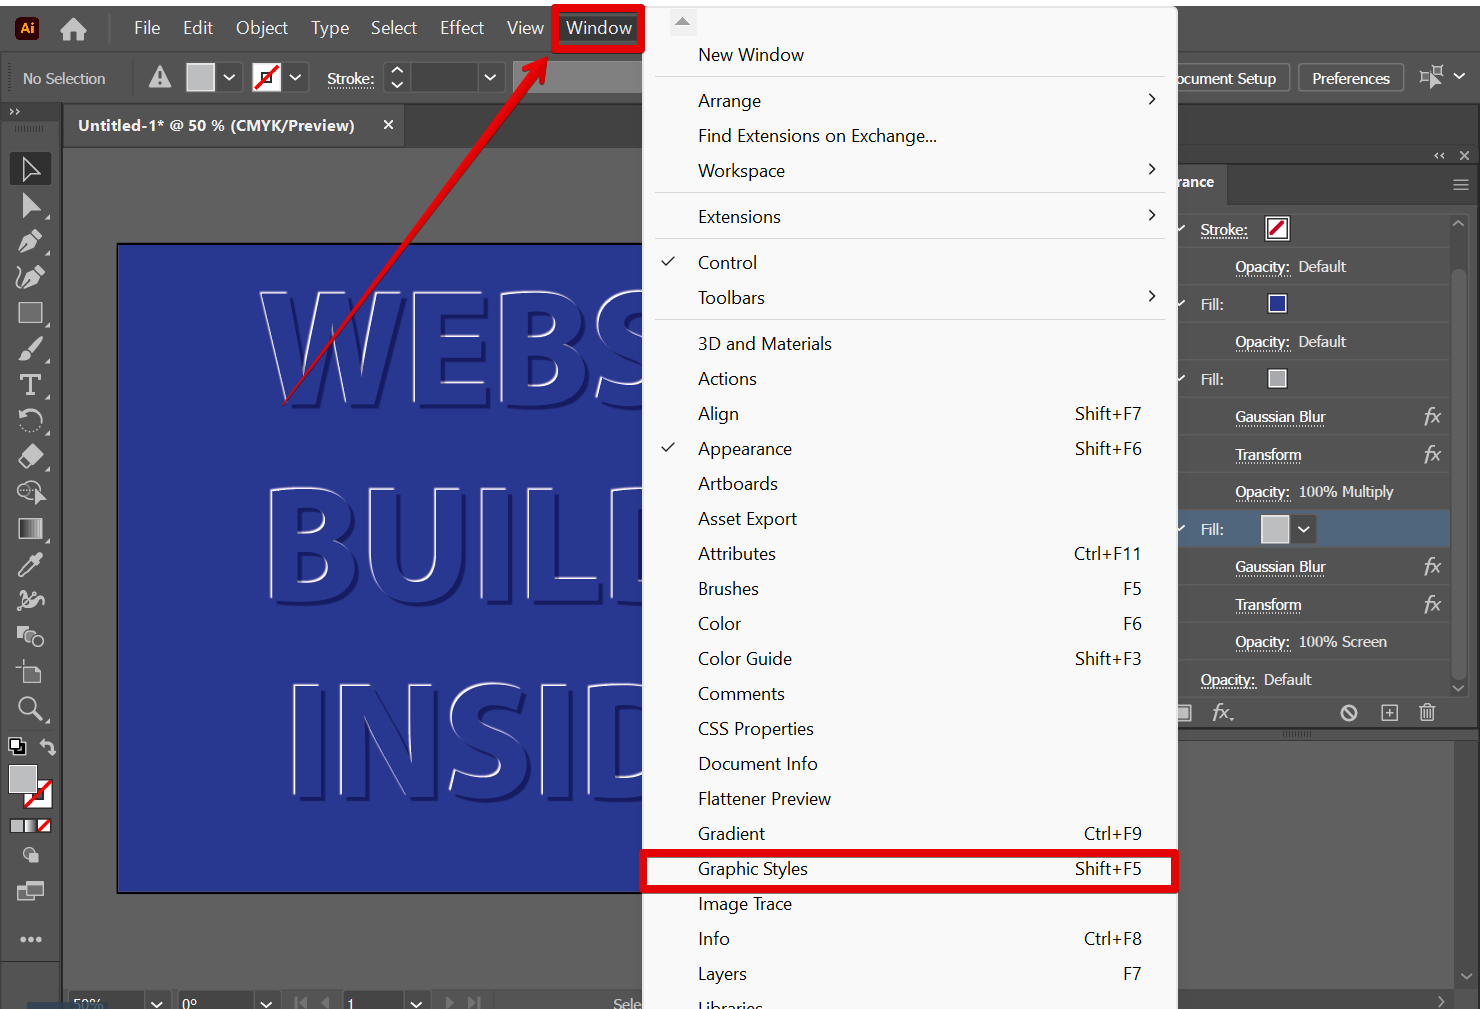
8. Save the Effect for Future Use
To save this effect for future use, open the “Graphic Styles” window.
Now, select the text, then drag it to the “Graphic Styles” window.
1. Put a Background Color
2. Input Text and Disable its Fill Layer
3. Create a New Fill Layer (Top Layer) for the Text
4. Duplicate the Top Fill Layer
5. Adjust the Settings of the Top Fill Layer
6. Create a New Fill Layer above the Top Layer with the Same Color as the Background
7. Change the Settings of the Last Fill Layer
Now that you know how to emboss text in Illustrator, you’re ready to start creating more amazing designs. Remember, the more practice you have, the better your results will be. So, keep practicing, and you’ll soon be embossing like a pro!