There are a few ways to link objects in Figma.
1. Link objects using the Interactions Feature
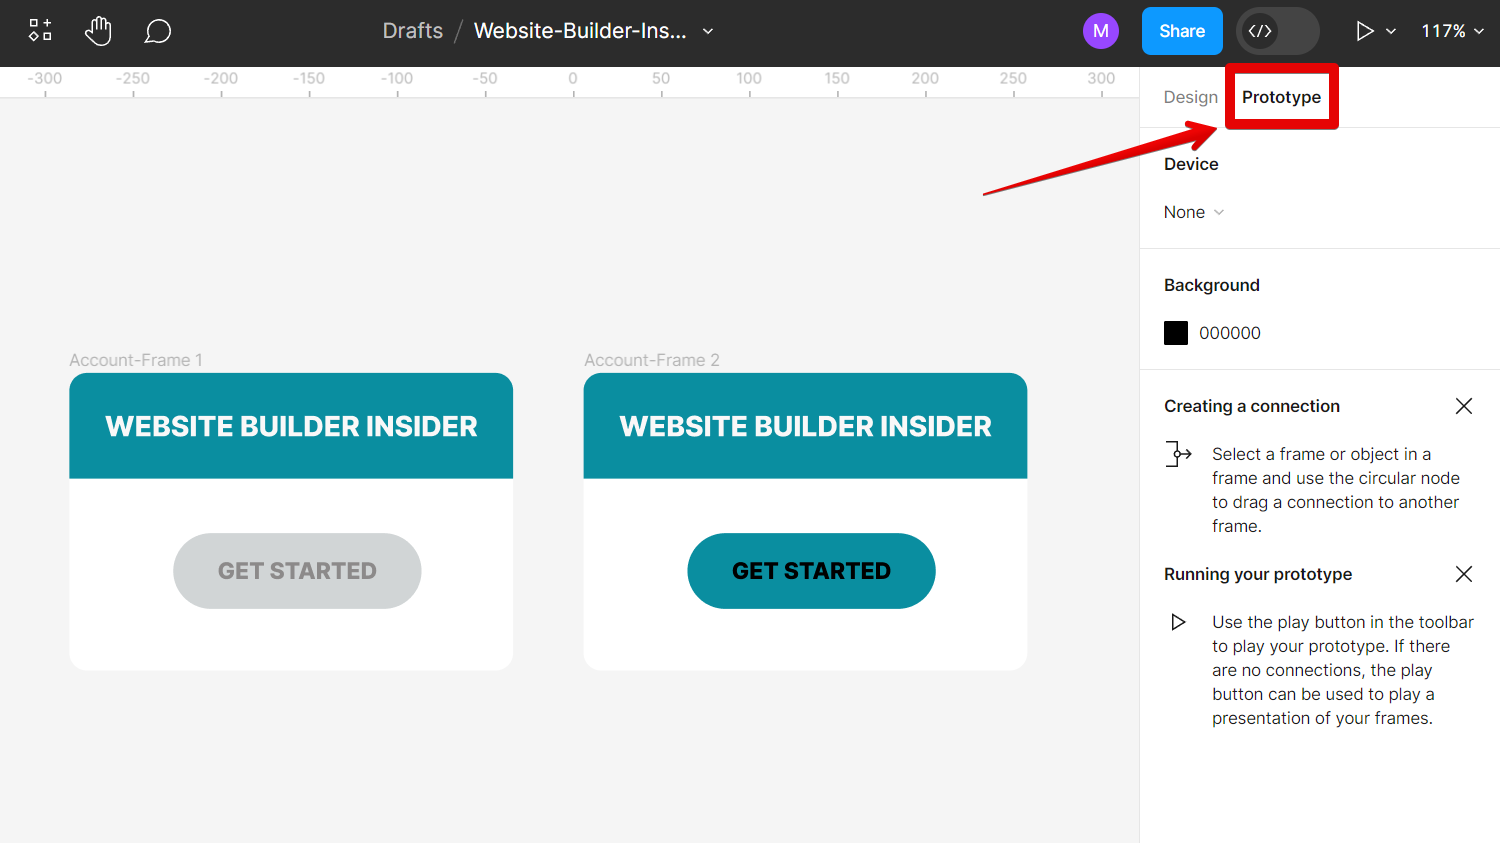
The first way is to use the Interactions feature in the Prototype tab. To do this, first, open the Prototype tab in the right panel.
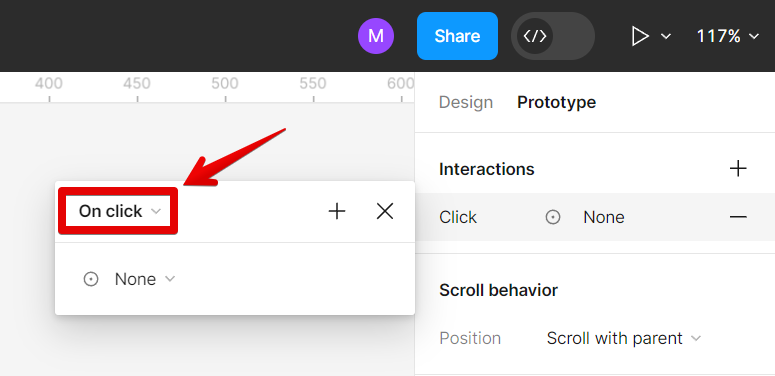
The next step is to select the object you want to link, then click the “+” icon next to the Interactions option in the Prototype tab to add an interaction.

A pop-up will appear, allowing you to select the type of interaction you want to use. In this tutorial, we will be using the “On click” interaction type.
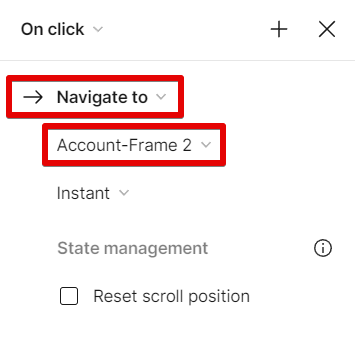
The next step is to select the object you want to link to. To do this, select the “Navigate to” option and choose the object that you want to link to.
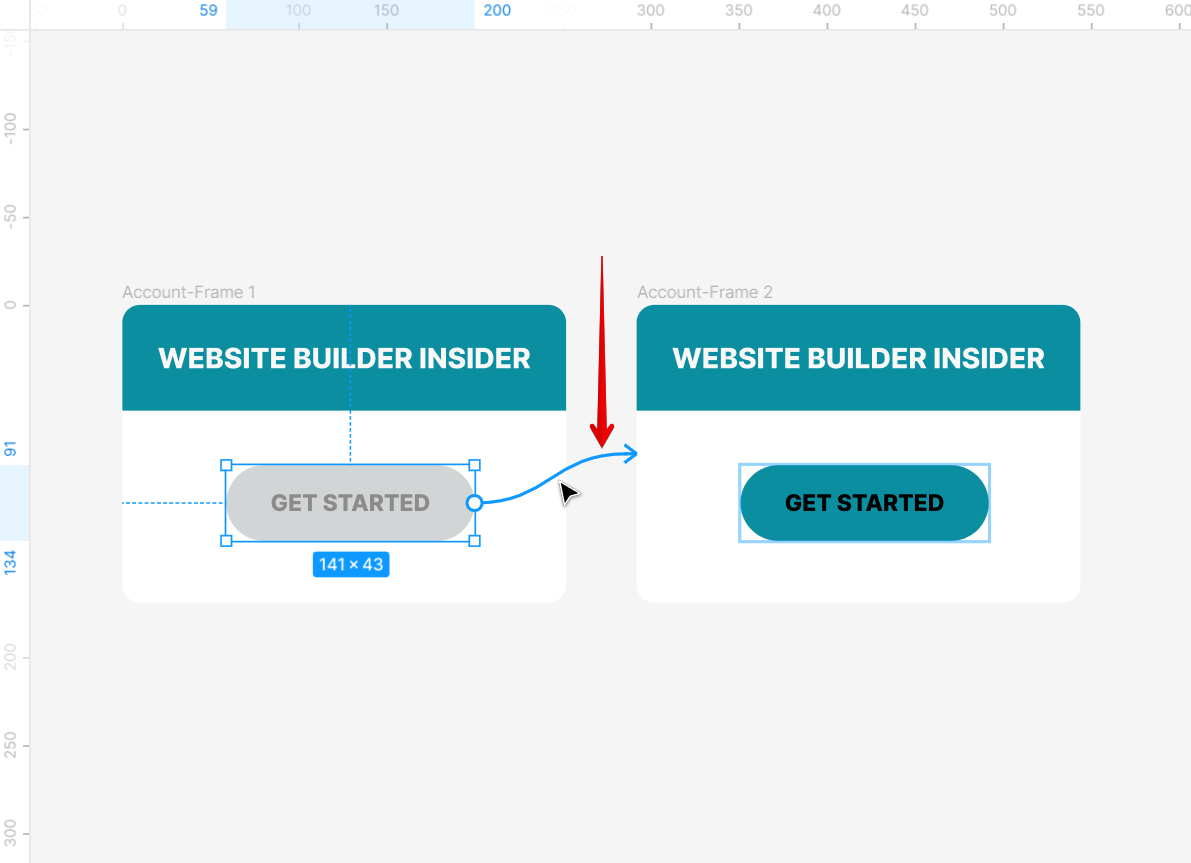
There should now be an arrow between the two objects, indicating that they are linked.
2. Link objects manually
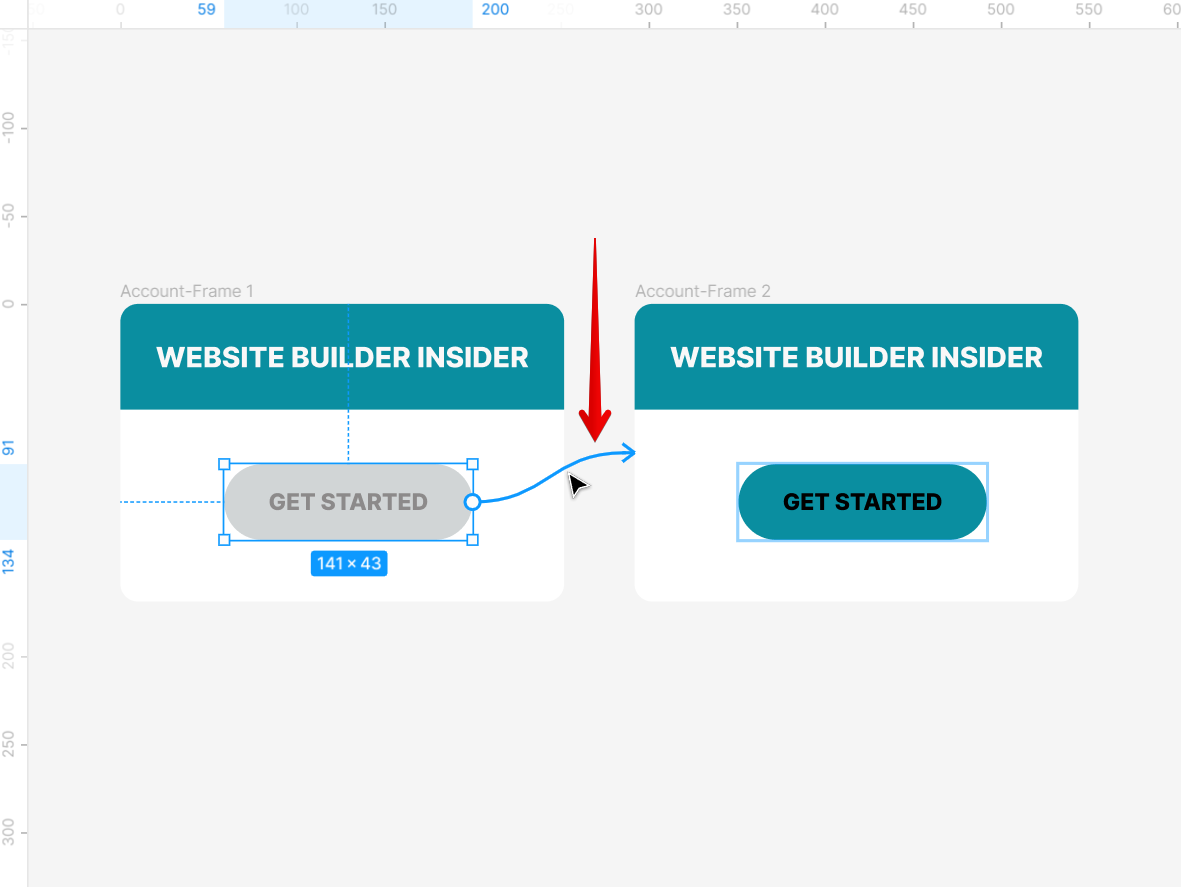
The second way to link objects is to do it manually. To do this, select the object you want to link, then hover your mouse over the object until the “+” icon appears.
NOTE: Make sure that the Prototype tab is still open so that the plus icon on the object will appear.
The next step is to click on the plus icon and drag it to the object you want to link to. You will then see an arrow that connects the two objects.
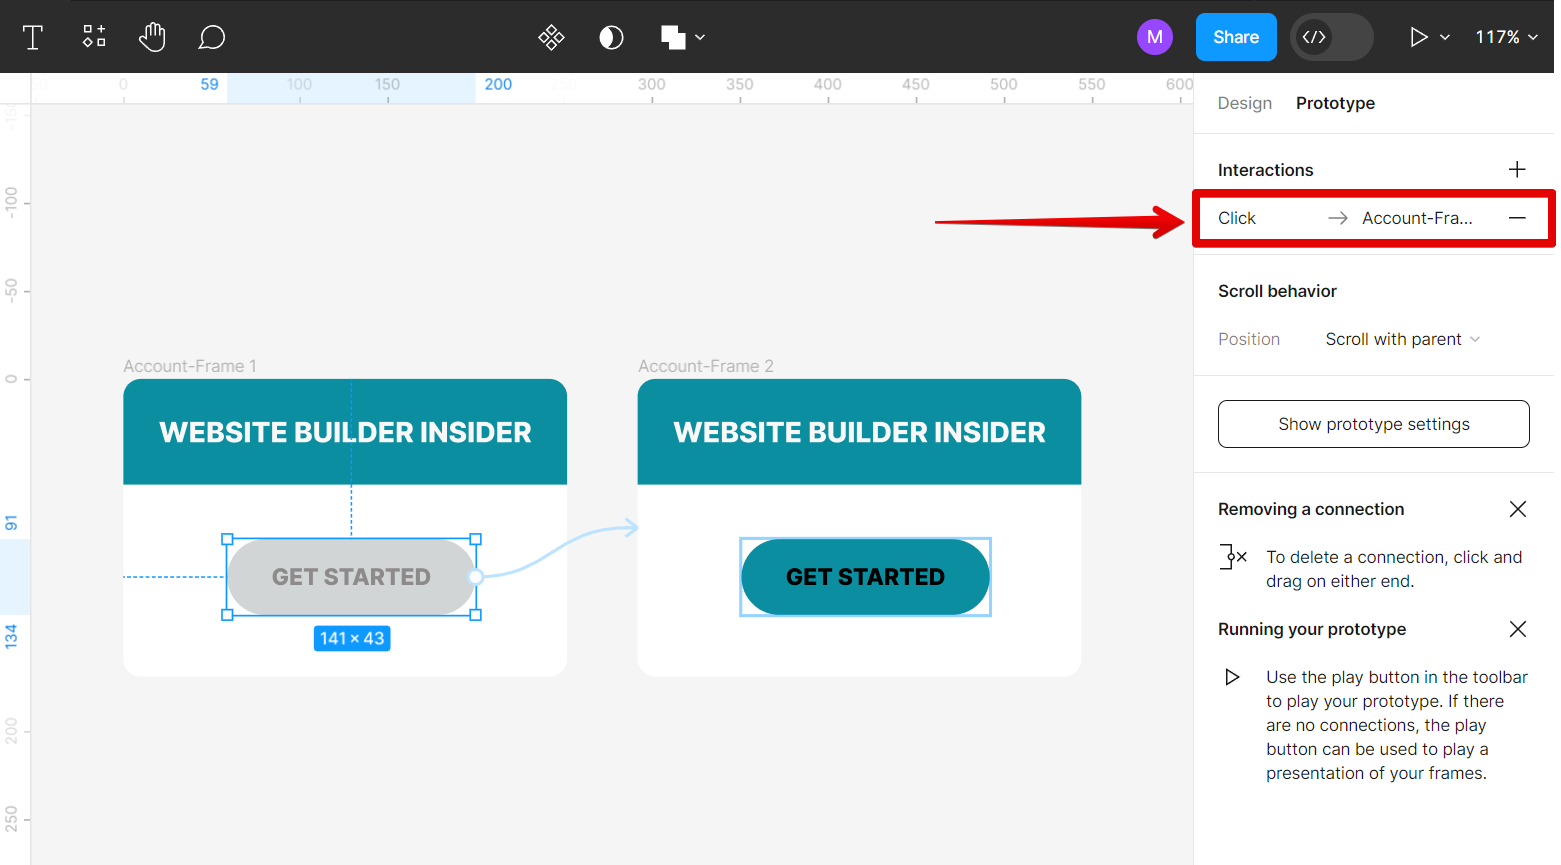
Once done, the linked objects should appear under the Interactions section in the Prototype tab.
PRO TIP: When linking objects in Figma, be careful not to accidentally create a frame. If you do, your objects will be placed inside of that frame and will be unable to be edited or moved independently.
7 Related Question Answers Found
Images are an important part of any website or blog. They can help to break up text, add visual interest, and make your content more engaging. If you’re using Figma to design your website or blog, you’ll need to know how to link an image.
If you’re working on a design in Figma that involves multiple objects, you may need to know how to merge those objects into a single shape. For example, you may have a design with multiple overlapping circles that you want to turn into a single shape. Or, you may have a design with multiple connected rectangles that you want to turn into a single shape.
There are many ways to create a link in Figma. The most common method is to use the “Create Link” button in the toolbar. This will create a link between the selected object and another object or frame in your design.
Embedding a Link in Figma
Embedding a link in Figma is a quick and easy process. To embed a link, follow these steps:
1. Open your Figma file and select the element you want to embed the link in.
2.
Figma is a vector-based design tool that is gaining popularity among web and app designers. One of the reasons for its popularity is that it offers more control over design elements than other tools. For example, you can adjust the width of a line by selecting the line and dragging the handles.
In Figma, you can create a frame by selecting the “Rectangle” tool and clicking and dragging on the canvas to create a rectangle. To change the size of the frame, click on the “Edit” tab in the top menu bar and then select “Resize.” You can also use the “Align” tool to align objects within a frame. To connect frames in Figma, you first need to select the frame that you want to connect.
There are many ways to open a link in Figma. You can use the Link tool, which is located in the Toolbar, or you can use the Insert menu. To use the Link tool, simply click and drag your cursor over the area you want to turn into a link.