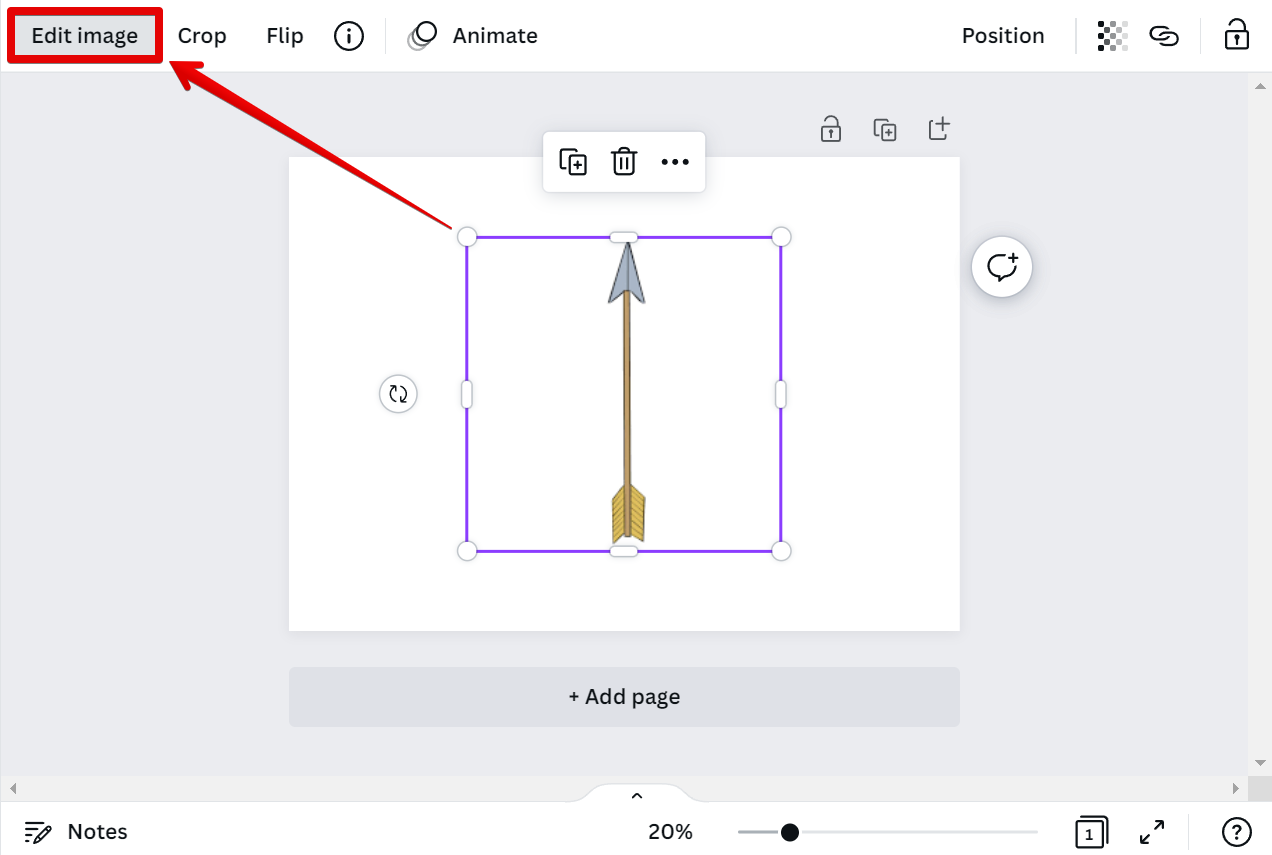
There is one simple way to bend an image in Canva. That is to use the built-in image filter.
To do this, click on the image and then click on the “Edit image” button.
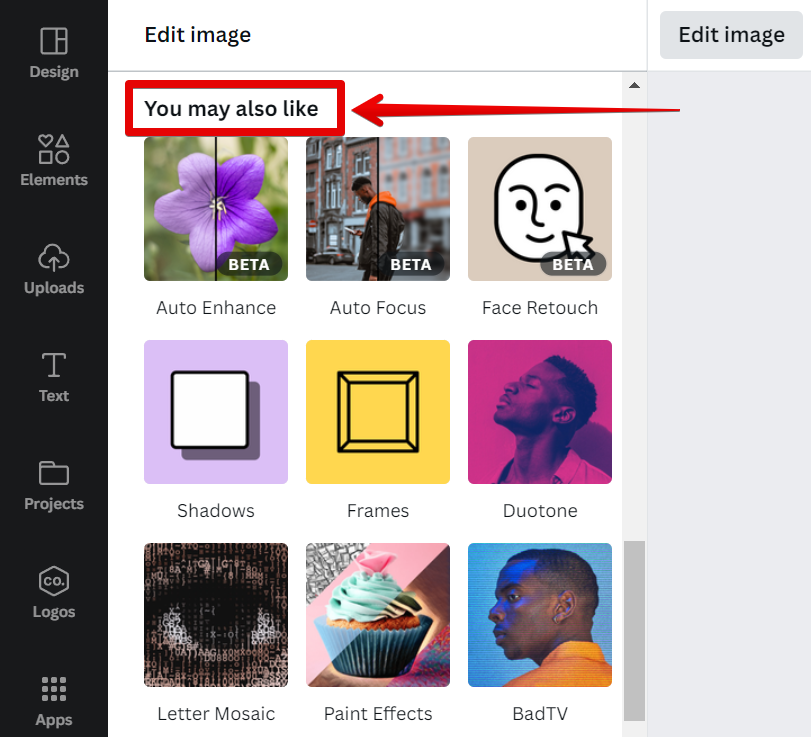
Next, go to the “You may also like” section of the Image Editor.
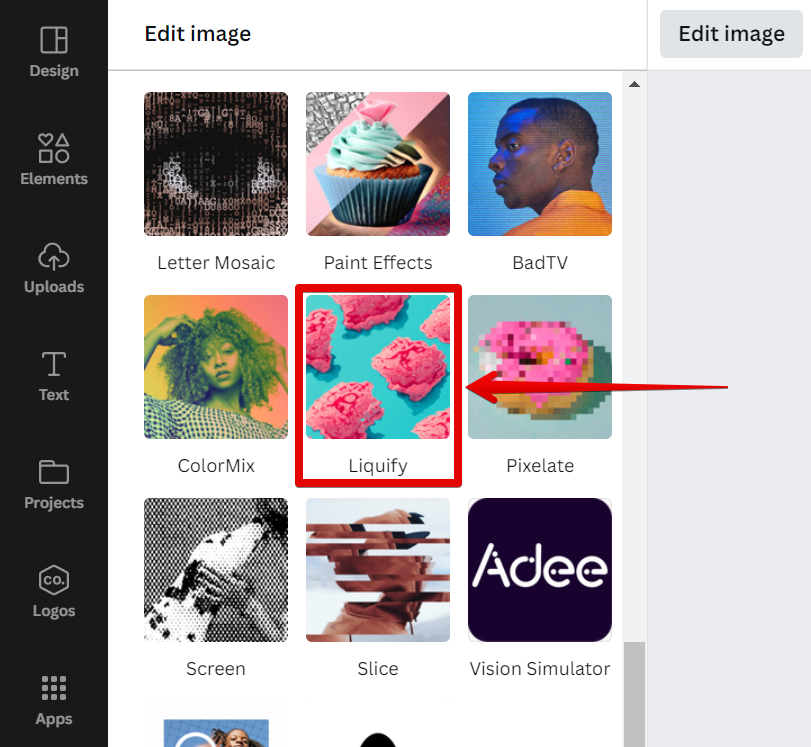
From there, browse for the “Liquify” filter and click on it.
NOTE: The Liquify effect adds a liquid motion style kind of filter to your image.
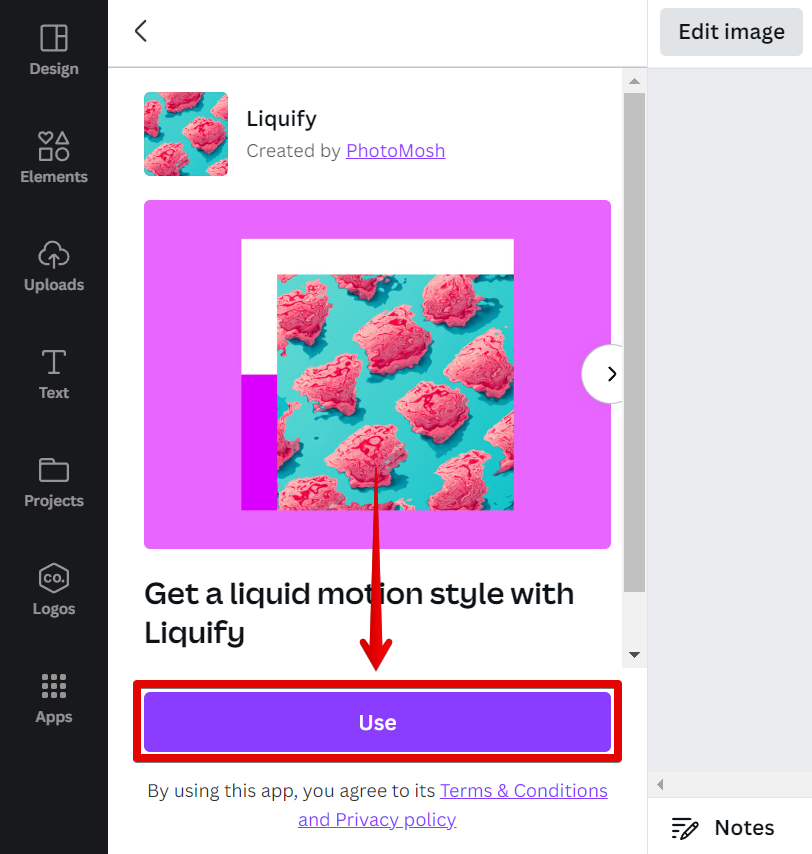
In the new page that will open, select the “Use” button.
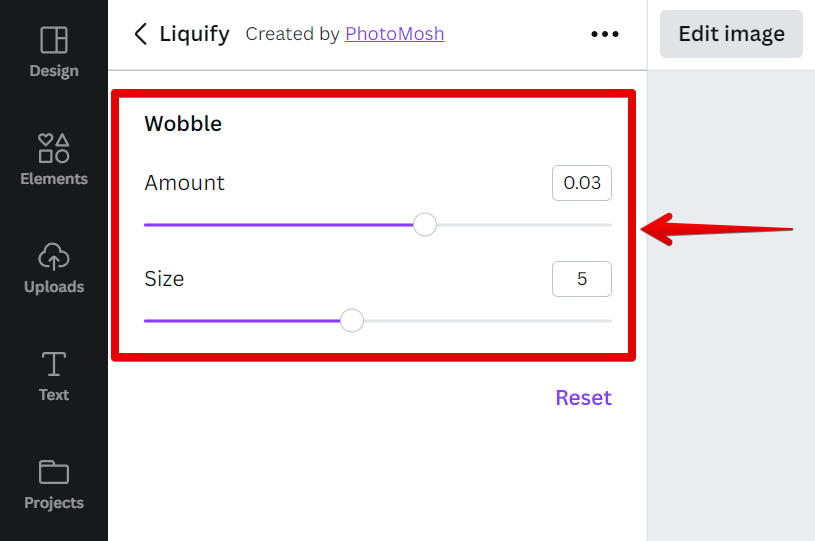
In the Liquify tools page, click on the “Wobble” effect, then select the “Apply” button and the effect will automatically bend your image. If you’d like to customize further how your image will bend, you can click on the settings icon on the image itself.
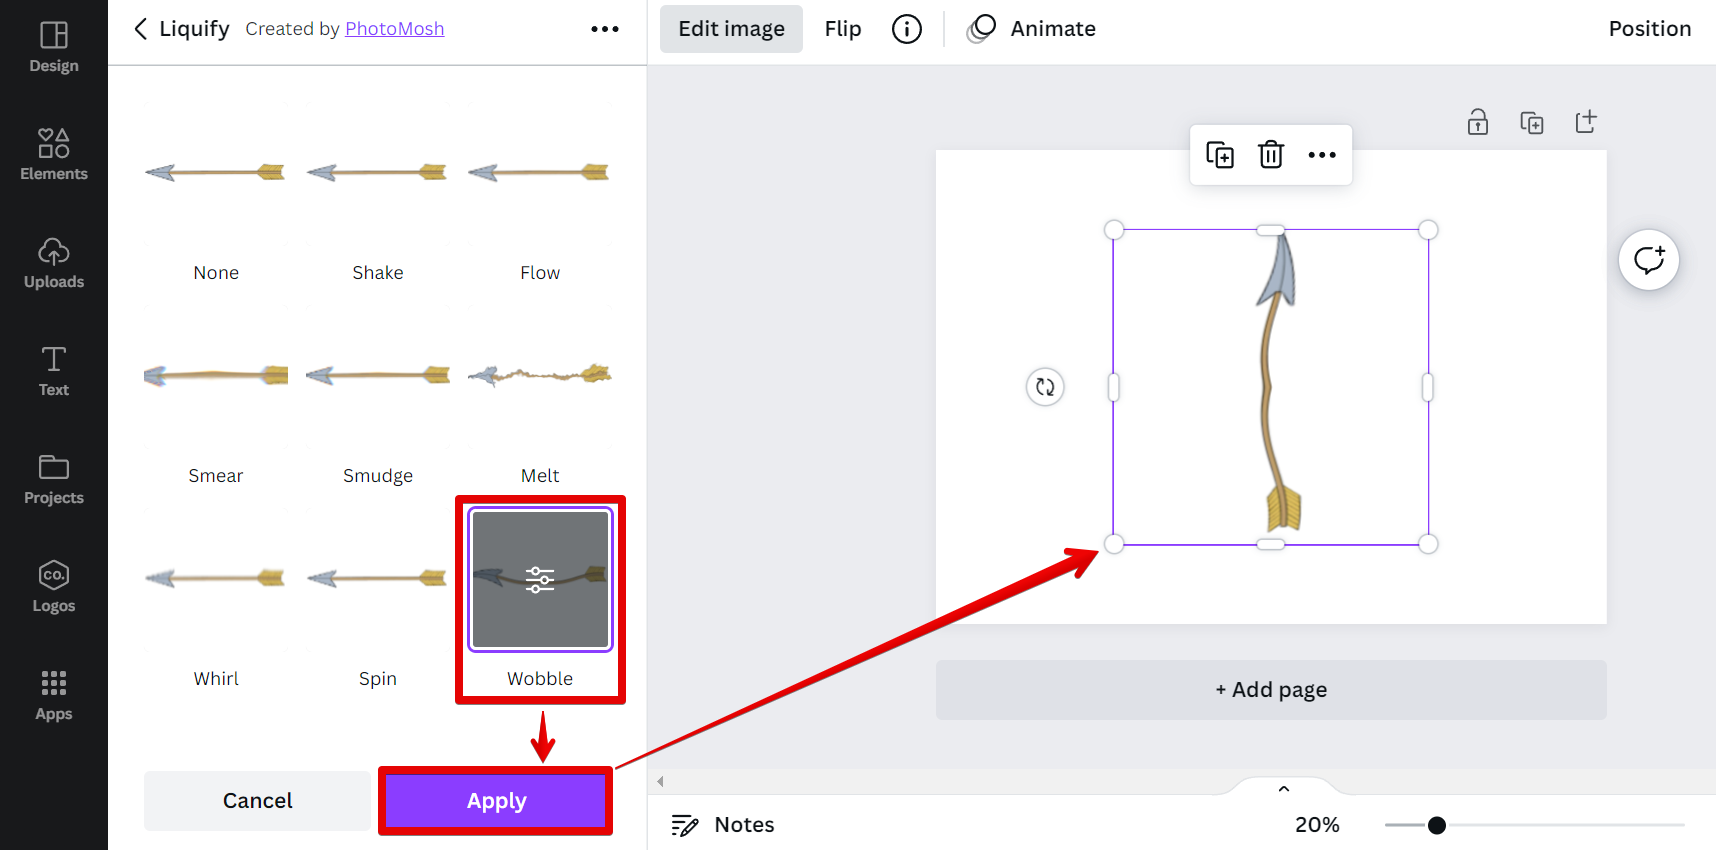
Finally, you can drag the slider to the left or right on the Wobble settings page to create the desired effect.
PRO TIP: If you are planning to bend an image in Canva, be aware that this may result in distortion or loss of quality. Make sure you have a backup of your original image before proceeding.
So there you have it! One straightforward way how to bend your image in Canva!
10 Related Question Answers Found
When it comes to online design tools, Canva is one of the best. With a simple interface and plenty of features, it’s perfect for creating high-quality visuals. One thing you might want to do with Canva is changing the shape of an image.
Curving an image in Canva is a great way to add some extra flair to your design. There are two ways to curve an image in Canva: using the “Warp” tool or by adding a “Border”. To use the “Warp” tool, simply select the image you want to edit and then click on the “Warp” icon in the top toolbar.
Adding an image to a shape in Canva is a great way to create a unique and eye-catching design. Here’s how to do it:
First, select the shape you want to add your image to
Then, click on the “Uploads” tab in the left-hand sidebar. Next, click the “Upload an image” button.
There are a few ways to cut out part of an image in Canva:
Using the Crop tool
To do this, Select the image and click “Crop“.Move the handles to cut out part of your image.Click “Done” if you already are satisfied with your modification.Cropping Done!What if you want more control over how to cut out parts of your image? You can try the Eraser Tool. To do this, Select the image and click “Edit image“. 2. Select Background Remover.3. Select the Erase Tool.4.
Yes, you can cut an image in Canva. It’s easy to do, and only requires a few clicks. Here’s how:
1.
As a new user to Canva, you may be wondering how to shape an image. The first step is to select the image you want to use. You can either upload your own image or choose one from our library of over 1 million stock images, illustrations, and icons.
Cropping an image in Canva is easy! First, open the image you want to crop in the editor. Then, select the Crop tool from the left toolbar.
Images are a key part of any design, whether you’re creating a blog post, social media graphic, or even a presentation. But how do you make sure your images look great in Canva? Here are some tips:
1.
Canva is a user-friendly graphic design tool that is perfect for creating professional designs for your blog or website. One of the great things about Canva is that it offers a wide range of templates and tools that make it easy to create stunning visuals. One of the most useful features in Canva is the ability to cut out images.
With Canva, you can easily create animated images. To do this, simply:
1. Open Canva and sign in or create a new account.
2.