Figma is a vector-based design tool that is gaining popularity in the design community. One of the reasons for its popularity is its ease of use. Adding a drop-down menu in Figma is a relatively simple process.
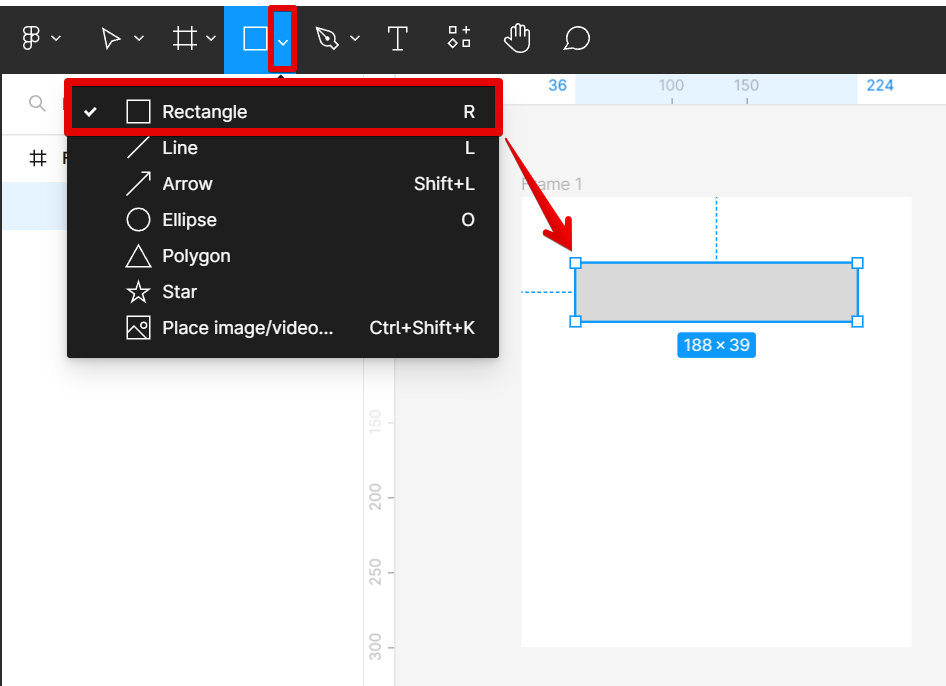
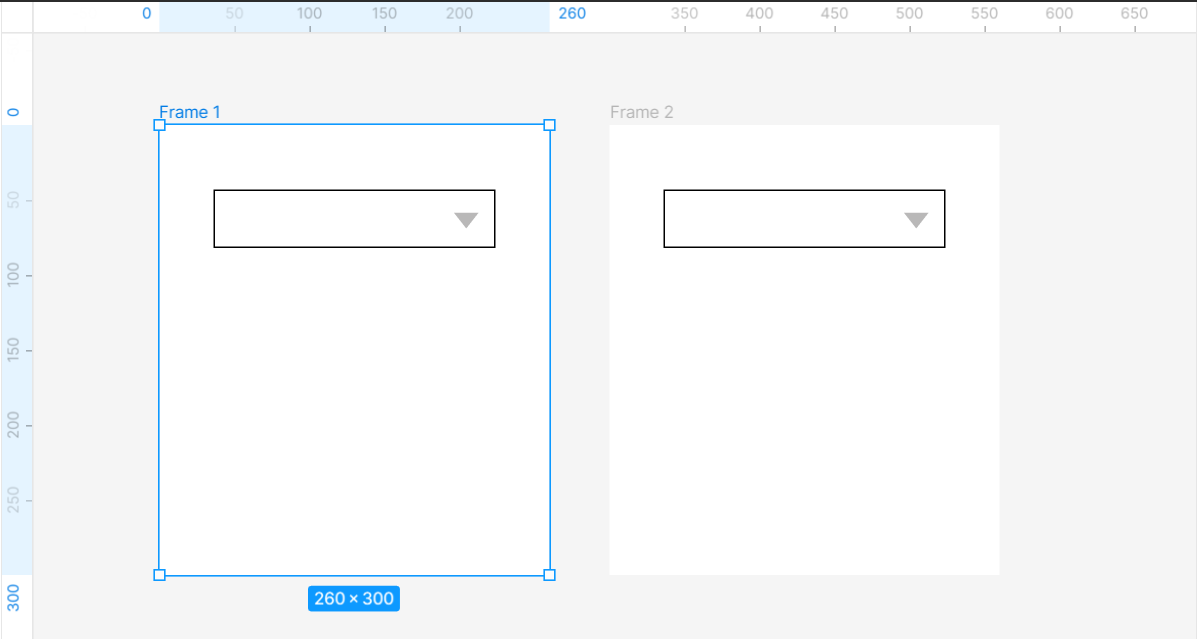
1. First, create a frame where you want the drop-down menu to appear. Then, add a rectangle or other shape to serve as the body for the drop-down menu. You can do this by selecting “Rectangle shape tool” from the toolbar.
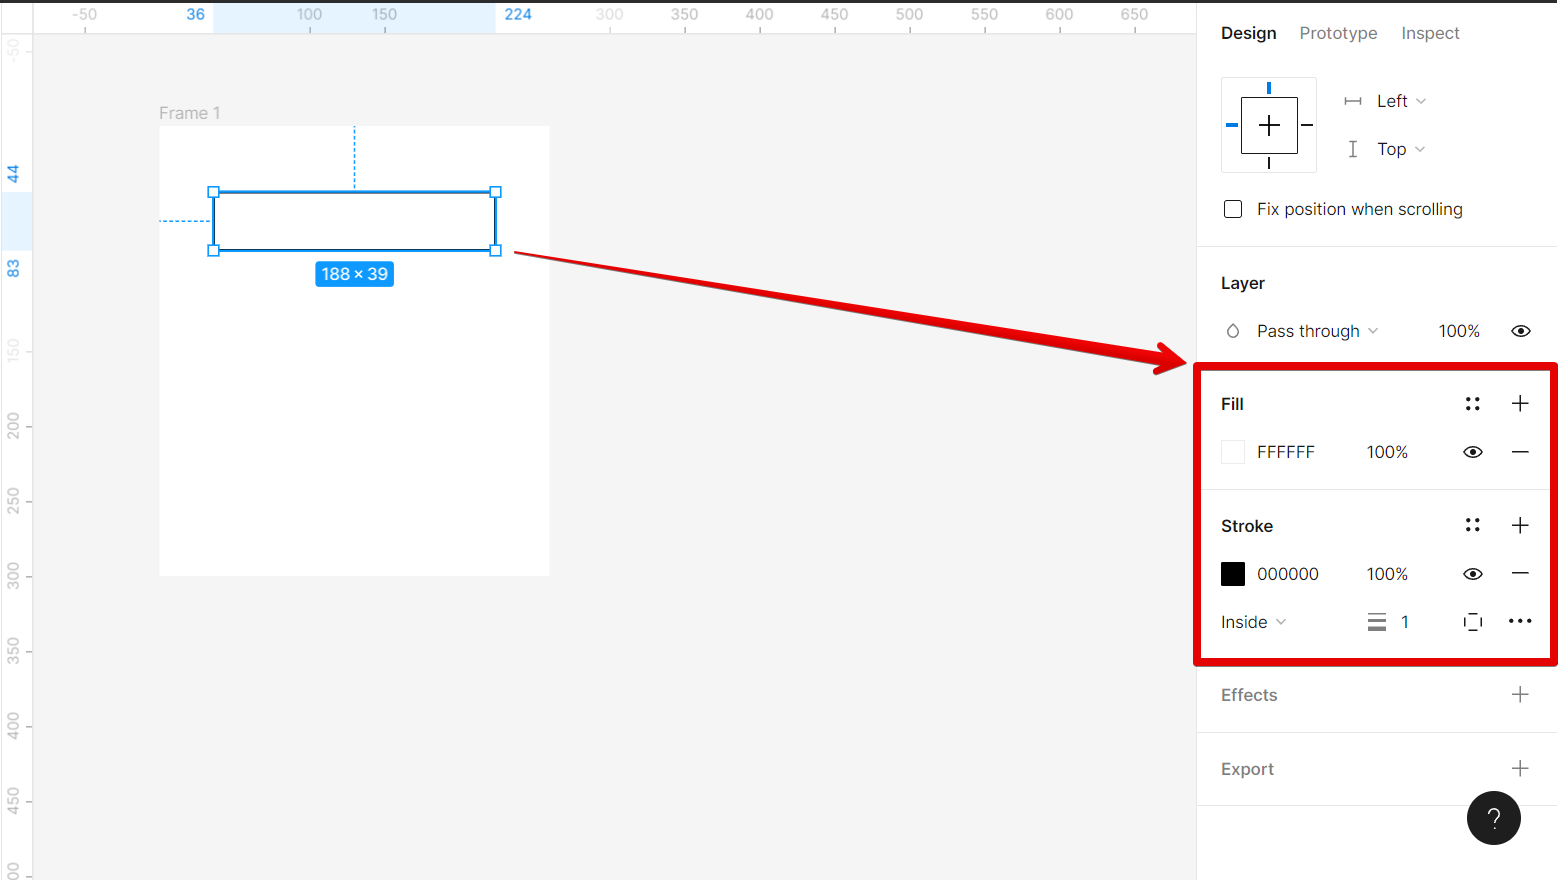
2. You can also add color fill and stroke to your drop-down’s body using the sections under the Design tab.
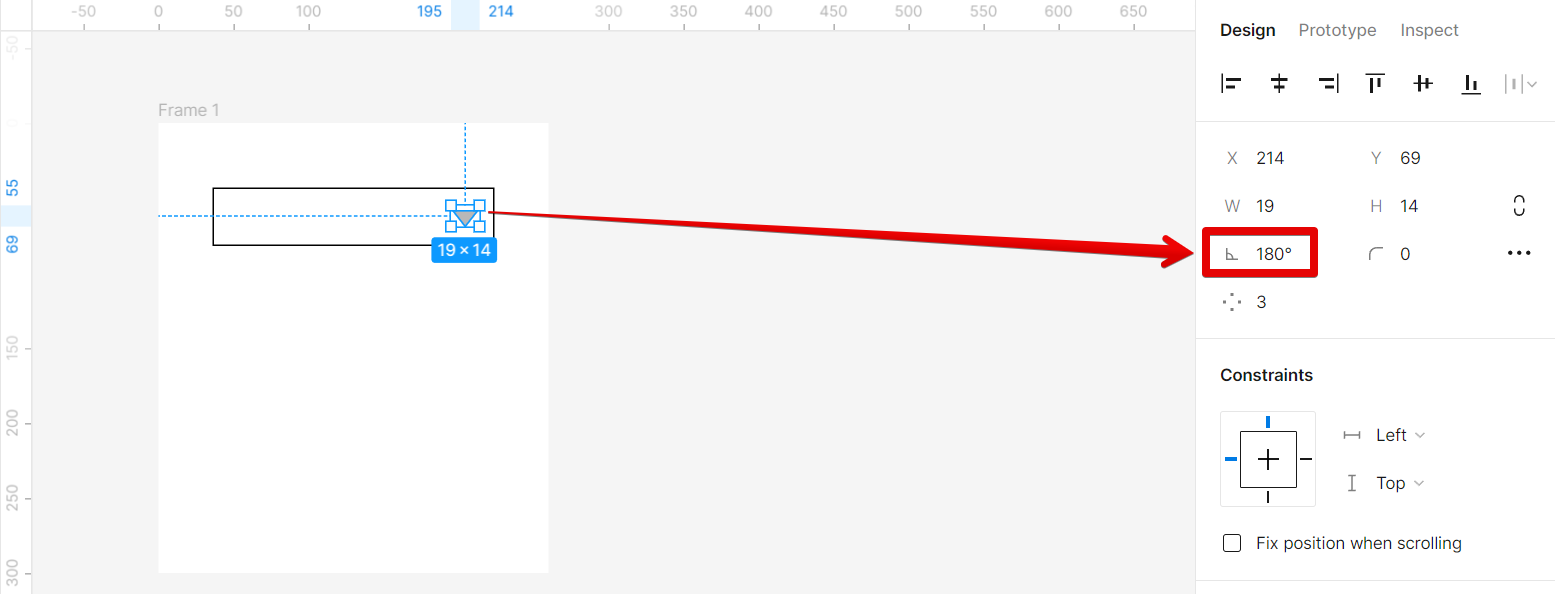
3. Now, we need to add a small triangle that will serve as the drop-down button. To do this, simply select the “Polygon shape tool” from the toolbar then click it and drag it across your canvas to create a small triangle and place it inside the drop-down.

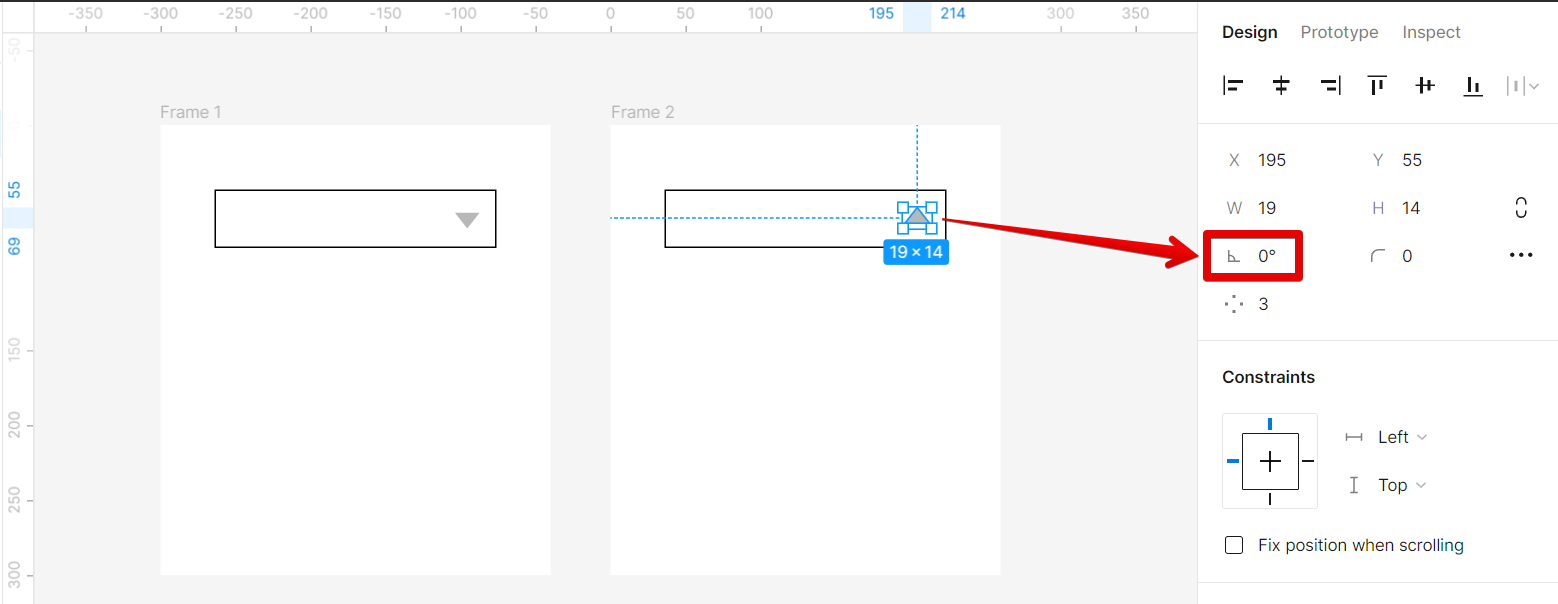
4. Adjust the angle of the triangle using the angle section under the Design tab for accurate alignment.
5. Once done, create a copy of the whole frame and place it just beside the original frame. You can do this using the keyboard shortcuts “Ctrl+C” to copy and “Ctrl+V” to paste.
6. You need to rotate the triangle on the second frame by 180 degrees to make it look like it rotates once triggered. So in this case, we will set the angle to zero degrees.
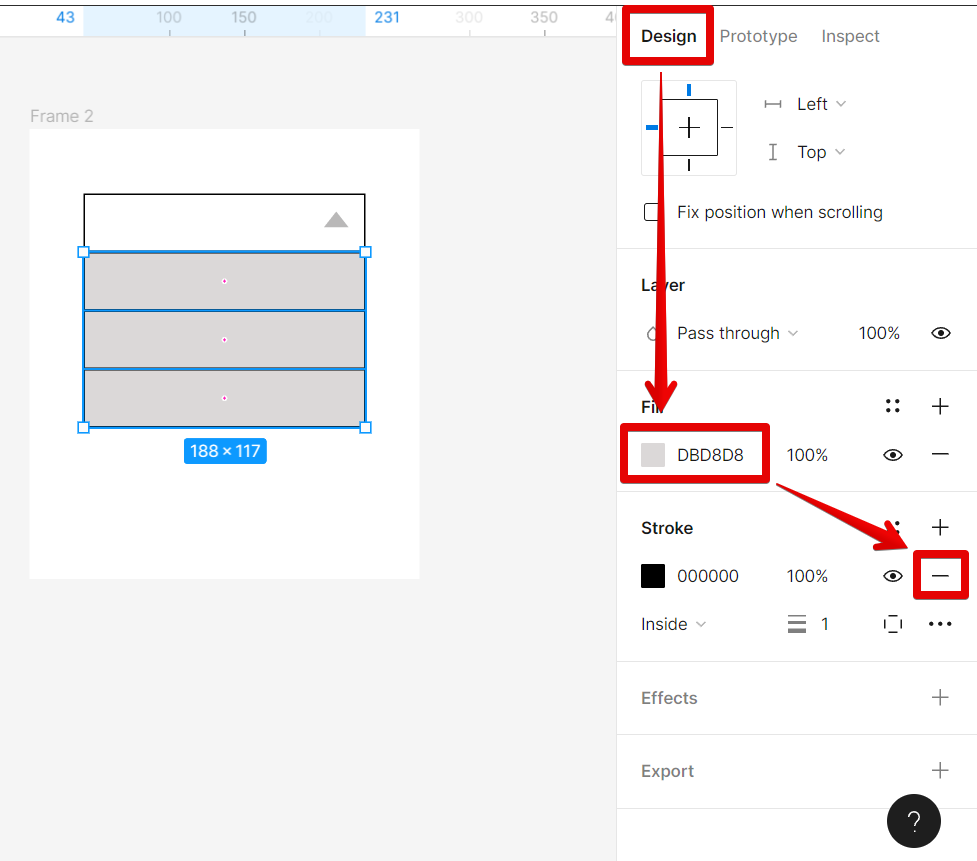
7. Next, create the actual drop-down menu in the second frame. To do this, create copies of the main rectangle body and place them below the button. Make sure to leave some space between each menu item so that users can see that they are clickable.

8. Change the fill color and disable the stroke of the dropdown menu to create a more distinct feature.
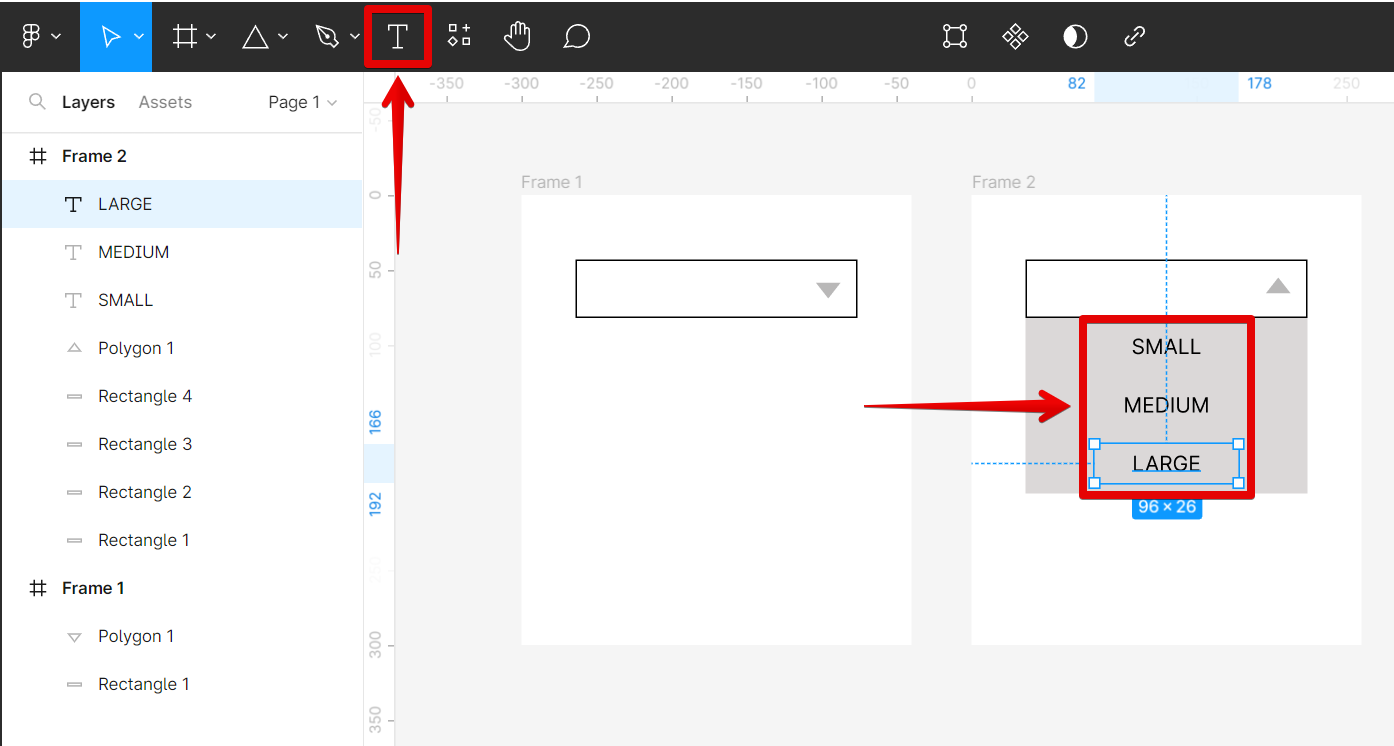
9. Now, add text to your drop-down menu using the “Text tool” from the top toolbar. These will serve as the options to choose from once the drop-down menu is triggered.
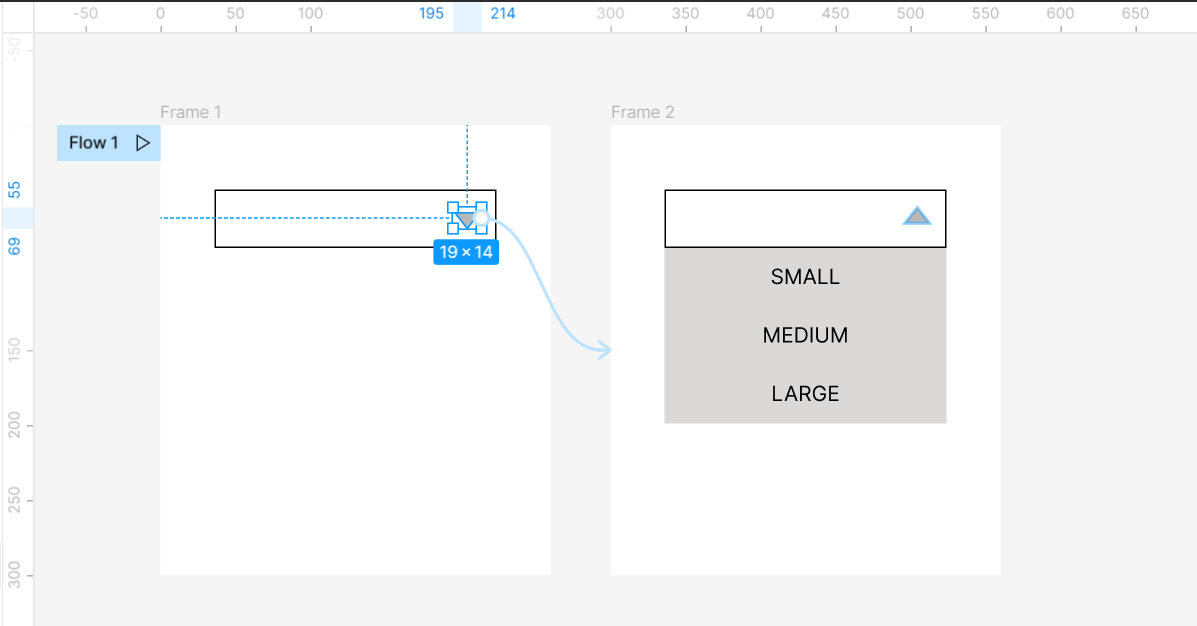
10. Once done, we can now start making the prototype of our design. To do this, just click on the “Prototype” tab and hover over the small triangle on Frame 1 until a “+” icon appears. This will serve as the first point of connection.
![]()
11. Now click on the “+” icon and connect it to Frame 2. This will make the drop-down menu in Frame 2 appear when the triangle button in Frame 1 is triggered.
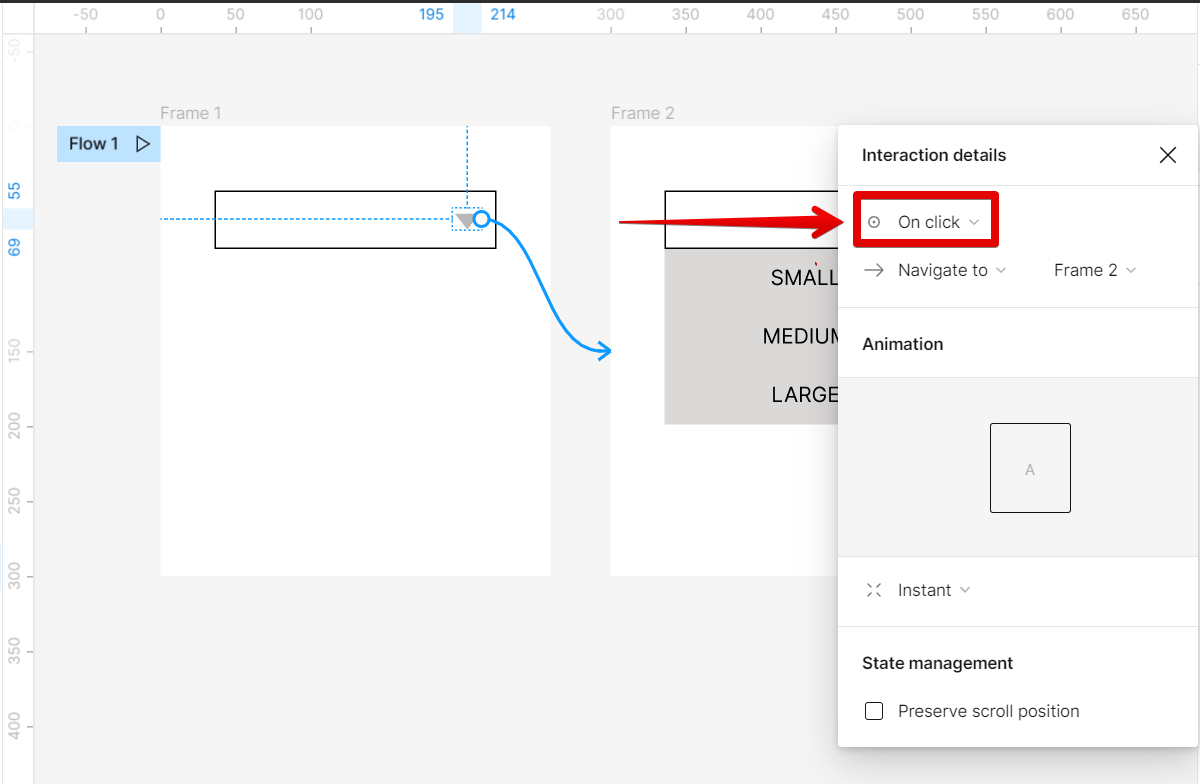
12. The next step is to add some interactions to your drop-down menu. To do this, in the “Interaction details” window that will show up, you’ll see a list of events that can trigger an action. From here, you can add an “On click” interaction that will show the drop-down menu when the user clicks on the button.
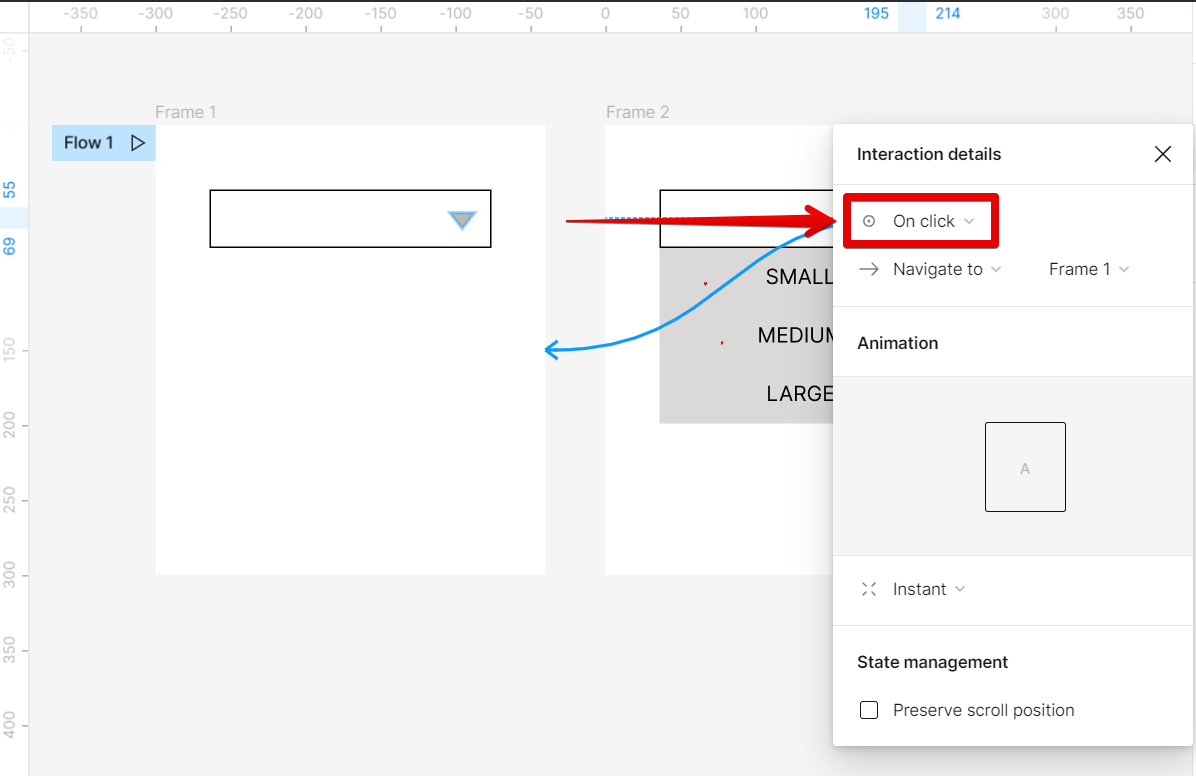
13. Now we go over to the next action we want to happen after opening the dropdown menu. In this case, we want to close the dropdown menu and go back to its original state. To do this, connect the triangle on Frame 2 to Frame 1.

14. Then, select the “On click” event in the Interaction details window.
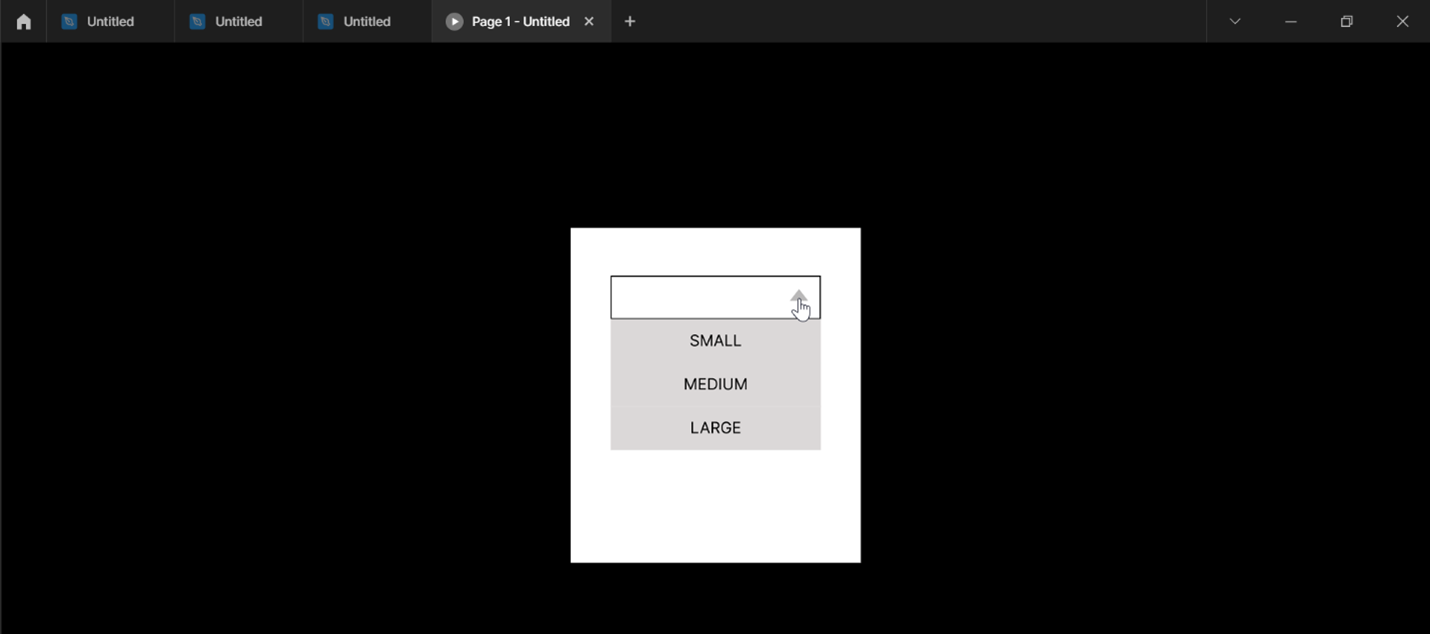
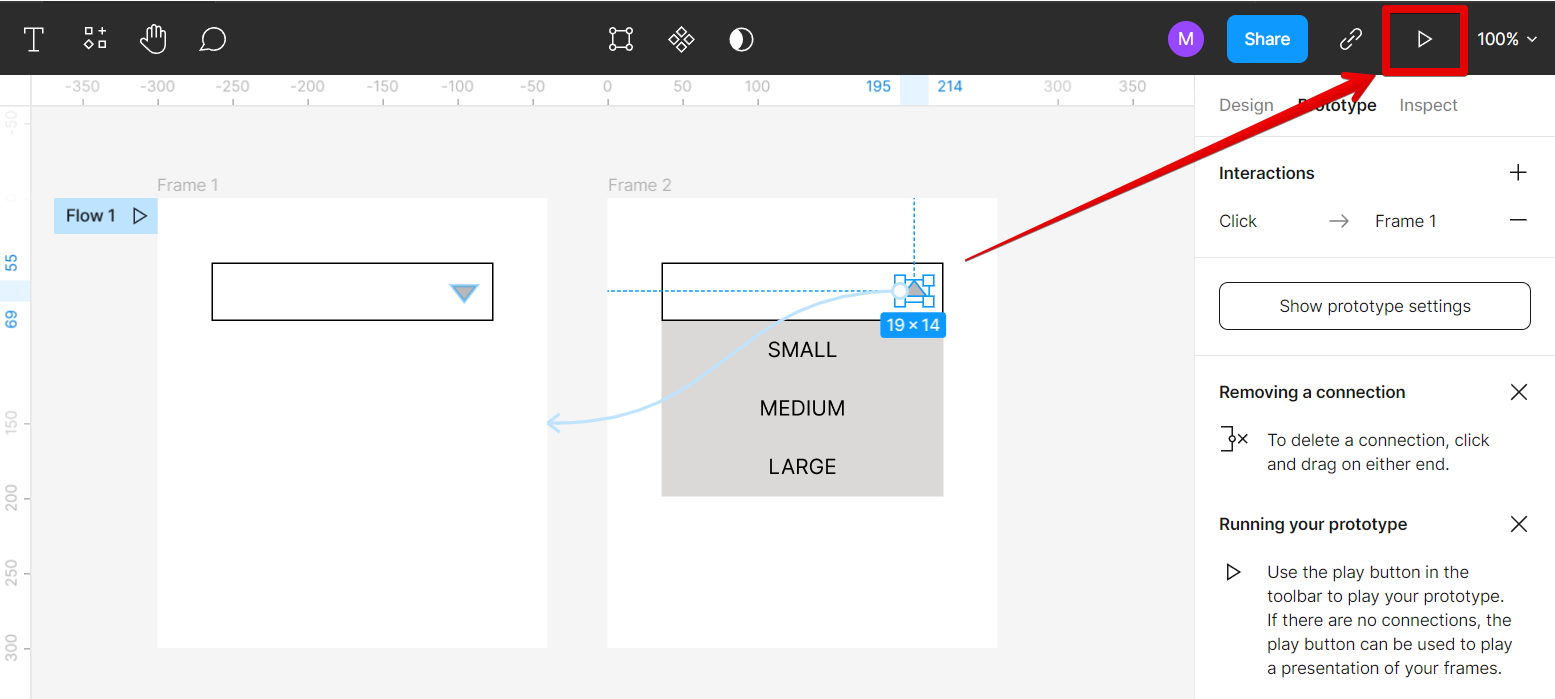
15. Finally, click on the “Play” button in the upper-right corner to see a preview prototype of your drop-down menu.
16. That’s all there is to it! With just a few clicks, you can add a fully functioning drop-down menu to your Figma design.