If you want to add an ICC profile to Photoshop, there are a few steps that you need to follow to do it.
First, you will need to download the ICC profile from the website of your printer or monitor manufacturer.
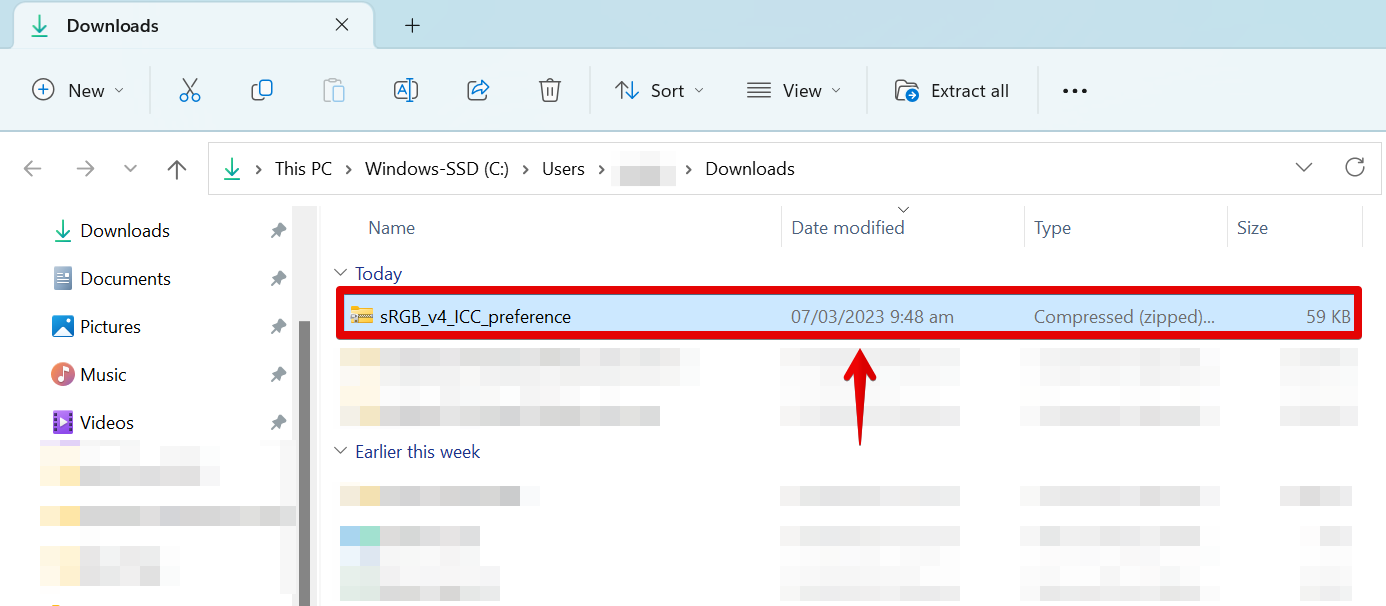
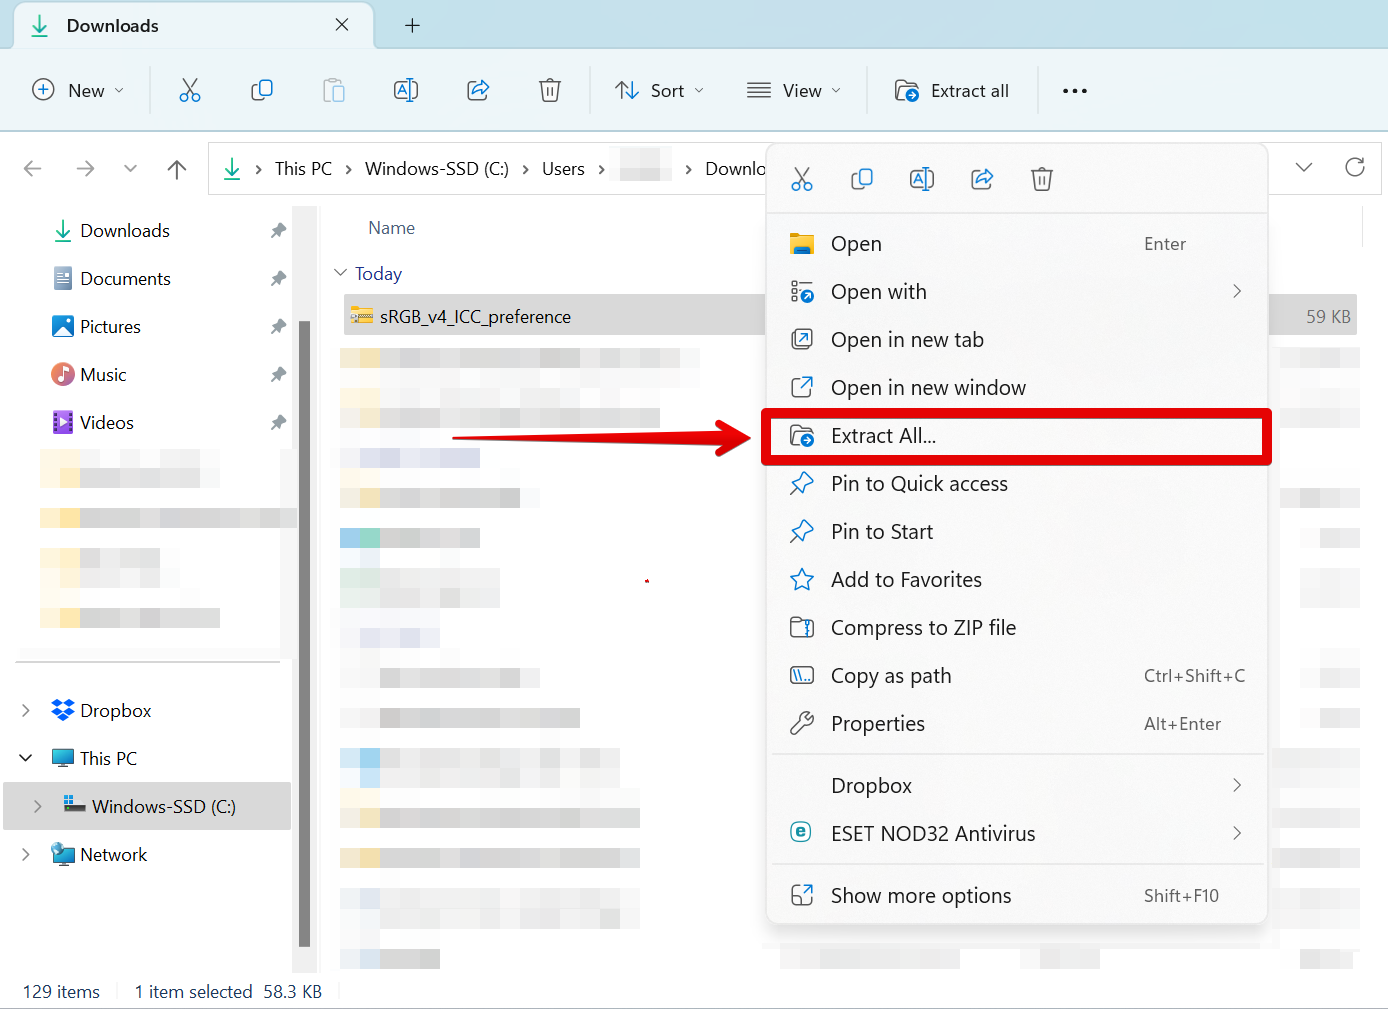
Once the file has been downloaded, unzip it. To do this, simply right-click on the file and select “Extract All” from the options.
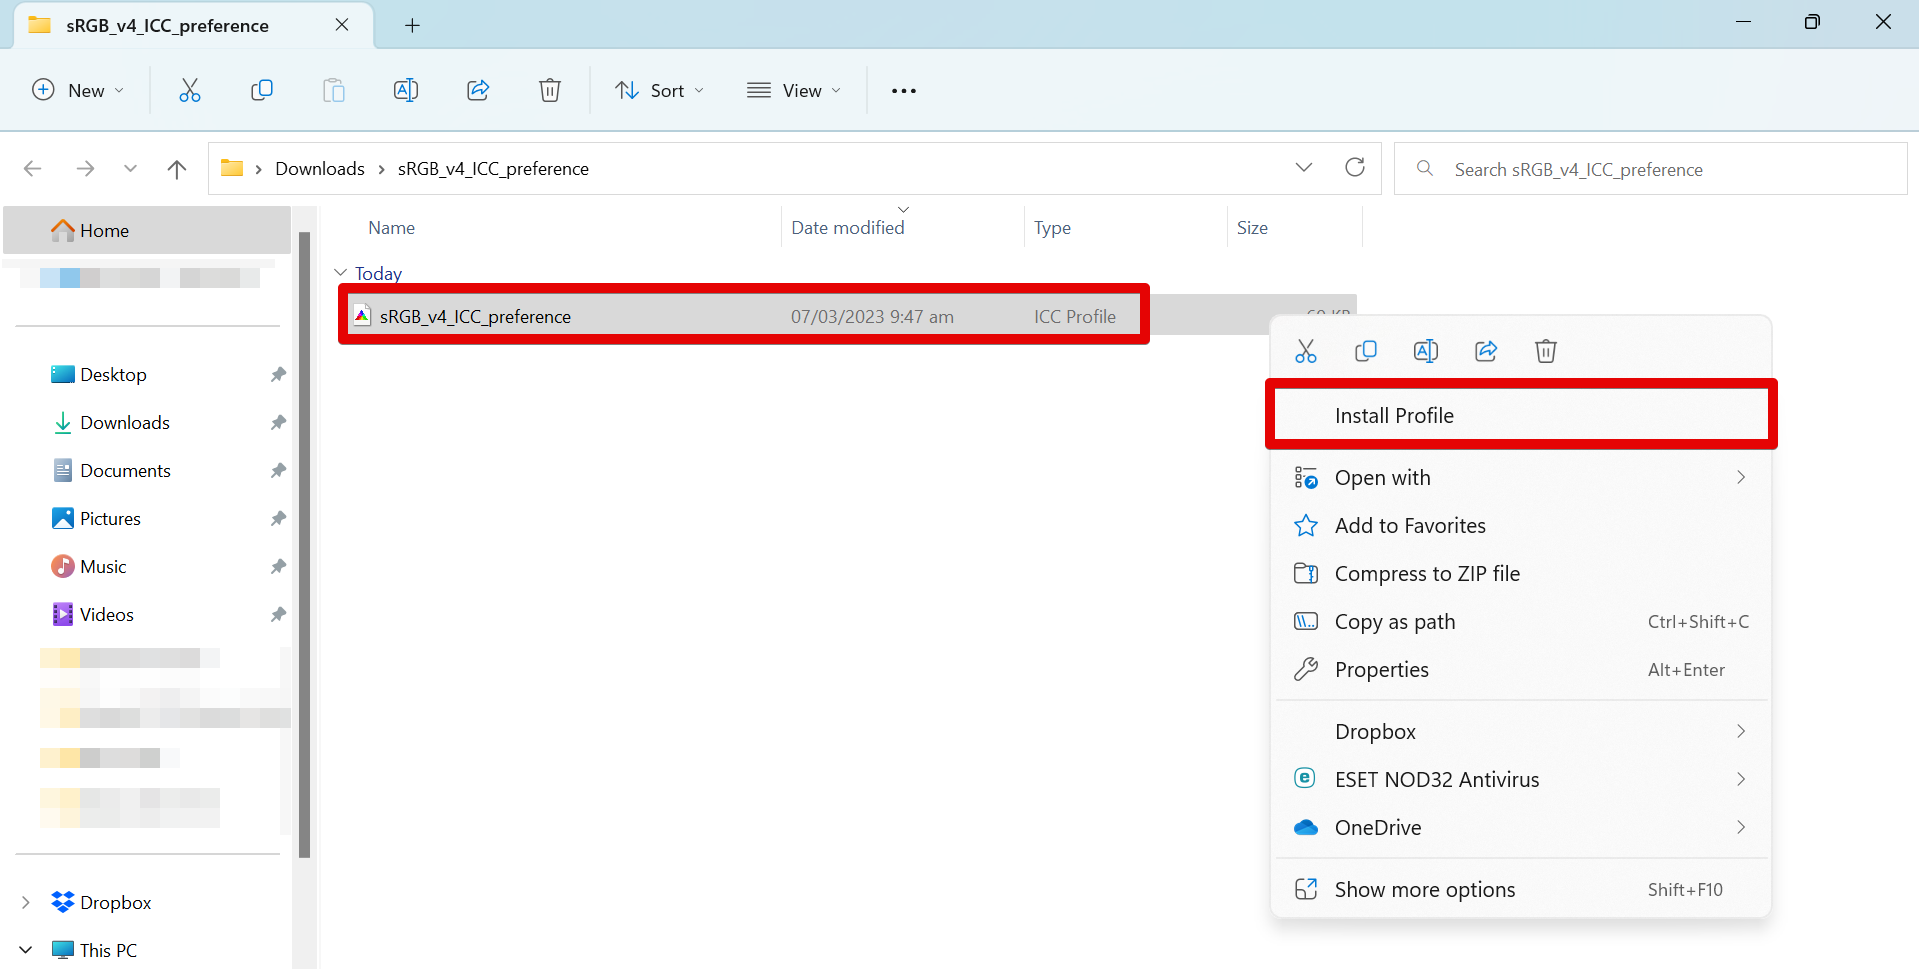
Find the ICC Profile file, then right-click on it and select the “Install Profile” option. Photoshop will then automatically install the profile into the correct location on your computer.
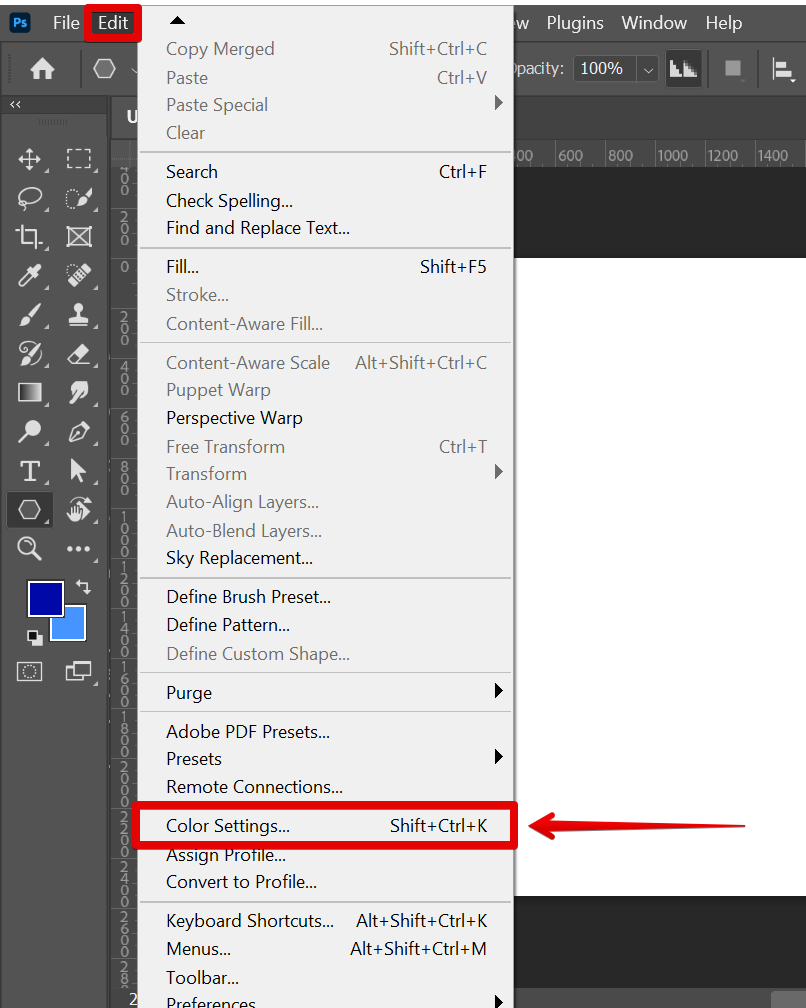
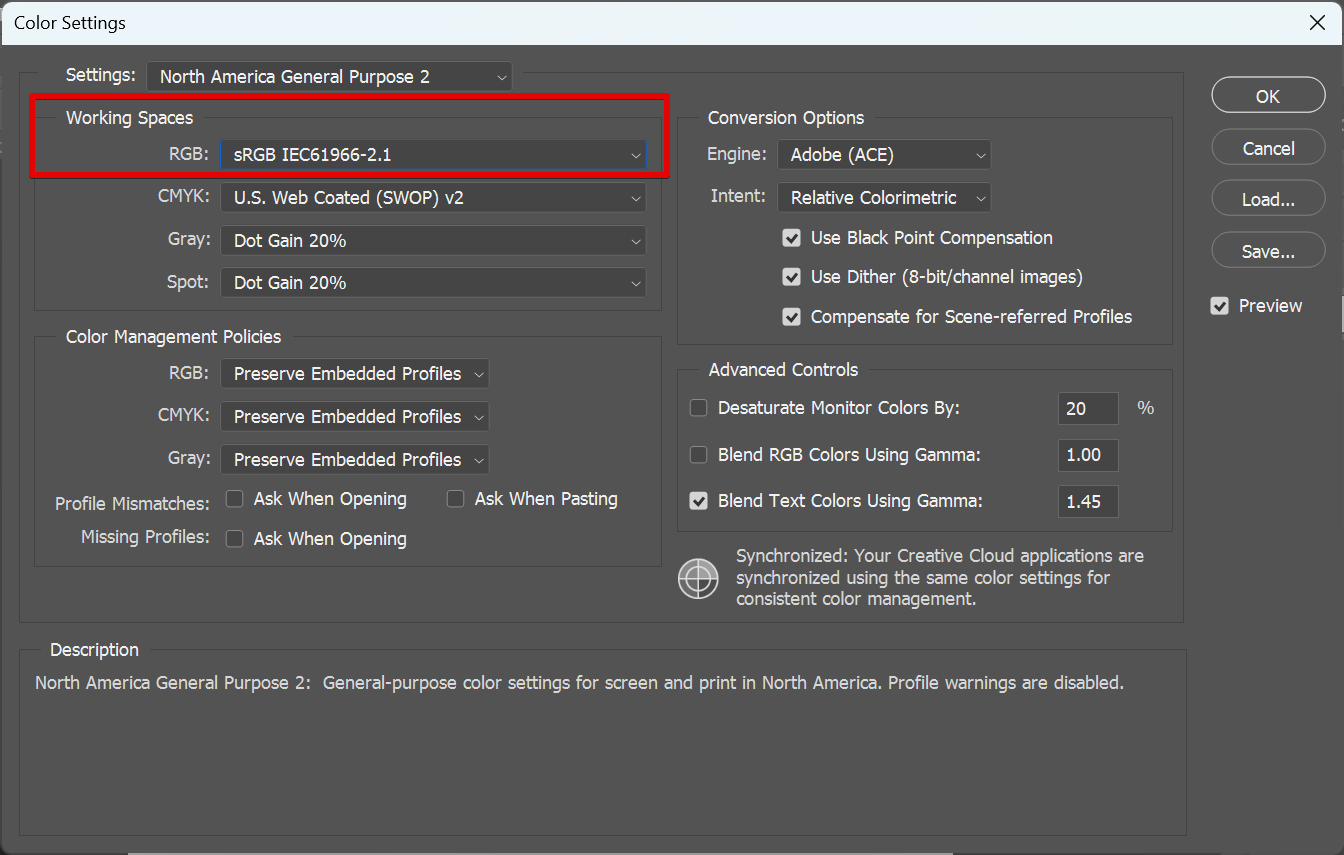
Once the profile has been installed, you will need to restart Photoshop for the changes to take effect. Once done, go to the Edit menu and select Color Settings.
In the Color Settings dialog box, make sure that the Working Space is set to the same color space as the ICC profile that you installed.
NOTE: For example, if you installed an sRGB ICC profile, you would need to set the Working Space to sRGB IEC61966-2.1.
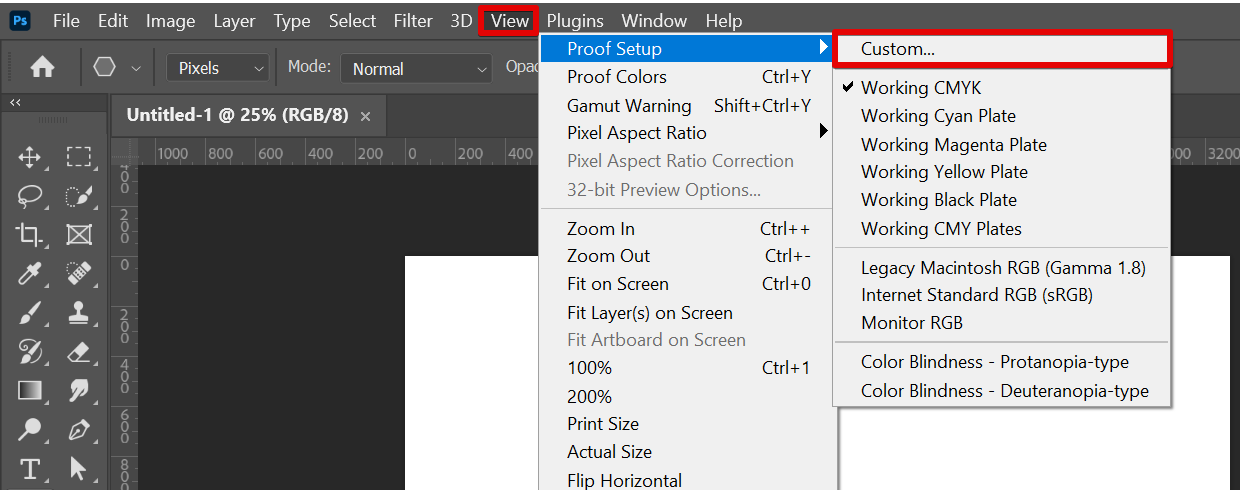
From there, go to the View menu and select Proof Setup > Custom.
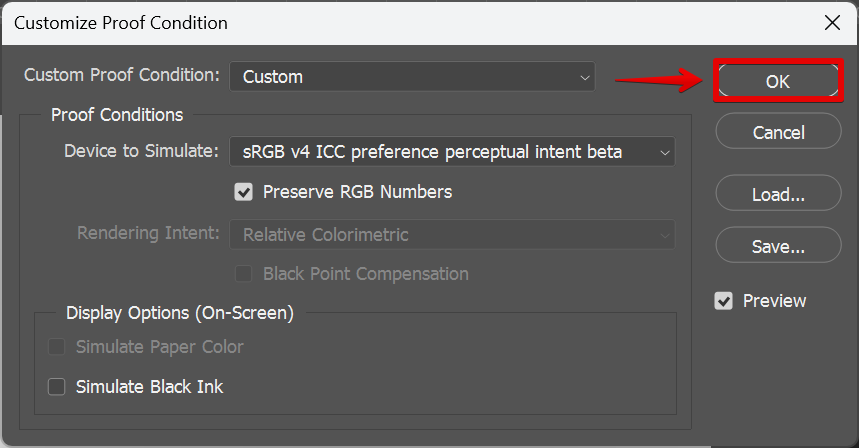
In the Customize Proof Condition dialog box, set the Device to Simulate section to the ICC profile you installed, and make sure to tick the Preserve RGB Numbers checkbox.

Finally, you will need to click on the OK button to save your changes.
PRO TIP: When working with ICC profiles in Photoshop, it’s important to understand that they are only supported by certain file formats. ICC profiles can be embedded in JPEG, TIFF, and PNG files, but not in PSD or RAW files. In addition, ICC profiles only work with 8-bit and 16-bit images; they will not work with 32-bit images.
No matter which method you use, adding an ICC profile to Photoshop is a pretty simple process. Just make sure that you’re using a high-quality ICC profile so that your images will look their best.
8 Related Question Answers Found
ICC profiles are essential for getting the most accurate color possible when printing images. They help ensure that the colors you see on your screen are the same as the colors that will be printed on your paper. Photoshop has a built-in tool for creating ICC profiles, which can be used to create profiles for both RGB and CMYK color spaces.
1.
Installing an ICC profile in Photoshop is a simple process that can be completed in just a few steps. First, you will need to download the ICC profile from the website of your printer or monitor manufacturer. Once the file has been downloaded, you will need to unzip it and then double-click on the file to open it.
ICC profiles are used to color manage digital images. Each device that you use to view or print your images has a unique ICC profile. When you edit an image in Photoshop, you can apply an ICC profile to ensure that the colors are rendered accurately on that device.
When you are working with ICC profiles in Photoshop, there are a few things that you need to keep in mind. First of all, you need to make sure that you have the latest version of Photoshop installed on your computer. Secondly, you need to make sure that your ICC profile is properly installed in Photoshop.
An ICC profile is a set of data that characterizes a color input or output device, or a color space, according to standards promulgated by the International Color Consortium (ICC). An ICC profile is used in color management systems to ensure that colors are accurately represented and reproduced throughout the various stages of production and delivery, from capture to output. There are different types of ICC profiles, depending on the device or color space being characterized.
Installing an ICC profile in Photoshop CC is a simple process. First, download the ICC profile to your computer. Next, open Photoshop and go to Edit > Color Settings.
ICC profiles are essential for getting the best color results from your images, whether you’re printing them out or displaying them on screen. But what exactly are ICC profiles, and how do they work? An ICC profile is a set of data that describes how a particular device or medium produces color.
There are a few different ways to change the ICC color profile in Photoshop. One way is to go into the Edit menu and select Color Settings. In the Color Settings dialog box, you can select a different color profile from the drop-down menu.