If you’re a web designer, you know how important it is to have access to quality graphics. However, finding the perfect image for your project can be a challenge.
That’s where Figma comes in. Figma is a great tool for creating vector graphics that can be exported for use in your designs. In this article, we’ll show you how to export a frame from Figma so you can use it in your next project.
To export a frame from Figma, first, open the file that contains the frame you want to export. Then, click on the “File” menu and select “Export.”
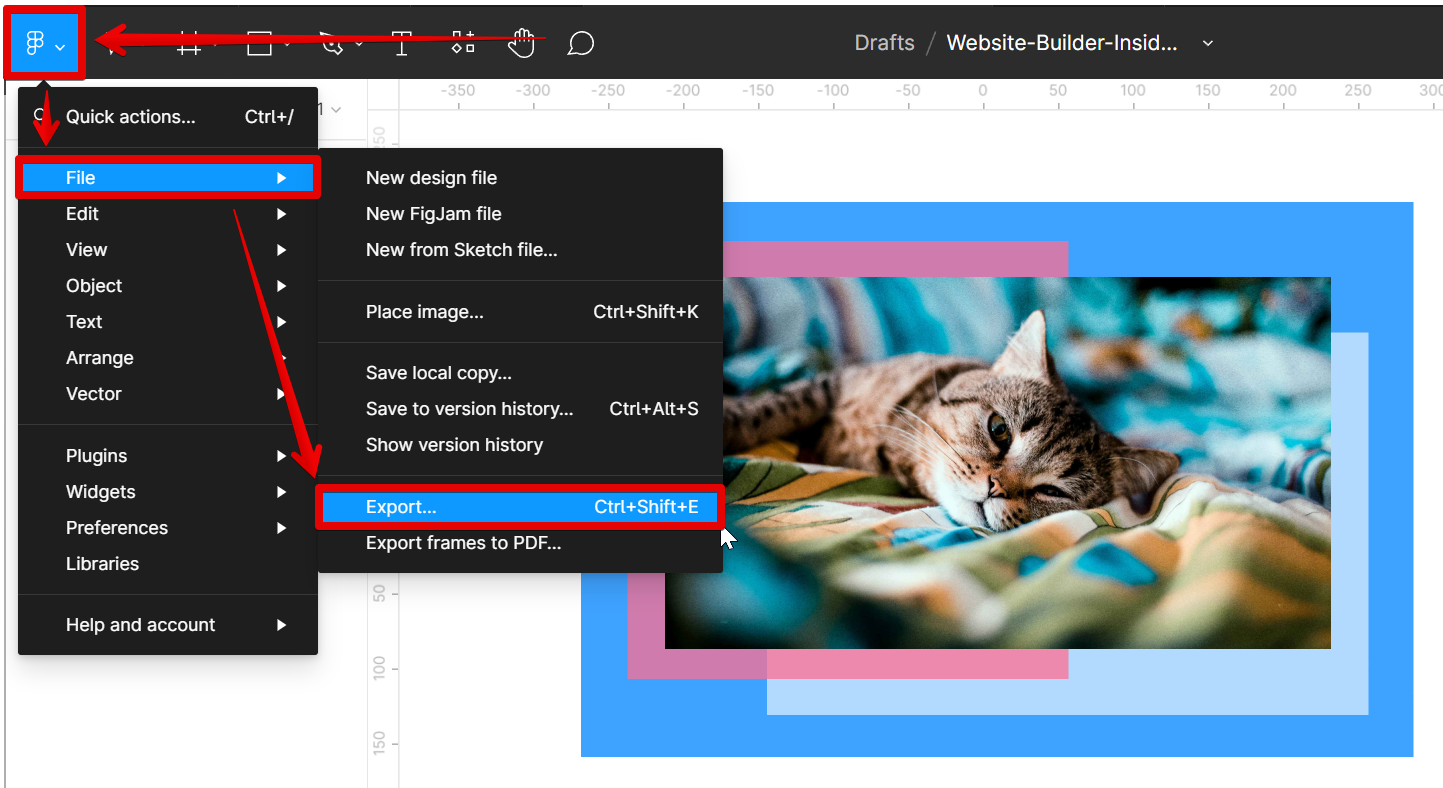
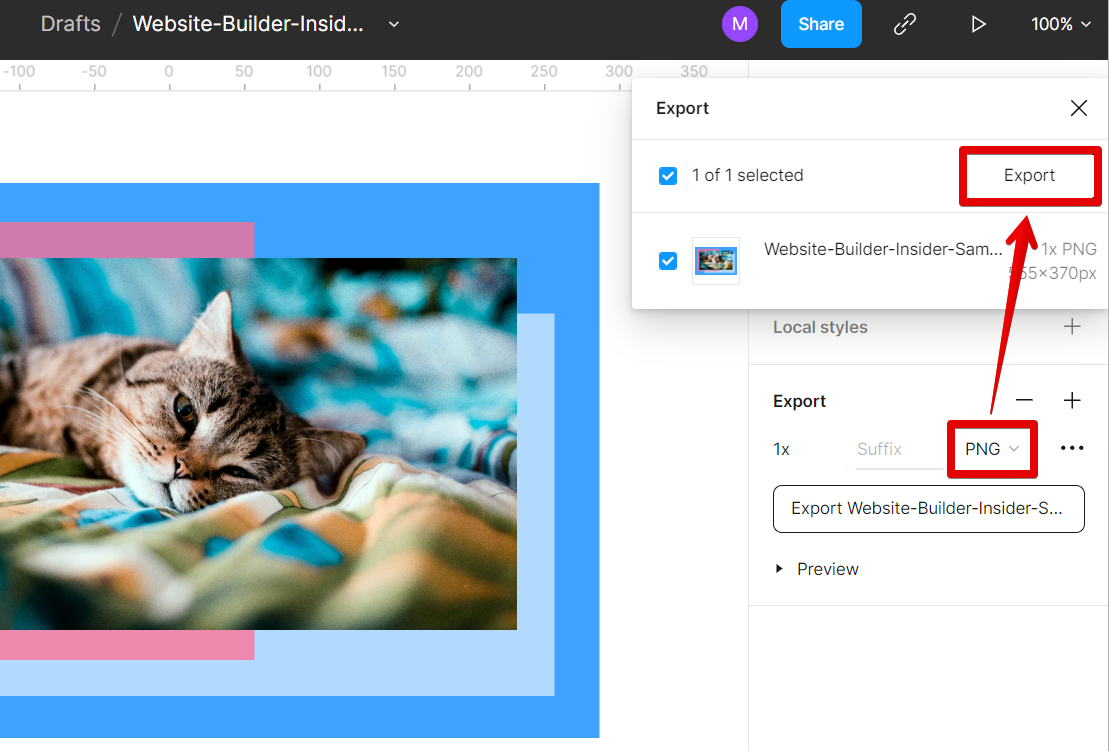
In the Export dialog box, select “PNG” from the Format drop-down menu and click “Export.”
PRO TIP: When exporting a frame from Figma, be sure to select the correct file format and resolution. Incorrect settings may result in poor-quality images or incorrect file sizes.
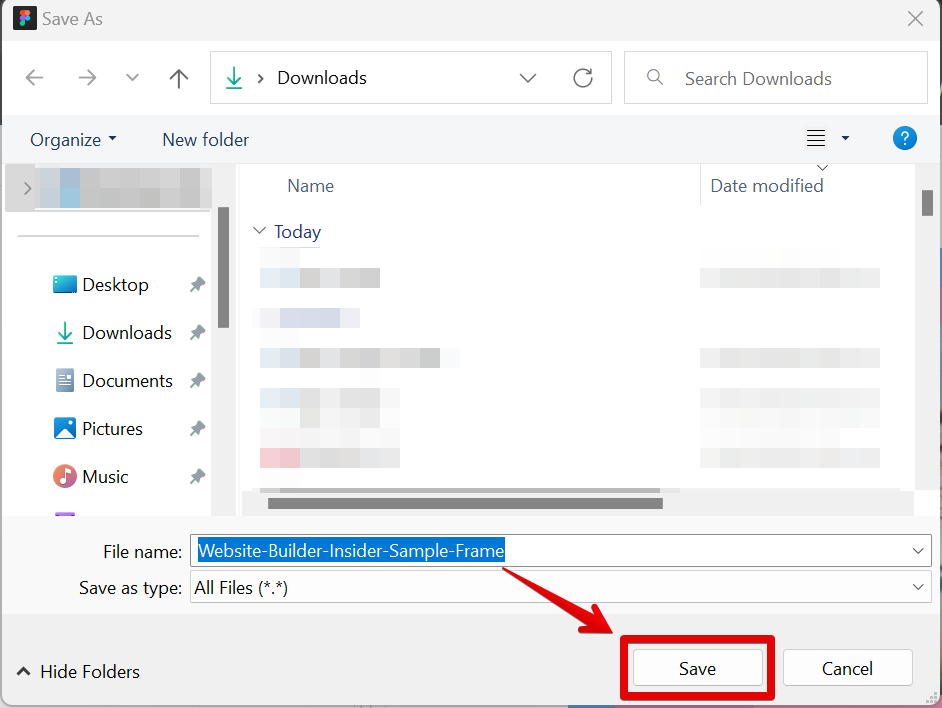
In the pop-up window that will appear, select your preferred file location and type in your file name. Once done, click on the “Save” button.
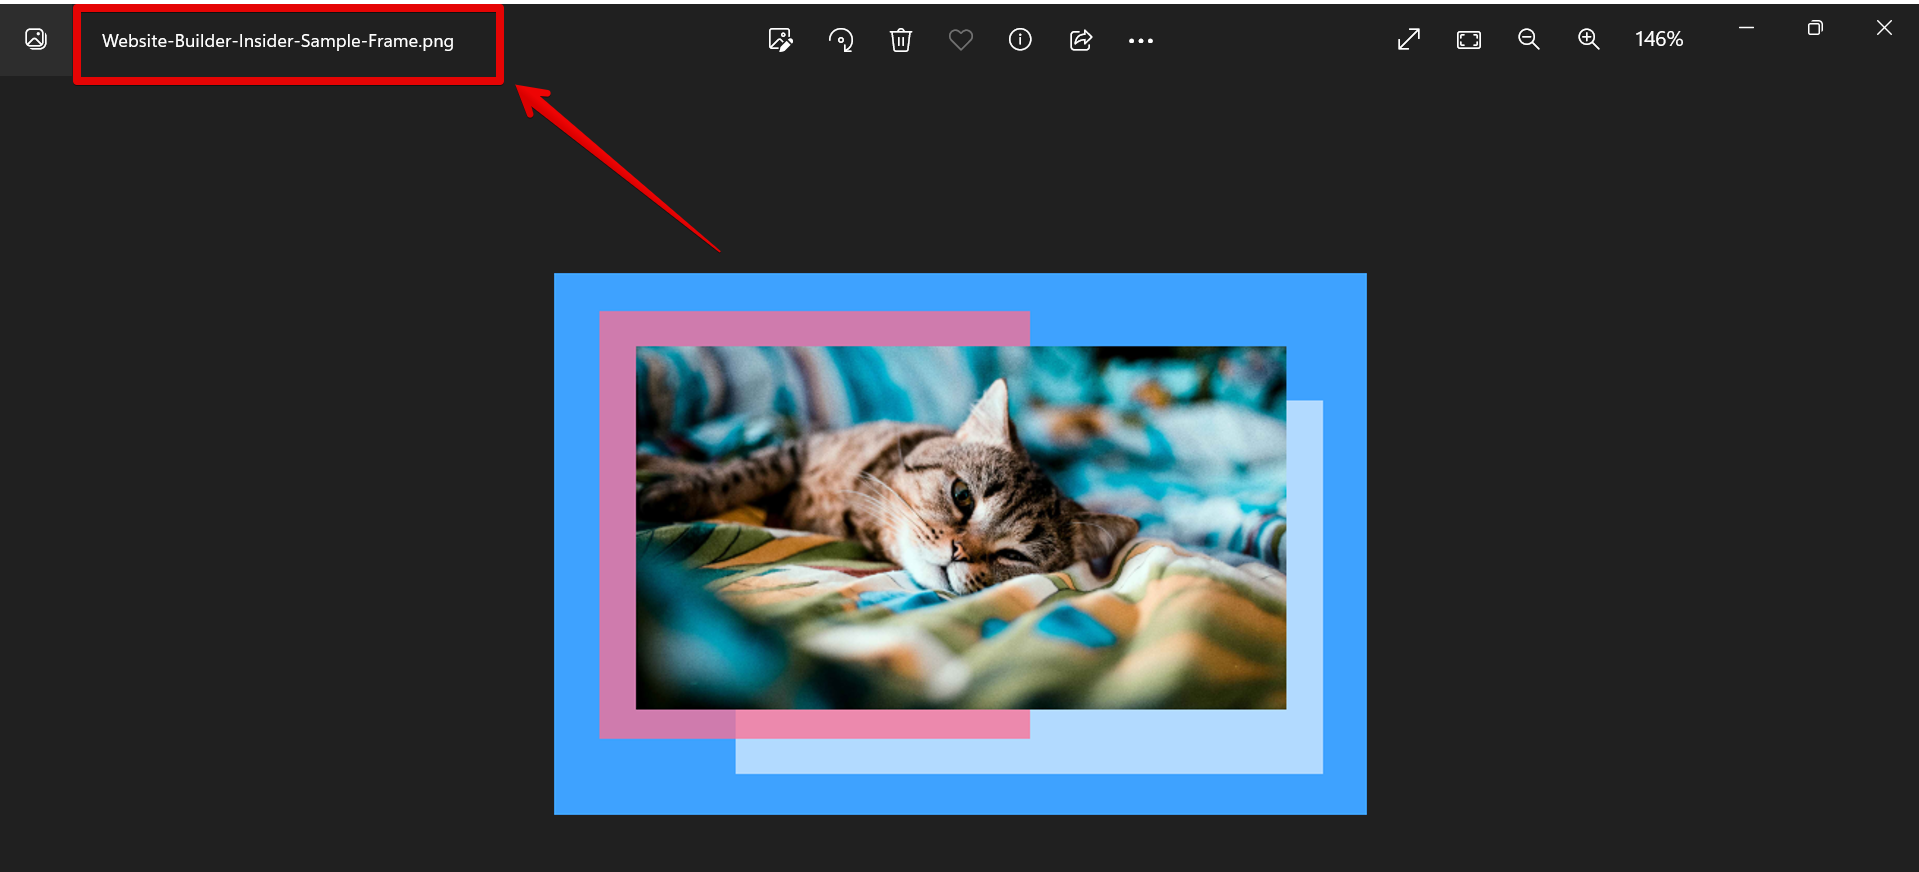
Once the PNG file has been exported, you can then use it in your design project. To do this, simply open the file in your preferred image editor and crop or resize it as needed. And that’s all there is to exporting a frame from Figma!
How Do I Export a Frame From Figma?
Exporting a frame from Figma is easy! Just follow these simple steps:
1. Open the file that contains the frame you want to export.
2. Click on the “File” menu and select “Export.”
3. In the Export dialog box, select “PNG” from the Format drop-down menu.
4. Click “Export.”
10 Related Question Answers Found
There are a few ways to export frames from Figma. The first way is to select the frame you want to export, then go to File > Export > Frames. This will export the selected frame as a .png file.
There are a few ways to export frames in Figma. One way is to select the frame you want to export and click on File > Export from the top menu. You can also right-click on the frame and select Export from the context menu.
Figma is a vector-based design tool that is gaining in popularity among web and app designers. One of its advantages over other design tools is its ease of use in exporting assets. In this article, we’ll show you how to export all frames in Figma.
There are a few ways that you can export a frame from Figma. One way is to select the frame that you want to export and then click on the ‘Export’ button in the top menu bar. This will open up the Export dialog box where you can choose the file format that you want to export the frame as, as well as the scale and background color.
Figma is a great design tool that allows you to export your designs as PNGs, SVGs, or PDFs. You can even export the whole image at once! To do this, simply select the ‘Export..’ option from the File menu.
Figma is a user interface design tool that allows users to create and edit user interfaces. To export a video from Figma, first select the video file that you want to export. Next, click on the Export button in the toolbar.
Figma is an amazing tool for creating and sharing digital designs. One of the great features of Figma is its ability to export images. Here we will walk you through the steps to exporting an image from Figma.
Figma is a great design tool that allows you to create amazing designs for your website or app. However, one thing that Figma doesn’t allow you to do is export your designs as videos. This can be a bit of a pain if you want to create a video demo of your design or if you want to create an animated GIF.
Figma is a vector graphics editor and design tool, created by Dylan Taylor and Evan Wallace. It is available for macOS, Windows, and Linux. With Figma, you can create vector graphics and illustrations, as well as design user interfaces for websites and apps.
There are a few things to keep in mind when exporting images from Figma:
Choose the right file format
Use the correct export settings
Consider using a vector graphic
File Format
The file format you choose will affect the quality of your image. For example, JPEG is a lossy format that will compress your image and result in a lower-quality image. PNG is a lossy format as well but to a lesser extent.