Rounding the corners of images is a common task in Photoshop. There are a few different ways to do it, but we’ll focus on the two most popular methods: using the Rectangle Tool with a Vector Mask and using the Rectangle Tool with the Inverse Tool.
1. Rectangle Tool with a Vector Mask
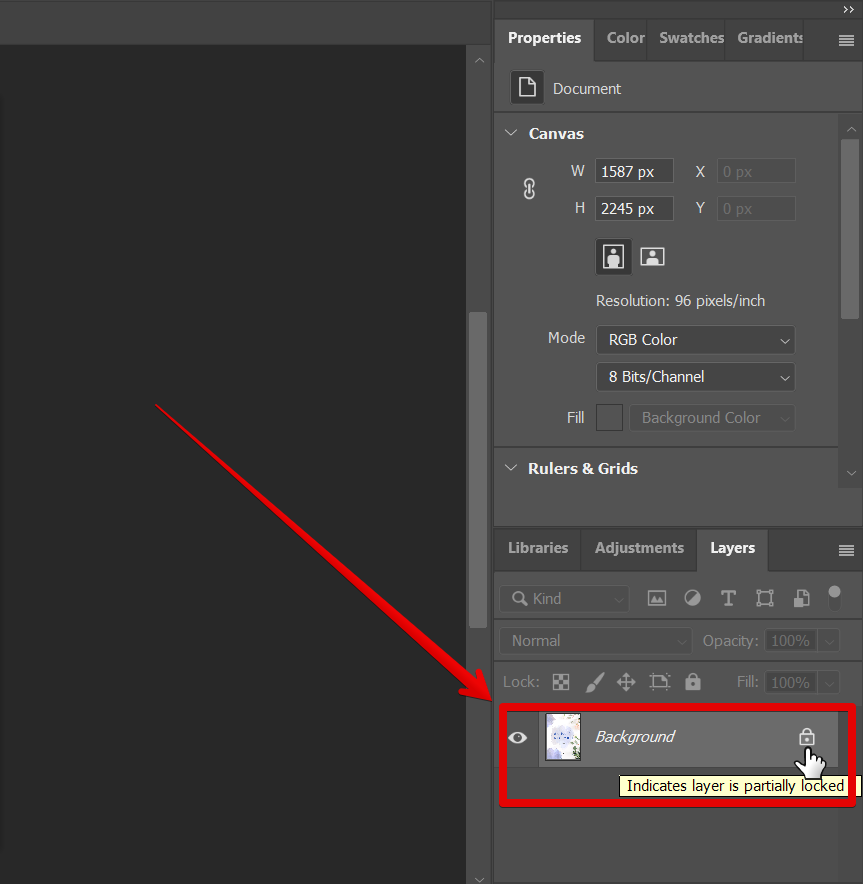
The Rectangle tool with a Vector Mask is the easiest way to round corners in Photoshop. To do this, first, make sure that your layer is unlocked. Just go to the “Layers” window and click on the lock icon on your layer to unlock.
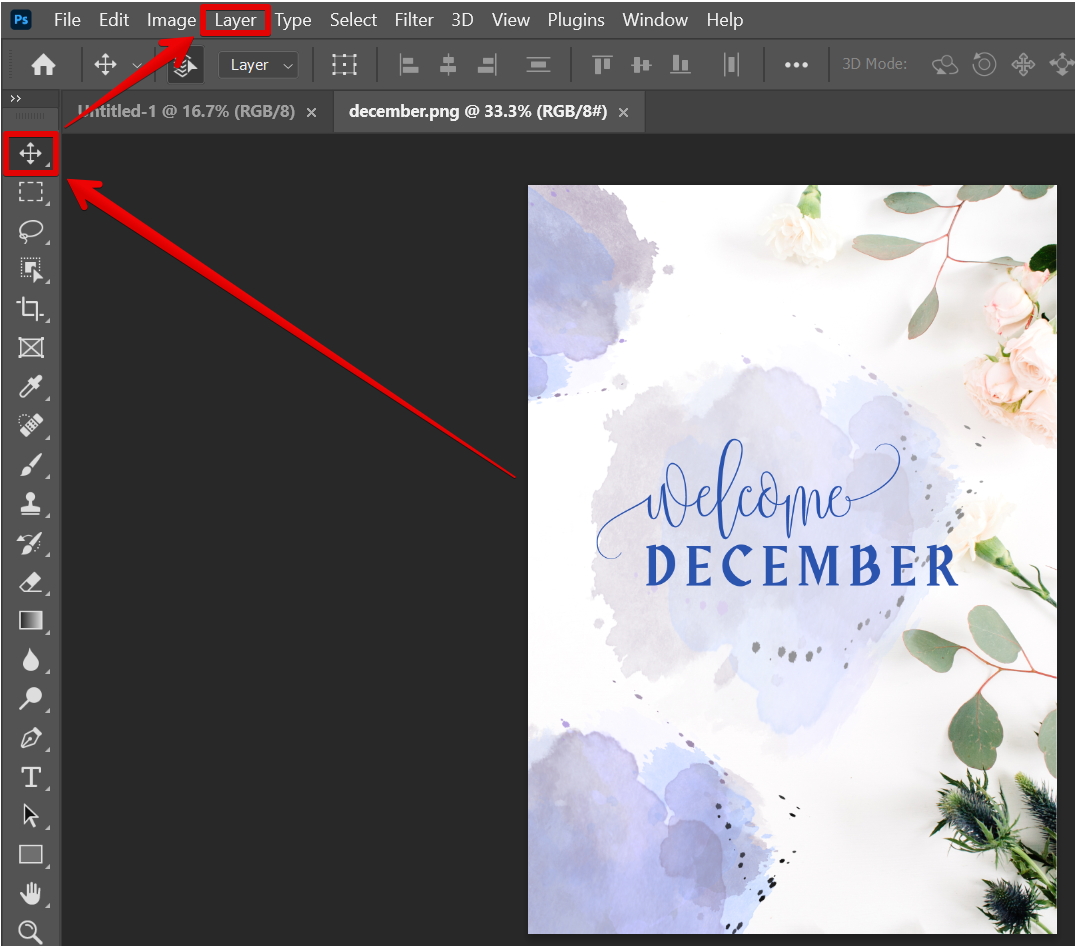
For the next step, select the “Move tool” from the toolbar, then click on “Layer” on the top menu.
NOTE: You need to make sure that the “Move tool” is selected before proceeding with the Layer settings. Otherwise, you might encounter problems with the next steps.
Select “Vector Mask” from there and click on the “Reveal All” option.
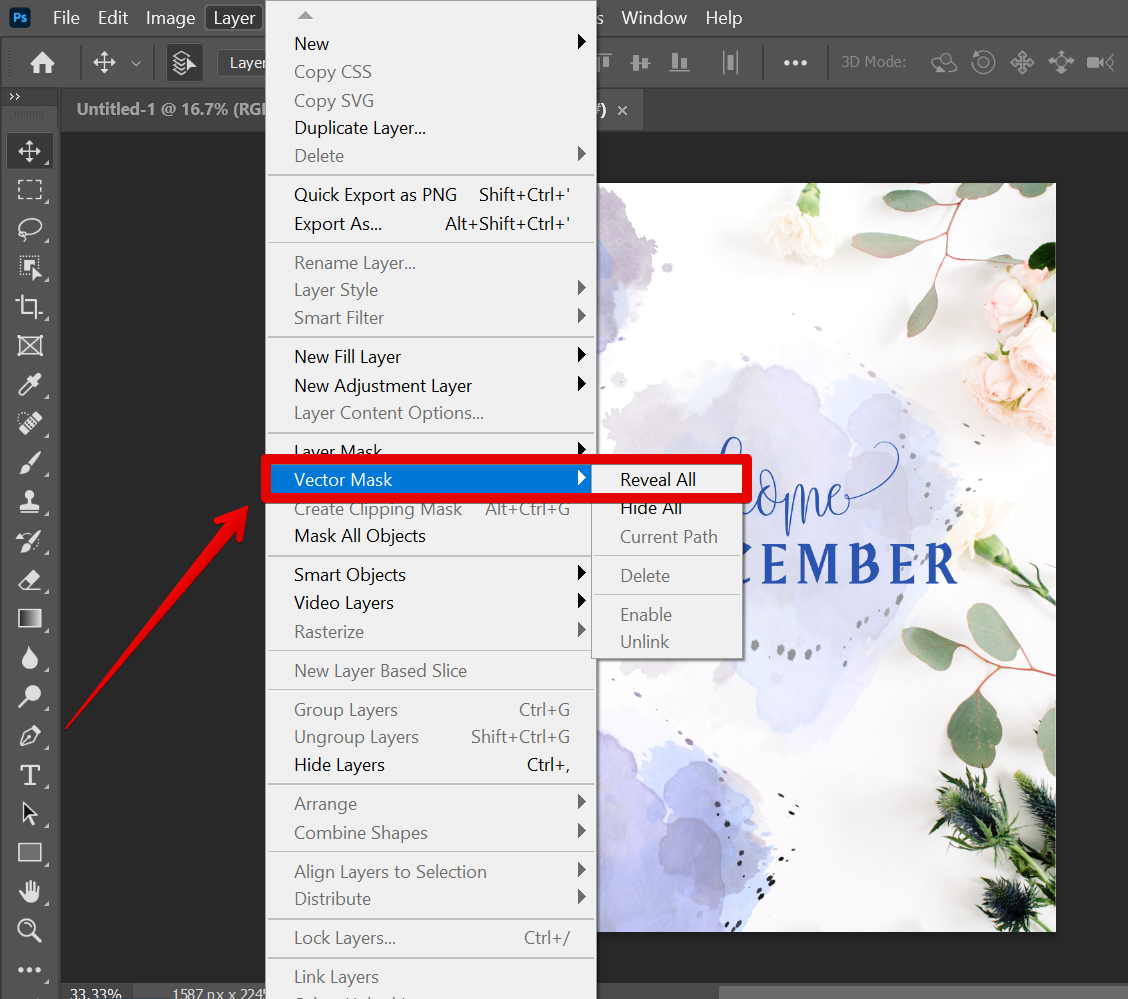
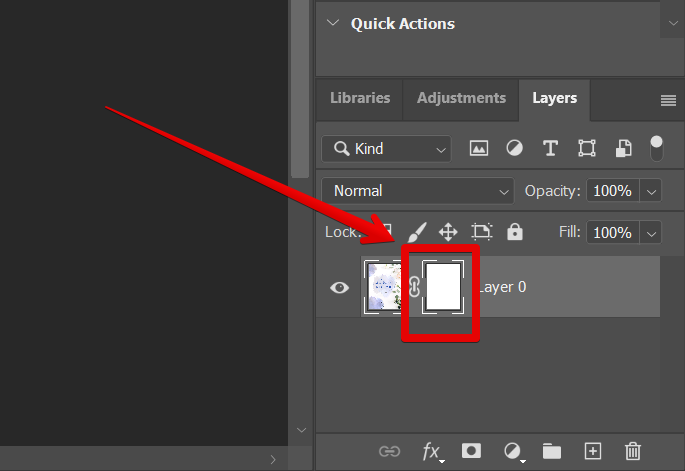
You should now see a white rectangle next to your original layer.
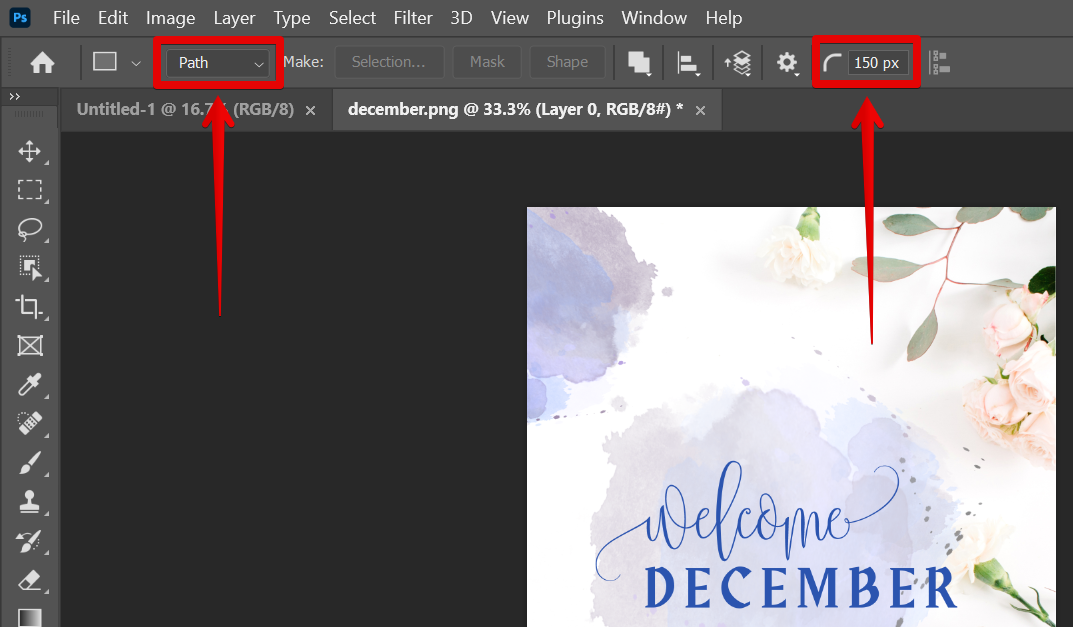
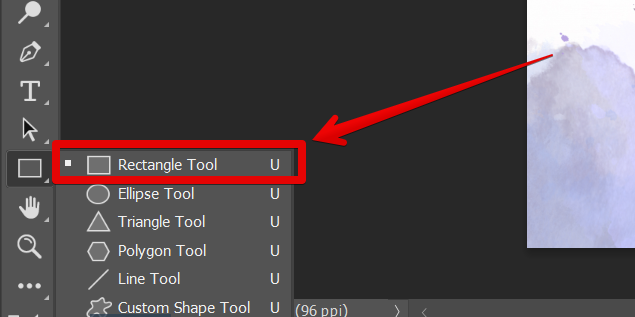
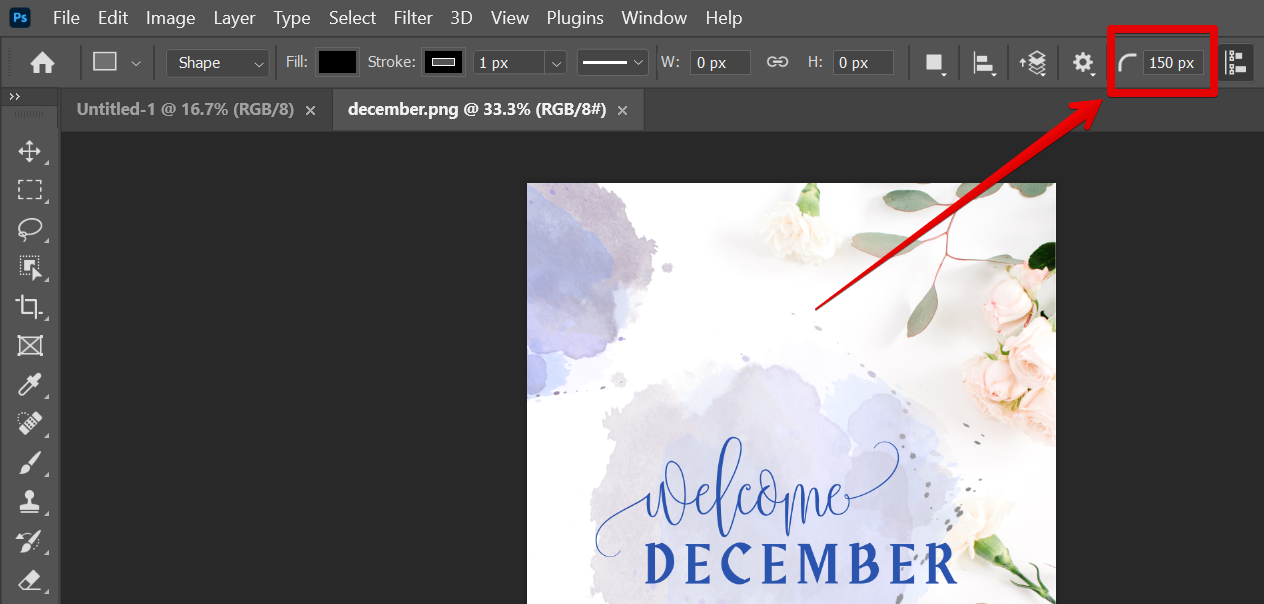
The next step is to select the “Rectangle tool” from the left toolbar.
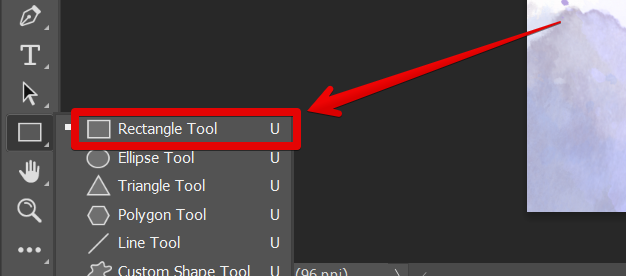
In the top menu, change the Rectangle tool settings to make a rectangle with rounded corners. To do this, set the radius of the rounded corners to 150 px. Also, set the tool mode to “Path”.
NOTE: You can adjust the radius of the rounded corners to your preference.
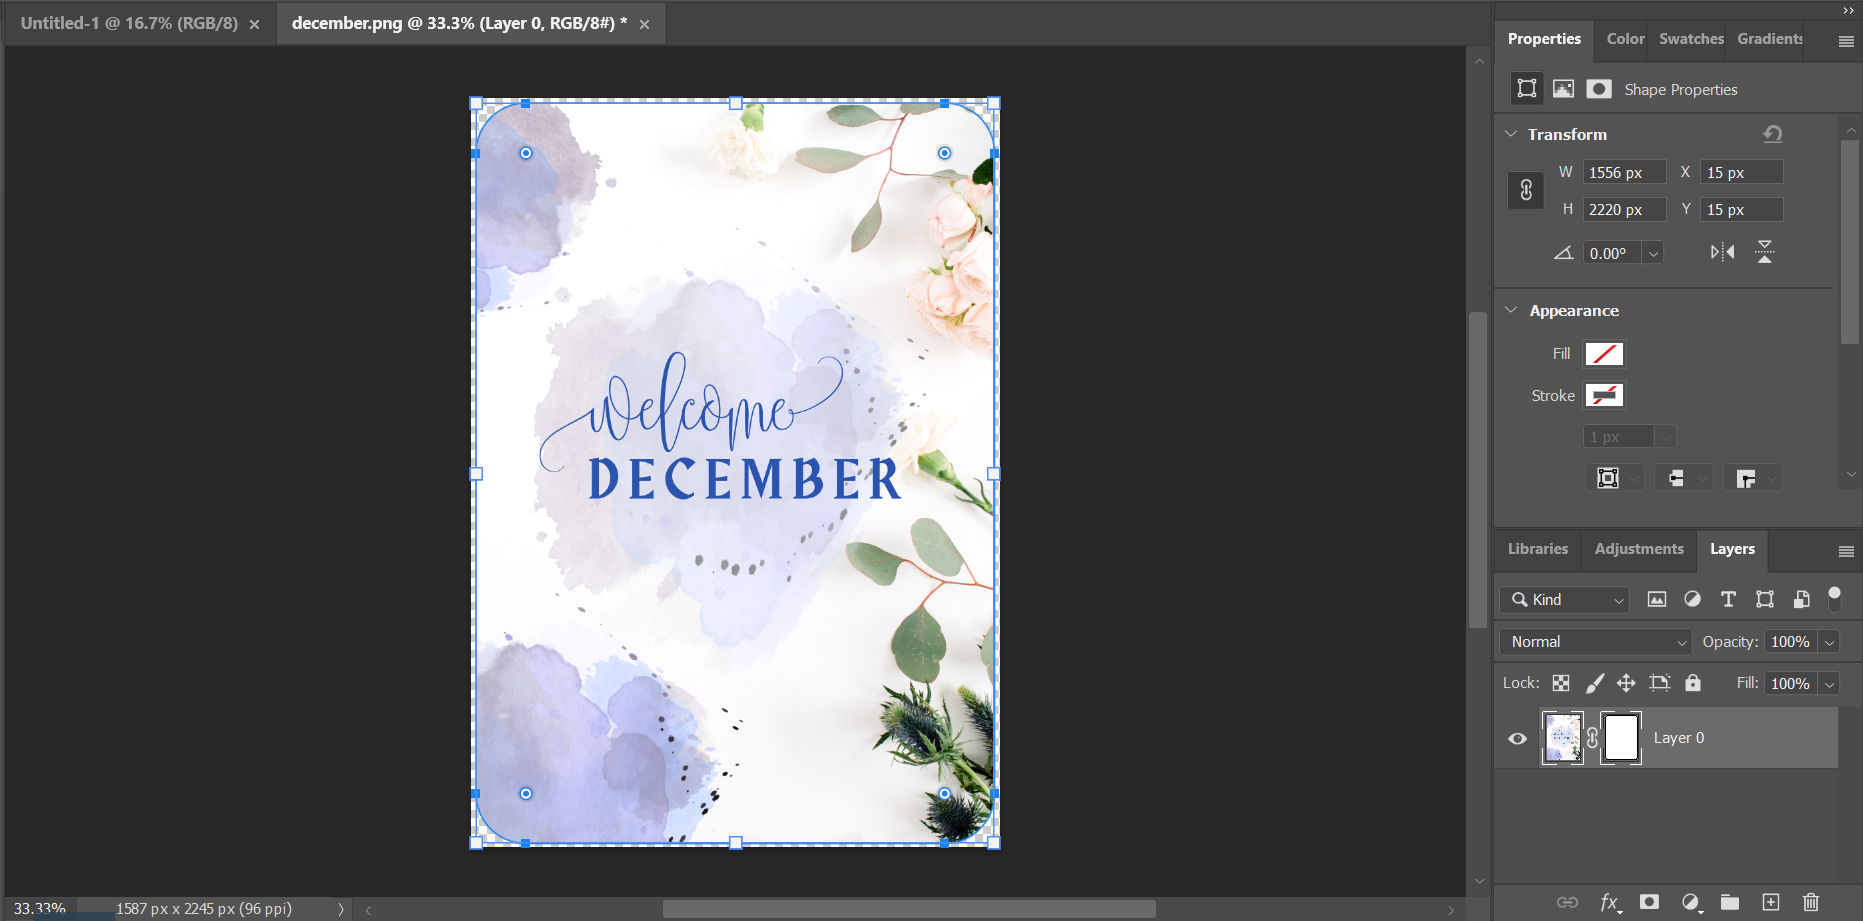
Once done, click and drag across your image to create a rounded rectangle which will automatically crop out the excess on the corners.
PRO TIP: If you are using Photoshop to round corners, be aware that a few things can go wrong. First, if your image has a lot of small details, the corners can end up looking blurry. Second, if you are not careful, the corners can end up looking too rounded. Finally, if you are not using the latest version of Photoshop, the corners may not look as smooth as they should.
2. Rectangle Tool with the Inverse Tool
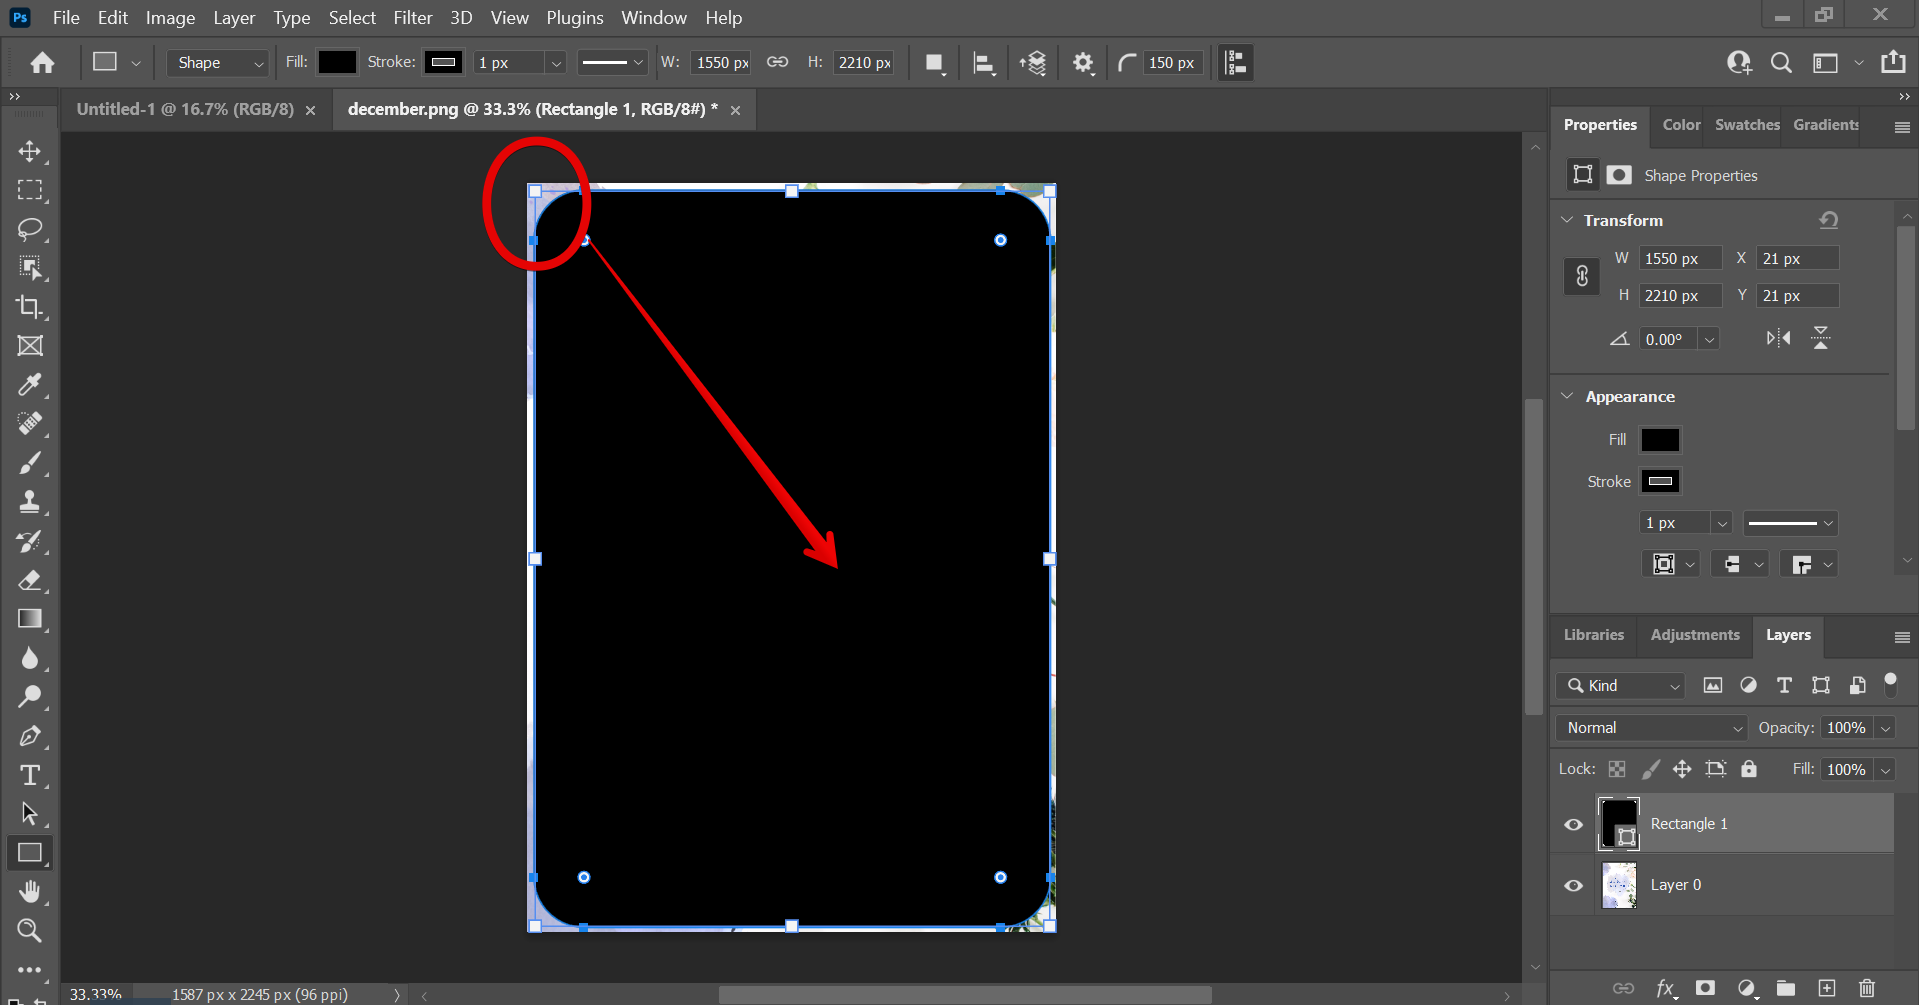
To round corners using the Rectangle tool and the Inverse Tool, first, create a rectangular shape using the Rectangle Tool. To do this, click on the Rectangle Tool from the left toolbar.
NOTE: Make sure to unlock your layer first before proceeding with the next steps.
In the top menu, set the radius of the rounded corners of your rectangle to 150 px.
Now click and drag across your image to make a rounded rectangle above it.
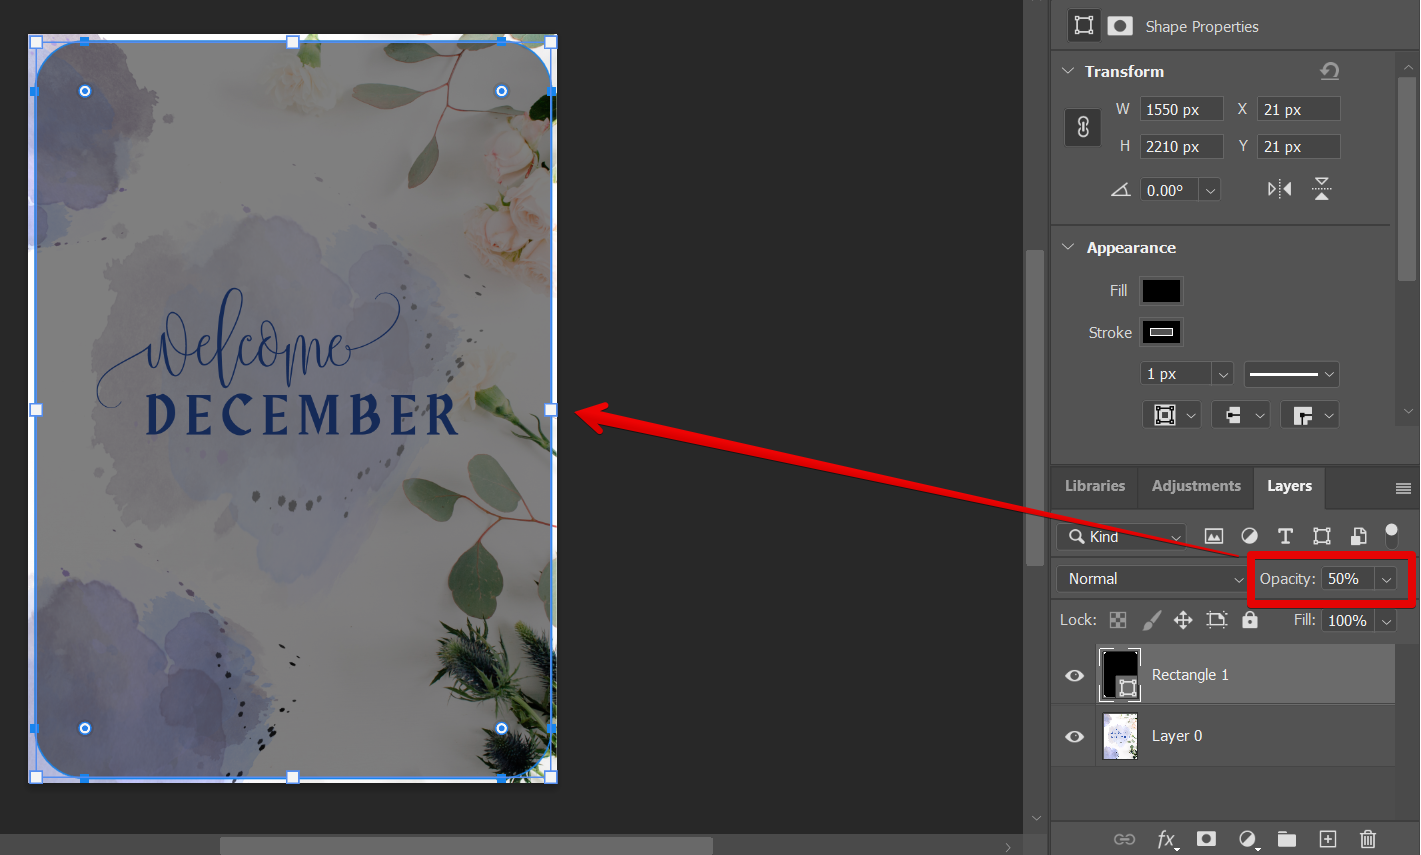
The next step is to set the Opacity of the rectangle layer to 50%, just so you can easily see it. You can do this in the “Layers” window.
Once done, press and hold the “Ctrl” key on your keyboard then click on the rectangle layer. You should now see an outline around the rounded rectangle on your image.

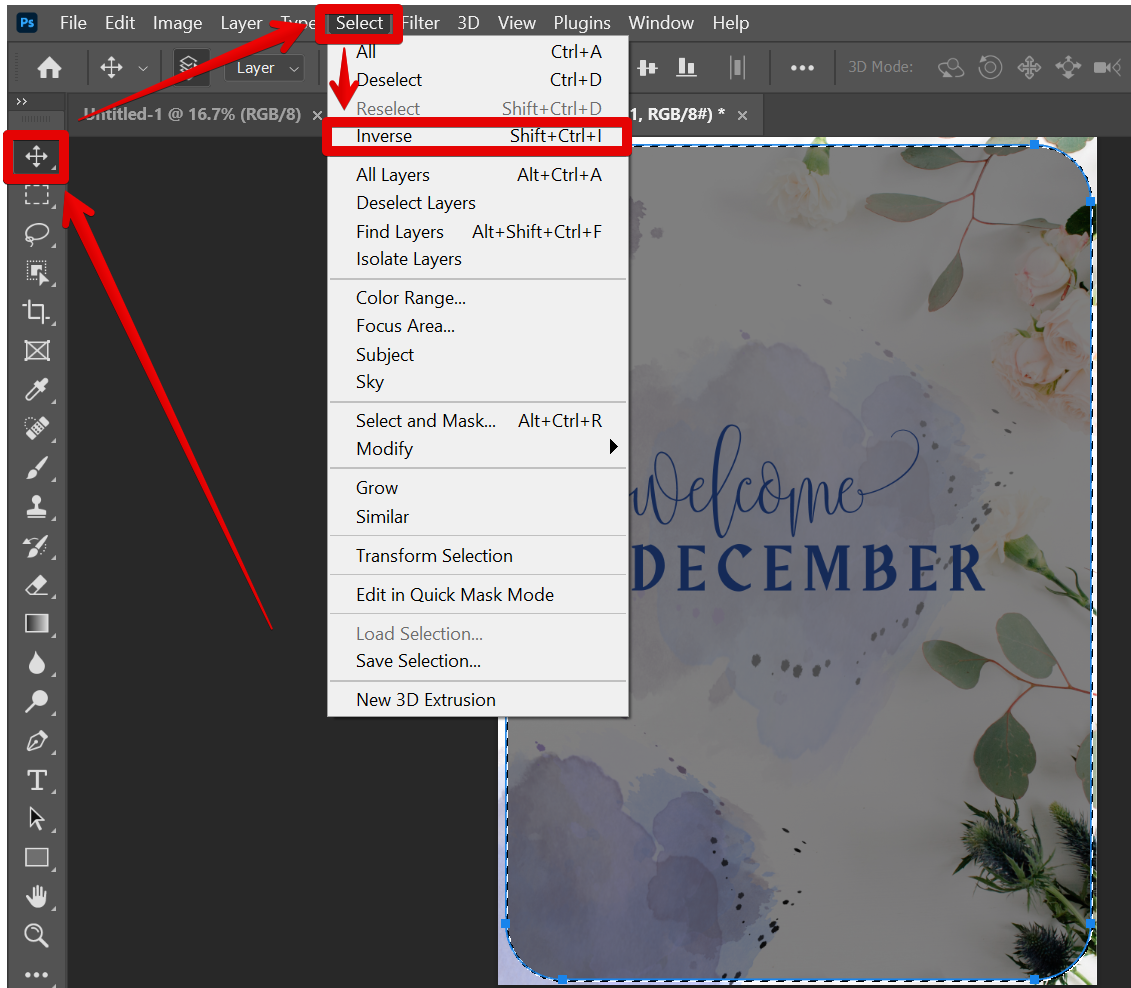
From there, select the “Move tool” from the left toolbar, then go to the “Select” option in the top menu and click on “Inverse.”
NOTE: Make sure to select the “Move tool” first before proceeding with the “Inverse” step. Otherwise, it won’t work as expected.
Lastly, press the “Delete” button twice on your keyboard and you should now see rounded corners of your image in Photoshop!
And there you have it! Both methods are quick and easy ways to round corners in Photoshop. Experiment with both to see which one works best for your needs.
10 Related Question Answers Found
If you want to give your images more personality, you can round the corners in Photoshop. This is a fairly simple process that can be completed in just a few steps. Here’s how to do it:
1.
There are a few different ways that you can make rounded corners in Photoshop. One way is to use the ‘Round Rectangle Tool’. With this tool, you can click and drag to create a rounded rectangle shape.
If you’re looking to add a little bit of extra flair to your photos, one way to do that is by cropping with rounded corners. Rounded corners can help give your photos a softer look, and can also help them stand out from the rest. Here’s how you can crop with rounded corners in Photoshop:
First, open up the photo you want to crop in Photoshop.
There are a few ways to blur edges in Photoshop, depending on the desired effect. For a soft, feathered edge, use the Gaussian Blur filter. For a more intense effect, use the Motion Blur or Radial Blur filters.
There are a few ways to crop a circle in Photoshop, but one of the easiest ways is to use the Elliptical Marquee Tool. First, make sure the layer you want to crop is selected in the Layers panel. Then, select the Elliptical Marquee Tool from the Toolbox.
You can make rounded corners in Photoshop CC by using the Rounded Rectangle Tool. To do this, first, select the Rounded Rectangle Tool from the Tools panel. Then, click and drag to create a rectangle with rounded corners.
Creating round labels in Photoshop is a simple process that can be accomplished in a few easy steps. Start by opening a new document in Photoshop. You can set the size and resolution to your desired specifications.
There are a few different ways that you can blur the edges of a photo in Photoshop. One way is to use the Gaussian Blur filter. To do this, go to Filter > Blur > Gaussian Blur.
Folded corners are a great way to add interest and style to your photos in Photoshop. They’re also relatively easy to create! In this tutorial, we’ll show you how to make a folded corner in Photoshop, using two different methods.
When it comes to making adjustments to photos in Photoshop, one of the most frequently used tools is the Eraser tool. The Eraser tool can be used to remove unwanted elements from a photo or to change the shape of an object. In this tutorial, we’ll show you how to use the Eraser tool to change the edges of a photo.