Illustrator is a powerful vector graphic design program that enables users to create logos, illustrations, and other graphics. One of the features that Illustrator users can use to make their projects more efficient is the Smart Guides feature.
To turn on the Smart Guides feature in Illustrator, follow these steps:
1. Open the Illustrator application.

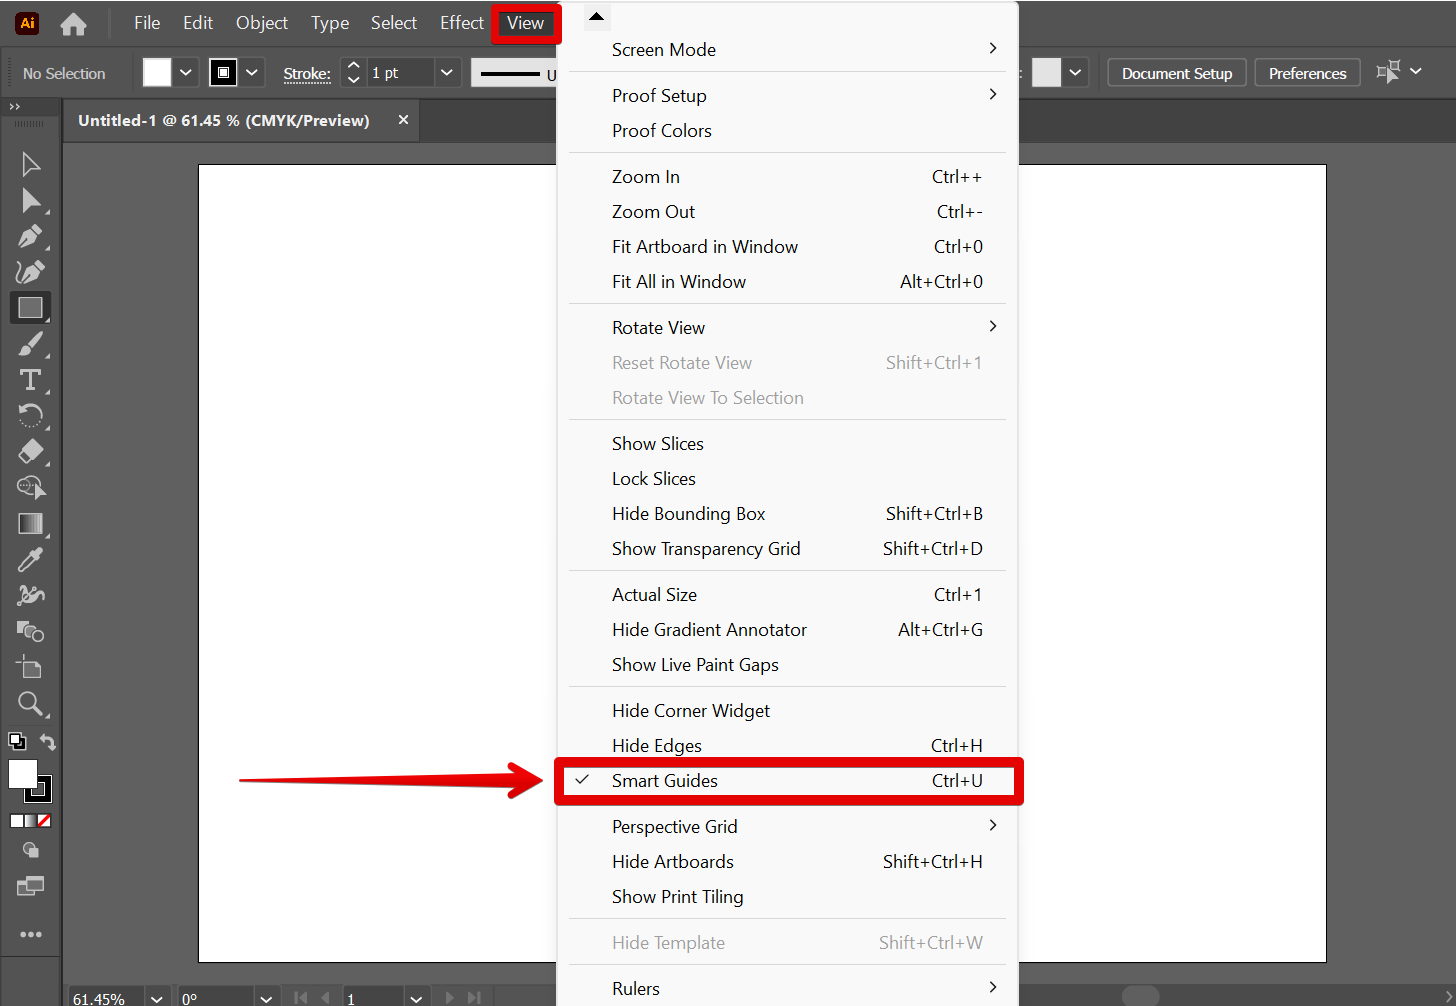
2. In the top menu, go to View and select the “Smart Guides” option to turn it on. You can also use the keyboard shortcut “Ctrl + U” to turn on Smart Guides.
NOTE: If “Smart Guides” in the View tab is already checked, that means it is currently turned on.
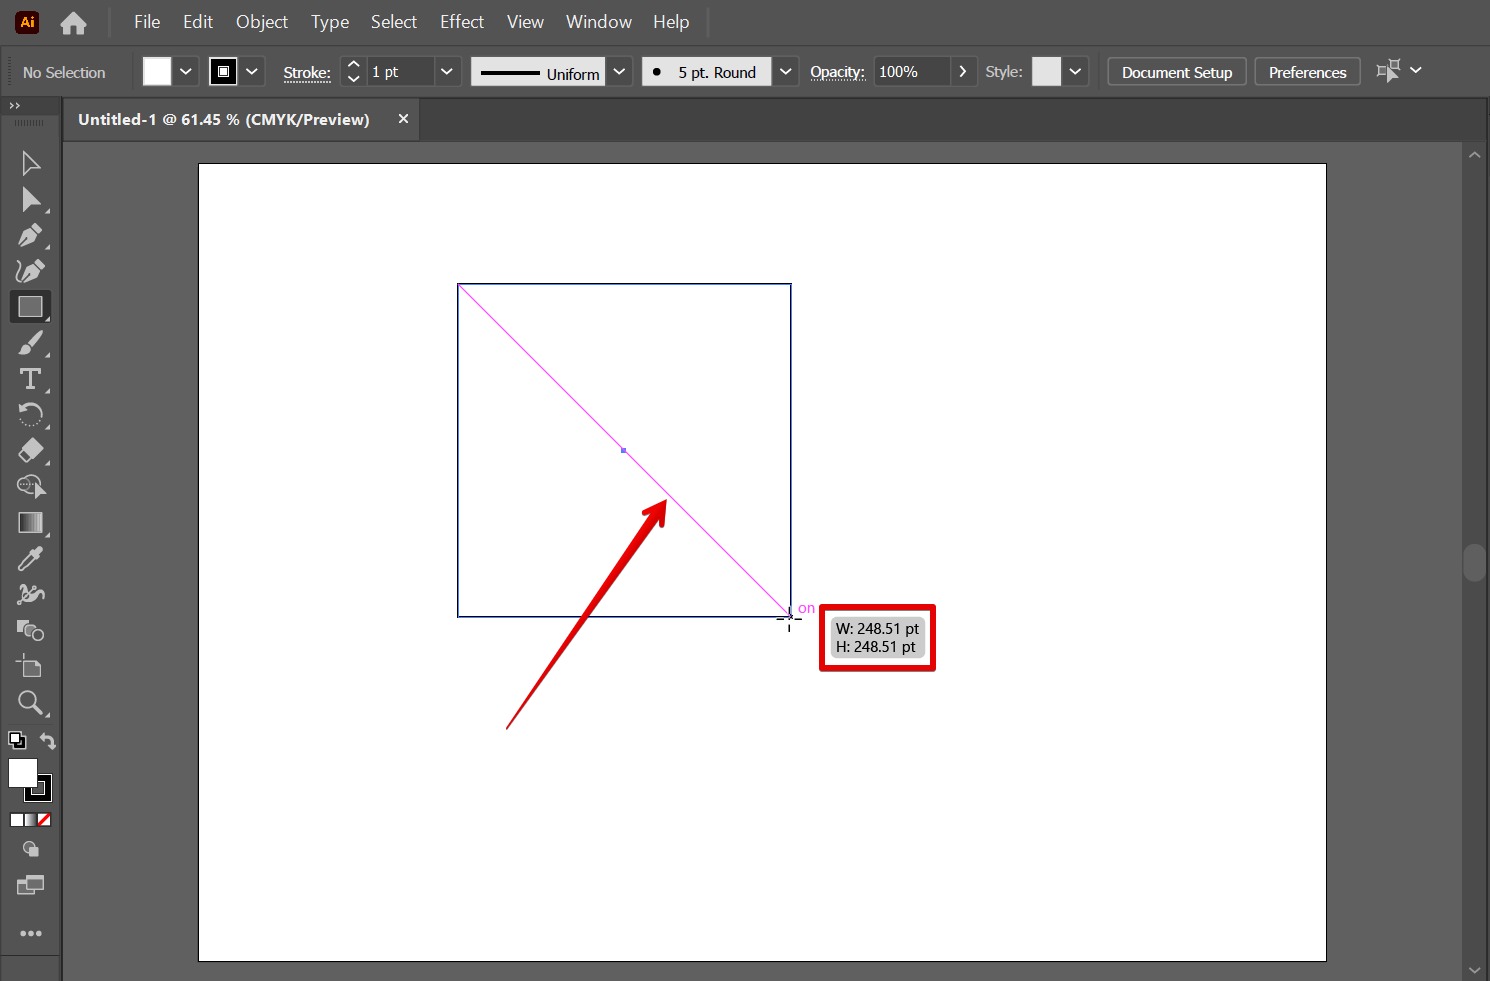
3. To use Smart Guides, try to create a rectangle using the “Rectangle Tool” in the left toolbar, then click and drag on your canvas. While creating your rectangle, there should now be a line guide across the shape and a preview of the rectangle’s current dimensions indicating that the “Smart Guides” is turned on.
NOTE: Smart Guides are used to ensure that the object or objects are placed in the correct position and resized accurately.
PRO TIP: Smart Guides are a great way to line up objects in Illustrator, but they can be a little tricky to turn on. Here’s a quick tip on how to do it:
1. Go to the View menu and select Smart Guides.
2. Alternatively, you can press Command + U (Mac) or Control + U (Windows) to toggle them on and off.
9 Related Question Answers Found
If you are seeing an “out of gamut” warning when you try to save a document in Adobe Illustrator, there are a few things you can do to fix the issue. First, make sure your document is in the correct format. If your document is in CMYK or RGB formats, it will most likely be in the correct format.
Snapping in Illustrator can be a helpful tool when you need to align objects, but it can also be annoying if it pops up all the time. There are a few ways to turn snapping off in Illustrator.
1. Use the Snap to Grid command.
If you are having problems with Illustrator tools not working properly, there are a few things you can do to reset them.
1. Quit Illustrator and relaunch it.
2. From the Illustrator menu, choose ” Preferences ”
3.In the ” Illustrator Preferences ” window, click on the ” Toolbars ” tab
4.
In Illustrator, you can enable guides by going to the View menu and selecting Guides. You can also access guides by pressing the G key. When you enable guides, you can create horizontal and vertical guides by clicking the Horizontal and Vertical buttons, respectively.
If you have a lot of anchor points in your Illustrator artwork, it can be difficult to delete them all at once. Here are three methods you can use to delete multiple anchor points:
1. Use the Direct Selection Tool (A) and select the anchor points you want to delete.
2.
Illustrator is a powerful vector graphics program that enables you to create detailed drawings and illustrations. One of the features of Illustrator is the ability to delete parts of objects. To delete a part of an object in Illustrator, you can follow these steps:
1.
Resizing an image in Illustrator is a common task that can be done easily without distortion. To resize an image, first select the image in the Illustrator document. Next, use the sizing tools in the toolbar to adjust the size of the image.
How to Remove an Effect in Illustrator
If you want to remove an effect from an image in Illustrator, there are a few different ways to go about it. You can use the Effect menu, the Stroke panel, or the Blur tool. The Effect menu has a number of different effects that you can apply to your image.
Making a water drop in Illustrator is simple. First, create a new document with a width of 600 pixels and a height of 300 pixels. Then, create a circle using the Ellipse tool (L).