Drawing curved lines in Canva requires a somehow different approach from other design software. Just follow these simple steps to know how.
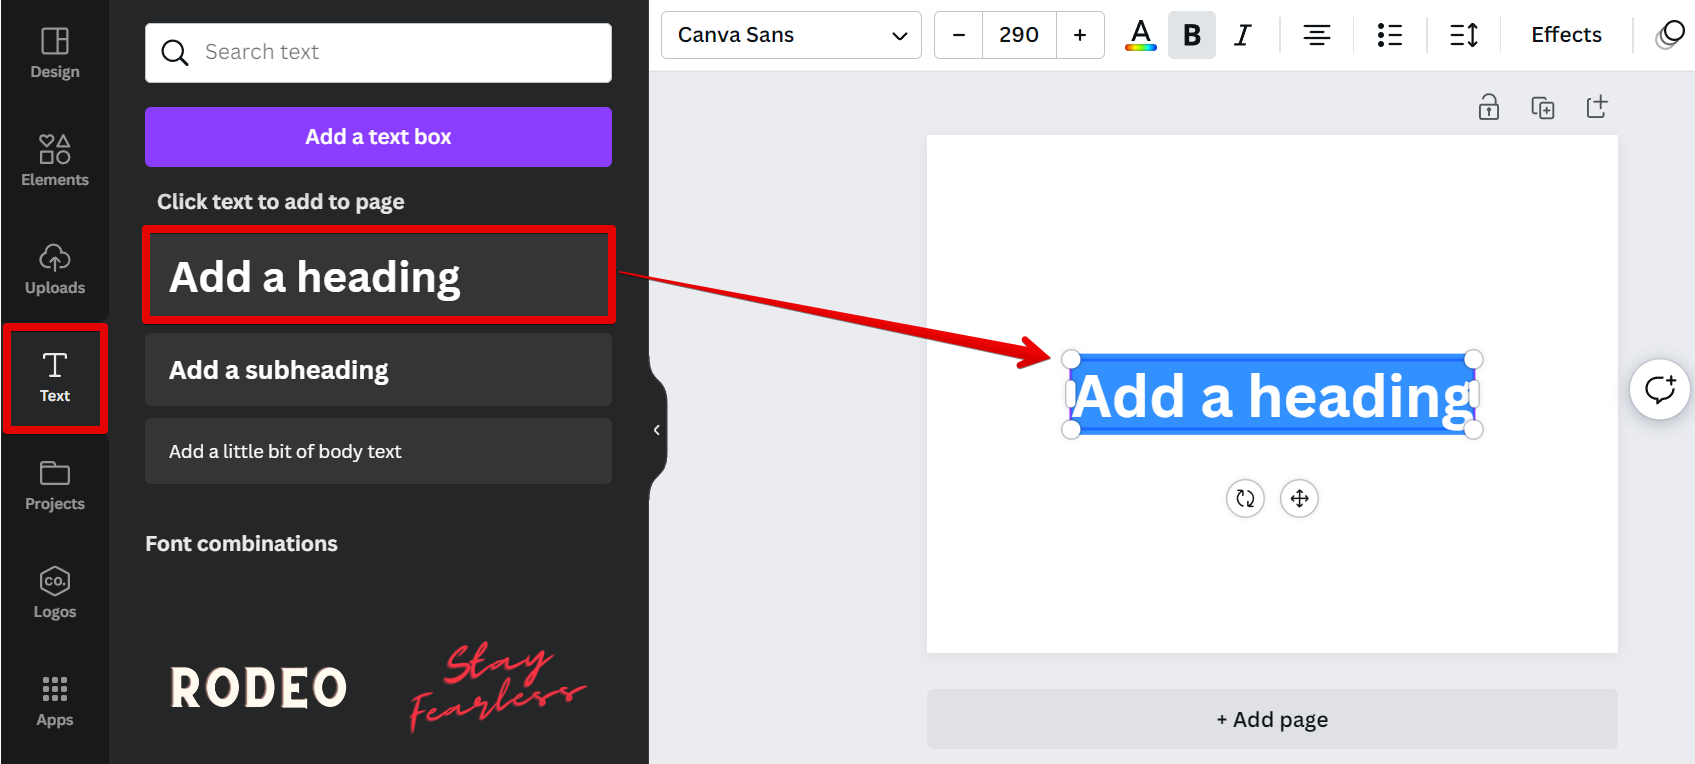
To draw a curved line in Canva, first, select the ‘Text’ tool from the left toolbar, then click the “Add a heading” option. A text box will be automatically added to your canvas.
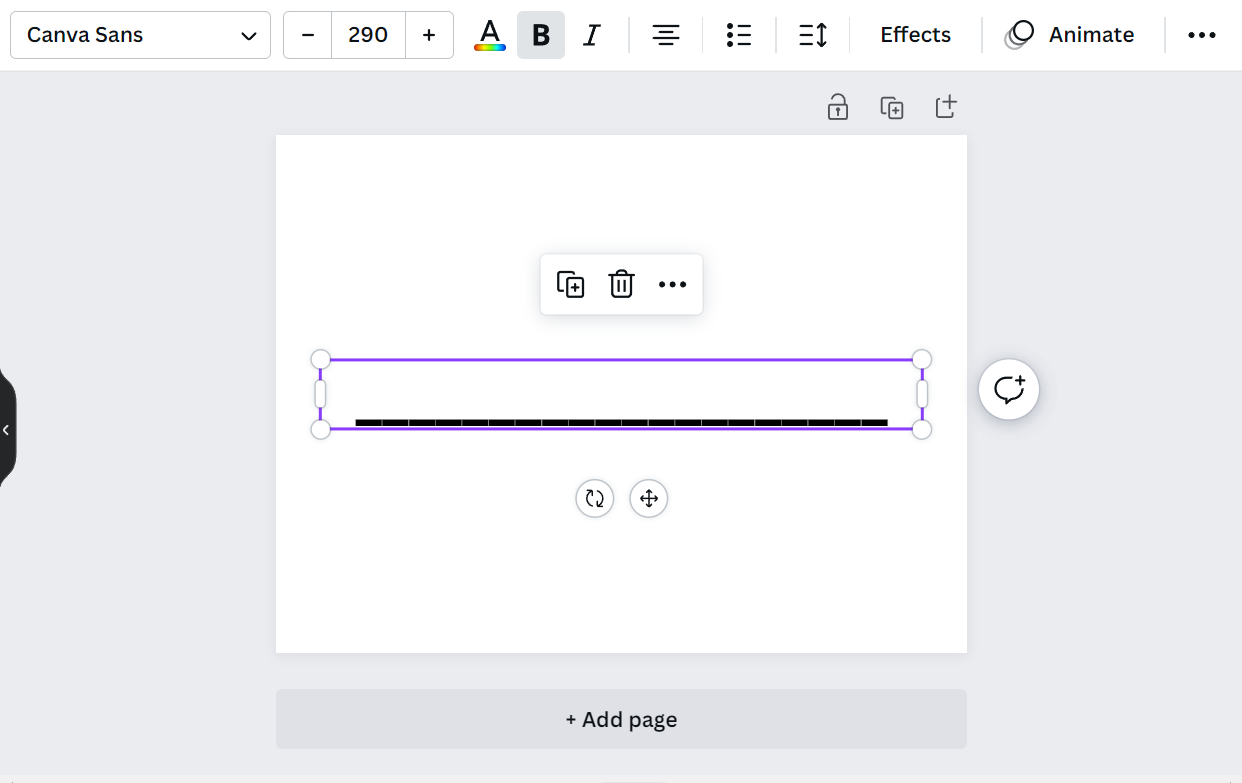
To make a straight line first, type in the text box the underscore sign (_) as many as you want, depending on how long the line will be.
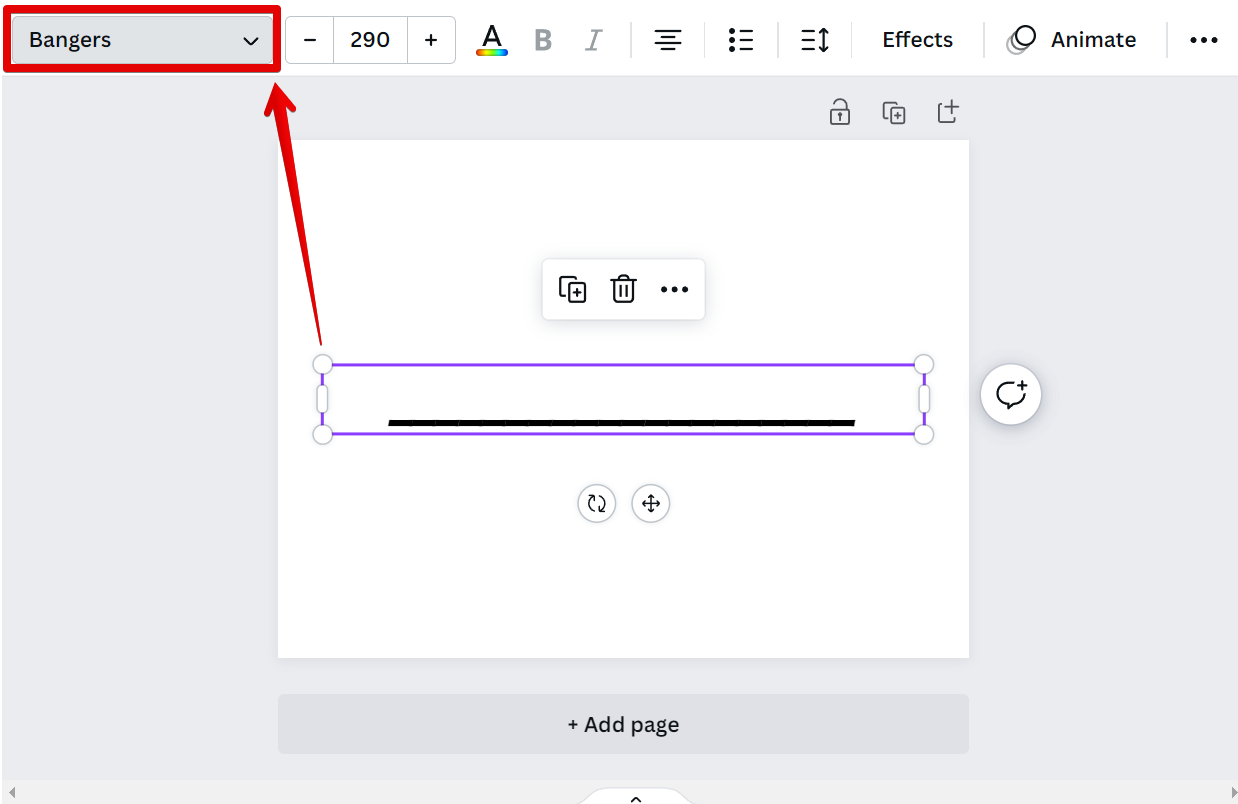
Next, select a font style that will give you the least spacing between the underscores. Here, we will use the “Bangers” font. You can also adjust the other settings of the line, like Line Weight and Color using the top menu.
NOTE: You can also explore other font styles for more options.
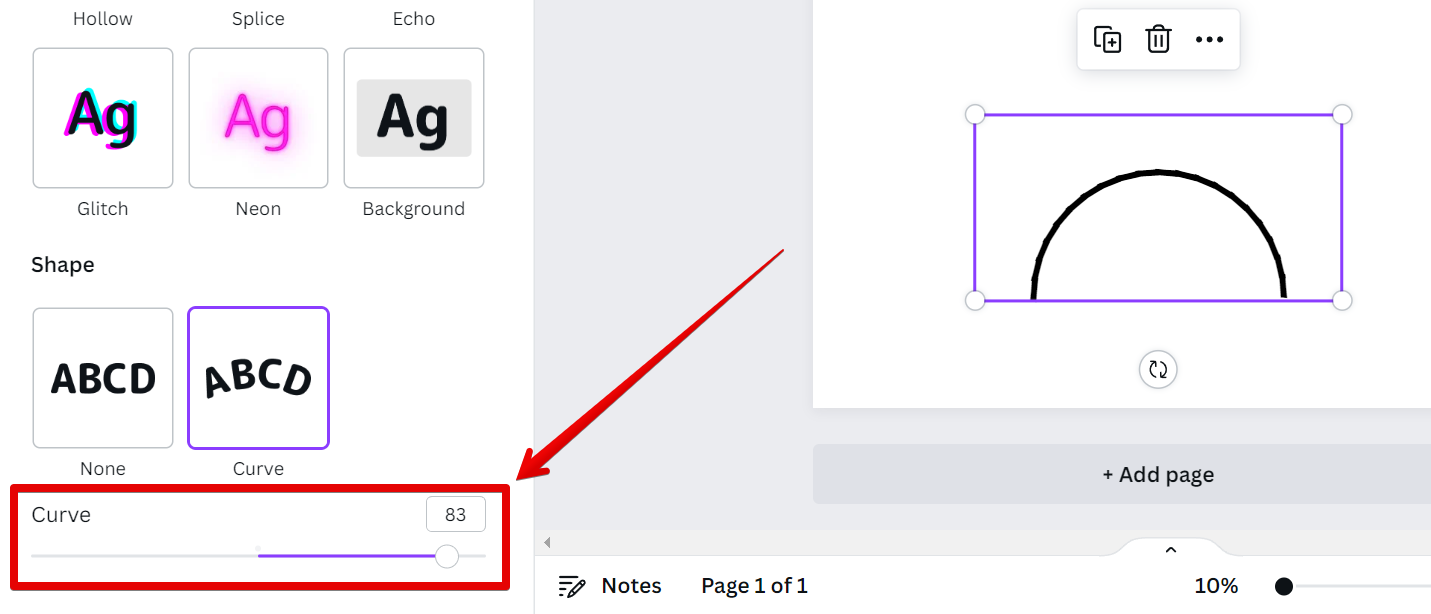
Once done, click on the “Effects” button at the top, then select “Curve” at the left menu which will appear.
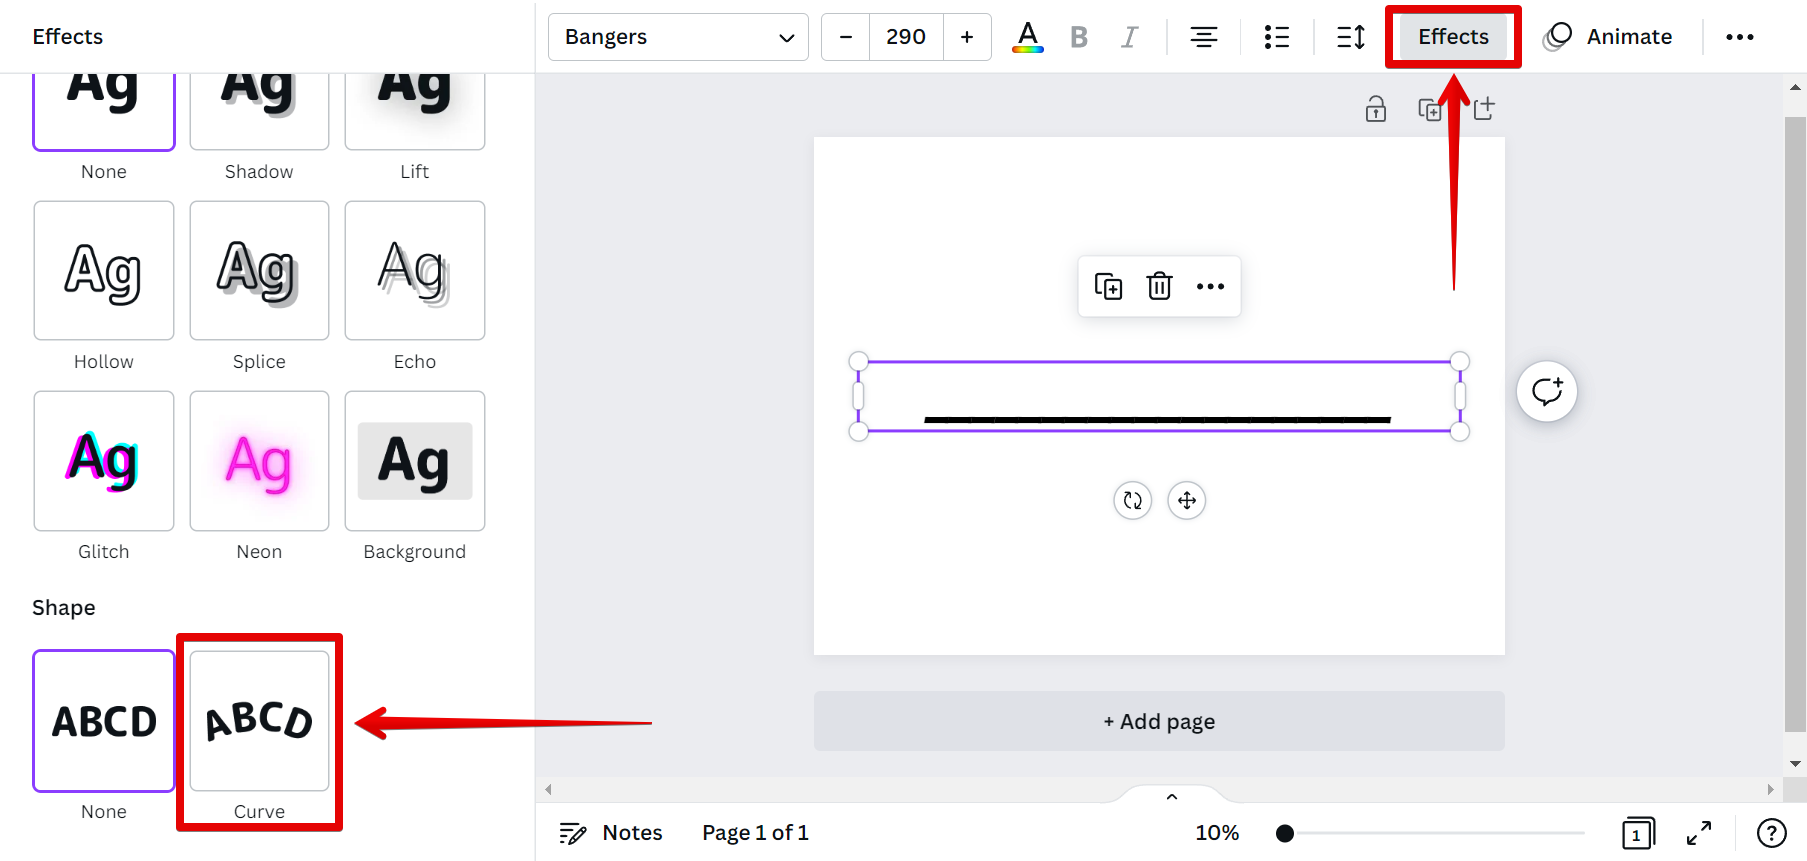
You can adjust the curvature of your line using the curve slider below.
NOTE: A positive value will give you a curve opening downwards while a negative value will result in an upward curve.
PRO TIP: Please be aware that drawing a curved line in Canva can be tricky and may not turn out as expected. If you are not satisfied with the results, please try another method.
Finally, to adjust the appearance of your curve, you can use the letter spacing tool at the top menu. Just use the slider to adjust how much space you’d like to have.

Conclusion:
No matter what approach you choose, drawing curves in Canva is easy and fun! Experiment with different tools until you find one that gives you the results that you’re looking for. And don’t forget – you can always adjust things like Line Weight and Color if you want to make further changes down the road.
8 Related Question Answers Found
When creating text for your designs in Canva, you may want to curve your text to follow the shape of an object in your design, or to create a particular effect. To do this, select the ‘Text’ tool from the left hand menu, then click on the ‘Text Effects’ button in the top toolbar. A drop-down menu will appear, from which you can select ‘Curved Text’.
There are a few ways to create curved text in Canva. One way is to use the ‘Text on Path’ tool. To do this, first create a path using the ‘Line’ tool.
Despite being a fairly new platform, Canva has a lot to offer users in terms of design features. One popular design element that Canva offers is the ability to create curved text. Curved text can add a bit of pizzazz to your designs, and can be used to create some interesting visual effects.
Yes, you can do curved text on Canva! There are a few ways to do it. One way is to use the “Text” tool and draw a curved line.
Curved text is a great way to add style to your HTML documents. You can use the Canva Curved Text Generator to easily create curved text for your web pages. Simply enter your text and select the desired curve, then click the “Generate” button.
Are you looking for an easy and free way to add some pizazz to your website or blog? Canva is a great online tool that lets you do just that. You can create graphics, logos, and even infographics with ease.
If you’re looking to add some extra pizazz to your Canva designs, you may be wondering if you can add curved text. The good news is that yes, you can! Here’s a quick guide on how to do it.
Introduction: Canva is a free online design tool used for creating graphics and images for projects. In Canva, you can draw lines in different shapes, sizes and colors to enhance the look of your design. In this tutorial, we will guide you step-by-step on how to draw lines in Canva.