There are a few different ways that you can make a dotted line in Figma. One way is to use the Pen tool to draw a path with dots along it. Another way is to use the Line tool to draw a dotted line.
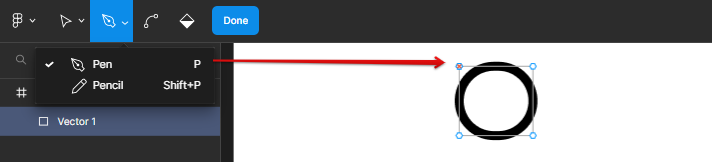
To use the Pen tool to create a dotted line:
1. Select the Pen tool from the toolbar.

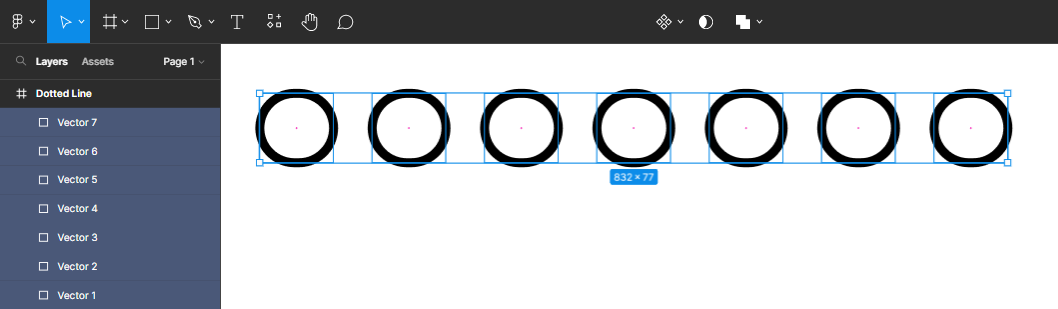
2. Click on the canvas to create a new point.
3. Move the cursor to the next point you want to add and click again. Repeat this until you have created the path you want.
4. To add dots along the path, select the first point and then press Alt (Windows) or Option (macOS). Click on the next point and repeat until you have added all of the dots you want.
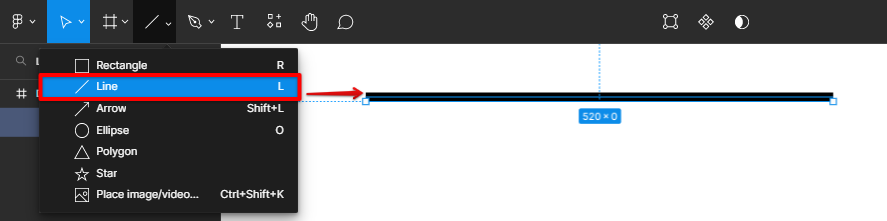
To use the Line tool to create a dotted line:
1. Select the Line tool from the toolbar. Then click and drag it to the canvas to create a line.
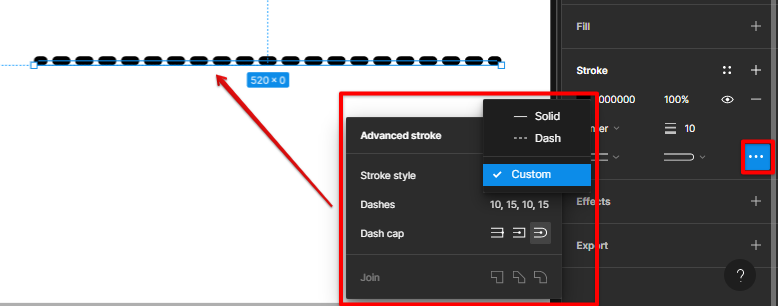
2. Click the More icon in the Stroke section on the right-side panel. In the Advance Stroke menu, select Custom for the stroke style, add the dash numbers, then select the rounded cap. Adjust the line size, and you should now have a dotted line.
PRO TIP: If you are not careful, you can easily create a dotted line in Figma that is not perfectly straight. Be sure to use the grid and snap-to guides when creating your dotted line to ensure it is perfectly straight.
10 Related Question Answers Found
If you are familiar with Adobe Illustrator, then you will be familiar with the pen tool. The pen tool is located in the top left corner of the Figma interface, and you can use it to draw lines, circles, and other shapes. To draw a line in Figma, you first need to select the pen tool.
Figma is a vector graphics editor and prototyping tool – and one of its key features is the ability to add grids to your designs. There are two ways to add a grid in Figma: by using the “Columns” option in the Layout section of the toolbar, or by adding a grid overlay to your project. Columns
The “Columns” option in the Layout section lets you quickly add a grid to your design by specifying the number of columns and gutters.
Grid systems are a vital part of web design. They provide a way to organize content on a page and keep elements aligned. Figma is a vector drawing and animation software that includes a grid feature.
Figma is a vector-based design tool that is gaining popularity among web and app designers. One of the reasons for this popularity is Figma’s ease of use. For example, adding a chart to your Figma design is a simple process that can be accomplished in just a few steps.
There are a few ways to add padding in Figma. The most common way is to use the padding tool in the left toolbar. You can also add padding by selecting the object you want to add padding to and going to the properties panel on the right and adjusting the padding values there.
Designing patterns in Figma is a great way to add some style and flair to your designs. There are a few different ways to go about creating patterns in Figma, and the best method will depend on the type of pattern you want to create. One way to create patterns in Figma is to use the Pattern tool.
Flow lines are an important part of any design. They help to lead the eye around the composition and create a sense of movement and balance. In Figma, there are a few different ways to create flow lines.
Wondering how to make a wavy line in Figma? Wave lines are a great way to add some visual interest to your designs, and they’re actually quite easy to create! Here’s a quick step-by-step guide:
1.
There are many ways to animate lines in Figma. The first way is to use the built-in line animation tool. To do this, simply select the line you want to animate and click on the “Line Animation” tool in the toolbar.
There are a few ways to draw a straight line in Figma:
1. Use the Line Tool
2. Use the Rectangle Tool
3.