There are some steps that you need to follow so you can make a vertical scroll in Figma.
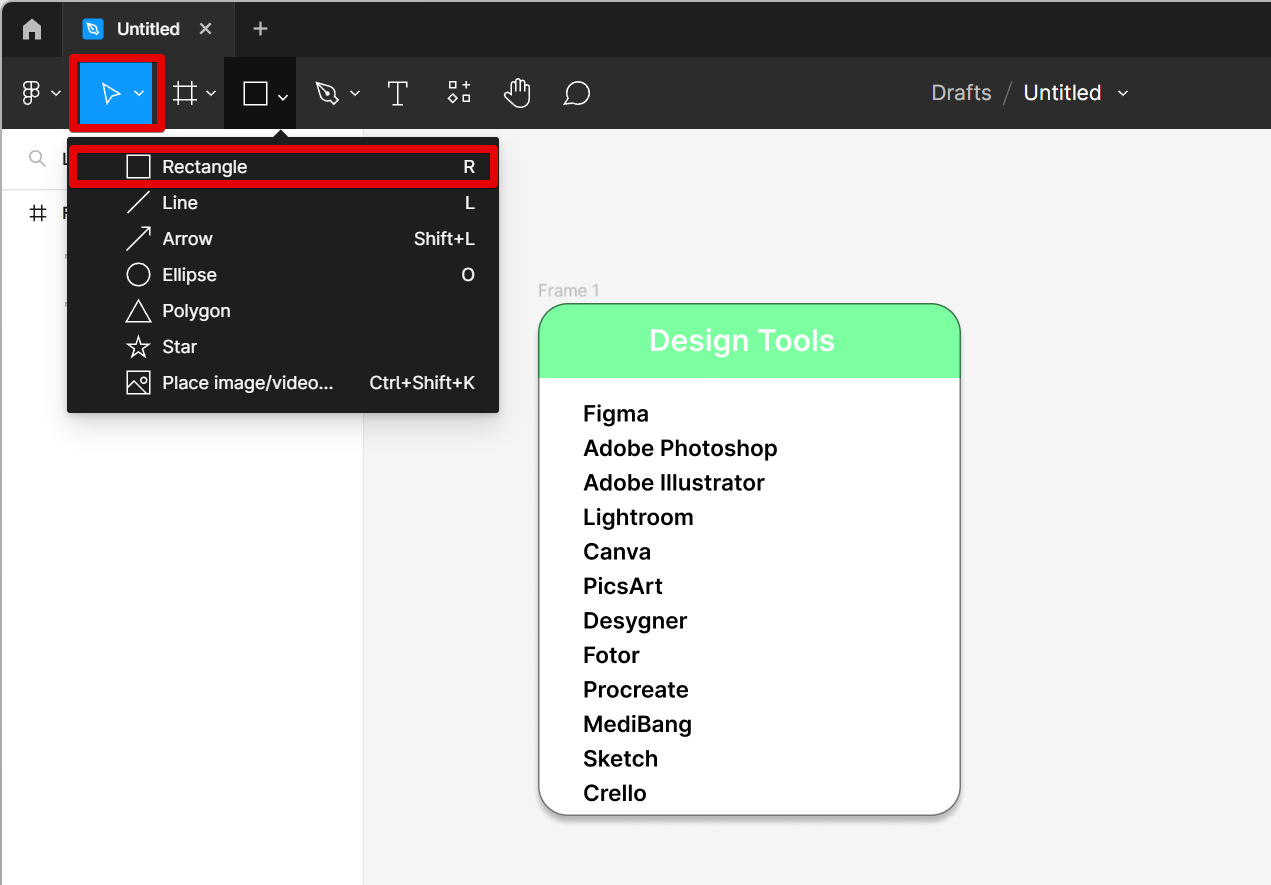
1. Making a vertical scroll bar in Figma is super simple. First, select the design or frame to which you want to add a scroll bar. Next, select “Shape Tools” in the upper-left corner of the screen, then select the “Rectangle” tool.
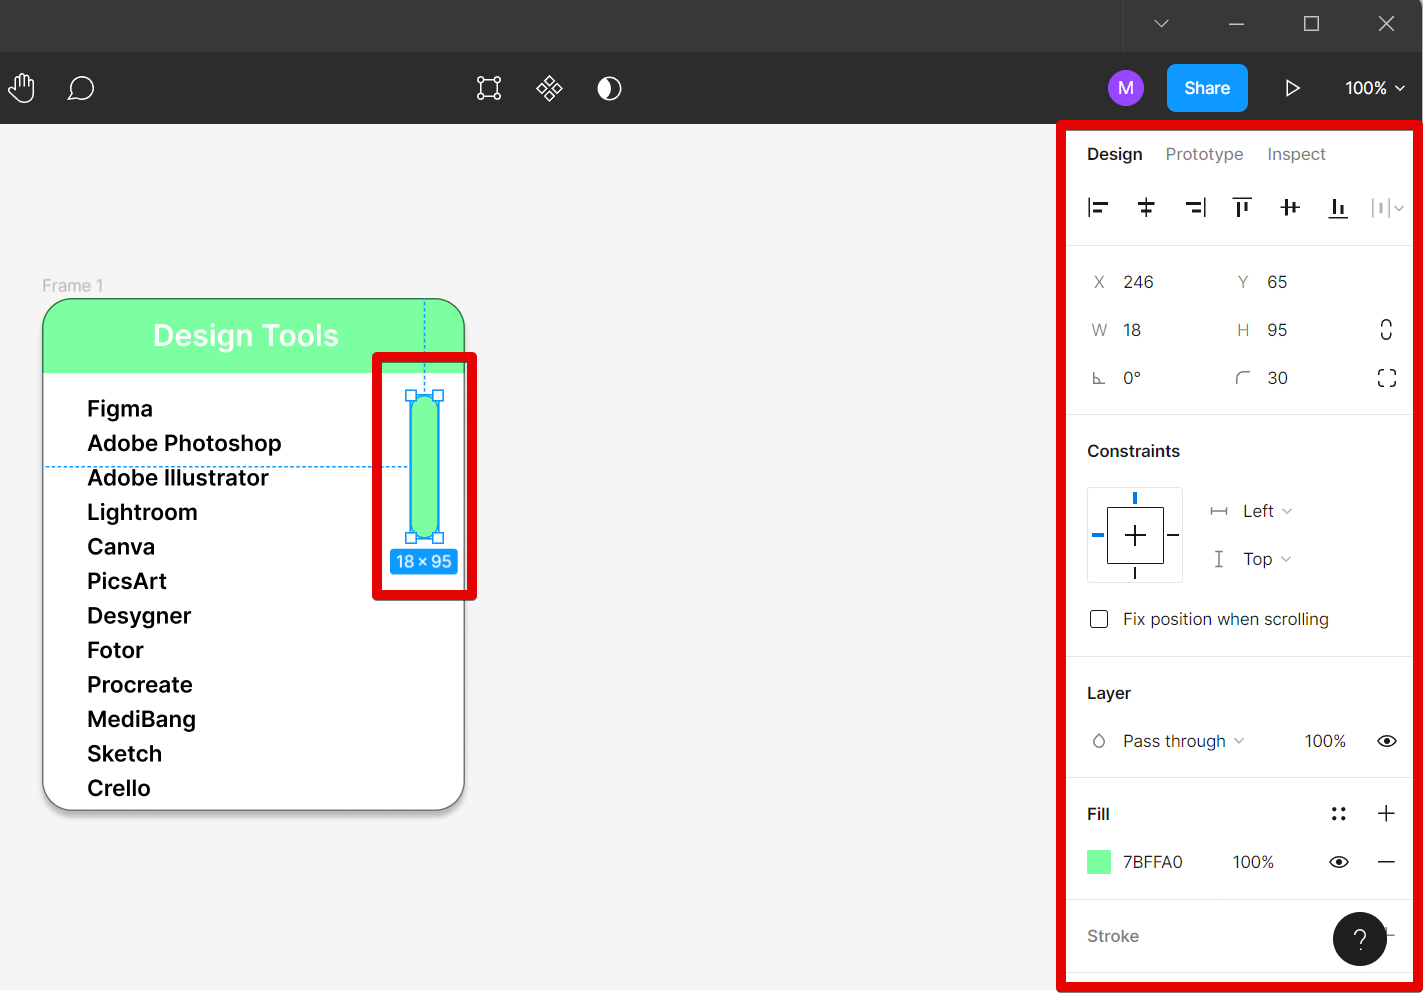
2. This will let you add a vertical scroll bar of your desired shape and size to your frame. You can edit the design of your scroll bar using the menu on the right.
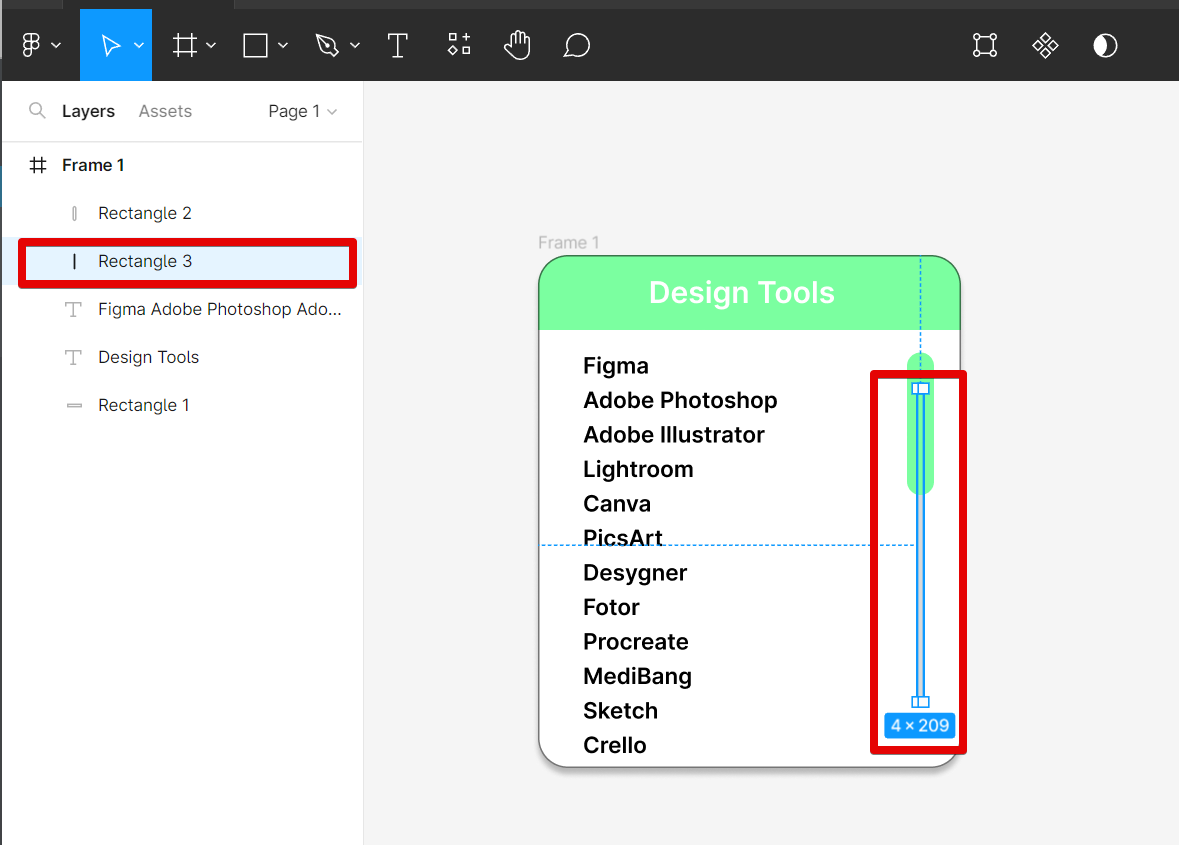
3. Add another thinner and longer rectangle to your frame which will serve as a scrolling guide. Make sure that it is behind the actual scroll bar. You can arrange that using the menu on the right by dragging the scroll guide layer below the layer of the vertical scroll bar.
4. Now that you have your vertical scroll bar, select the whole frame to copy it (Ctrl+C) and then paste it (Ctrl+V) on the same page. Now you can see two frames of the same design side by side.
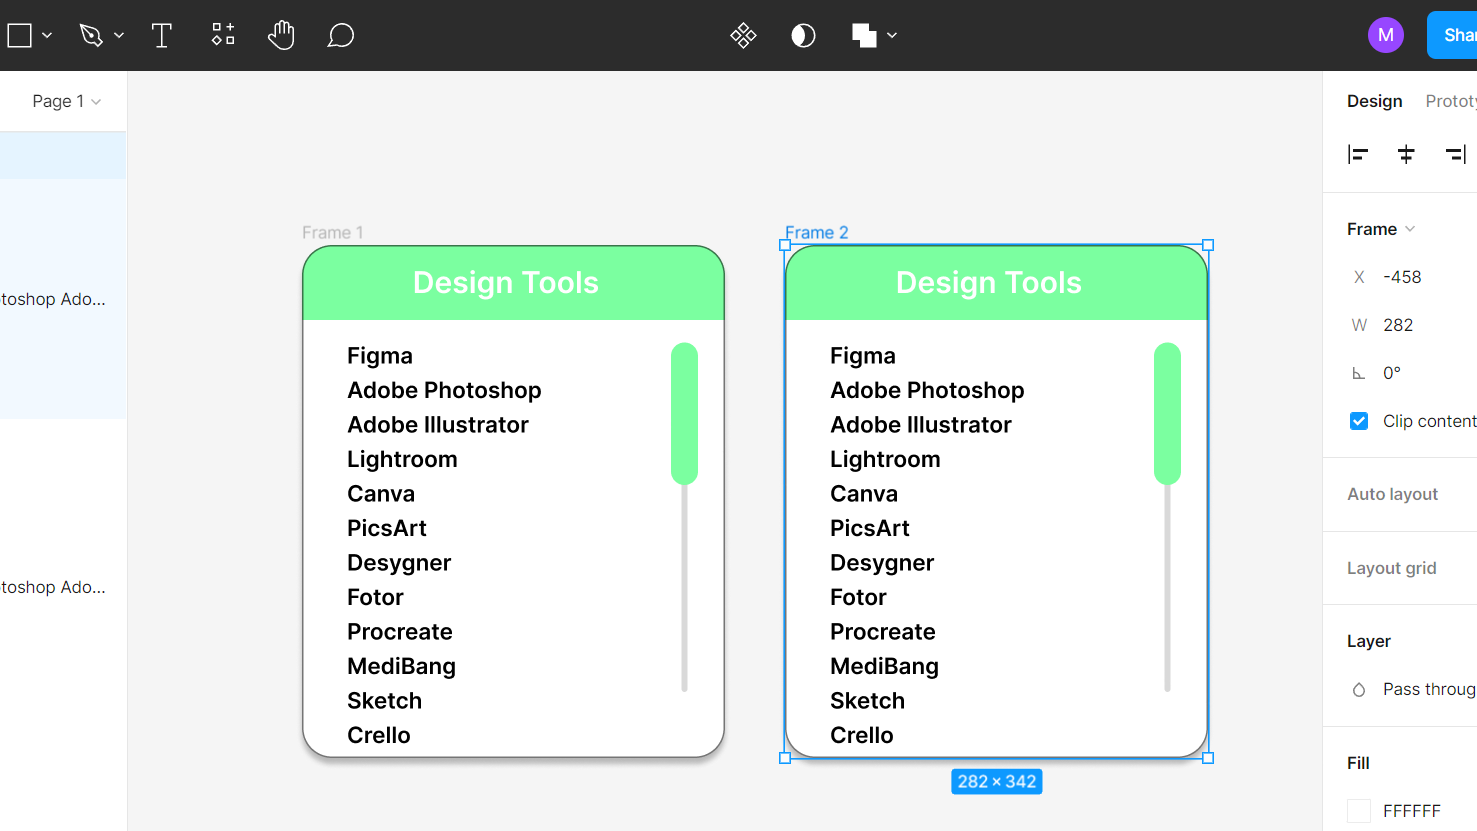
5. The second frame will be meant for the second part of the animation when you scroll down. For this, select the vertical scroll bar and adjust the “Y” component.
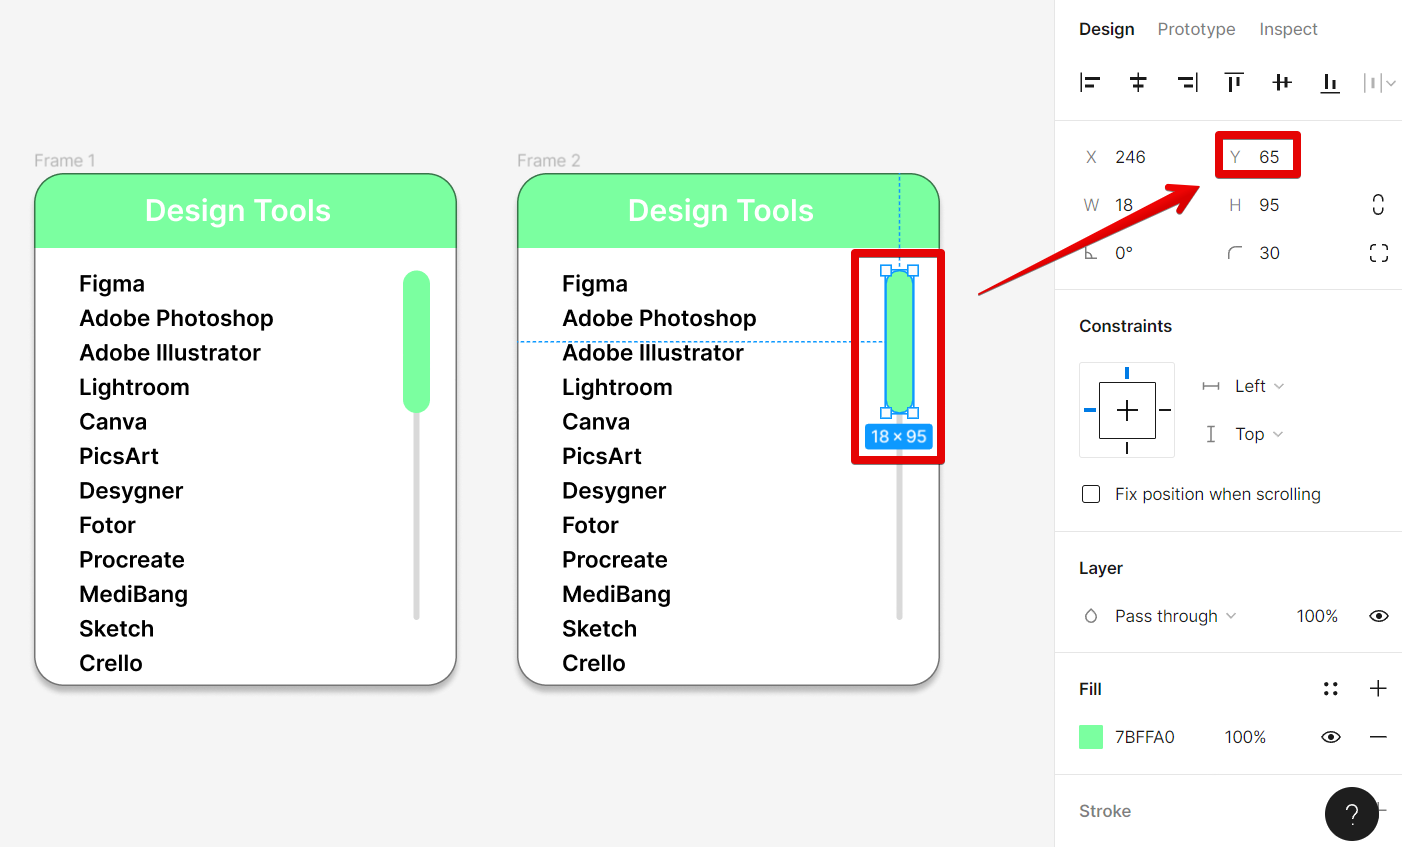
6. Do this until it goes down to the bottom of the scrolling guide.
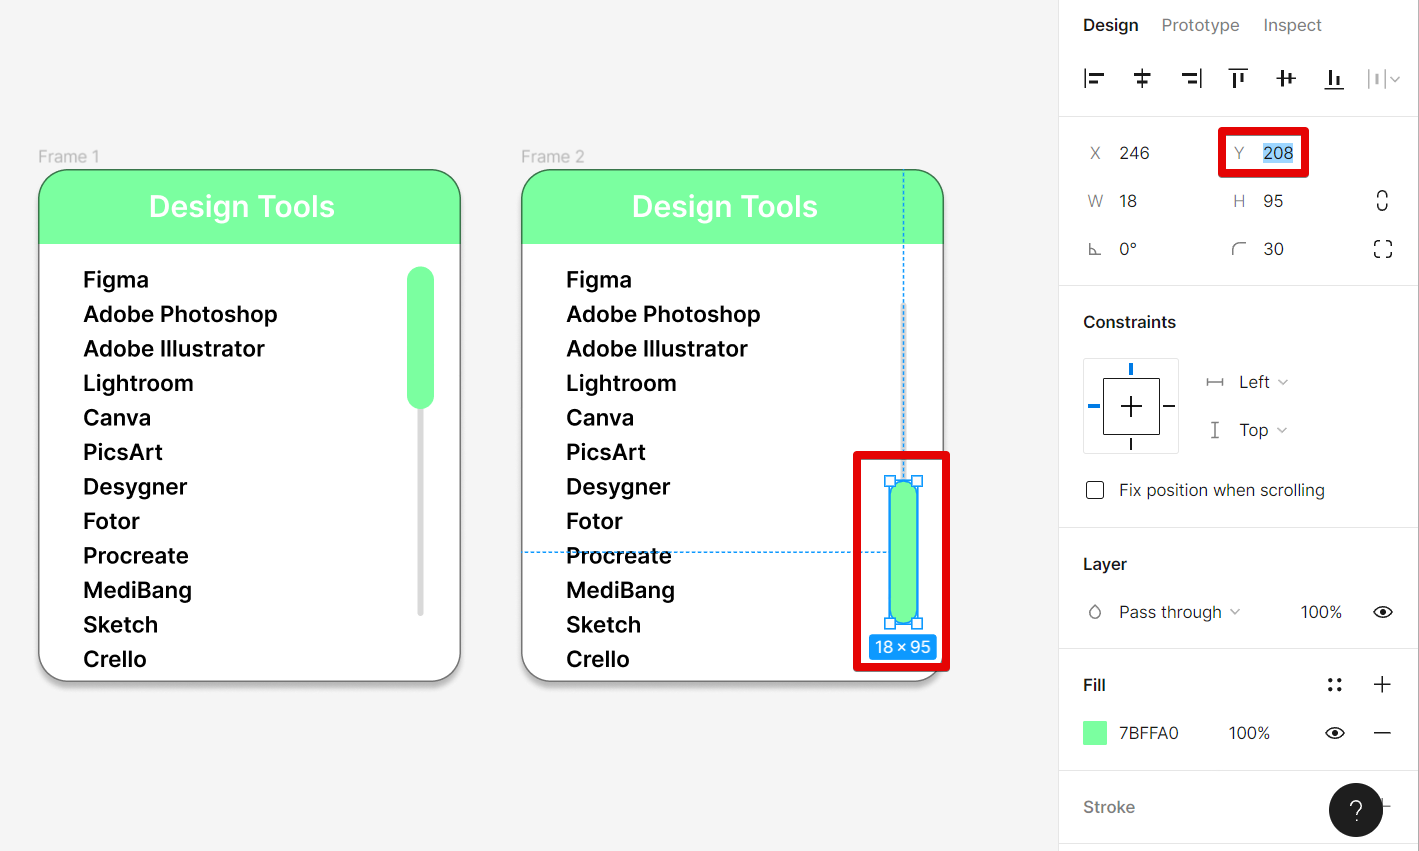
7. Next is to adjust the text to show what will happen after scrolling down.

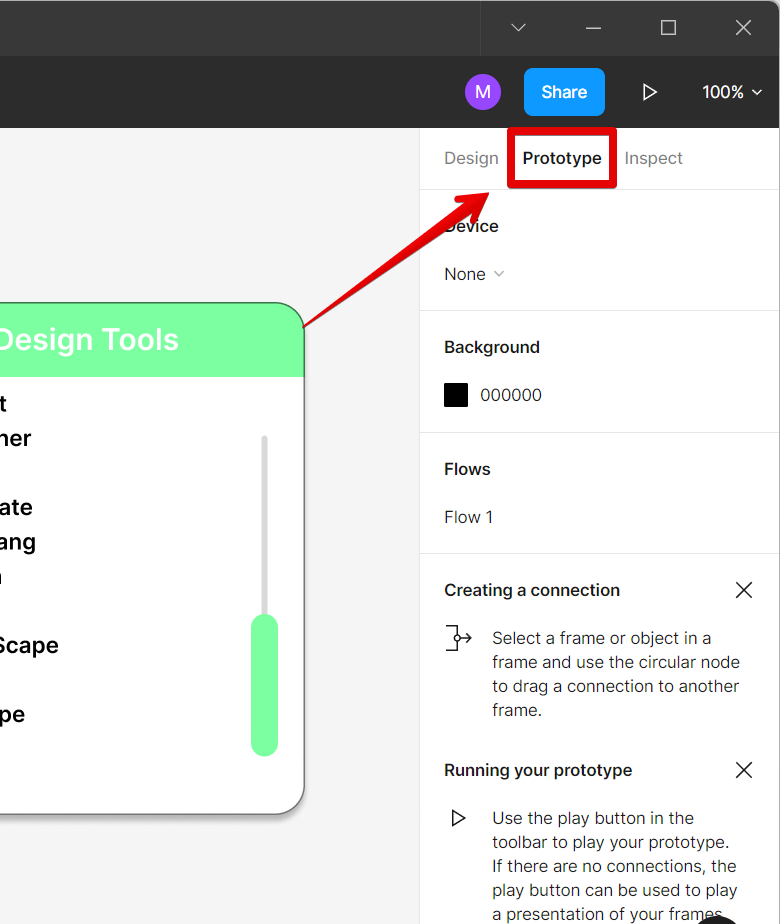
8. After that, you can now go to the “Prototype” tab at the upper-right corner of the screen to manage the flow of your vertical scroll bar’s animation.
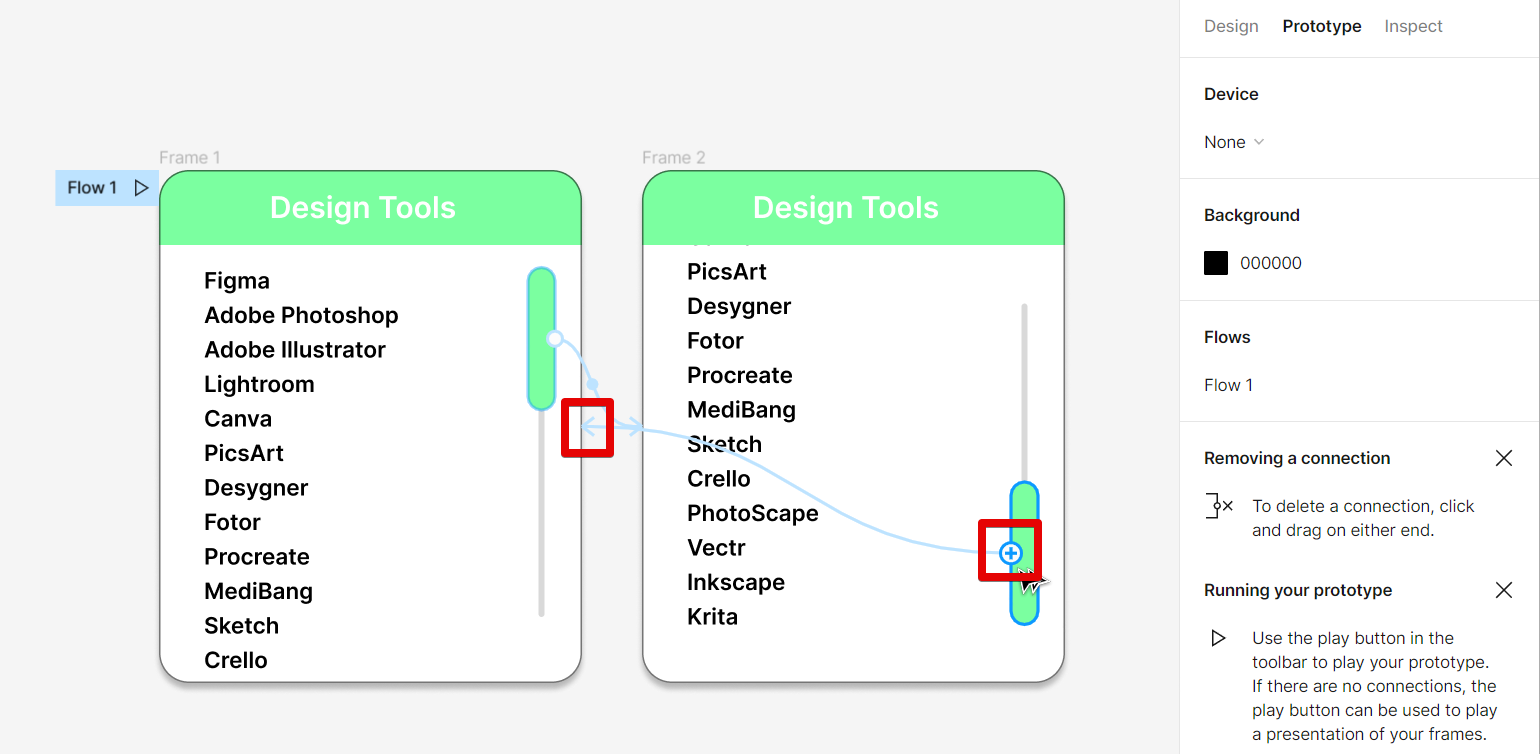
9. To create your flow, click on the “+” of the scroll bar in the first frame and connect it to the second frame. If you want to get really fancy, you can also add interactive scrollbars that allow your users to scroll by dragging on the screen.
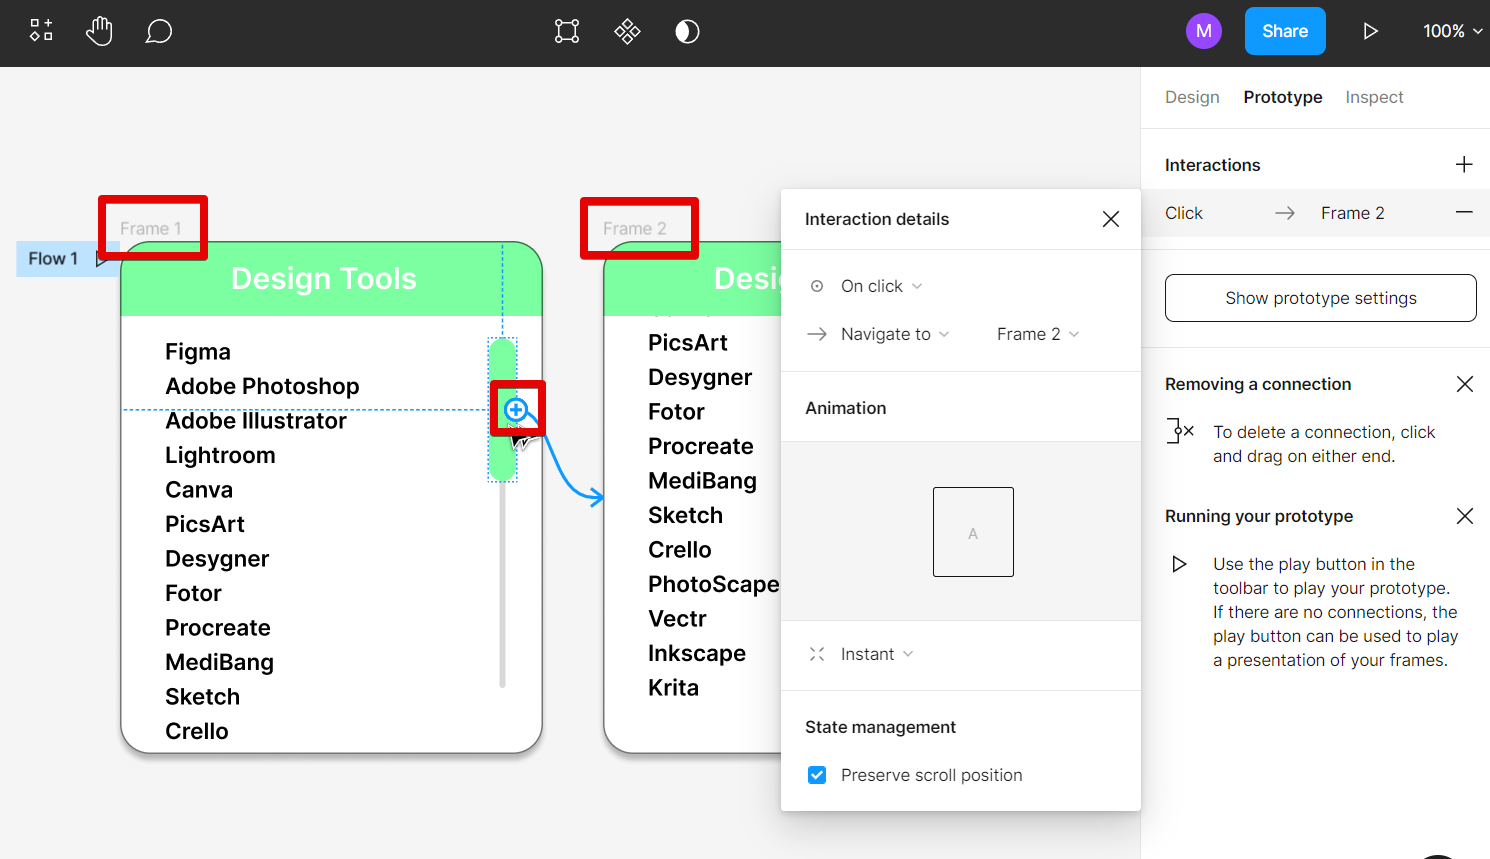
10. In the pop-up window of Interaction details, select the “On drag” option.
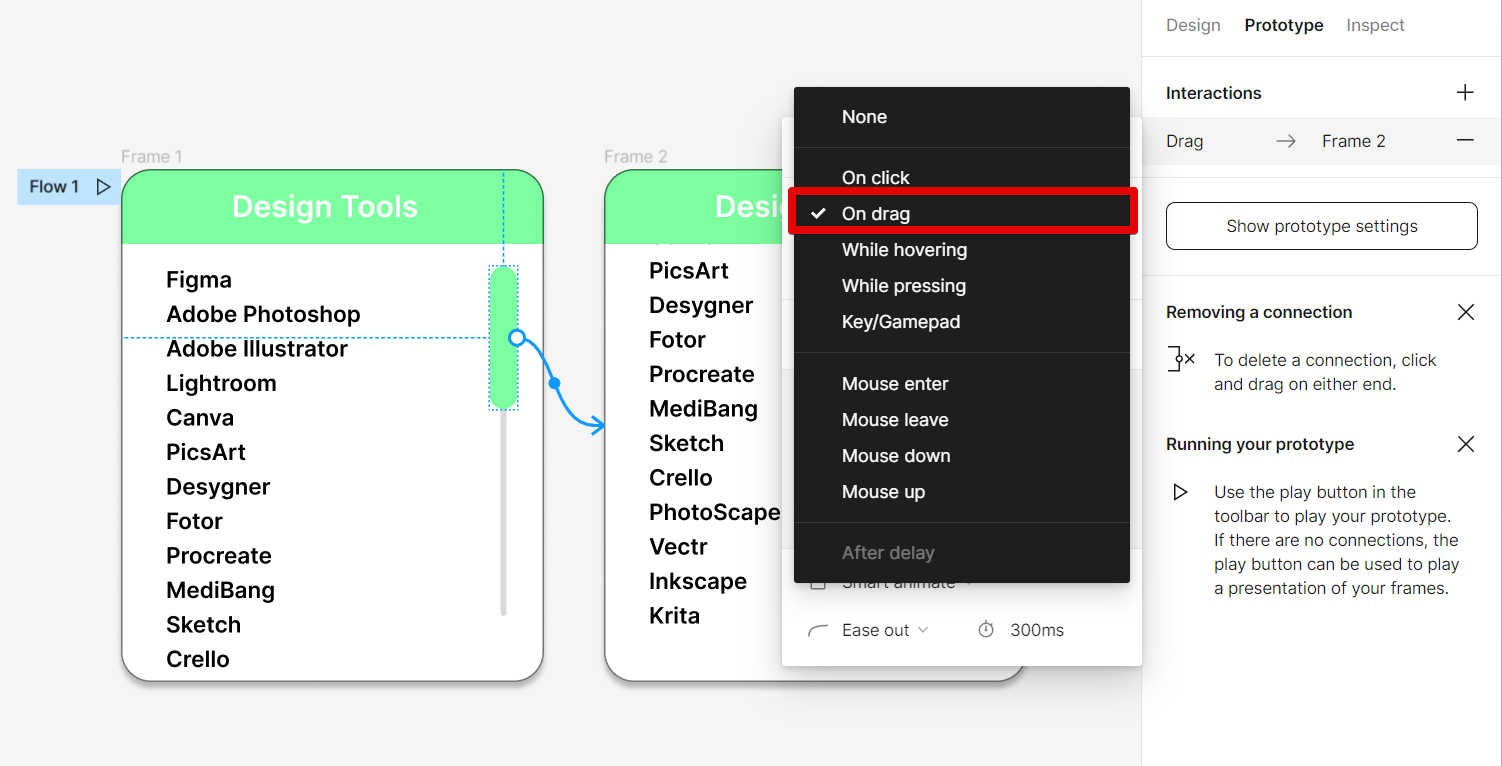
11. Next, click on the “+” of the scroll bar in the second frame and connect it to the first frame.
12. In the pop-up window of Interaction details, select “On drag”.

13. Once done, you can see the preview of your vertical scroll bar working by clicking on the “Play” button found in the upper-right corner of the screen.
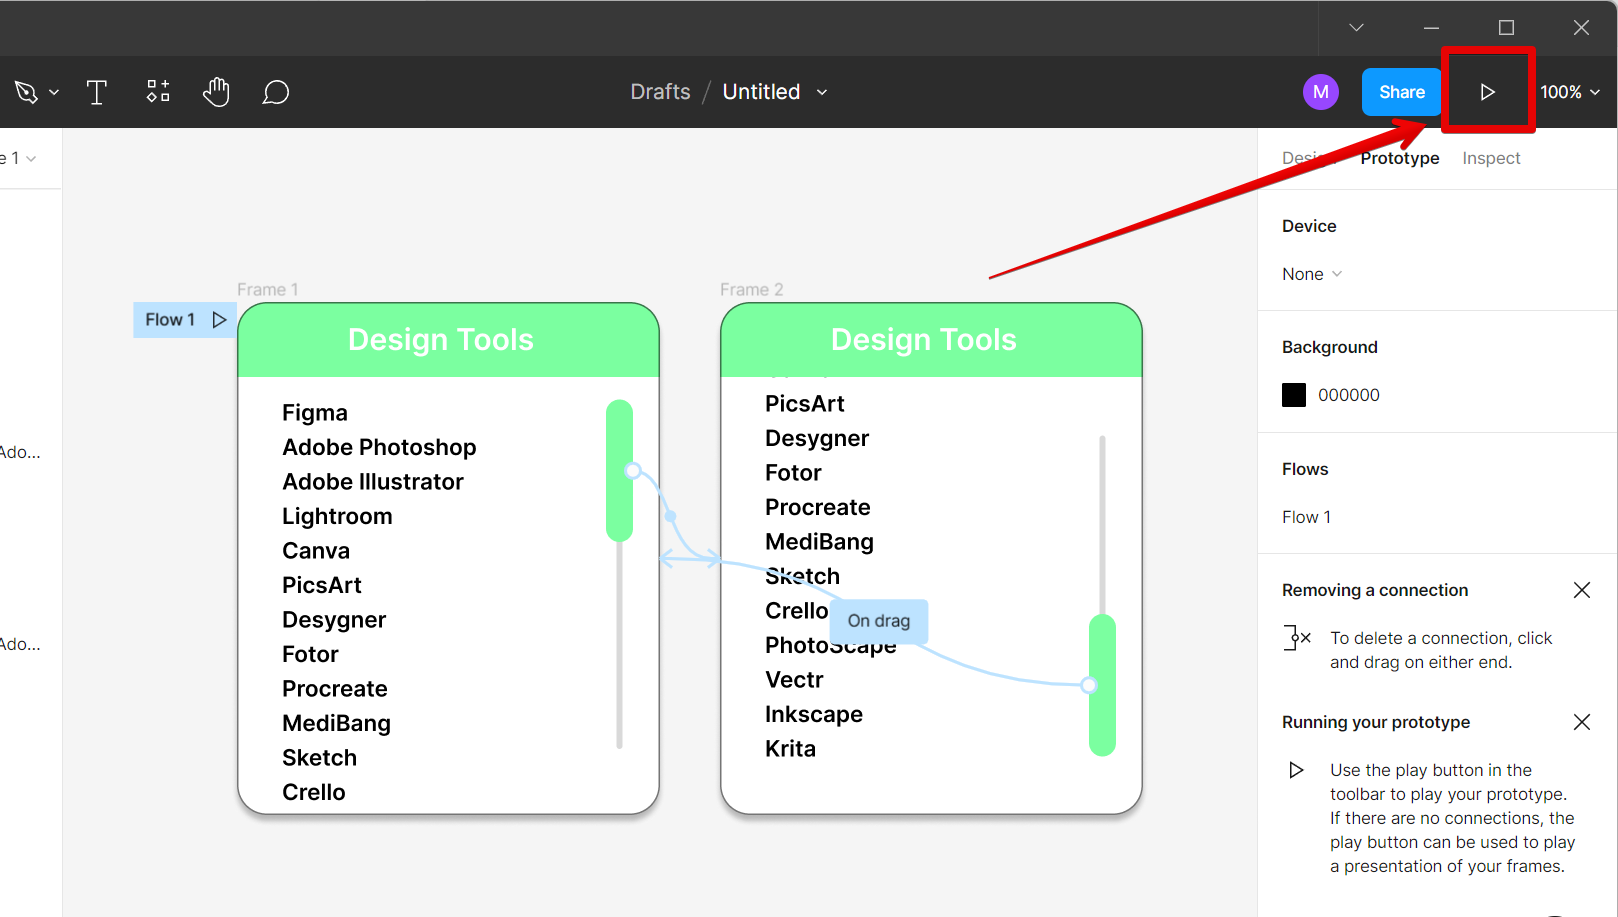
14. This will open a new window and you can see your vertical scroll bar in action!

1. Make sure your document is set up correctly before starting. This means creating a frame that is the full size of your document and ensuring that all of your content is placed within that frame.
2. If you have multiple pages of content, you will need to create separate frames for each page and then link them together using the scroll tool.
3. Pay attention to the scrollbars that appear when you are previewing your document. Make sure they are set to the correct size and position before exporting your file.
Conclusion:
Making a vertical scroll bar in Figma is a complex process but it’s all worth it once you see it working perfectly! Just keep in mind to match the design of your vertical scroll bar to your overall design using the Design menu while following the steps enumerated above and you’re good to go!