Erasing in Canva is easy! There are two ways to do this: using the Crop tool and the Eraser tool.
1. Crop tool
The “Crop tool” is usually utilized to remove the edges of an image and resize it. To use this, simply select the image and click on the “Crop” button at the top menu.
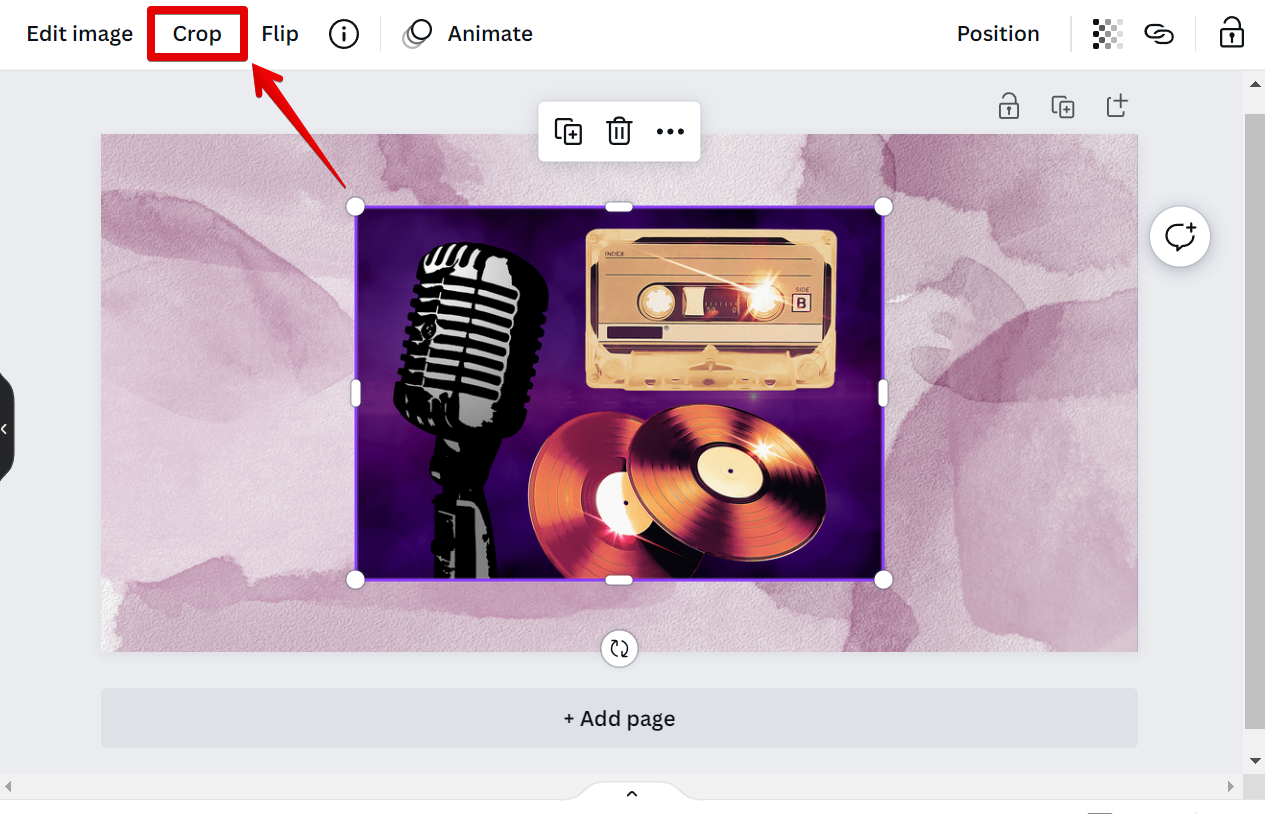
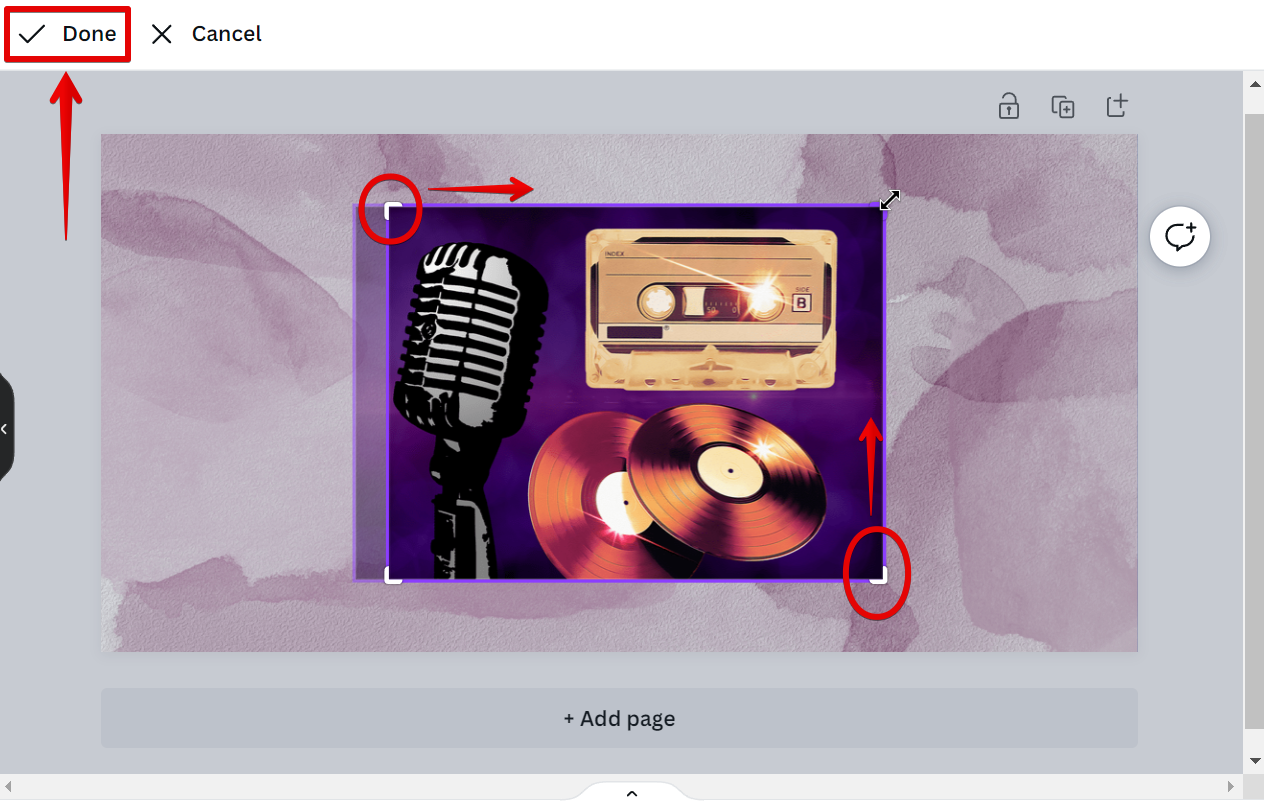
From there, click and drag on the handles around the image to remove the edge parts. Once finished, just select “Done” at the top-left corner to save your changes.
PRO TIP: If you are not careful, you can easily erase something in Canva that you did not mean to. Make sure that you are intentional about what you are erasing before you do so.
2. Eraser tool
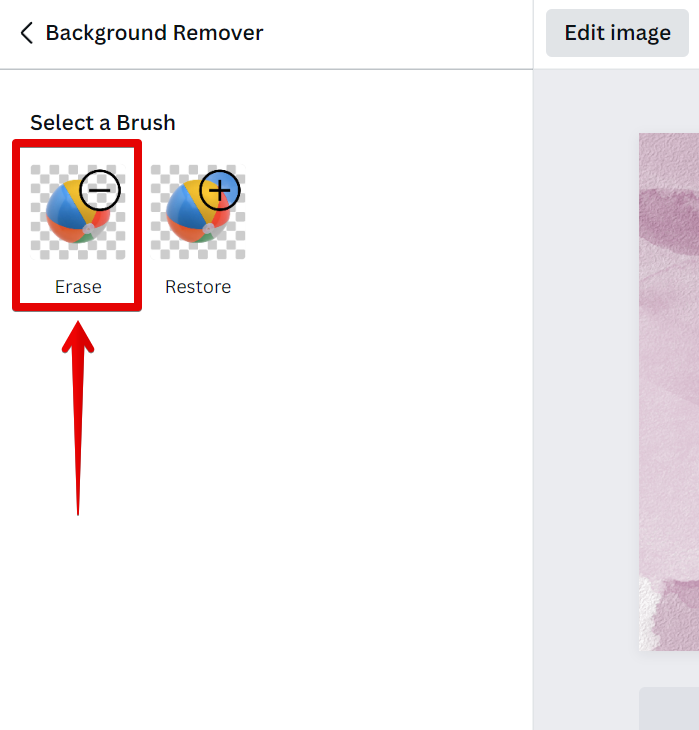
Another tool that you can use to erase in Canva is the “Eraser tool” which can be found within the “Background Remover tool” settings.
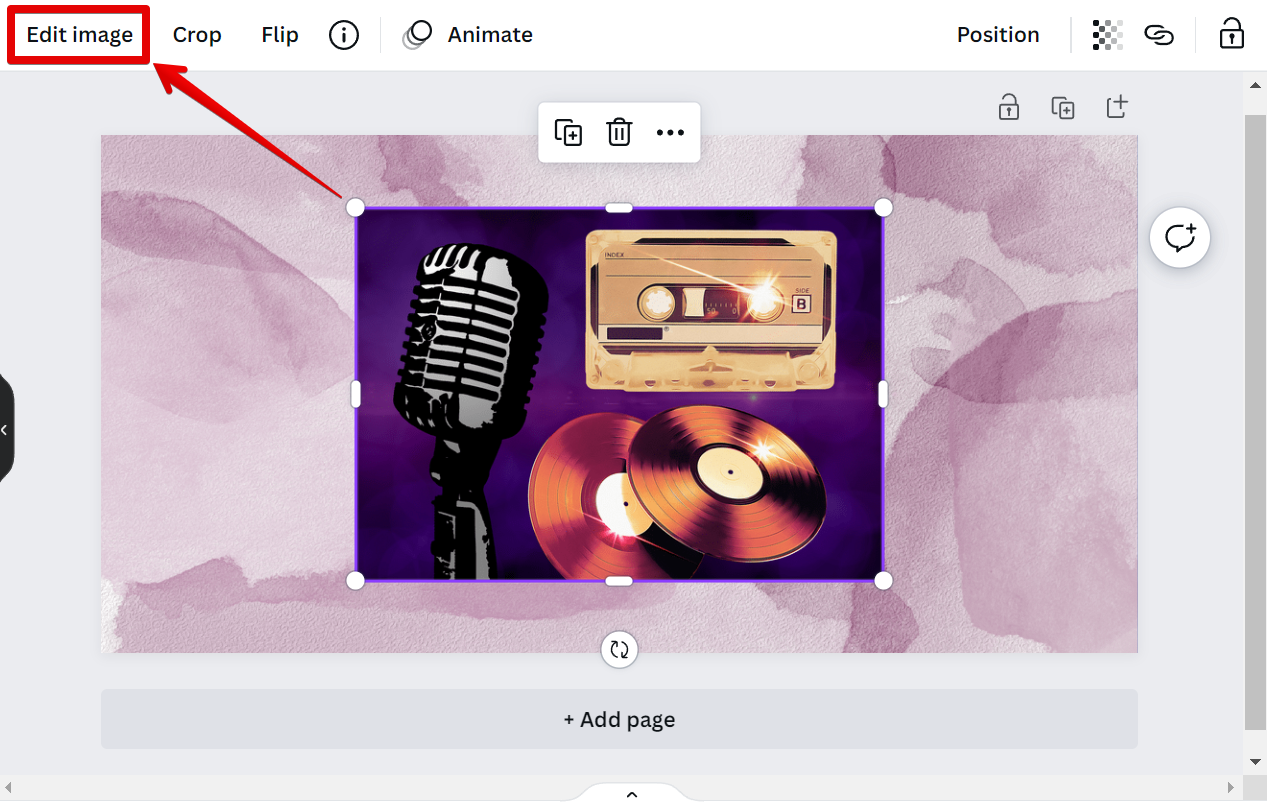
To get started, just click on the image and select the “Edit image” button at the top-left corner of the page.
In the left menu, select the “Background Remover tool” and wait for the process to finish.
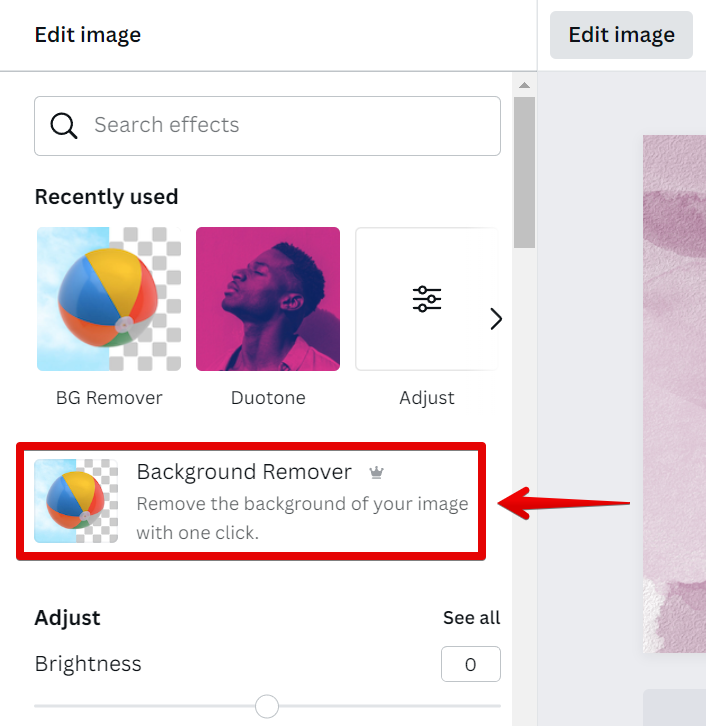
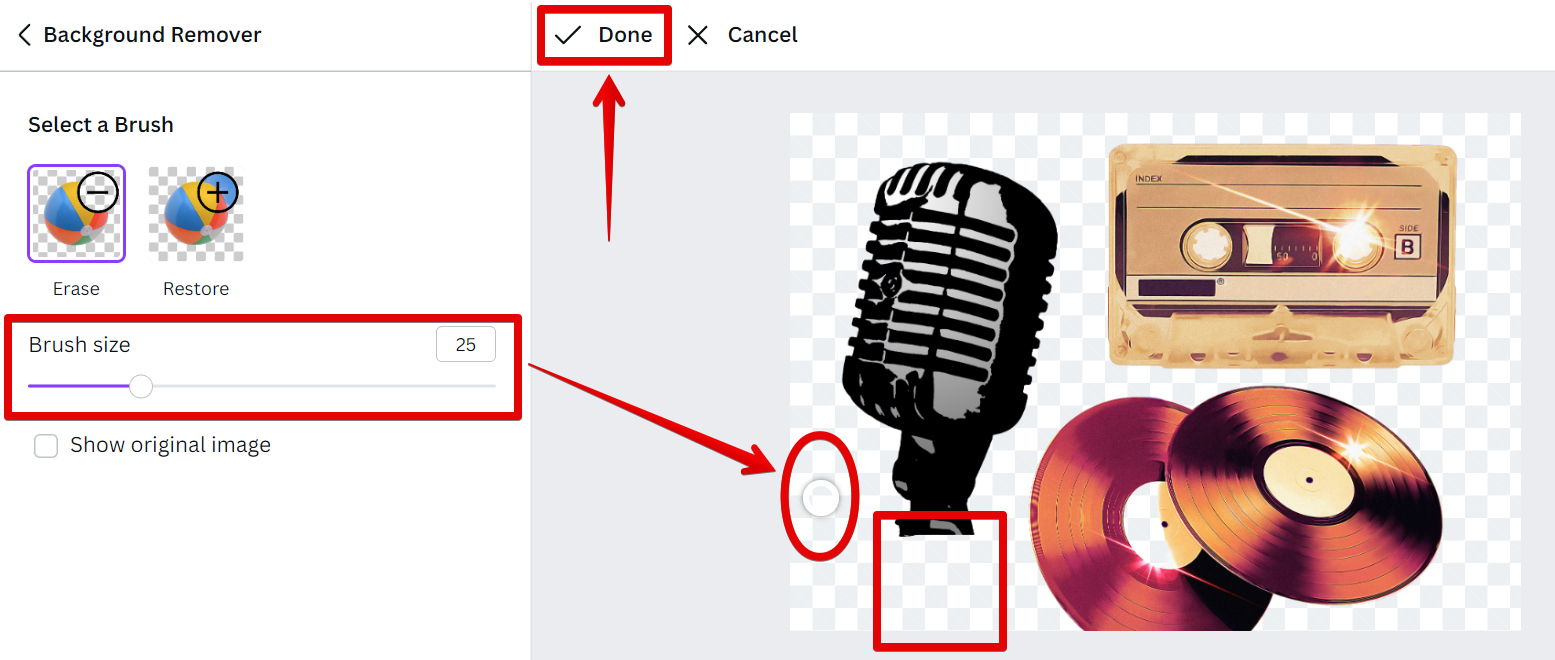
Once done, select the “Erase” option in the Background Remover tool settings.
Then, click and drag on top of the parts of your image that you want to erase. When you’re satisfied with the changes, just select the “Done” button to save your work!
NOTE: You can also change the “Brush size” to your preference using the slider at the left menu.
The Eraser tool is a great way to clean up your designs. It’s also handy for making minor adjustments to objects. So next time you’re in Canva, be sure to give it a try!
8 Related Question Answers Found
If you’ve ever used a traditional art eraser, you know that they come in all shapes and sizes. The same is true for the eraser tool in Canva. There are three different types of erasers you can use: the standard eraser, the polygonal lasso eraser, and the magic wand eraser.
Canva is a user-friendly graphic design tool that is perfect for creating professional designs for print and digital media. It has an extensive library of templates, tools, and resources that make it simple to create high-quality designs. One of the most useful features of Canva is the ability to easily add text to your designs.
There are a few ways that you can use the Brush Eraser on Canva. You can use it to erase part of an image, or you can use it to erase part of a text layer. You can also use it to erase part of a shape layer.
Brush eraser is a tool in Canva that allows you to erase pixels from your image. You can use it to remove unwanted objects from your image, or to create interesting effects. To use the brush eraser, first select it from the toolbar.
The Brush Eraser tool in Canva is a great way to clean up your designs and create sharp, clean lines. Here’s how to use it:
1. Select the Brush Eraser tool from the toolbar on the left side of the Canva interface.
2.
A Canva board is a great way to organize and share your designs. You can use it to create mood boards, inspiration boards, and project boards. You can also use it to collaborate with others on design projects.
As someone who is always looking for new and better ways to do things, I was curious to know if there was an eraser tool in Canva. For those who don’t know, Canva is a free online design platform that is beloved by users for its ease of use and wide array of tools and features. While it doesn’t have everything, it does offer a lot.
As we all know, Canva is a great design tool that allows users to create beautiful designs with ease. But what about when you make a mistake? Is there an eraser tool in Canva that can help you fix your mistake?