Image Trace is a feature in Adobe Illustrator CS6 and not in Adobe Photoshop.
Image Trace enables users to convert raster images into vector graphics. There are many reasons why someone might want to do this, but the most common reason is for use in printing or other design applications where vector graphics are required. Image Trace can be a very useful tool, but it is not without its drawbacks.
In this article, we will take a look at what Image Trace is, how it works, and some of the pros and cons of using this feature.
Let’s dive right in.
Introducing Image Trace
Image Trace was first introduced in Adobe Illustrator CS6 and has been a part of every subsequent release of the software. It allows you to make vector illustrations from raster images (PSD, PNG, JPEG, etc.). You can quickly and easily trace an existing drawing to create a new one.
Image Trace allows you to do things like digitizing hand-drawn sketches and turning them into editable vector graphics. You can find it under the Window menu item and then under Other Panels.
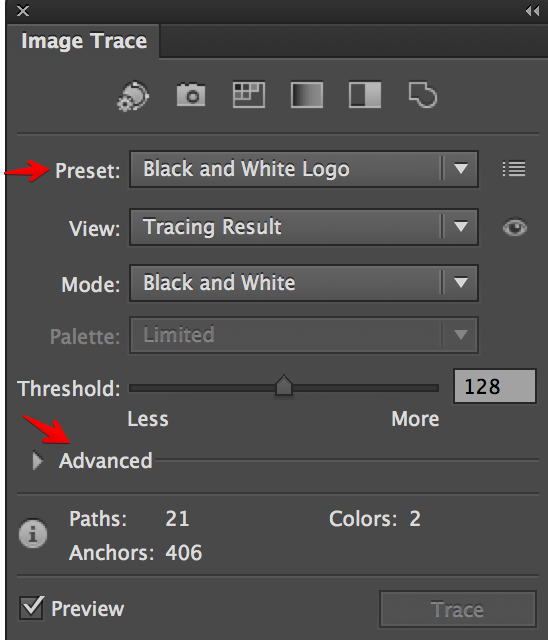
Once you have the Image Trace panel open, you will see that there are two options: Tracing Presets and Advanced Options. The Tracing Presets are a set of pre-defined options that you can use to quickly convert your image into a vector graphic. These presets are great for simple images, but for more complex images, you will need to use Advanced Options.
When using the Advanced Options, you will have a number of different settings that you can adjust to get the results that you want.
Mode
The first setting is Mode. This setting determines how the trace will be created. There are four different modes: Color, Grayscale, Black and White, and Outline. Each mode has its own strengths and weaknesses, so you will need to experiment with each one to see which one works best for your particular image.
Threshold
The next setting is Threshold. This setting determines how similar adjacent pixels must be in order to be grouped together. A higher threshold means that adjacent pixels must be very similar in order to be grouped together, while a lower threshold means that they can be less similar.
Paths and Pixels
The next two settings are Paths and Pixels. These settings determine the accuracy of the trace. Paths represent the accuracy of the vector paths that are created, while Pixels represent the accuracy of the raster image that is used as a basis for the trace.
A higher value for either of these settings will result in a more accurate trace, but it will also take longer to create.
Noise
The final setting is Noise. This setting determines how much noise (random pixels) will be removed from the image during tracing. A higher value means that more noise will be removed, resulting in a cleaner trace.
Pros and Cons of Image Trace
Now that we understand how Image Trace works let’s take a look at some of its advantages and disadvantages.
Advantages
One advantage of Image Trace is its accuracy. When used with high-quality images, Image Trace can produce very accurate vector graphics. This makes it ideal for use in design applications where precision is important. Another advantage of Image Trace is its speed.
It is typically much faster to trace an image than it is to redraw it by hand. This can save a lot of time when working with complex images.
Disadvantages
There are also some disadvantages to using Image Trace. One disadvantage is that it can sometimes produce unsatisfactory results with low-quality images. This is because Image Trace relies on pixel information to create its vectors, and if an image has low-quality pixels, then the resulting vector graphic will also be low-quality.
Another disadvantage of Image Trace is that it can sometimes be slow when working with very large images. This is because Photoshop has to process a lot of information when tracing large images, and this can take some time.
How to use Image Trace in Adobe Illustrator
Using the Image Trace tool in Adobe Illustrator, you can quickly and easily transform a raster image into a vector image by following these steps:
Step 1: Choose Window > Image Trace from Adobe Illustrator’s menu bar while the image is open. Once you’ve got the picture picked out, click the Preview button. This will provide you with a real-time preview of your vectorized image.
Step 2: Choose the mode that works best with your layout from the Mode menu.
Step 3: Then, tweak the Colors, Grayscale, or Threshold sliders. This slider’s appearance will alter depending on the mode you’ve chosen, but all three have the same general purpose.
Step 4: Drop the drop-down Advanced menu to reveal further customization options.
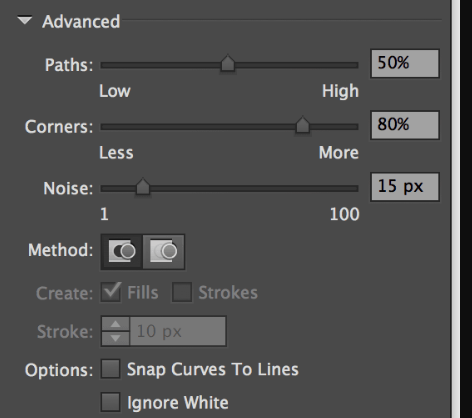
Step 5: Modify the Paths slider.
With this, you can determine how many individual paths will exist in your final product. Simpler designs have fewer paths, but having too few paths can distort or box out your image. However, if your design has too many paths, the edges will look rough. Once again, the answer to this question is dependent on your particular public persona, so strike a balance that works for you.
Step 6: Make changes to the Corners slider.
Inputting a value here determines how many corners your design will have. If you use fewer corners, your design’s curves will be smoother, while more corners will make them more acute.
Step 7: Activate the slider for Noise.
By adjusting the noise slider, you can tell Illustrator to disregard everything outside of the specified pixel range. If you increase it, there will be less of a ruckus. This can be very helpful for cleaning up your design and getting rid of unwanted artifacts. Smaller details in your design may be lost if you use this technique, so as always, strike a balance.
Step 8: To save your image as an Adobe Illustrator (.ai), Adobe Portable Document Format (.pdf), or Encapsulated PostScript (.eps) file, click the Expand button.
Conclusion
Image trace is a feature found in Adobe Illustrator CS6 and not Photoshop. This feature allows users to convert raster images into vector illustrations. If you are unsure of how to access this feature or use it to its full potential, there are plenty of tutorials available online.
With a little practice, you’ll be able to image trace like a pro!