Adding a Device Frame in Figma
If you’re working with devices in your designs, you’ll want to add a device frame to your project. A device frame is a rectangular area that surrounds all of the devices in your design.
It helps to keep your design organized, and it makes it easier to identify which device is being referenced.
To add a device frame in Figma, follow these steps:
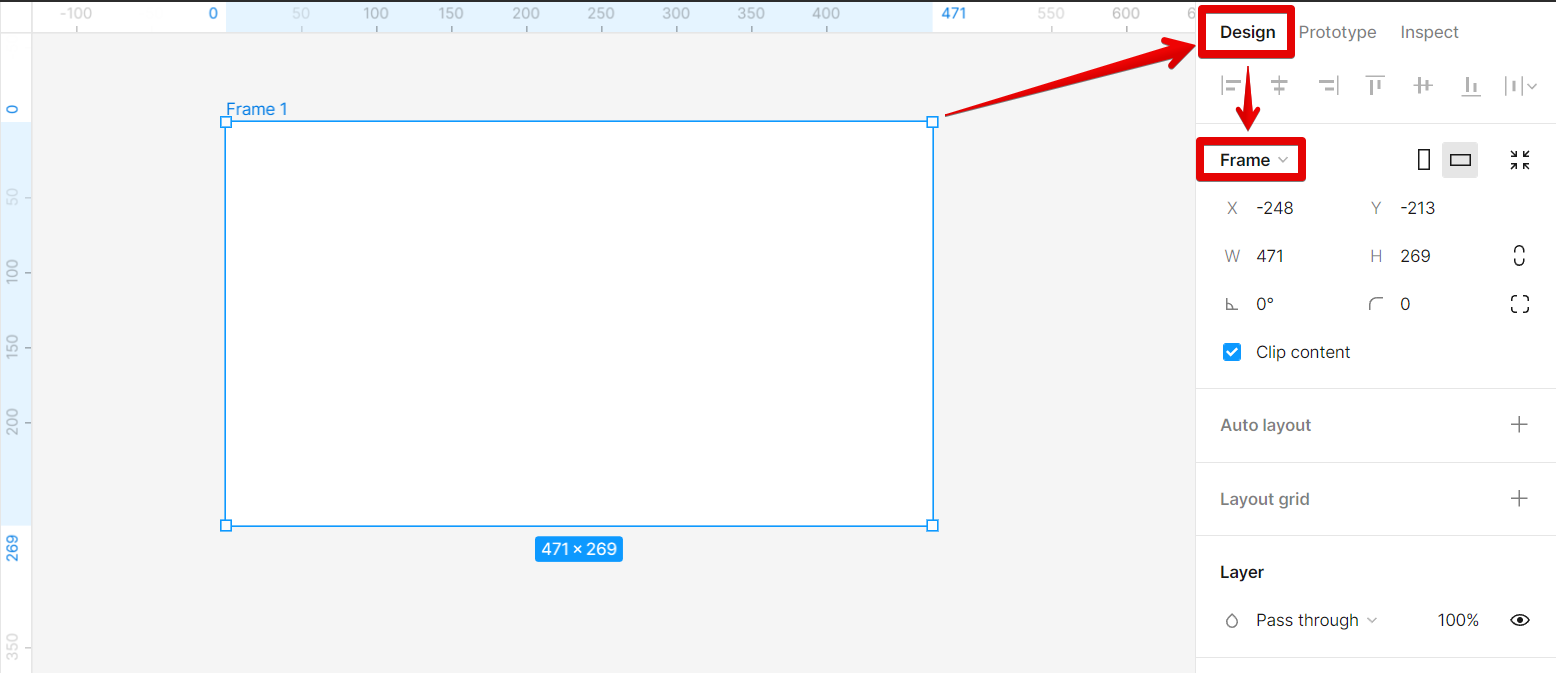
1. In your project, click on the frame that you want to change. Then, select the Design tab and click on the “Frame” drop-down menu to open up more options.
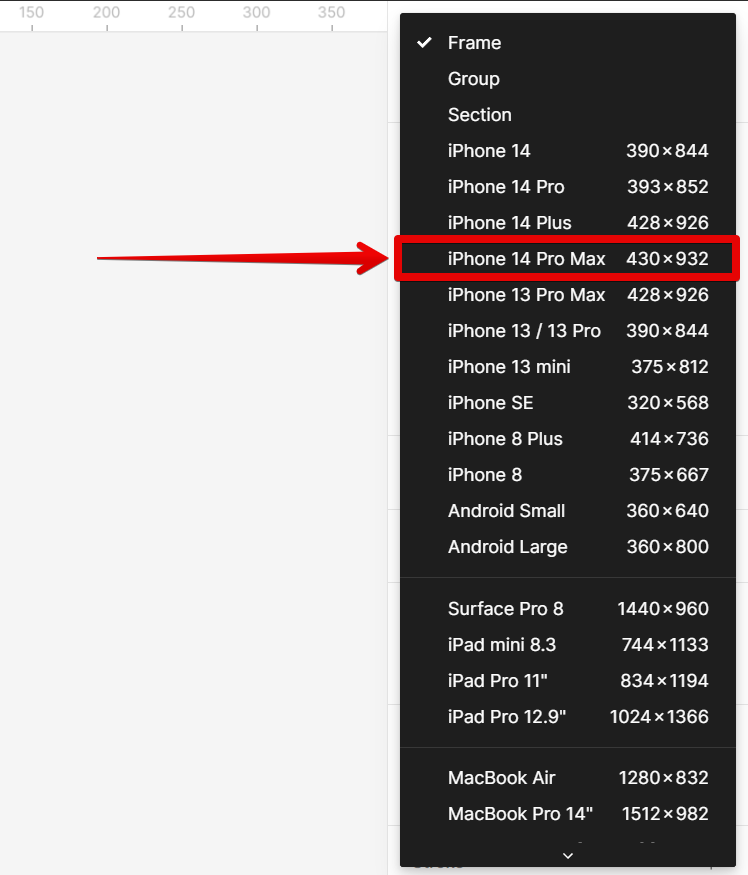
2. From there, select a model from the available devices listed to apply the size of its frame to your design.
NOTE: Scroll down to see the full list of device frames available.
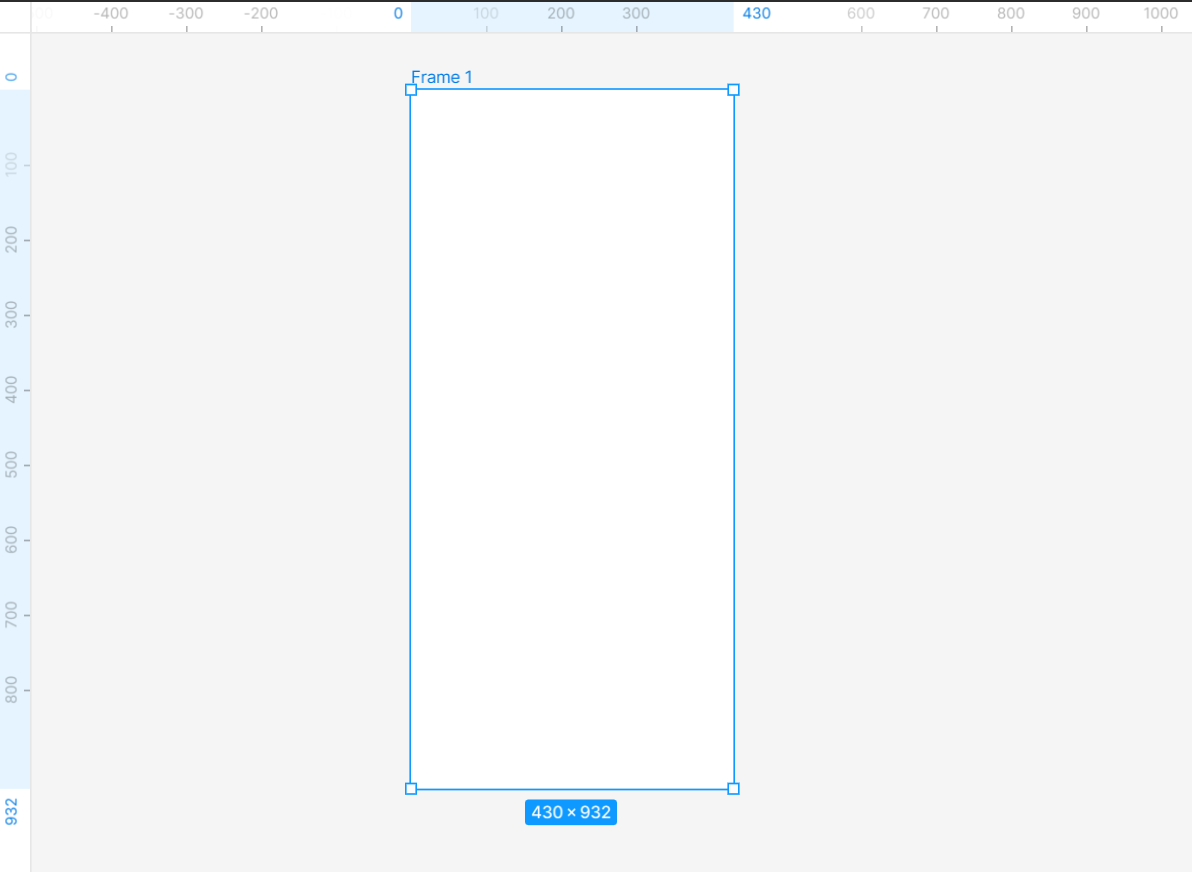
3. And that’s it! The frame will then be applied to the selected frame in your design!
PRO TIP: If you are not familiar with Figma, adding a device frame can be tricky. Make sure to read the instructions carefully and follow them step-by-step. Otherwise, you may end up with a frame that is not properly sized or placed.
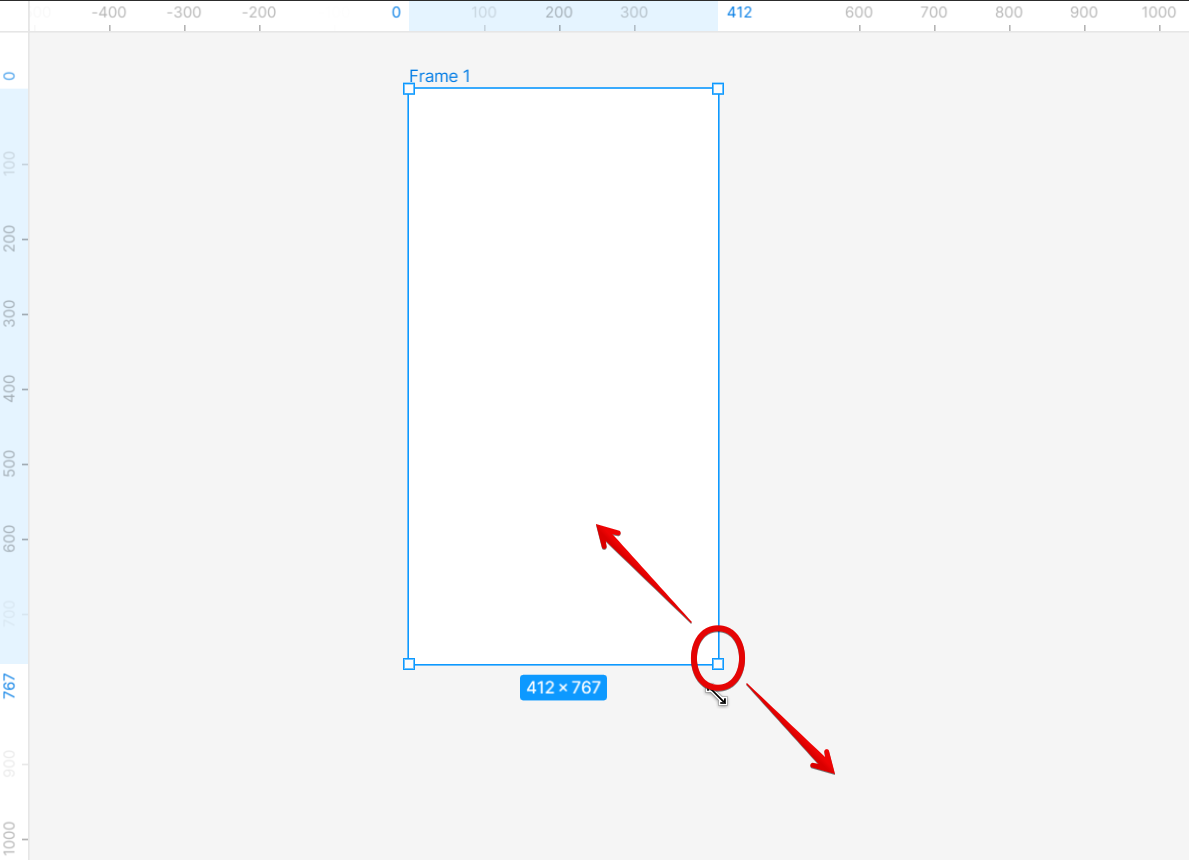
4. If you need to resize the frame, you can do so by clicking and dragging the frame border handles.
8 Related Question Answers Found
Adding a component in Figma is a breeze. There are a few different ways to do it, depending on the type of component you want to add. If you want to add a simple component, such as a button, you can simply drag and drop it into your project.
Embedding videos in Figma is possible, but it requires a little bit of extra work. First, you’ll need to create a new file in Figma and save it as a .mp4 file. Next, you’ll need to create a new scene in Figma and add a Video Embedding component.
Building Components in Figma
Creating a component in Figma is a simple process. First, you need to create a new file in your project and name it accordingly. For our example, we will create acomponent.
Adding a video to a Figma design can be done in a few different ways. First, you can use the Media Library to add video files from your computer. Second, you can use the Figma Video Editor to create a video from scratch.
Adding a UI Kit to Figma is a simple process. First, open Figma and click on the File tab. Under the Files section, click on the Add New Item button.
Adding Google Maps in Figma is as easy as adding a new map widget to your project. In Figma, open the Resources section and select the “Plugins” tab. In the Plugins tab, search for the “Mapsicle” plugin and click on the “Run” button beside it.
Adding Font Awesome to Figma
If you’re looking to add Font Awesome to your Figma projects, there are a few things to keep in mind. First, you’ll need to add the Font Awesome CDN to your project. This can be done by clicking the “Font Awesome” tab in the project overview and selecting the “Add CDN” button.
Making a device mockup in Figma is easy. First, create a new document. Then, in the document’s toolbar, click the “Mockup” button.