In Illustrator, you can change the color of any object by converting it into a tracing object and then into a path using the “Image Trace” tool and the “Expand” tool. After that, you can continue by filling up the path with another color using the “Fill” option.
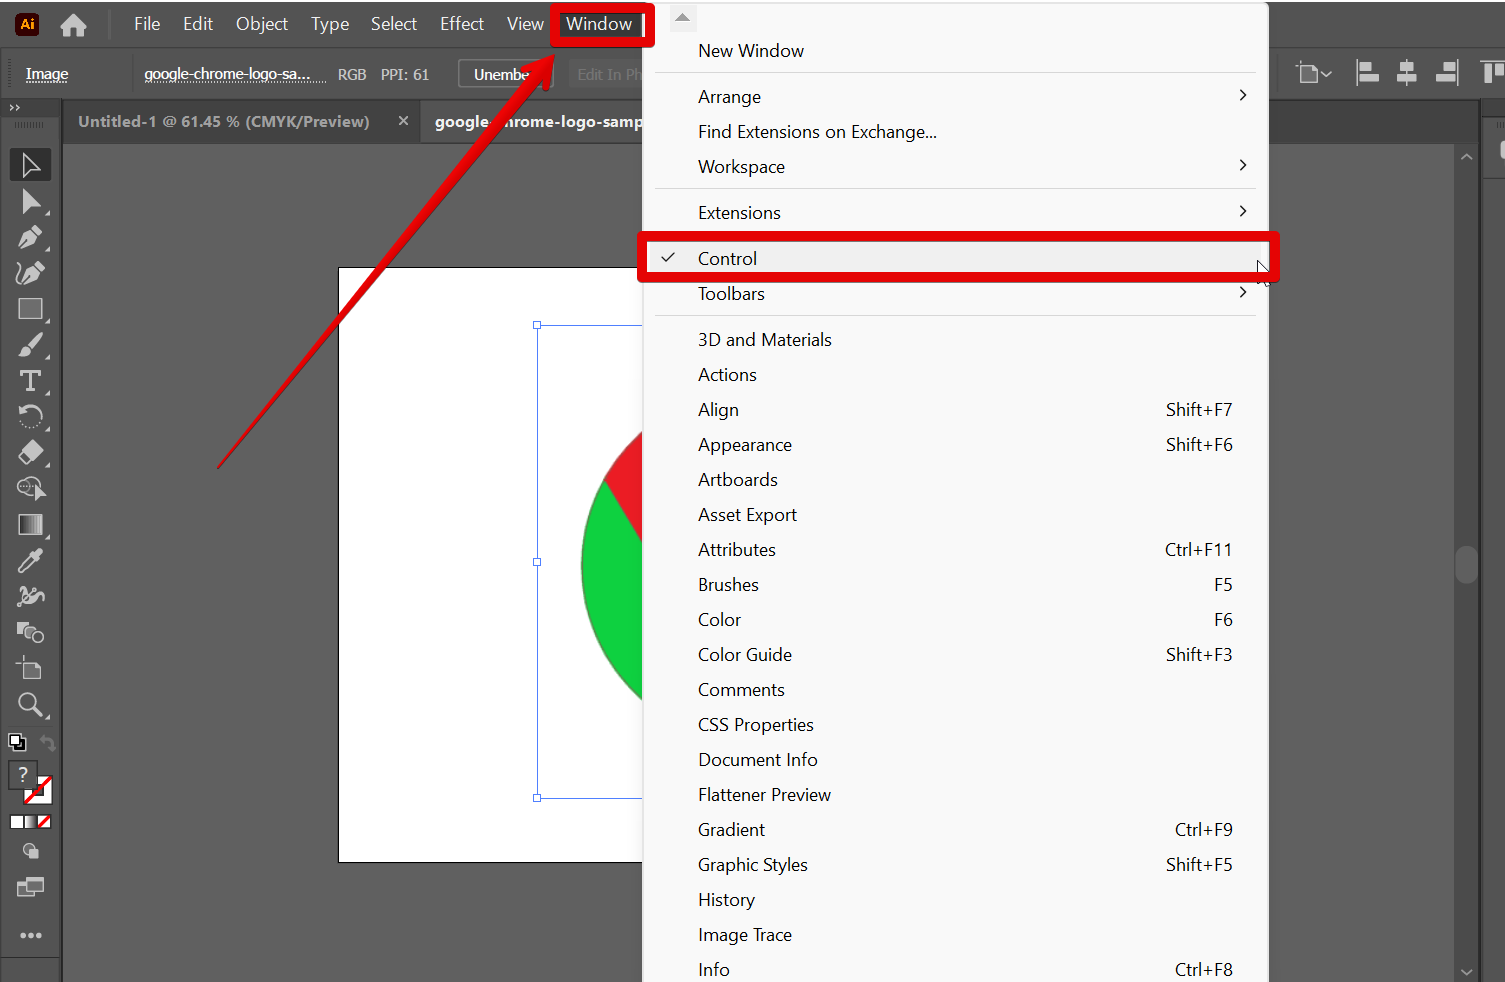
To do this, first, go to the “Window” tab at the top menu and make sure to select the “Control” option.
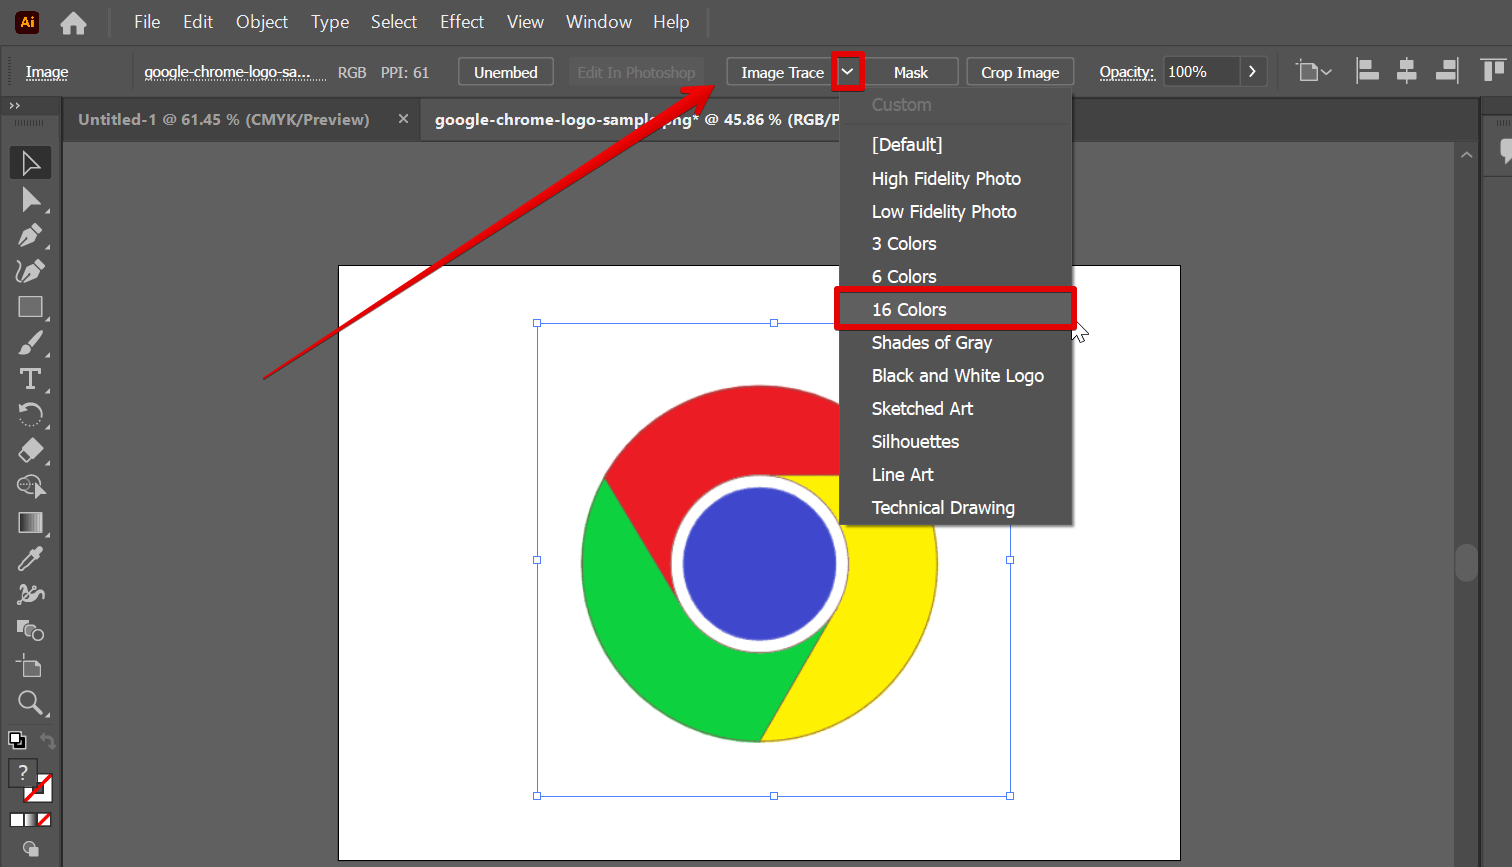
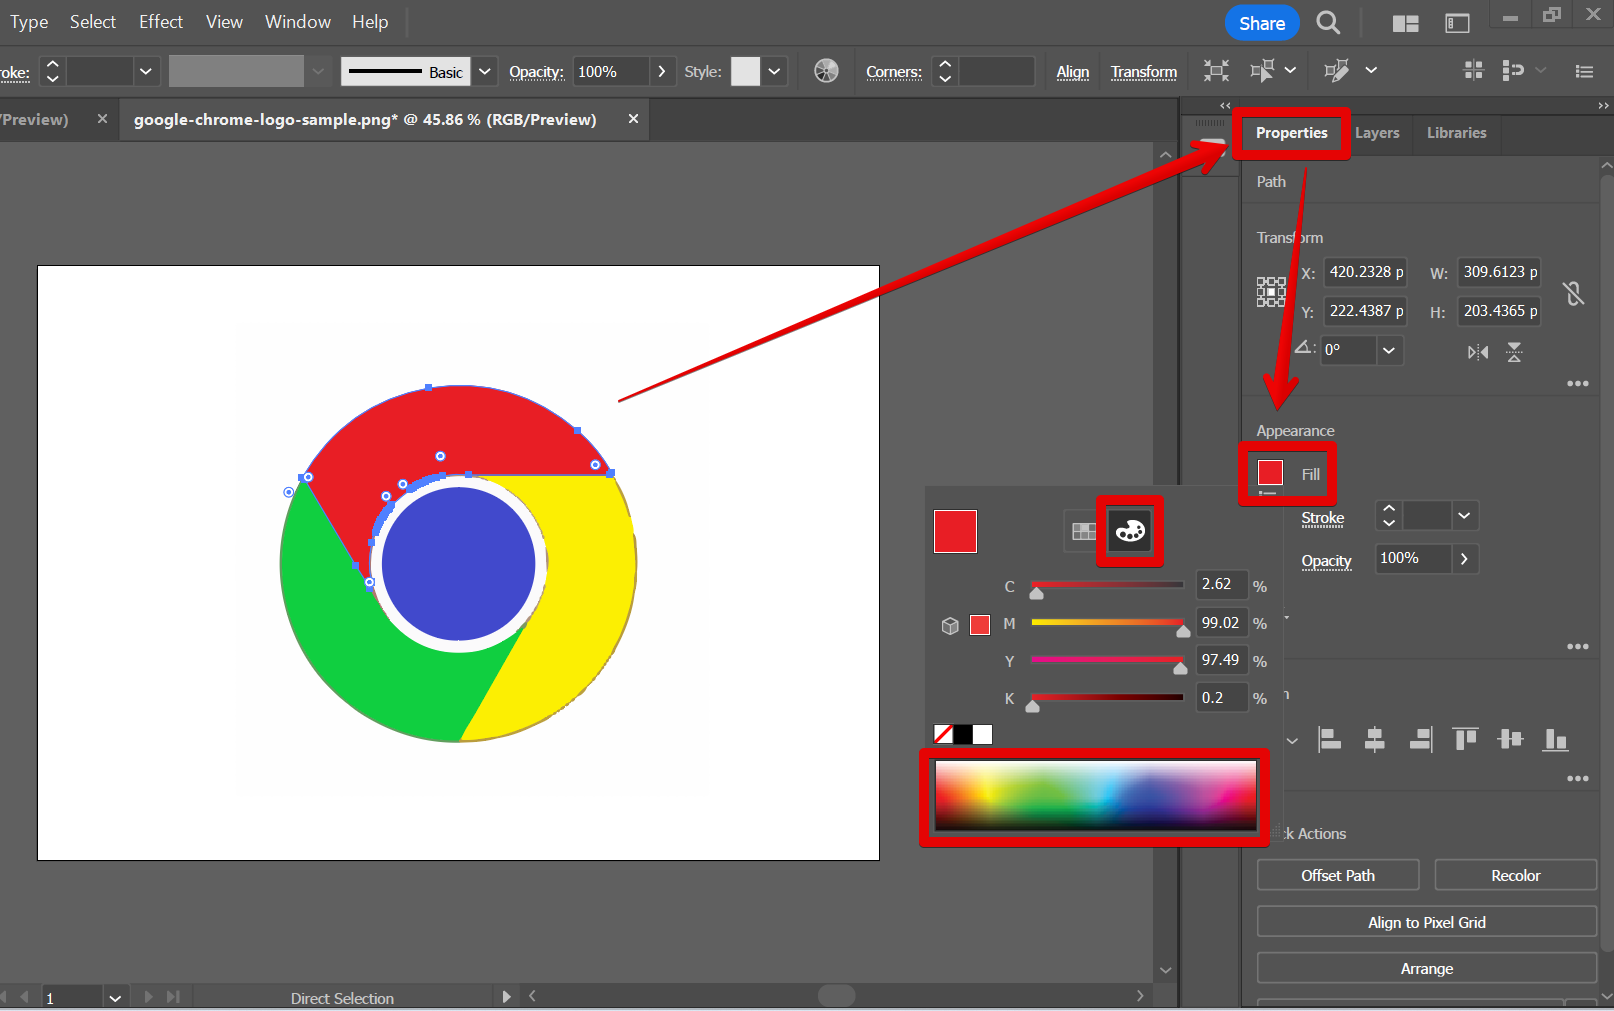
Once done, go to the Image settings at the top, click on the downward arrow beside “Image Trace” and select “16 colors”.
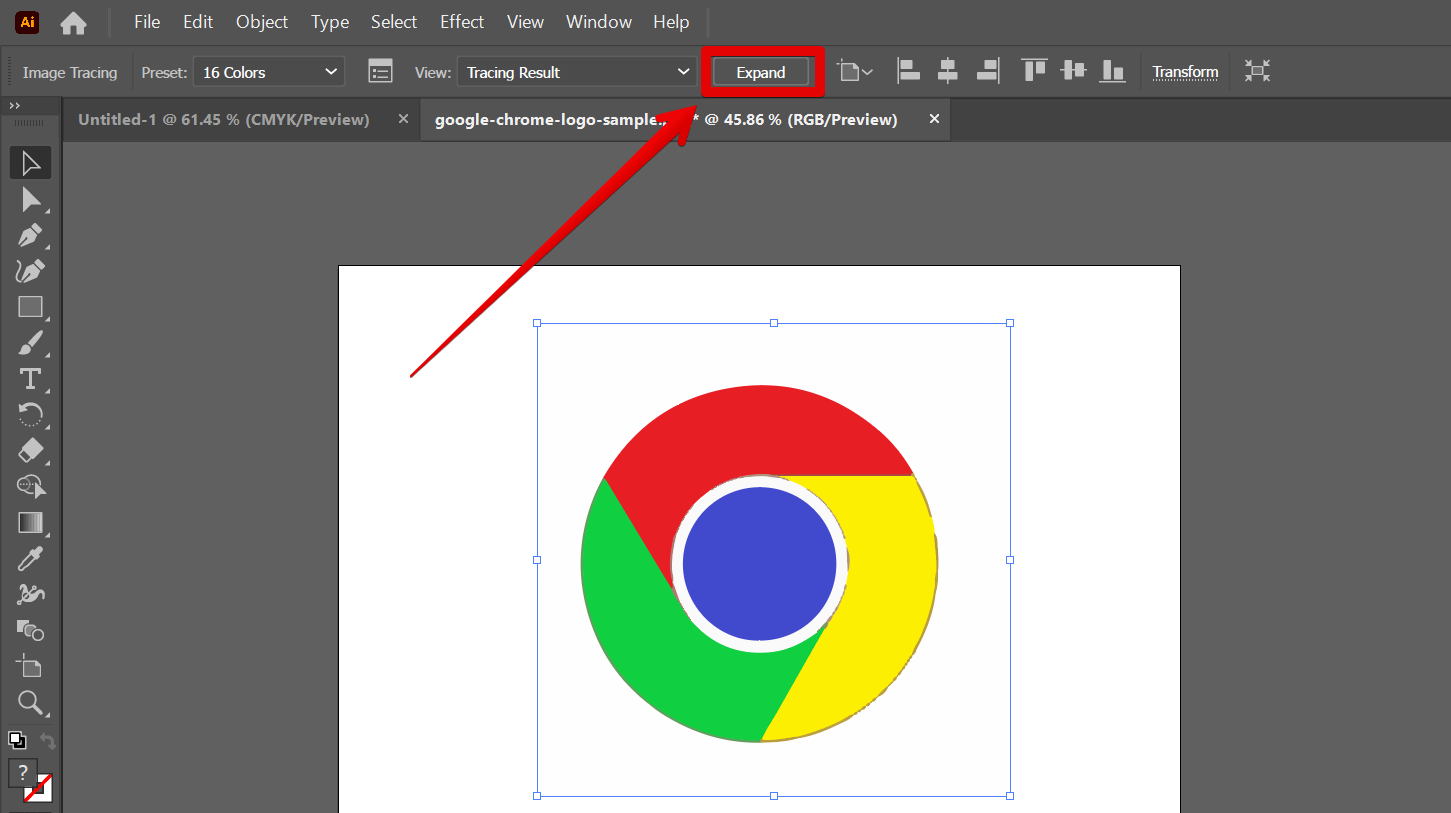
From there, click on the “Expand” button that will appear, still at the top menu.
NOTE: The “Expand” tool converts your image into paths.
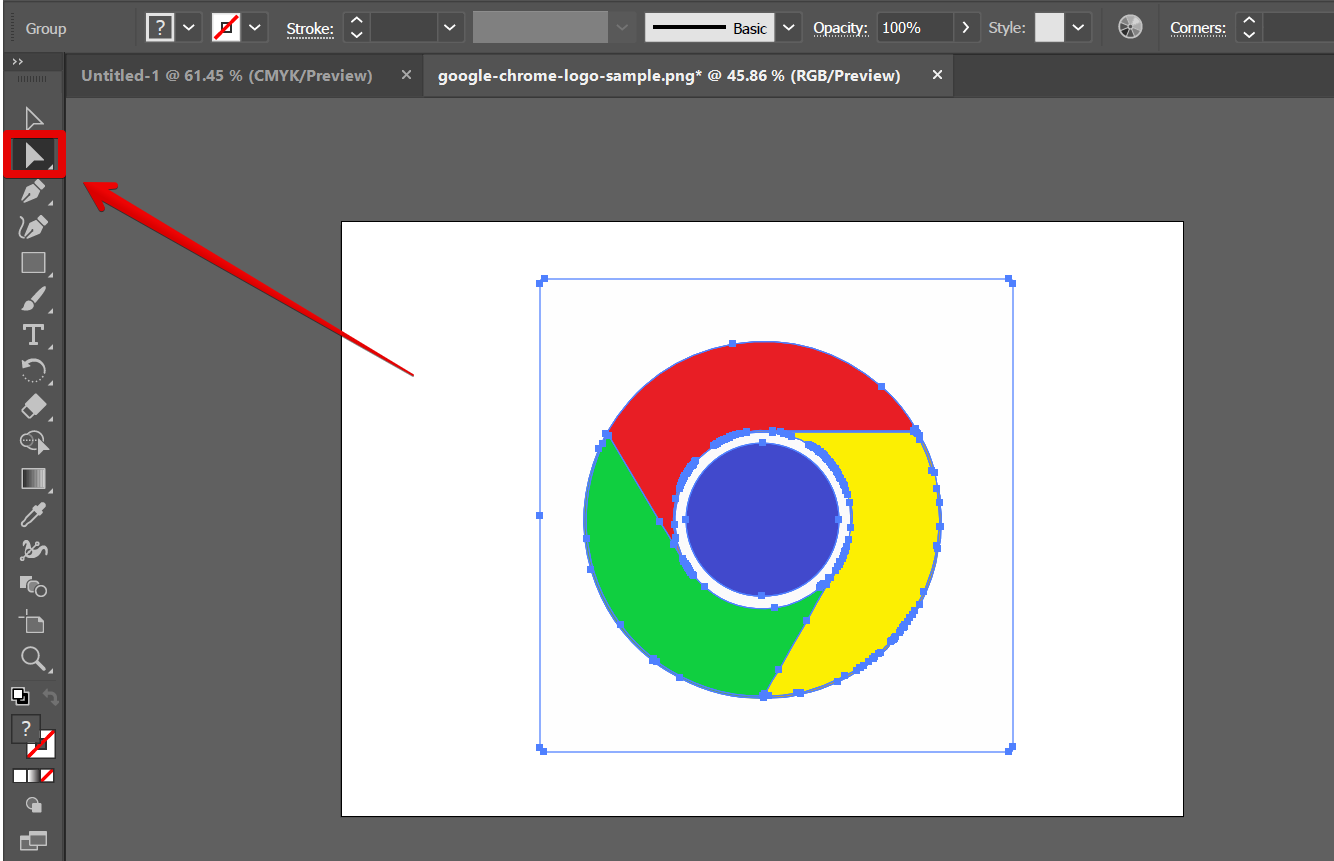
The next step is to click on the “Direct Selection Tool” from the toolbar on the left. This will let you see the paths in your image.
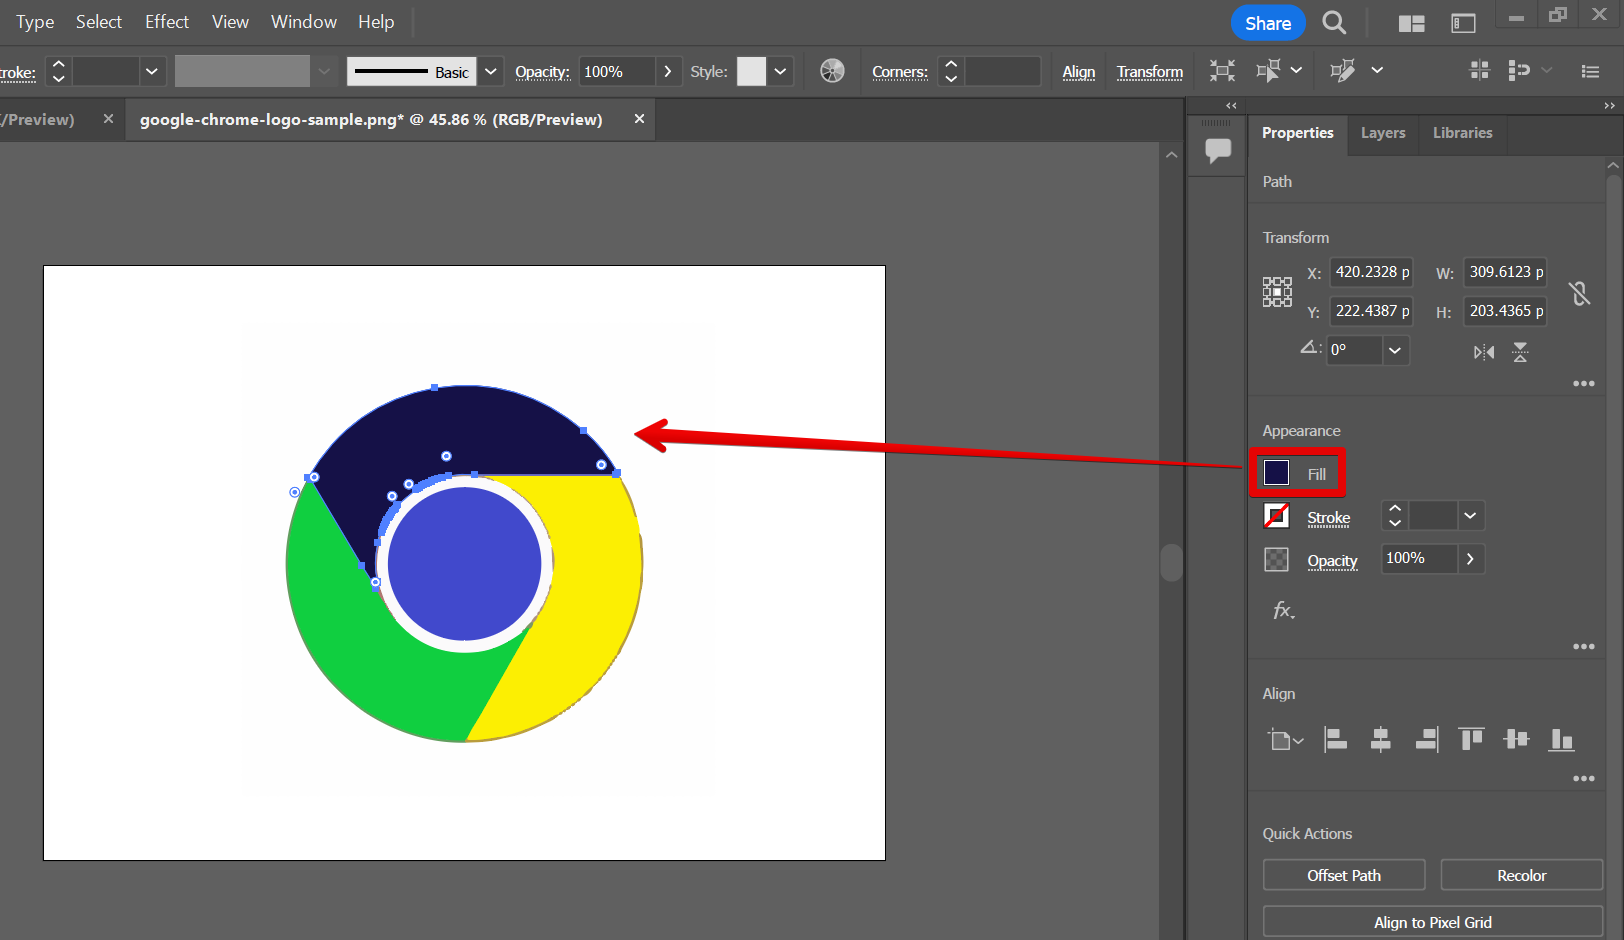
Now you can select the part of your image that you want to change the color of. From there, go to the “Appearance” window at the “Properties” tab and select the “Fill” option. There you can select the color of your choice.
And there it is! You can now change the color of your image in Illustrator.
PRO TIP: When changing the color of an image in Illustrator, be sure to select the image, then go to the ‘Direct Selection Tool’ in the toolbar. From there, go to the Appearance section and you can choose to change the color of your image using the Fill option.
9 Related Question Answers Found
Changing the perspective of an image in Illustrator is a relatively simple process. To begin, open the image you want to transform in Illustrator, then use the Selection Tool to select the image. Next, go to the top menu and open the Image Trace options.
There are a few ways to change the color of objects in Illustrator. One way is to use the Color Picker tool. To use the Color Picker, open the Toolbar and select the Color Picker tool ( ).
In Illustrator, you can change the color of an object in 2 easy ways.
1. Replacing the Color by Selecting the Specific Object
To change the color of an object, select the object that you want to recolor with the direct selection tool. Then, click Fill and choose which color you would like.
2.
Illustrator is an amazing program for creating graphics, but sometimes you may want to recolor an image to make it more your own. There are a few different ways to recolor an image in Illustrator. One way is to use the Color palette.
Image sharpening is an important part of any design process. There are a variety of ways to sharpen an image in Illustrator. Here are a few methods:
1.
An image can be used to create a color palette in Illustrator by selecting the image and then clicking on the “Create Color Palette” icon in the toolbar. Basically, you can use the “Eyedropper tool” to do the task. The “Create Color Palette” dialog box will open.
How to Change Perspective in Illustrator
When you are working in Illustrator, it is often helpful to change your perspective. This can help you to see the design from different angles, and to make better decisions about how to design a particular piece. There are a few ways to change your perspective in Illustrator.
Illustrator lets you change the color mode from RGB to CMYK. RGB is the default color mode, and it uses red, green, and blue color values to create colors. CMYK uses cyan, yellow, magenta, and black color values to create colors.
There are a few ways to change colors in Illustrator. You can use the Color Picker, or the Color Panel. The Color Picker is found in the Tools Panel, and the Color Panel is found in the Window menu.