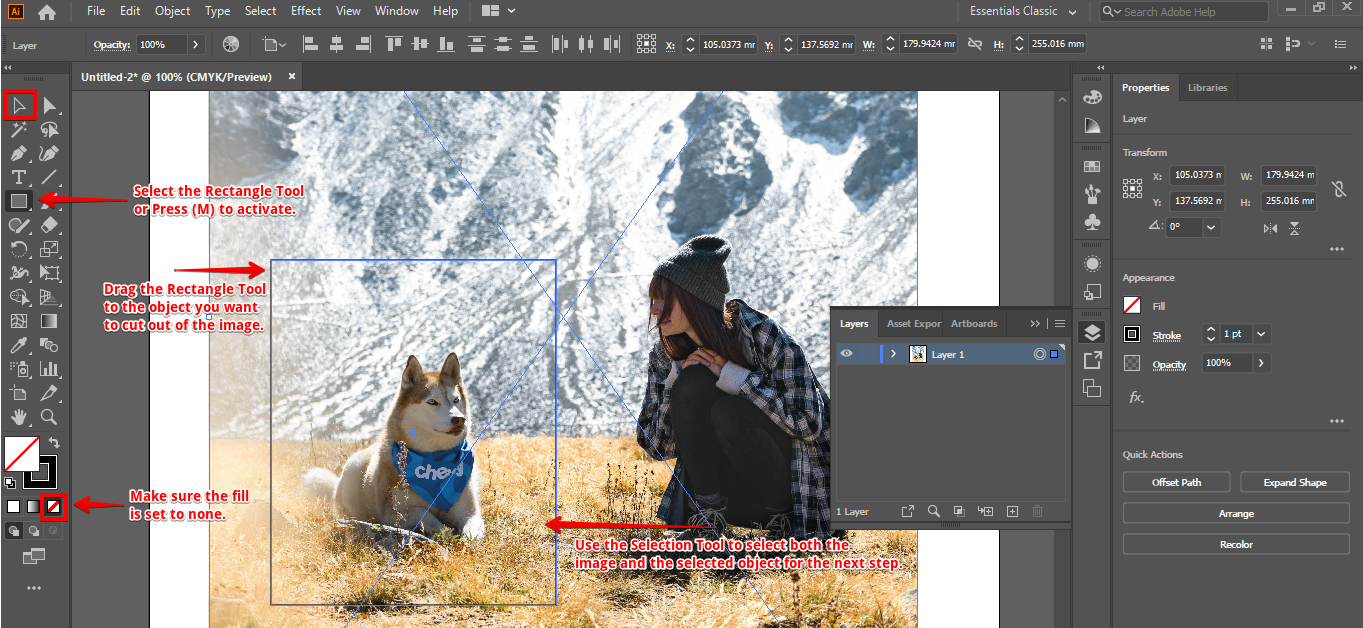
In Illustrator, you can cut out parts of an image by using the Selection tool and the Rectangular Marquee tool.
To cut out a rectangular section of an image, start by selecting the Selection tool and clicking inside the image. Then, use the Rectangular Marquee tool to draw a rectangular selection around the area you want to cut out. Make sure the fill is set to none. Lastly, use the Selection Tool to select both the image and the selected object for the next step.
PRO TIP: Warning: Cutting out part of an image in Illustrator may result in the loss of some image quality.
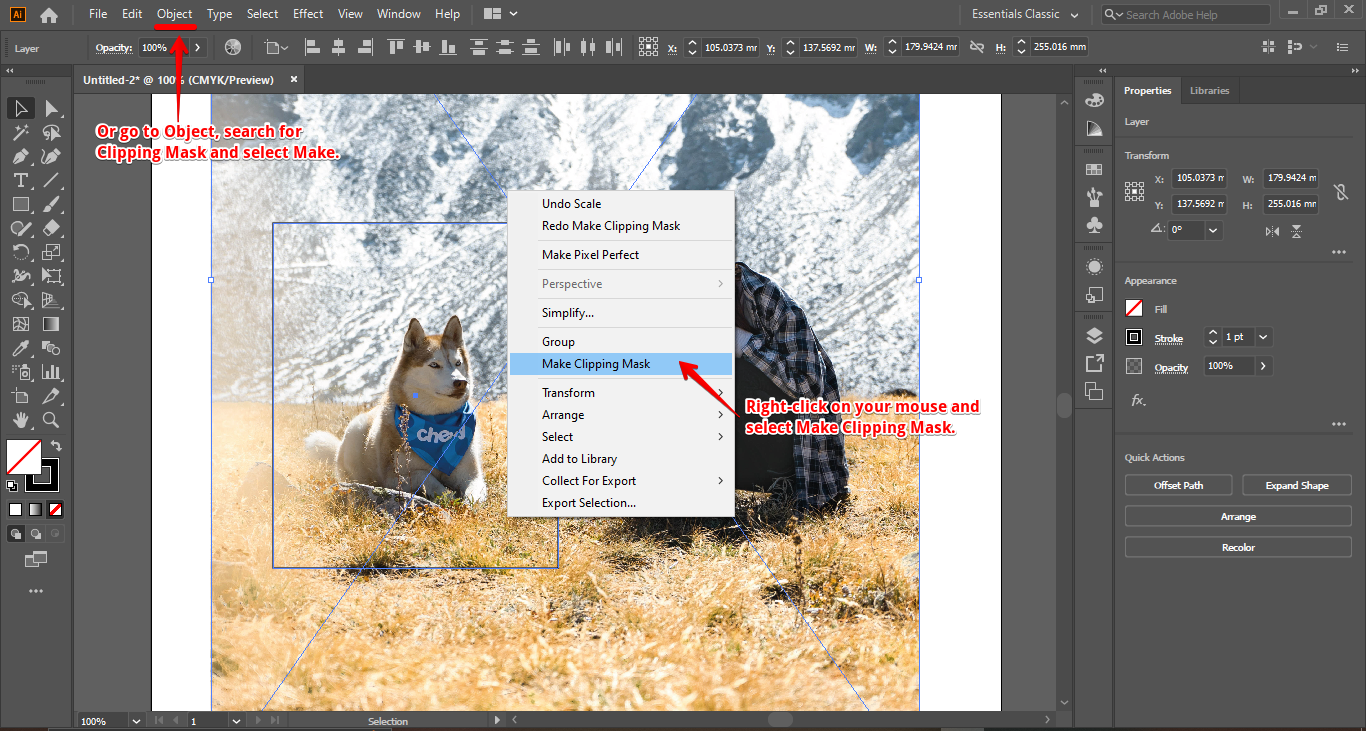
To cut out an image using the Selection tool, first, click and hold down the mouse button on the area you want to select, and then drag the cursor over the area you want to cut out. When you release the mouse button, the selection will be cut out. Similarly, you can right-click on your mouse and select Make Clipping Mask or go to the Object tab, search for Clipping Mask and select Make.
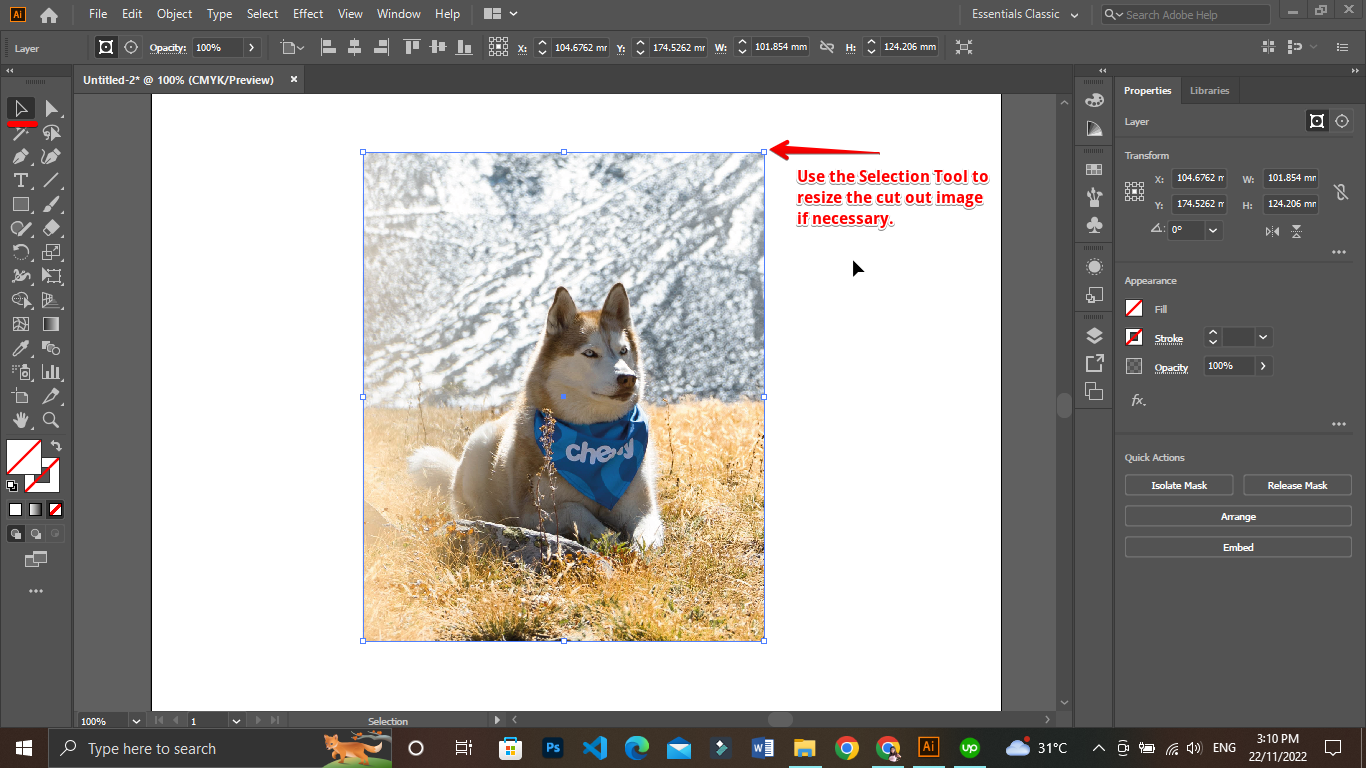
To cut out an image using the Rectangular Marquee tool, start by clicking and holding down the mouse button on the area you want to select, and then drag the cursor over the area you want to cut out. The final output should now look like the image below. Lastly, use the Selection Tool to resize the cut-out image if necessary.
To adjust the size of the selection, use the handles on the corners of the selection.
9 Related Question Answers Found
There are a few ways to cut out parts of shapes in Illustrator. The most common way is to use the Select tool (or the Direct Selection tool if you are using a mouse) and click and drag to create a selection around the part of the shape you want to cut out. Then, use the Cut tool (or the Cut Selection tool) to slice the selected area from the shape. .
Illustrator is a vector graphic design application that allows users to create images and illustrations. There are a variety of tools that are available to cut an image, but the most common is the Crop tool. To use the Crop tool, first select the image that you want to cut and then click on the Crop tool in the toolbar.
Illustrator is an amazing program for creating graphics, but sometimes you may want to recolor an image to make it more your own. There are a few different ways to recolor an image in Illustrator. One way is to use the Color palette.
Image sharpening is an important part of any design process. There are a variety of ways to sharpen an image in Illustrator. Here are a few methods:
1.
Illustrator is a great program for creating vector graphics. You can easily cut shapes out of Illustrator with a few simple commands. First, select the object you want to cut.
Illustrator is a vector-based graphic design application that allows users to create images, logos, and illustrations. The program has a user-friendly interface that is easy to learn, and the tools available allow users to create sophisticated designs. To create an image in Illustrator, users first need to create a vector file.
In Illustrator, you can change the color of any object by converting it into a tracing object and then into a path using the “Image Trace” tool and the “Expand” tool. After that, you can continue by filling up the path with another color using the “Fill” option. To do this, first, go to the “Window” tab at the top menu and make sure to select the “Control” option.
Changing the perspective of an image in Illustrator is a relatively simple process. To begin, open the image you want to transform in Illustrator, then use the Selection Tool to select the image. Next, go to the top menu and open the Image Trace options.
Embedding an image in Illustrator is easy. First, open the image in Illustrator. Next, use the Image Tools Options menu to open the Image Properties dialog box.