PRO TIP: If you are planning on reducing the size of an image in Illustrator, be aware that this may result in the loss of some image quality. In order to avoid this, it is best to resize the image in another program such as Photoshop before importing it into Illustrator.
In Illustrator, you can reduce the size of an image by opening the Object menu.
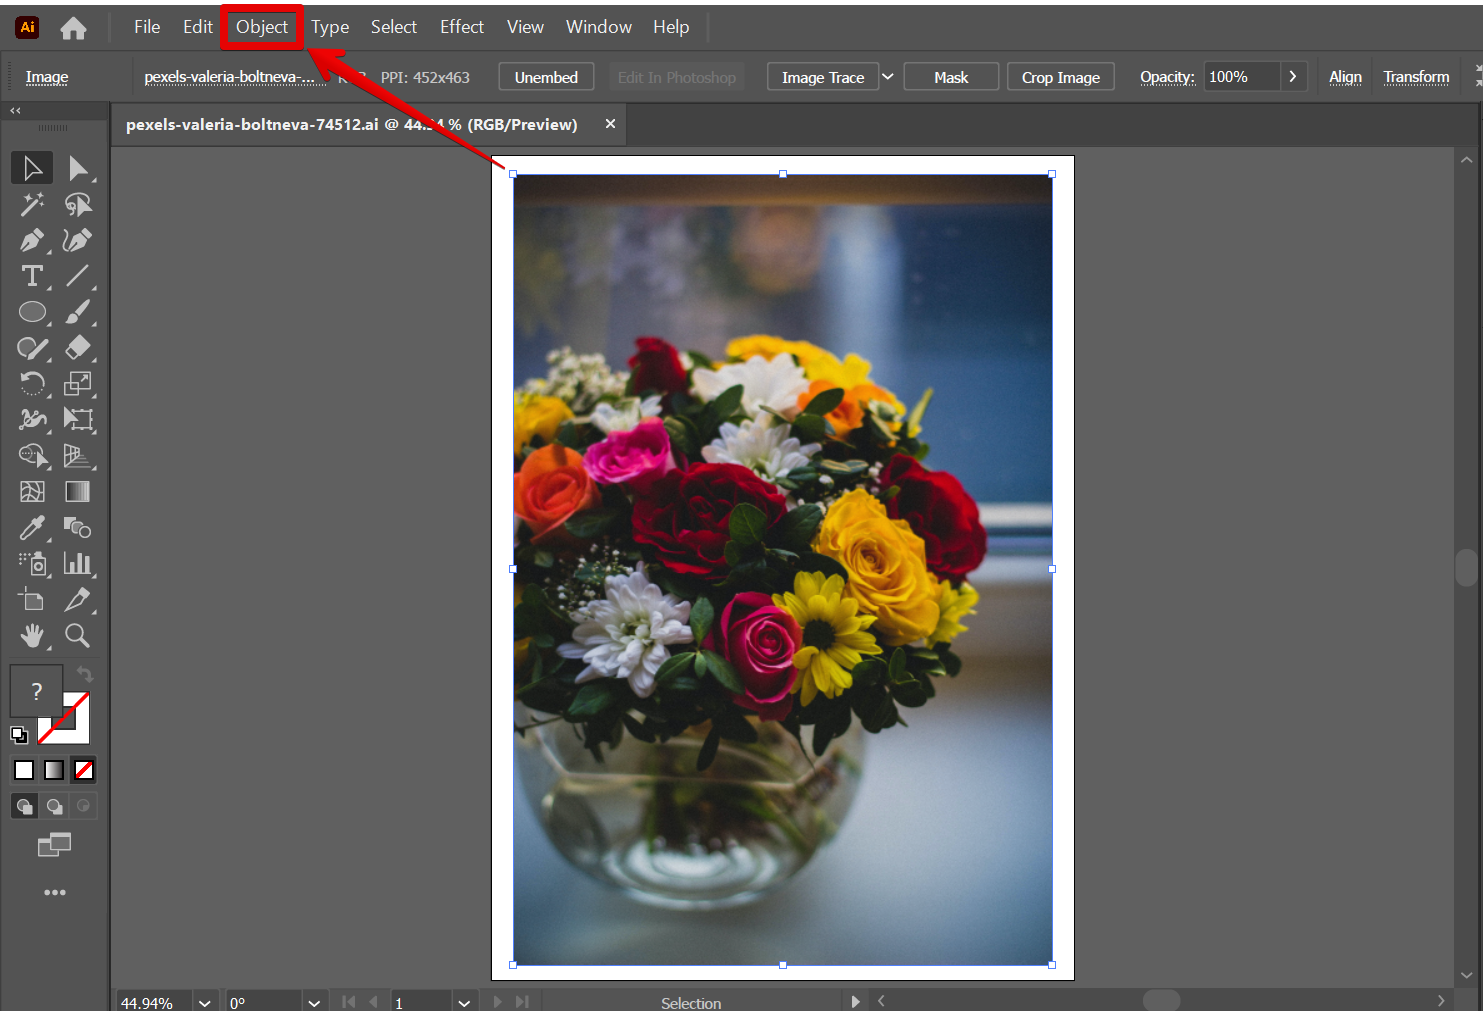
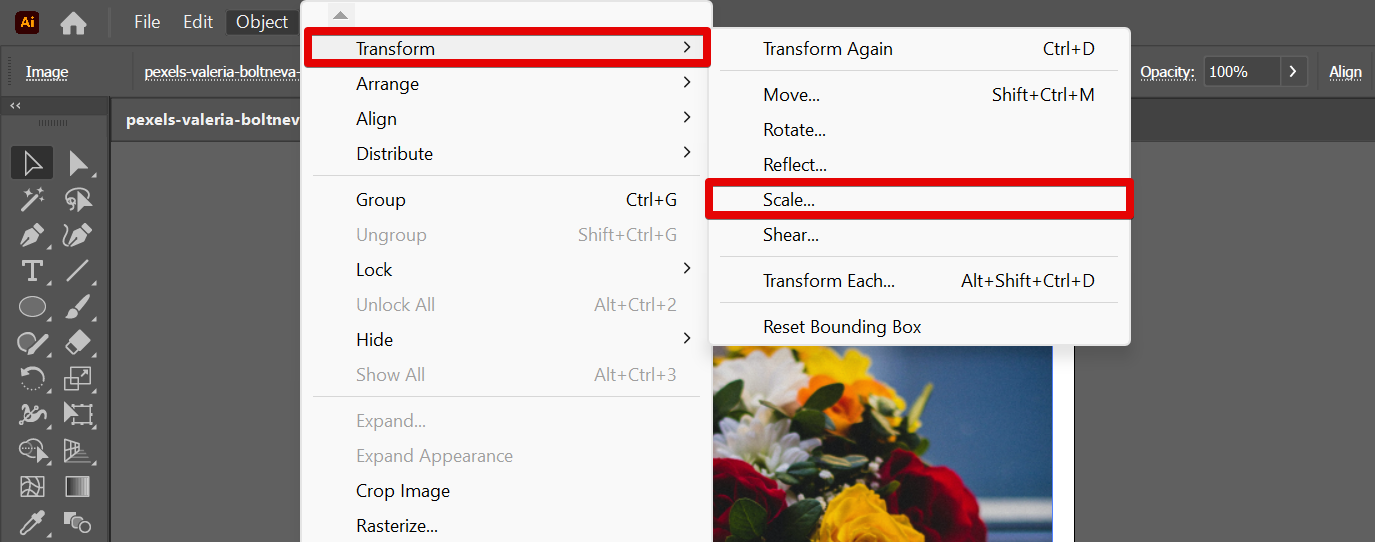
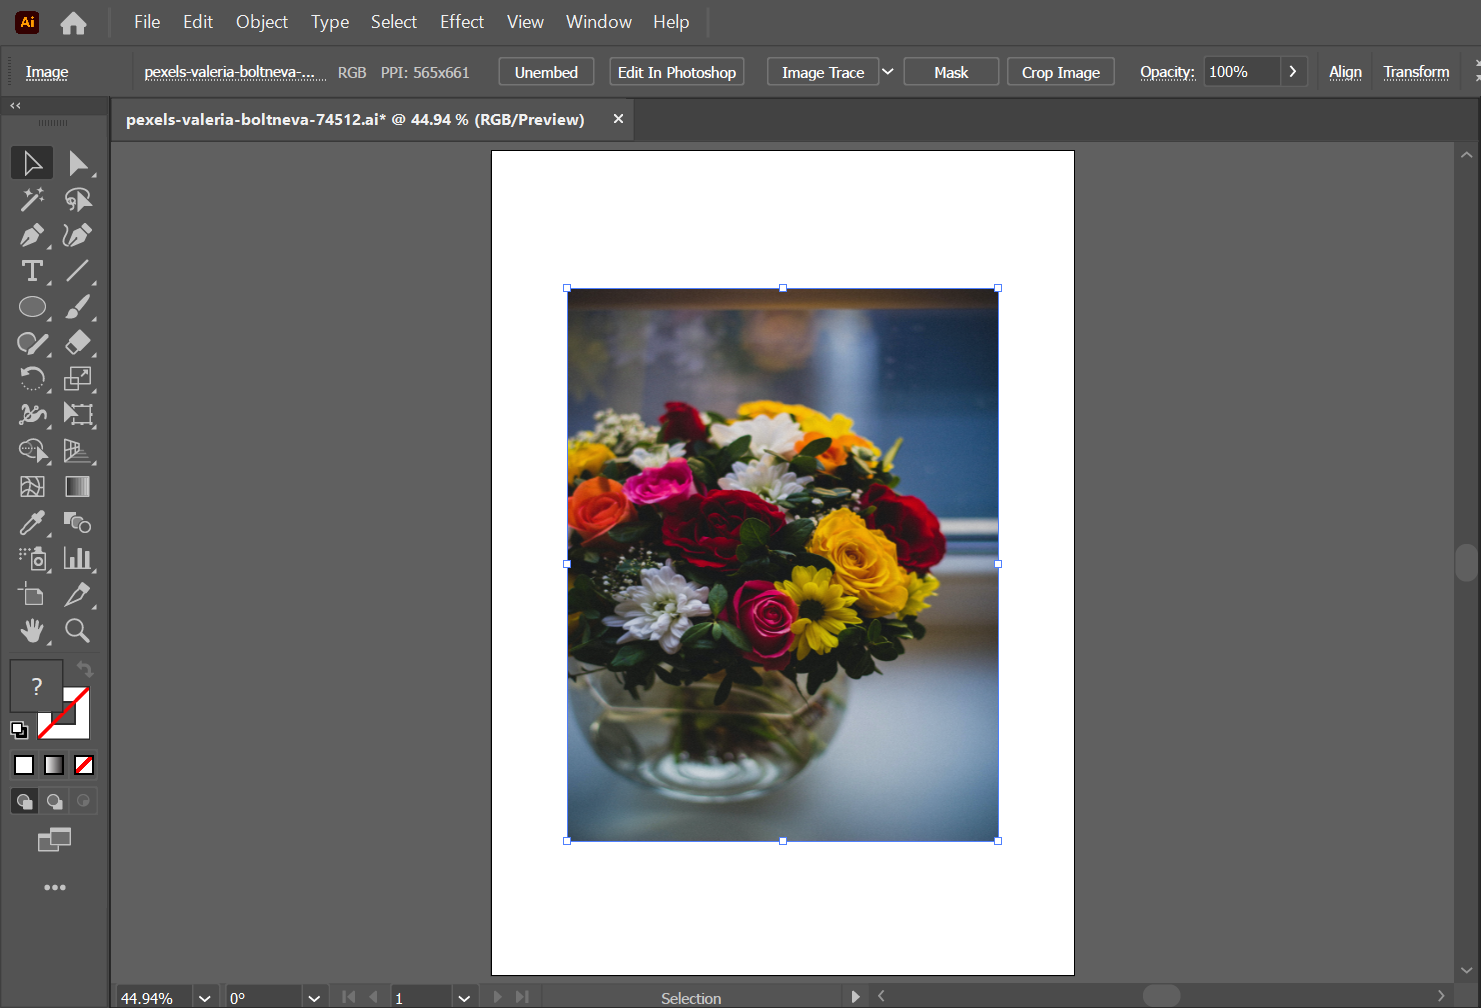
From there, choose Transform > Scale.
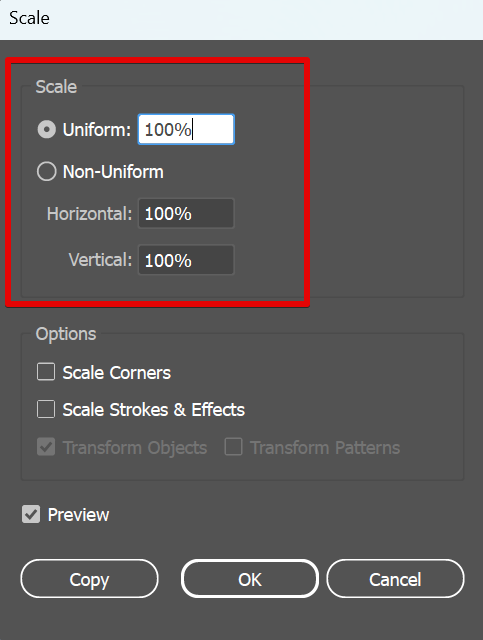
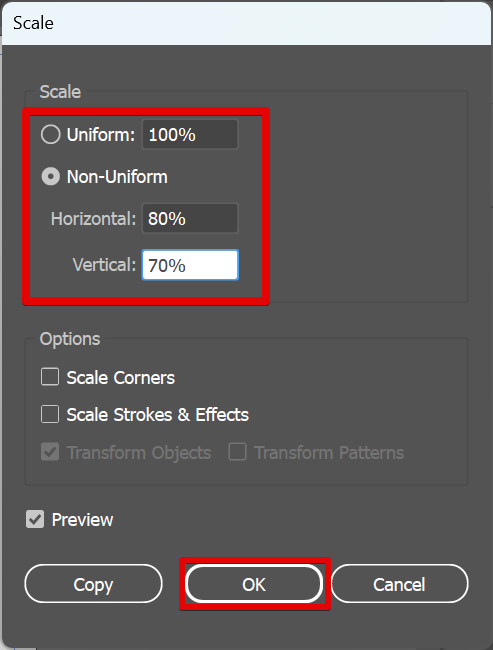
In the Scale dialog box, you can find two options for the Scale settings. You can use the Uniform option if you want to maintain the aspect ratio of your image while resizing it. On the other hand, you can use the Non-Uniform option to freely change the size of your image without any constraints.
You can specify the horizontal and vertical dimensions of the image to reduce its size. When you’re finished, click the OK button to apply the changes.
NOTE: You can click on the Preview checkbox to see the real-time changes in the size of your image.
And there you have it! Your image size is now reduced!
7 Related Question Answers Found
When you want to reduce the size of an image in Illustrator, there are a few different ways to go about it. The first option is to use the sizing options in the toolbar. You can click on the sizing handle in the corner of the image, and then select one of the preset sizes.
In Illustrator, you can change the size of the page in a number of ways. You can use the Page Setup dialog box, which you can access by selecting File > Page Setup. You can also use the control buttons at the bottom of the Artboard window.
Illustrator is a powerful vector graphics program that enables you to create detailed drawings and illustrations. One of the features of Illustrator is the ability to delete parts of objects. To delete a part of an object in Illustrator, you can follow these steps:
1.
When compared to other image editing and manipulation apps, Adobe Illustrator is in a league of its own. In contrast to Photoshop, the other mainstay of Adobe’s Creative Suite, Illustrator relies on vectors (lines and curves) to construct graphics. Therefore, erasing an area of an image is handled differently than it is in other editors.
In Illustrator, if you want to erase part of an image, there are a few ways you can do it. The easiest way is to use the Eraser tool. You can also use the Direct Selection tool to erase part of an image by clicking and dragging on the area you want to erase.
How to Remove an Effect in Illustrator
If you want to remove an effect from an image in Illustrator, there are a few different ways to go about it. You can use the Effect menu, the Stroke panel, or the Blur tool. The Effect menu has a number of different effects that you can apply to your image.
If you want to return to Outline View in Illustrator, you can do so by following these steps:
1. Select the object you want to switch back to Outline View on.
2. Click on the Outline View button ( ) located in the Control panel.
3.