When you’re ready to print your Photoshop project, you need to save it as a high-resolution JPEG. Here’s how:
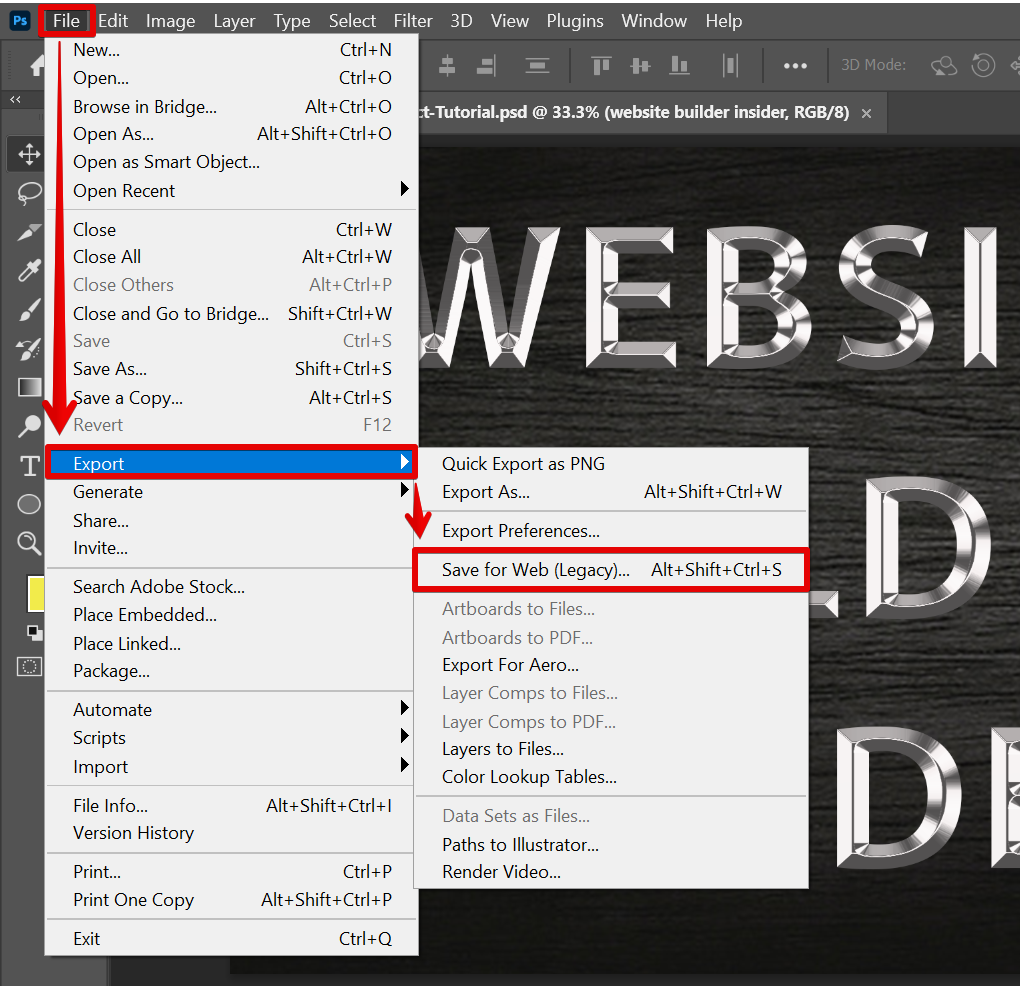
1. Go to File > Export > Save for Web (Legacy).
NOTE: You can also use the keyboard shortcut “Alt+Shift+Ctrl+S” for this.
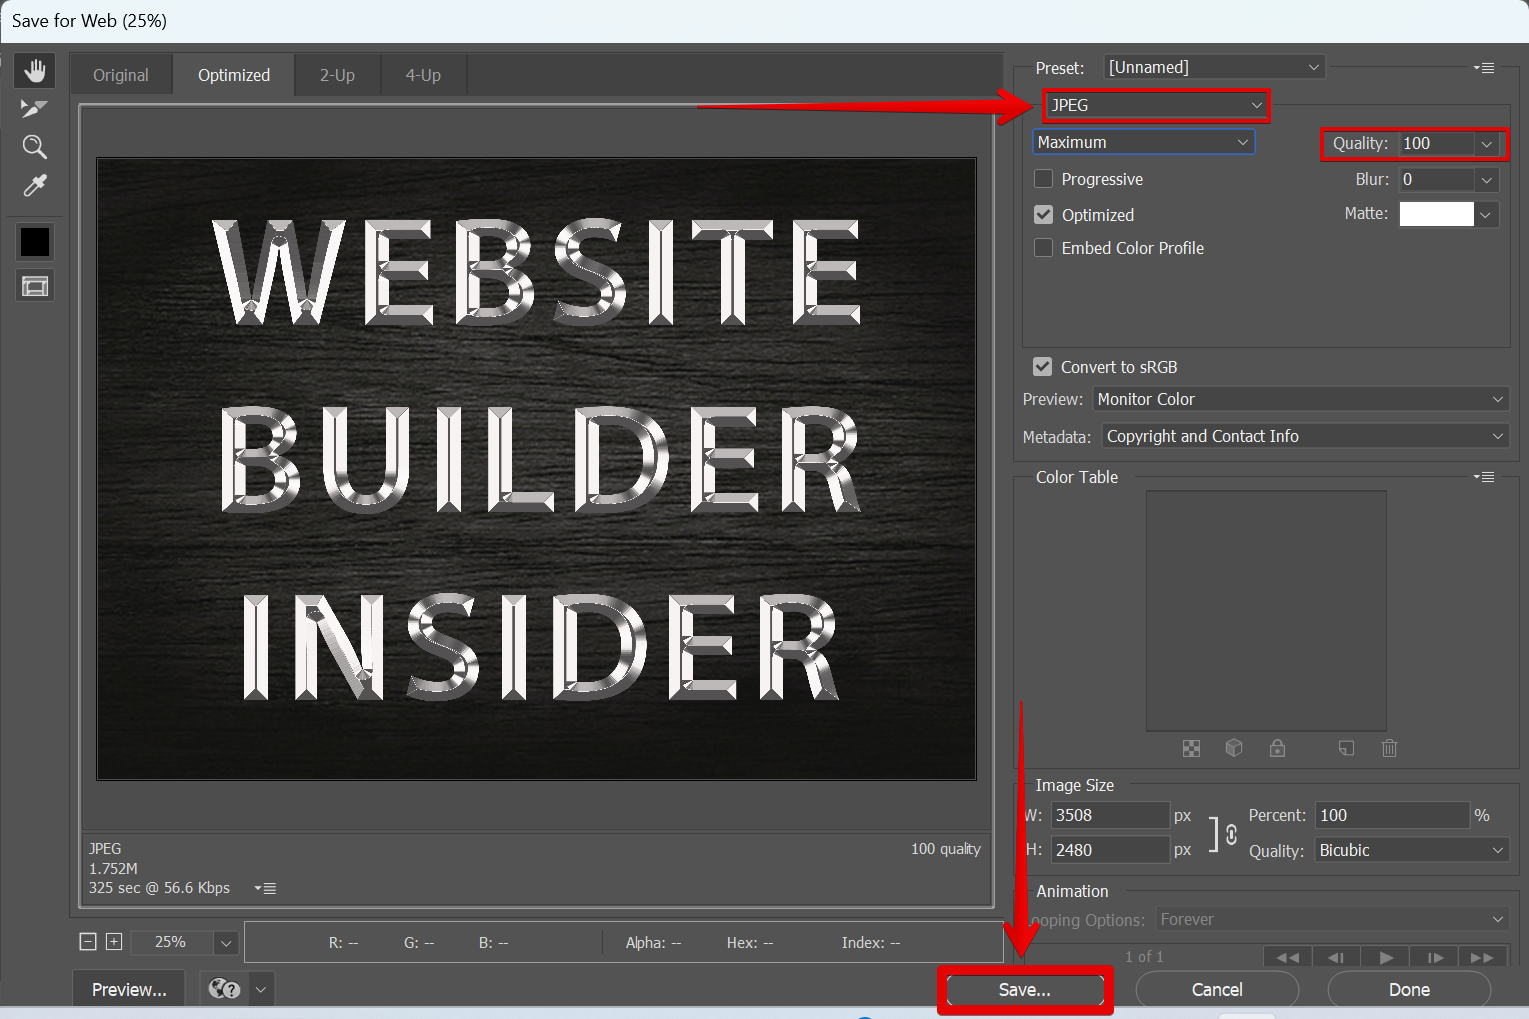
2. In the window that pops up, choose “JPEG” from the Format drop-down menu and set the Quality slider to “100” which is its maximum. Once done, click on the “Save” button.
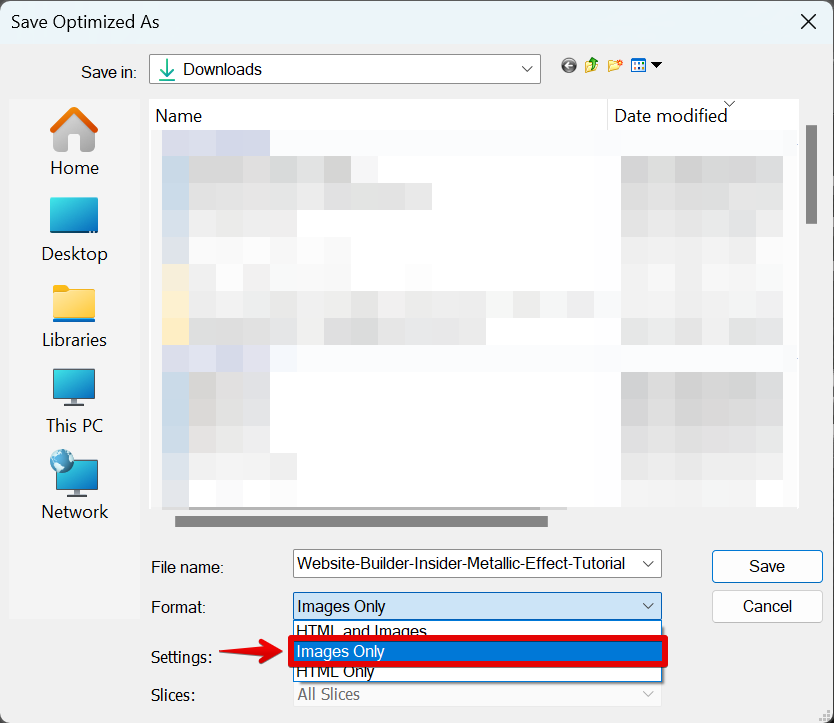
3. A new window will appear. Under the Format section, select “Images only” from the drop-down menu.
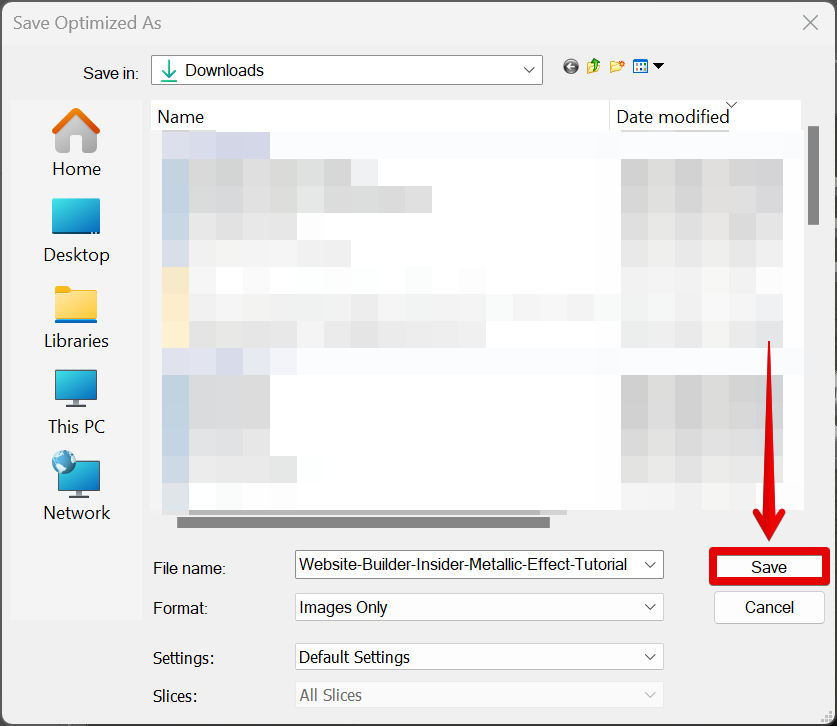
4. Finally, click “Save” and your JPEG will be created!
PRO TIP: When saving a Photoshop file as a JPEG, it is important to make sure that the quality settings are set to high or maximum in order to avoid loss of quality. Additionally, setting the resolution to 300 DPI or higher will ensure that the image maintains its sharpness and clarity when printed.
Conclusion:
Saving a Photoshop file as a high-resolution JPEG is easy! Just go to File > Export > Save for Web (Legacy), choose JPEG from the Format drop-down menu, make sure the Quality is set to “100” which is the maximum, and then click Save. In the next window, select the “Images only” format and hit on the “Save” button again. Your JPEG will be created in no time!
5 Related Question Answers Found
When you’re working in Photoshop, there are a few different ways to save your work as a JPEG. The first thing to do is to make sure that your document is in the right format. If it’s not, you can go to Image > Image Format and change it to RGB.
Learning how to save a Photoshop image in high resolution is important for anyone who wants to create high-quality prints or use their image for professional purposes. There are a few things to keep in mind when saving images in high resolution, and following these steps will ensure that your images come out looking sharp and clear. When creating an image in Photoshop, the first thing you need to do is make sure that the image is at least 300 pixels per inch (ppi).
There are many reasons why you might want to batch convert RAW files to JPEG. Perhaps you need to share your photos with someone who doesn’t have a RAW file viewer, or maybe you want to make a backup of your photos in a more widely-compatible format. Whatever the reason, Photoshop makes it easy to convert multiple RAW files to JPEGs in just a few steps.
HDR files are high-dynamic range images that contain a greater range of tonal detail than standard images. They can be created using special HDR cameras or by combining multiple exposures of the same scene using image-editing software. HDR files usually have the extension .hdr or .exr.
JPEG files are a type of image file that are often used for web graphics. They are also sometimes used for digital photos. Photoshop is a program that can be used to open and edit JPEG files, as well as many other types of image files.