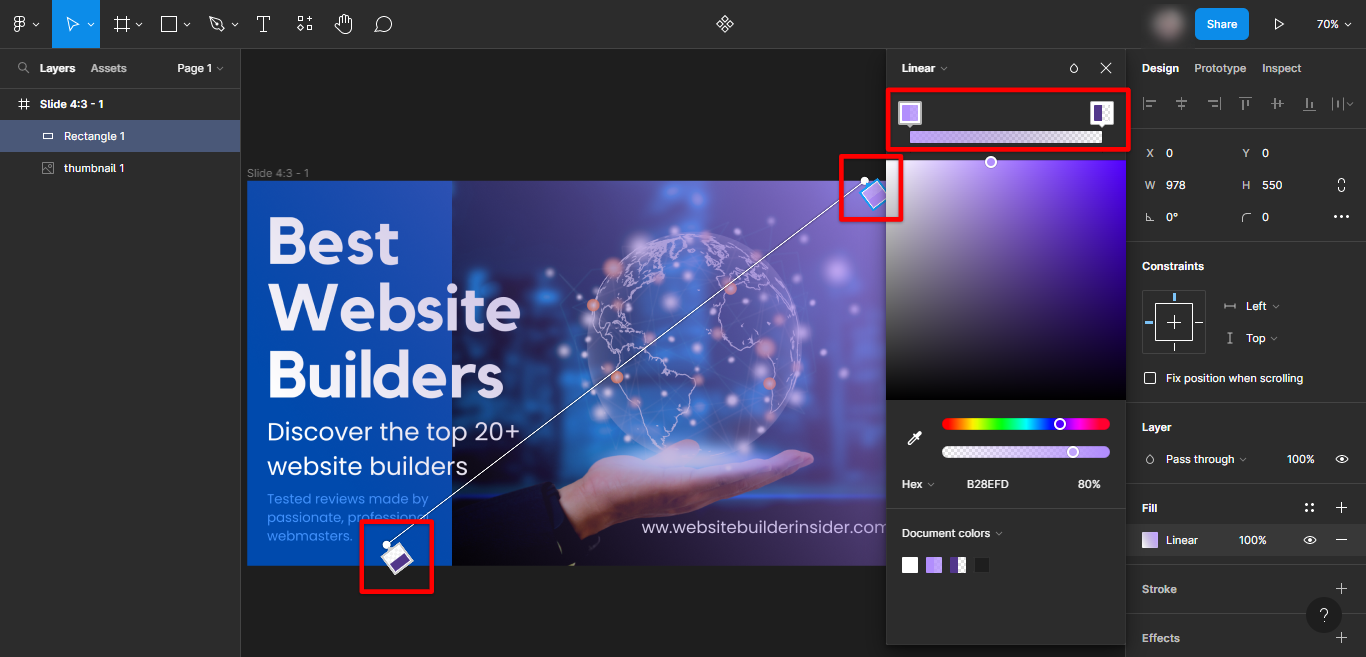
There are a few ways to gradient an image in Figma. The first way is to use the Fill tool. With the fill tool selected, click on the image. Make sure to add a rectangle the same size as your image and put it on top before clicking the fill tool.

In the color picker that appears, select the two colors that you want to use for the gradient. Then, click on the gradient type dropdown and select the type of gradient that you want to use. Finally, adjust the angle of the gradient using the slider.
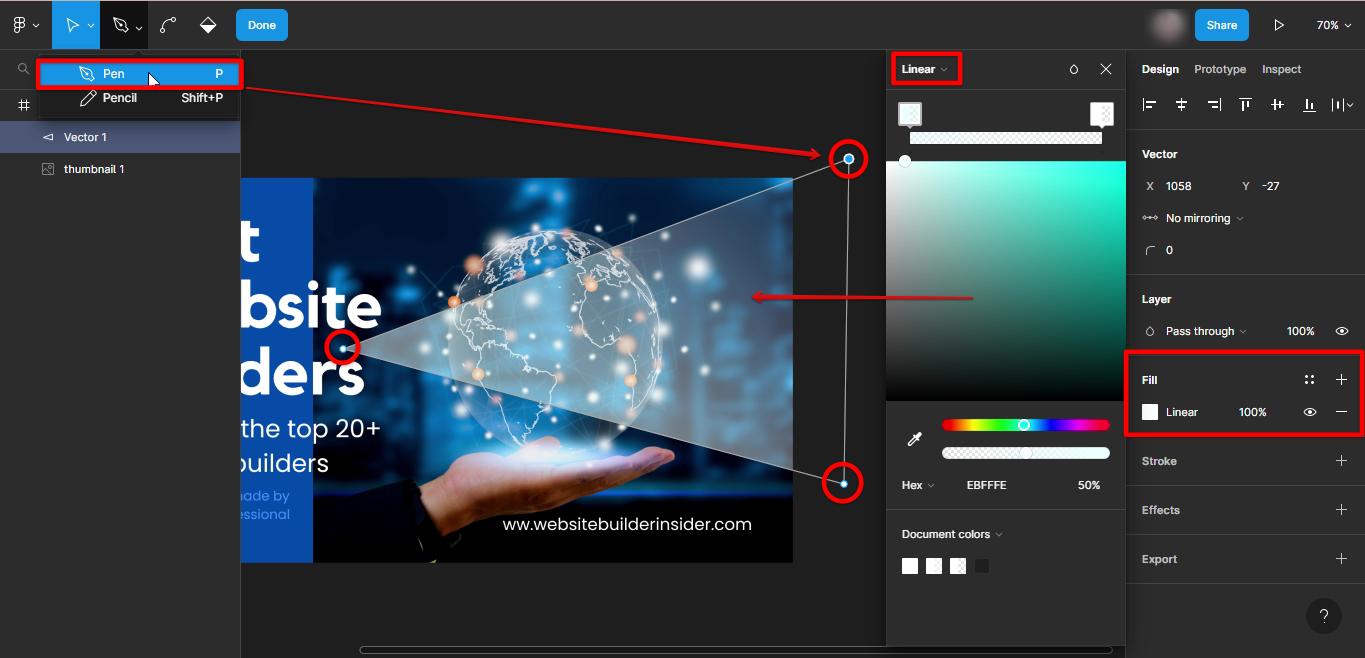
The second way to gradient an image in Figma is to use the Pen tool. With the pen tool selected, click on the image. Draw in the area where you want to put your gradient. Then follow the same steps demonstrated above.
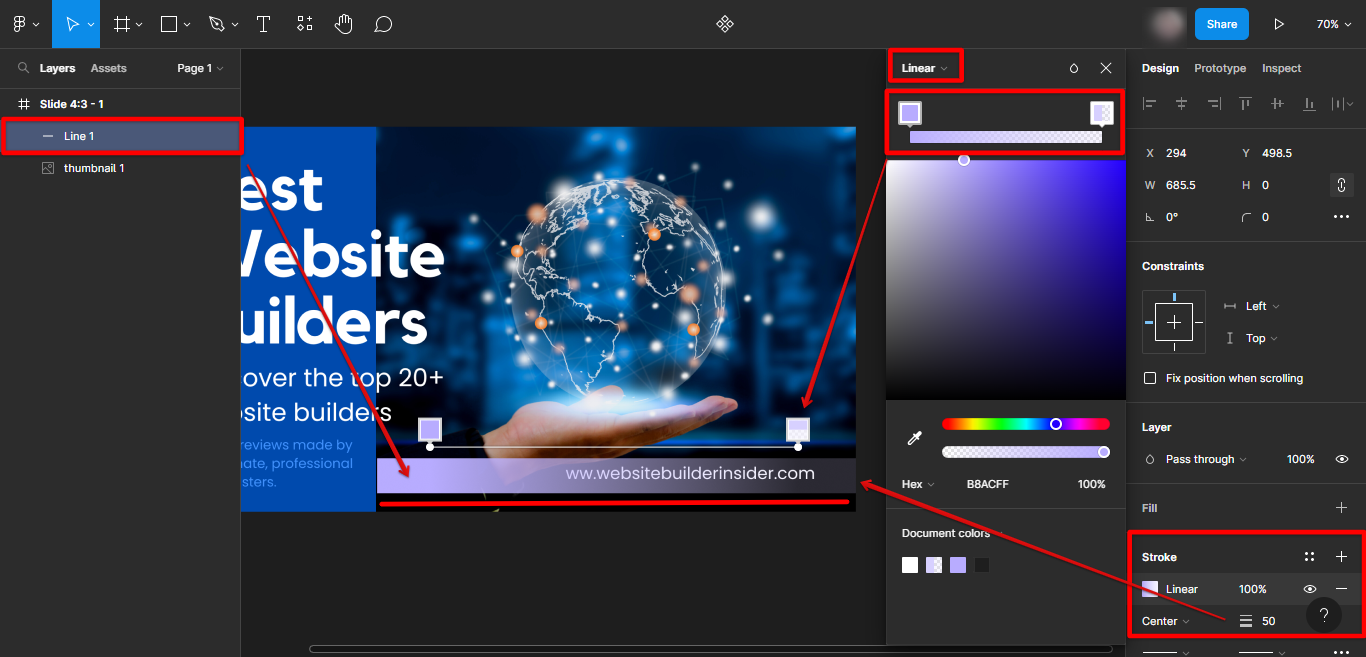
The third way to gradient an image in Figma is to use the Line tool. With the line tool selected, click on the image. Then, draw the line in the area where you want to add a gradient effect. Next, adjust the stroke weight of your line and in the dropdown menu, select the type of gradient you want to use. Finally, pick your colors and adjust the angle of the gradient using the slider.
How Do You Gradient an Image in Figma?
There are a few ways to gradient an image in Figma.
The first way is to use the Fill tool. With the fill tool selected, click on the image. In the color picker that appears, select the two colors that you want to use for the gradient. Then, click on the gradient type dropdown and select the type of gradient that you want to use. Finally, adjust the angle of the gradient using the slider.
PRO TIP: Please be aware that there are a few things to consider before adding a gradient to an image in Figma. First and foremost, make sure that the image is high-resolution and that the colors you wish to use for the gradient are complementary. Secondly, it’s important to create a backup of the image before adding a gradient, as there is no undo button for this effect. Finally, make sure to save your work frequently, as Figma has been known to crash when working with gradients.
The second way to gradient an image in Figma is to use the Pen tool. With the pen tool selected, click on the image. In the color picker that appears, select the two colors that you want to use for the gradient. Then, click on the gradient type dropdown and select the same options as before.
The third way to gradient an image in Figma is to use the Line tool. With the line tool selected, click on the image. Then, draw the line in the area where you want to add a gradient effect. Next, adjust the stroke weight of your line and in the dropdown menu, select the type of gradient you want to use. Finally, pick your colors and adjust the angle of the gradient using the slider.
8 Related Question Answers Found
When it comes to creating a gradient image in Figma, there are a few things you need to know. First, you need to create shapes using the shape tools available in Figma. However, if you want to use irregular shapes, you can use either the “Pen tool” or install a plugin.
There are multiple ways to do gradient in Figma. One way is to use the built-in gradient tool. To do this, select the object you want to apply the gradient to.
Figma is a great design tool for creating beautiful user interfaces, and one of its most powerful features is the ability to apply gradients to images. You can use gradients to add depth and interest to your designs, and they’re especially useful for creating realistic backgrounds and buttons. In this tutorial, we’ll show you how to apply gradients to images in Figma.
A gradient is a gradual transition between two or more colors. In HTML, there are two ways to create a gradient. The first is using the background-image property, and the second is using the filter property.
A gradient is a gradual transition of colors. In Figma, you can paste a color gradient into any frame, shape, or text object. To paste a gradient:
1.
Gradients are a great way to add some visual interest to your designs, and Figma makes it easy to create them. There are two ways to create gradients in Figma: using the Gradient tool, or by adding a Linear or Radial gradient fill to an object. To use the Gradient tool, select the object you want to apply the gradient to, then click and drag on the canvas to create a gradient.
There are two steps to copy a gradient in Figma. The first is to use the “Copy” function and then the “Paste” function to apply the gradient. To copy a gradient using the “Copy” and “Paste” functions, follow these simple steps:
1.
Adding gradients to your Figma design is a great way to add some extra style and flair. There are a few different ways to add gradients, and each has its own advantages and disadvantages. Method 1: The first way to add gradients is by using the built-in gradient tool.