GIFs are a popular image format on the internet. They are often used for short, animated clips or images. However, you may have noticed that some GIFs have a different framerate than others. The framerate of a GIF is the number of frames per second that the GIF plays at. You can change the framerate of a GIF in Photoshop by following a few simple steps.
First, open the GIF in Photoshop. Then, go to Windows > Timeline. A timeline tab will appear at the bottom of the screen.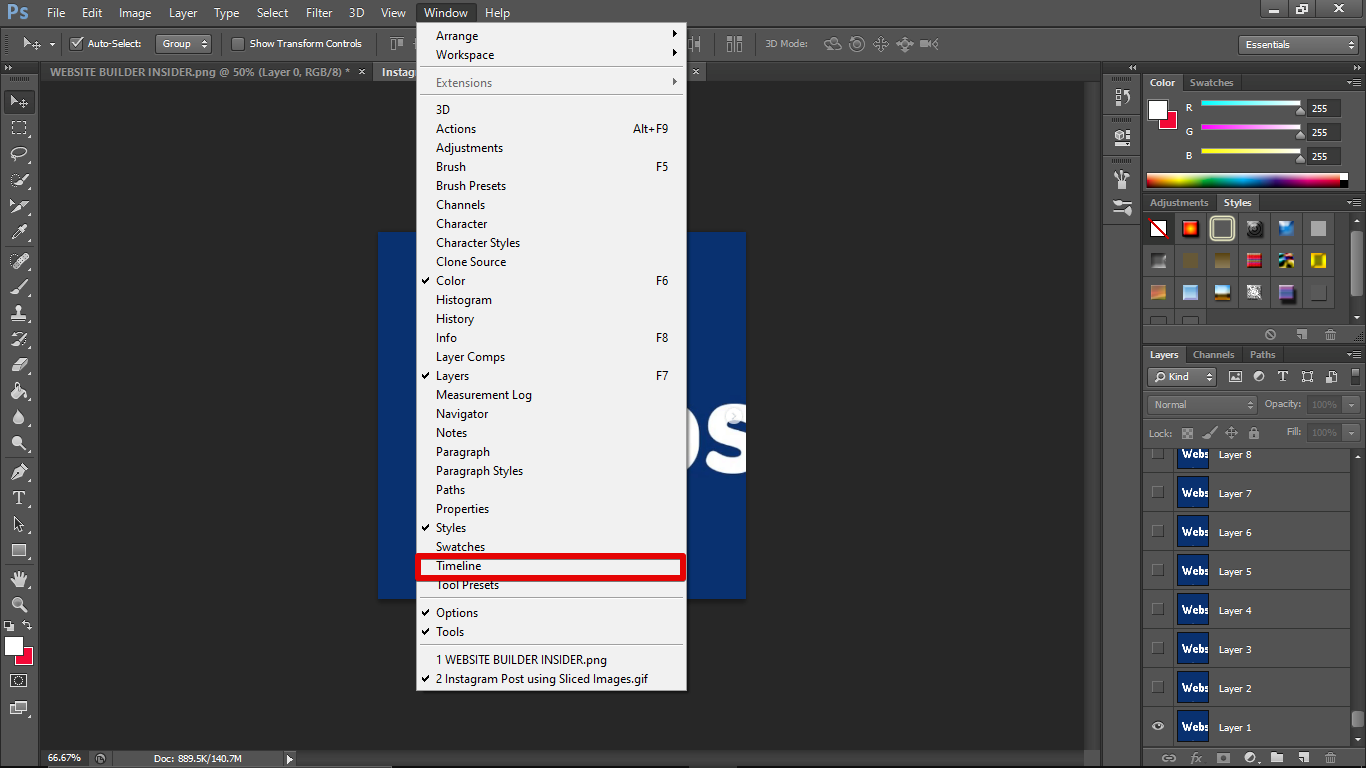 Click the Convert to Video Timeline icon.
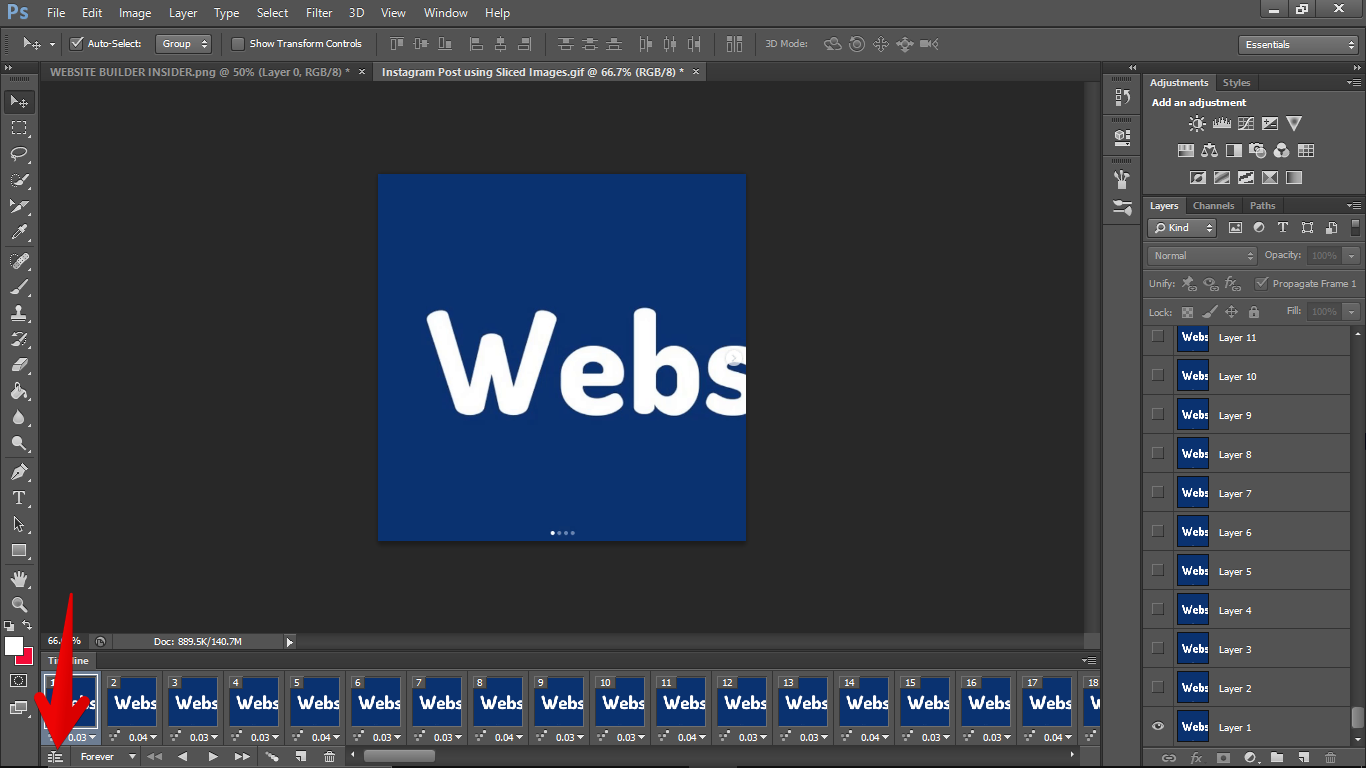 Select Timeline Frame Rate.
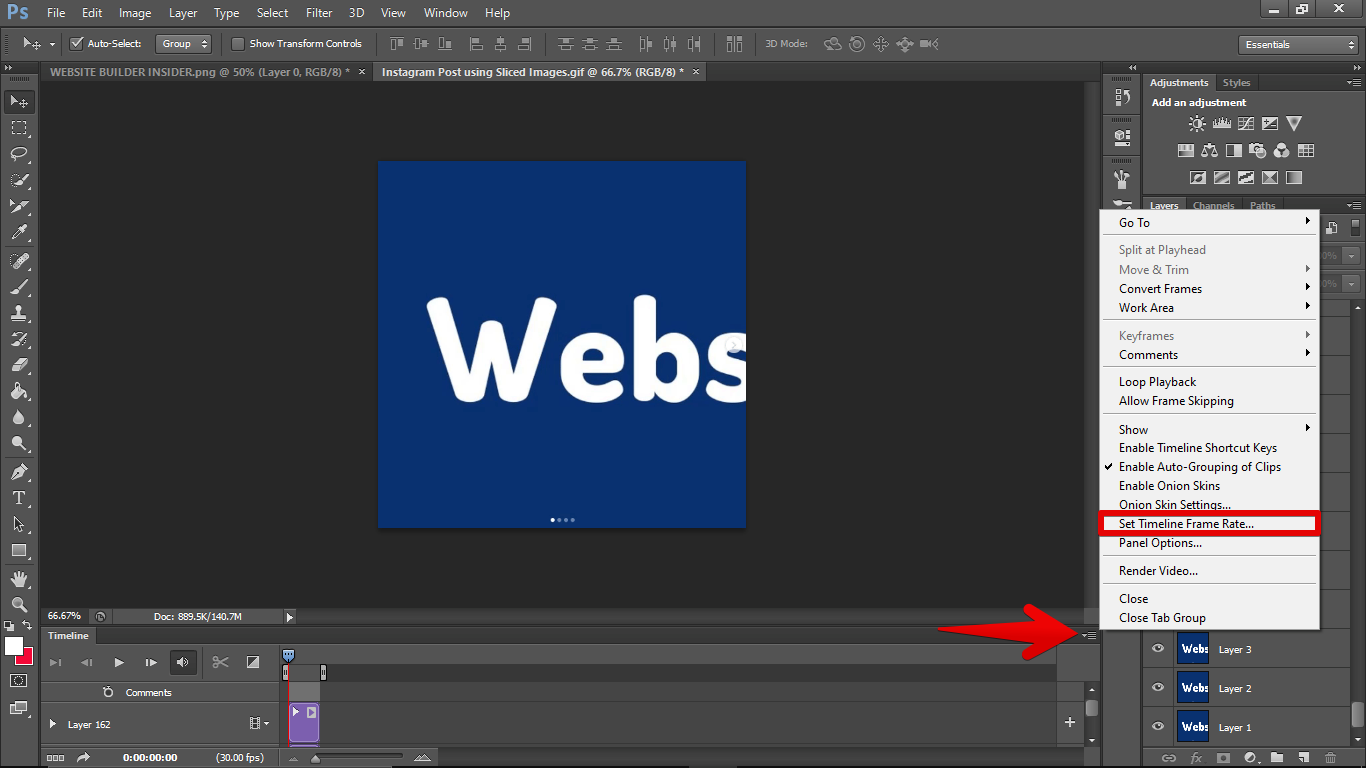 In this window, you will see an option for Frame Rate. You can change this number to adjust the framerate of your GIF. Keep in mind that a higher framerate will result in a larger file size. Once you’re happy with your settings, click OK.
 That’s all there is to it! Changing the framerate of a GIF in Photoshop is a quick and easy process. So if you want to create a slower or faster-moving GIF, now you know how.
PRO TIP: If you are changing the framerate of a GIF in Photoshop, be sure to make a backup of the original file first. Changing the framerate can cause issues with the animation and may result in a lower quality GIF.
Conclusion:
To change the framerate of a GIF in Photoshop, open the GIF in Photoshop and go to Window > Timeline. In the Timeline tab that opens. Click the Convert to Video Timeline icon and then, select Timeline Frame Rate. find the Frame Rate option and change the number to adjust the speed of your GIF.
Keep in mind that a higher framerate will result in a larger file size. When you’re happy with your settings, click Save.
9 Related Question Answers Found
GIFs are a great way to add some fun and personality to your website or blog. But what if you want to edit an existing GIF? In this article, we’ll show you how to do just that in Photoshop.
If you have ever wondered how to edit a GIF in Photoshop, you are not alone. Many people who are familiar with Photoshop’s capabilities are curious about how to edit this type of image. While it is possible to edit a GIF in Photoshop, it is important to understand that there are some limitations.
Yes, you can edit a GIF in Photoshop. You can use the timeline to add or remove frames, change the order of the frames, and set frame duration. You can also use Photoshop to crop, resize, and rotate a GIF.
want to cut a GIF in Photoshop? Here’s how:
Open the GIF in Photoshop. Go to File > Export > Save for Web (Legacy).
There are a few ways to speed up a GIF in Photoshop. One way is to go to File > Export > Save for Web (Legacy). In the lower left corner of the dialog box that pops up, there is a Quality section.
There are a few ways to split a GIF into frames in Photoshop. One way is to use the ‘Save for Web & Devices’ function. To use this function, open the GIF in Photoshop and go to File > Save for Web & Devices.
There are a number of ways to make GIFs in Photoshop, but the easiest and fastest way is to use the ‘Save for Web’ function. To start, open the image or video you want to make into a GIF in Photoshop. Then, go to File > Save for Web.
Do you have a GIF that you want to edit in Photoshop? Maybe you want to add or remove a frame, or change the color of the image. Whatever the reason, editing a GIF in Photoshop is easy to do.
GIF files are a great way to share short animations or videos online, but you may be wondering if it’s possible to edit them with Photoshop. The answer is yes! Here’s a quick guide on how to do it.